
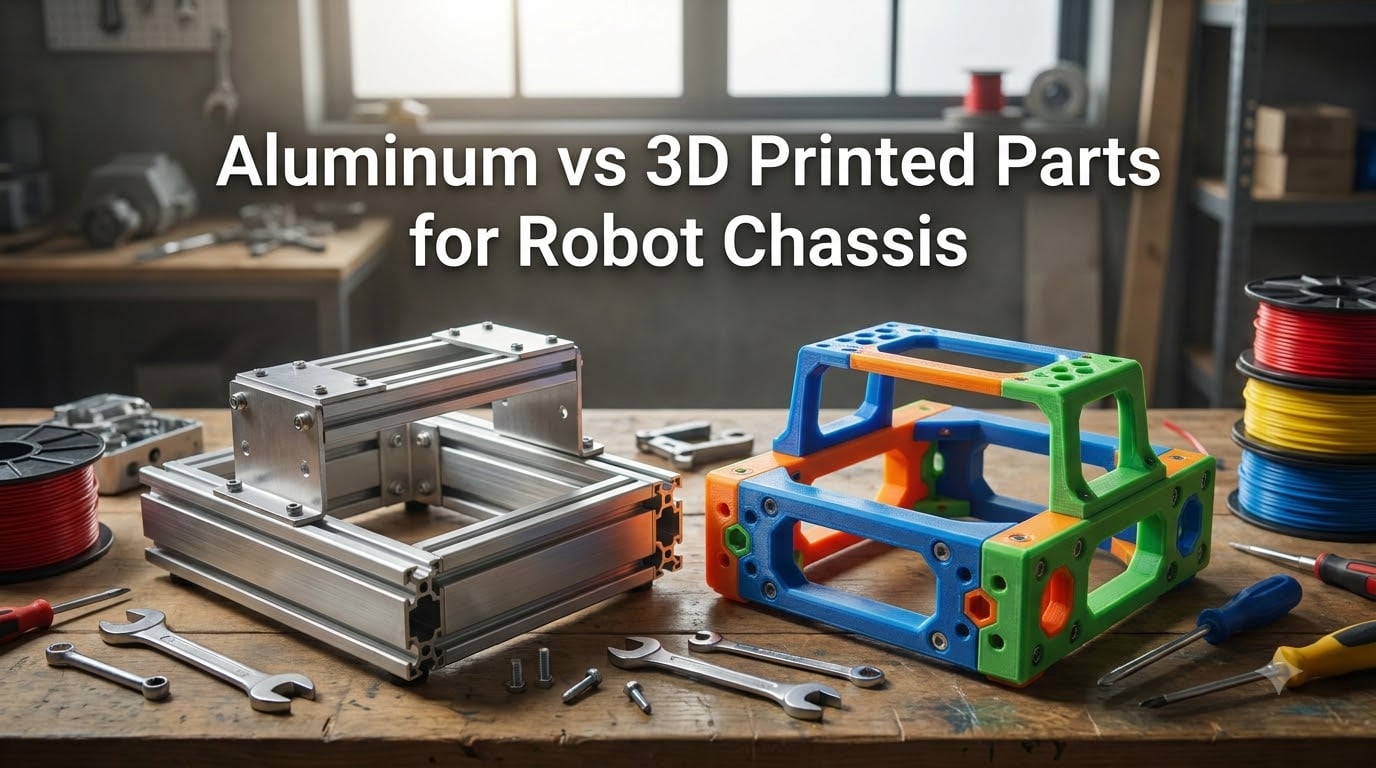
I have been building robots for over a decade, and the question I get most often is still the simplest: should I use aluminum or 3D printed parts for my robot chassis?
It is a fair question, because the choice defines everything that follows. Your motor sizing, your battery budget, your fabrication timeline, even your ability to repair the robot after a hard hit all flow from that one decision. If you want a deeper primer on how a chassis actually carries loads and integrates with the rest of the robot, our guide on how robot chassis design works is a good companion read.
Aluminum has been the default answer in hobby and competition robotics for decades. 3D printing changed the conversation almost overnight. Printers that fit on a desk can now produce chassis plates, brackets, gearboxes, and even full robot frames in a few hours. Some of those prints survive serious abuse. Many do not.
In this 2026 guide, I am going to walk you through both materials honestly. We will compare the numbers, look at where each one wins, and explore the hybrid approach that serious builders increasingly use. By the end, you will have a clear framework for picking the right material for your next robot.
Table of Contents
Aluminum Properties and Applications for Robot Chassis
Aluminum is the workhorse metal of hobby robotics for good reason. It is light, strong, easy to machine, and it does not rust.
Most robot builders reach for 6061-T6 aluminum. It is the same alloy used in everything from bicycle frames to aircraft structural components. Tensile strength sits around 310 MPa with a yield strength near 276 MPa. Density is roughly 2.7 g/cm³, which gives it a strength-to-weight ratio that is hard to beat with plastics.
For higher-stress applications, 7075 aluminum offers roughly 1.5x the yield strength of 6061. We use it in combat robot frames where impact loads can exceed several hundred newtons in a single hit. The trade-off is cost and slightly trickier machining. 7075 wants sharp tools and proper feeds to avoid work hardening.
5052 aluminum is the other common option. It is softer and more formable than 6061, which makes it great for bent sheet metal enclosures and battery trays. You will not see it in structural frames as often, but it shines in non-load-bearing panels.
Three properties make aluminum especially attractive for robot chassis:
- Corrosion resistance out of the box. You can leave it bare or anodize it for extra hardness and color.
- Machinability. A basic CNC mill or even a careful drill press can cut precise features.
- Heat dissipation. Aluminum pulls heat away from motors and motor controllers naturally.
The downsides are real too. Aluminum costs more per kilogram than most plastics. Cutting it requires sharper tooling than wood and generates chips that need cleanup. Welding aluminum is possible but requires TIG setup and practice.
3D Printed Materials Overview for Robot Frames
3D printing exploded the options for robot builders. A printer in the $200 to $500 range can produce usable parts from a growing family of thermoplastics, and the list of available filaments keeps getting longer.
PLA is the entry point. It prints at low temperatures (around 200°C) with minimal warping, and it is cheap. Tensile strength hovers near 50 MPa. The catch is brittleness and a low heat deflection temperature around 60°C. Leave a PLA chassis in a hot car and you will come back to a pretzel.
ABS is the classic “real plastic” choice. It prints hotter (around 240°C) and benefits from an enclosed heated bed. Tensile strength sits around 40 MPa, but ABS handles impacts far better than PLA. We have seen ABS robot frames take direct hits from 1-pound battle bots and keep rolling.
PETG strikes a useful middle ground. It prints almost as easily as PLA but offers better layer adhesion and impact resistance. For chassis plates on small robots, PETG is our go-to starting point.
Nylon is where 3D printed parts start competing with metal on toughness. It flexes under load rather than snapping, which is exactly what you want in a crash. The downsides are moisture sensitivity and the need for higher extrusion temperatures around 260°C.
Polycarbonate prints at 280°C or higher and delivers tensile strength near 60 MPa. We use it for brackets that see repeated loading. It demands an enclosed printer and a heated bed capable of 110°C.
For serious performance, PEEK and PEI (Ultem) filaments are now printable on industrial machines. Tensile strength can exceed 90 MPa. These materials cost $200 per kilogram or more and require chamber temperatures above 100°C. They are showing up in professional robotics and aerospace prototypes.
Carbon fiber reinforced filaments are the other high-performance option. Mixing short carbon fibers into a nylon or PETG base can push tensile strength 30% to 50% higher than the base material. The fibers also improve stiffness and reduce warping.
One critical note: 3D printed parts are anisotropic. The strength along the Z axis (between layers) is usually only 40% to 60% of the strength in the X-Y plane. Print orientation is a design decision, not an afterthought.
Direct Comparison of Aluminum and 3D Printed Chassis Properties
Numbers tell the story better than adjectives. The table below summarizes the key mechanical and practical properties for the most common aluminum alloy (6061-T6) and the most common 3D printing materials.
| Property | 6061-T6 Aluminum | PLA | ABS | PETG | Nylon | Polycarbonate | Carbon Fiber Nylon |
|---|---|---|---|---|---|---|---|
| Tensile Strength (MPa) | 310 | 50 | 40 | 53 | 70 | 60 | 90 |
| Yield Strength (MPa) | 276 | N/A (brittle) | 30 | 40 | 45 | 55 | 70 |
| Density (g/cm³) | 2.7 | 1.24 | 1.04 | 1.27 | 1.14 | 1.20 | 1.15 |
| Flexural Modulus (GPa) | 69 | 3.5 | 2.3 | 2.1 | 1.4 | 2.4 | 4.5 |
| Heat Deflection (°C) | 580 (melts) | 60 | 100 | 80 | 95 | 140 | 120 |
| Water Absorption | None | Low | Low | Low | High (8%) | Low | Moderate |
| Cost per kg (approx.) | $5-$15 | $20 | $25 | $25 | $50 | $60 | $80 |
Notice how aluminum dominates on stiffness, heat tolerance, and water resistance. 3D printed plastics win on density (mass per volume) and on the ability to form complex shapes without machining. Cost per kilogram favors aluminum, but the total project cost depends on tooling, labor, and iteration speed.
Strength and Durability Analysis for Robotic Applications
Raw strength numbers only matter if they match the loads your robot actually sees. A small line-following robot and a 12-pound combat bot live in completely different mechanical worlds.
For light-duty robots under 1 kg of payload, PLA and PETG work fine. I have built sumo bots weighing 500g with PETG frames that survived dozens of matches. The impact forces stay below 50 N, well within the material’s limits.
For mid-weight robots between 1 and 5 kg, we recommend ABS or nylon. Impact loads can spike above 200 N during collisions. PLA snaps. ABS bends and recovers. Nylon absorbs the hit and springs back.
For heavy-duty robots over 5 kg or anything that takes direct impacts, aluminum is the safe answer. Even a 3mm aluminum plate outperforms any plastic at those energy levels. We have seen 1/8 inch polycarbonate do well in static structures, but it does not survive repeated high-energy hits the way aluminum does.
Failure modes differ between the two materials, and that matters for repairability. Aluminum bends, cracks, and dents in ways you can often hammer back into shape or patch with a welded bead. 3D printed parts usually fail at layer lines, and once delamination starts the part is scrap. You can reprint, but that takes hours.
Fatigue behavior is another consideration. Aluminum has well-characterized fatigue limits and predictable crack growth. Most 3D printing thermoplastics have limited fatigue data and can fail unexpectedly after thousands of cycles under loads well below their static strength.
Weight and Performance Considerations
Weight is not just a number on a spec sheet. It shapes every other design decision downstream.
A chassis built from 6061 aluminum at 2.7 g/cm³ is heavier than the same shape in PETG at 1.27 g/cm³. If you double the wall thickness to match aluminum’s stiffness, the weight gap closes further but the plastic version usually still wins on raw mass.
Lower mass means smaller motors, smaller batteries, and longer run times. If you are building a small autonomous robot, that 200g difference between an aluminum and a PETG chassis could let you drop one battery cell. Our guide on choosing robot batteries walks through how chassis weight feeds into your power budget.
But mass is not always the enemy. Heavier robots push harder, plow through obstacles, and resist being shoved by opponents. In a sumo robot competition, extra mass from an aluminum chassis can be the difference between winning and losing.
Center of gravity matters more than total weight. A heavy aluminum base plate with lightweight plastic upper structures can give you the mass you need for traction without raising the CoG. Many of our competition robots use exactly this layout.
Cost Comparison Across Robot Scales
The sticker price of raw material is misleading. The real cost includes equipment, labor, iteration, and scrap.
For a hobbyist with no equipment, the entry cost favors 3D printing. A $250 printer and a $30 spool of PETG can produce a complete small robot chassis in a weekend. To work in aluminum, you need at minimum a drill, hacksaw, files, and a vise. To do it well, you need a CNC mill or access to a makerspace with one.
For professional builders and competition teams, the math shifts. CNC machining time is expensive but produces parts in minutes. A 3D printer can take 6 to 20 hours for a comparable chassis, even at faster print speeds. Over a production run of 50 robots, machining aluminum becomes cheaper per part than printing plastic.
Scrap rates favor 3D printing for prototypes. A failed print wastes $2 of filament. A wrong aluminum cut wastes $20 of material plus machining time. That asymmetry pushes prototyping toward plastic and production runs toward metal.
Manufacturing and Tooling Requirements
The tools you need to work each material shape the decision as much as the material properties themselves.
Aluminum fabrication calls for sharp carbide tools, a rigid machine, and a coolant strategy. You can do rough cuts with a hacksaw and drill press, but precision features like pockets and slots really need a CNC mill or lathe. Hand tapping threads in aluminum is straightforward with the right taps.
3D printing asks for a calibrated machine, a level bed, and dry filament. The skill floor is lower, but the troubleshooting ceiling is high. Warping, layer shifts, clogged nozzles, and adhesion failures all consume time. We have spent entire weekends chasing a single print quality issue.
Assembly methods differ too. Aluminum parts typically use machine screws, nuts, and tapped threads. 3D printed parts usually pair with heat-set threaded inserts or self-tapping screws. The inserts melt into the plastic and give you reusable, strong threads.
Iteration speed is where 3D printing shines. Redesign your chassis plate and you can have a new version printed in 4 hours. Redesign an aluminum plate and you need to reprogram your CAM, cut a new piece, and deburr it. For early-stage development, plastic wins.
Environmental Resistance and Thermal Management
Where and how your robot operates changes the material math dramatically.
Outdoor robots face moisture, UV, and temperature swings. Aluminum handles all three with no special treatment. PLA and ABS absorb some moisture and degrade under UV. PETG and ASA handle UV better. For permanent outdoor installations, aluminum or ASA-printed enclosures are the safe answer.
Underwater or high-humidity environments are tricky. Aluminum will pit if you scratch the anodized layer, but otherwise holds up. Most 3D printed plastics absorb water and slowly lose mechanical properties. Nylon is the worst offender here, soaking up to 8% water by weight and softening noticeably.
Heat dissipation is where aluminum pulls ahead decisively. If your motors or motor controllers are mounted to the chassis, an aluminum frame acts as a passive heatsink. We have measured 10°C lower operating temperatures on motor controllers mounted to aluminum plates versus identical units mounted to ABS plates.
Thermal management also affects your electronics. Our piece on separate power for logic and motors explains why isolating noisy motor circuits matters, but the chassis material influences how well that isolation holds up under thermal stress.
Cold weather affects both materials. Aluminum gets brittler below -40°C, but few hobby robots operate there. Most 3D printed plastics stay flexible down to -20°C and then start to stiffen. ABS in particular can crack from cold impacts.
Hybrid Construction: Combining Aluminum and 3D Printed Parts
The cleanest answer for most serious robot builders is not “aluminum or plastic” but “both.” Hybrid construction pairs aluminum extrusion or plate structures with 3D printed brackets, mounts, and covers.
The most common pattern uses 20×20 or 20×40 aluminum extrusion as the main frame. V-slot or T-slot extrusions accept standard hardware and let you slide brackets anywhere along the length. You then 3D print the custom brackets, motor mounts, and sensor mounts that fit between the extrusions.
We used this exact approach on a 3 kg autonomous vehicle project last year. The aluminum extrusion handled the structural loads. The PETG brackets held the motors, the LIDAR mount, and the cable routing. Total cost was under $80 in materials and the chassis took a weekend to build.
Joining the two materials requires some planning. The simplest method is heat-set threaded inserts pressed into the plastic. You heat the insert with a soldering iron and push it into a printed hole. The result is a strong, reusable thread that a standard machine screw can bite into. Pull-out strengths above 50 N are common.
Another option is through-bolts with captured nuts. Print a clearance hole in the plastic, drop a nut on the back side, and bolt through into aluminum. This works well for larger joints and for parts you expect to disassemble often.
Adhesives can work but require care. Epoxy bonds well to both aluminum (after sanding and degreasing) and to ABS or PETG (after light abrasion). Cyanoacrylate (super glue) bonds to plastic but not reliably to aluminum without a primer. We keep both options in the shop.
Case studies from the competition robotics world support the hybrid approach. Top-ranked FIRST Robotics teams typically use aluminum drivetrain frames with custom 3D printed sensor mounts and cable management. Battle bot teams often combine aluminum armor with printed internal brackets to save weight where the loads are lower.
How to Choose the Right Material for Your Robot
Material selection gets easier when you walk through a few key questions in order. Use this framework on your next build.
Step 1: Identify the dominant load. Bending loads, impact loads, and fatigue loads each favor different materials. Heavy impact loads favor aluminum or nylon. Bending loads favor aluminum or carbon fiber reinforced filament. Pure compressive loads can be handled by almost anything.
Step 2: Estimate the peak force. A small wheeled robot under 500g rarely sees more than 30 N. A medium robot between 1 and 5 kg can see 200 N or more. Above 5 kg or in competition combat, expect peaks above 1000 N. Match your material to those numbers.
Step 3: Map the operating environment. Indoor lab use is forgiving for almost any material. Outdoor use demands UV and moisture resistance. Underwater or wet environments push toward aluminum or ASA.
Step 4: Define your budget and timeline. Prototyping on a deadline favors 3D printing. Production runs of 20 or more units often favor machined aluminum. Most projects end up somewhere in between.
Step 5: Match material to your experience. If you have never machined metal, start with PETG or aluminum extrusions with printed brackets. If you have never printed plastic, start with PLA prototypes or budget for a learning curve.
For most first-time builders, the safest path is a hybrid build. Aluminum extrusions for the main frame, 3D printed brackets for everything custom. You get the strength of metal where it matters and the design freedom of plastic where you need it.
If you are designing a robot with multiple degrees of freedom, our explainer on degrees of freedom in robotics will help you map mechanical loads to specific chassis regions. For drivetrain decisions that depend on your chassis stiffness, see our guide on backlash in robot gearing.
Frequently Asked Questions
What is the best metal for robot chassis?
6061-T6 aluminum is the best all-around choice for most robot chassis. It offers a tensile strength around 310 MPa, weighs roughly 2.7 g/cm³, machines easily with standard tools, and resists corrosion without coating. For higher-stress applications like combat robots, 7075 aluminum offers about 1.5x the yield strength at higher cost.
Can aluminum parts be 3D printed?
Yes. Aluminum parts can be 3D printed using a process called binder jetting or direct metal laser sintering (DMLS). These industrial methods fuse aluminum powder layer by layer with a laser or binder. Hobby FDM printers cannot print aluminum directly, but they can print molds for casting aluminum or print parts that fasten to machined aluminum components.
What is the best material for humanoid robots?
Humanoid robots typically use a combination of materials. Carbon fiber reinforced composites and machined aluminum dominate the structural skeleton because of high stiffness-to-weight ratios. 3D printed PA-CF or PETG parts fill the role of covers, cable channels, and non-structural mounts. High-stress joints like hips and ankles almost always use aluminum or steel.
How strong are 3D printed robot parts compared to aluminum?
Most 3D printed thermoplastics deliver tensile strength between 40 and 70 MPa, with advanced materials like PEEK and carbon fiber composites reaching 90 MPa or higher. Aluminum 6061-T6 delivers 310 MPa. The gap is significant for static loads, but 3D printed parts compensate through geometry, lower mass, and the ability to form complex internal structures.
Is anything illegal to 3D print for a robot?
Most 3D printed robot parts are legal. The restrictions apply to specific items like firearm components (which are regulated or banned in many jurisdictions), key blanks for restricted locks, and certain medical devices. Robot chassis, brackets, and gears are generally fine to print. Always check your local laws if you plan to print functional weapon components or items covered by export controls.
Conclusion
The aluminum vs 3D printed parts for robot chassis debate does not have a single winner. Aluminum delivers unmatched strength, heat tolerance, and environmental durability for the structural skeleton. 3D printing delivers unmatched design freedom, iteration speed, and weight savings for brackets, mounts, and complex geometries.
For your next robot, identify the highest-stress loads and put aluminum there. Use 3D printing for everything else. That hybrid approach has worked for our team on projects ranging from 500g sumo bots to 15 kg autonomous vehicles.
Once you have chosen your chassis material, the next step is integrating the rest of your robot. Our walkthrough on robot power system wiring is a logical next read. Get the chassis right, then bring the electronics in safely.