
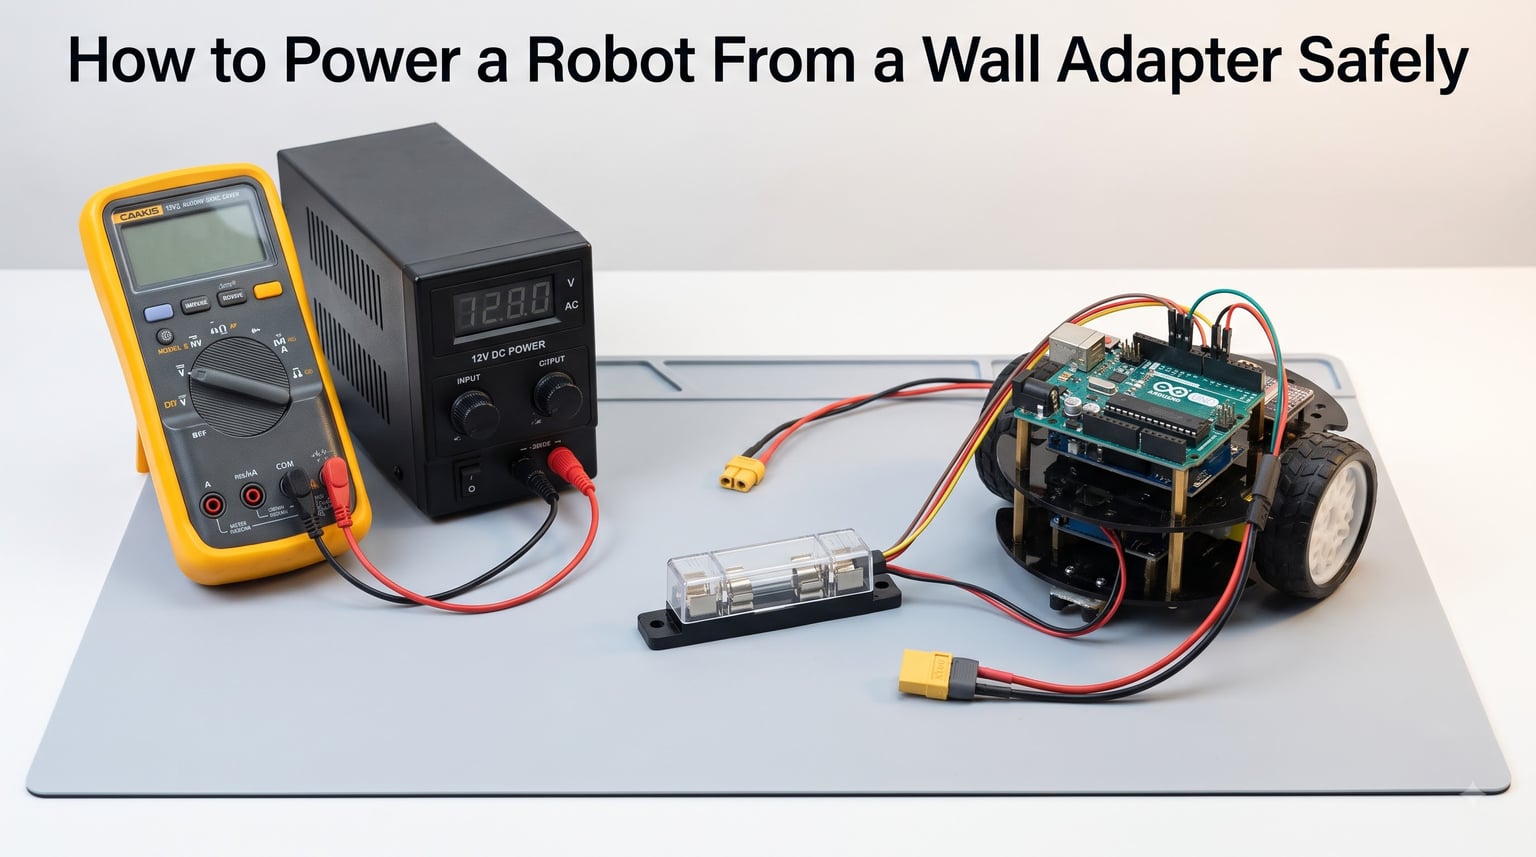
When I built my first wall-powered robot, I nearly burned out a $60 speed controller by borrowing a 12V battery charger as a “quick” power supply. That mistake taught me why learning how to power a robot from a wall adapter safely is one of the most important skills in hobby robotics. A properly matched wall adapter gives you stable voltage, unlimited runtime, and a reliable bench setup that batteries simply cannot match. The trick is matching the adapter to your robot’s voltage and current needs, then wiring it with the same protections you’d expect in any commercial product.
This guide walks through the exact process I now use on every stationary robot and bench test rig. We will cover the difference between a power supply and a battery charger, how to size your voltage and current, the three main adapter types, a safe wiring sequence, the protection circuits every robot needs, and how to troubleshoot brownouts before they fry your components.
If you want broader context before diving in, our guide on choosing robot battery alternatives explains when a wall adapter is the smarter pick over LiPo or NiMH packs. For stationary robots and bench development, the wall almost always wins.
Table of Contents
Why Power a Robot From a Wall Adapter Instead of a Battery Charger
Wall adapters deliver clean, regulated DC power designed for continuous operation. Battery chargers are built to charge batteries using a specific charge profile, which makes them dangerous stand-ins for power supplies. Forum users on Chief Delphi and Arduino have reported dozens of chargers burning out when used as robot supplies, sometimes within minutes.
The core problem is voltage spikes. A “12V” smart charger can swing up to 20V during absorption or equalization stages, and that surge blows LEDs, logic level shifters, and motor drivers instantly. A wall adapter holds its output within 5% of the rated voltage, regardless of load. Your microcontroller sees 5.00V when idle and 4.95V when motors spin up, not 4.2V one moment and 18V the next.
Continuous duty is the second big win. Chargers often throttle down or shut off when they sense no battery, leading to random resets mid-test. Adapters just run. If your robot needs to log data overnight, drive a webcam pan-tilt rig, or run a CNC-style pick-and-place, only a proper power supply gives you the uptime.
If you are deciding between an adapter and a chemistry like LiPo for a mobile build, our robot battery chemistry comparison breaks down the trade-offs by weight, runtime, and safety.
The Hidden Costs of Using the Wrong Adapter
A cheap “universal” wall adapter with selectable voltage tips might seem like a bargain, but most lack short-circuit protection, thermal shutdown, and current limiting. When a motor stalls and draws 3x its rated current, the adapter either droops the voltage (causing brownouts) or overheats and fails. Either way, your development time evaporates.
A purpose-built DC power supply adds three things you cannot get from a random charger:
Stable voltage under varying load
Documented current rating with headroom for inrush surges
Built-in protection for over-current, short-circuit, and over-temperature
Understanding Your Robot’s Power Requirements
Every robot needs two numbers from its power source: voltage and current. Voltage (measured in volts) is the “pressure” pushing electricity through the circuit. Current (measured in amps) is the “flow” actually delivered. Mismatching either one is the most common way beginners damage their robot.
Start by listing every component on your robot and finding its rated voltage. Most modern robots mix 3.3V (some sensors, Raspberry Pi GPIO), 5V (Arduino, logic, servos), 12V (motors, pumps, larger relays), and sometimes 24V (industrial steppers). The good news is one adapter at the highest voltage can feed a separate logic and motor power system through buck converters, which step the voltage down cleanly for each subsystem.
Current is where beginners underestimate the most. Here is a quick example I ran on my last bench robot:
Arduino Uno: 50 mA
HC-SR04 ultrasonic: 15 mA
Two MG996R servos idle, 10 mA each, but 1500 mA peak when stalled
12V DC gear motor: 300 mA typical, 1.5A stall
Total idle draw: 385 mA. Total peak draw (all motors stalled at once): about 3.1A. I sized my wall adapter to 5A at 12V to leave a comfortable margin for inrush spikes. That 60% headroom is the kind of buffer your adapter needs to stay cool and quiet.
If your motors do not list a stall current, calculate it using Ohm’s Law: stall current equals supply voltage divided by motor resistance. A 12V motor with 4 ohms of coil resistance will pull 3A when stalled. Multiply by 1.5x to 2x for safety margin, and round up to a standard adapter size.
How to Find Voltage and Current Ratings
Check the data sheet for every component. For motors, the rated voltage is the recommended operating voltage, but most DC motors can take 20% over their rating briefly. The rated current is what they draw under normal load, not stall. Plan for stall conditions, especially with gearmotors that have high gearing ratios.
If you do not have a data sheet, a quick bench test with a current meter tells you everything. Set up your adapter at the target voltage, place an ammeter in series with the motor, and read the current at no load and with the shaft held. That range is your sizing window.
Choosing the Right Power Supply Type for Your Robot
Once you know your voltage and current requirements, picking an adapter comes down to three families: linear supplies, switching supplies, and repurposed ATX supplies. Each has trade-offs in cost, efficiency, noise, and current capacity.
Linear DC Power Supplies
Linear supplies use a transformer to step down mains voltage, then a regulator to produce clean DC. They are heavy, bulky, and inefficient, but they produce very low ripple voltage (typically under 5 mV). If you are running sensitive analog sensors, audio circuits, or precision motor control, a linear supply gives you the cleanest signal.
For small robots under 2A, a wall-wart-style linear adapter works fine. Anything bigger gets heavy fast: a 12V 10A linear supply weighs about 8 pounds because of the iron transformer.
Switching DC Power Supplies
Switching supplies use high-frequency switching and small transformers to step down voltage efficiently. Most bench supplies you see on electronics workbenches are switching types. They run cooler, weigh less, and cost less per amp than linear supplies. The trade-off is higher ripple voltage, typically 50 to 150 mV peak-to-peak.
For digital logic and most hobby robotics, switching supplies are the right pick. They come in fixed-voltage versions (commonly 5V, 12V, 19V, 24V) with current ratings from 1A up to 30A or more. A 12V 10A switching supply weighs about 1.5 pounds and fits in your palm.
ATX Computer Power Supplies
An old PC power supply is a hack worth knowing. ATX supplies deliver 3.3V, 5V, and 12V from a single mains cord, with current ratings that often reach 20A on the 12V rail. They have built-in short-circuit protection, over-current protection, and thermal shutdown. Hobbyists on Chief Delphi have used them for years as cheap robot test supplies.
The catch is the “PSU-on” trick: ATX supplies stay in standby until the motherboard sends a signal. To run one without a motherboard, you short the green wire (PS_ON) to ground on the ATX connector. There are good guides on YouTube, but if you want a plug-and-play experience, a bench supply is safer and tidier.
Step-by-Step Guide to Wiring Your Robot to a Wall Adapter
Wiring is where the safety rubber meets the road. I follow the same sequence every time, whether I am setting up a bench rig or hardwiring a stationary robot. If you want a deeper dive into general wiring best practices, our safe robot power wiring guide covers additional detail.
Step 1: Verify the adapter output. Plug the adapter into mains power with no load connected. Use a multimeter to confirm the output voltage matches the label within 5%. If you measure 14V on a 12V adapter, send it back. A 2V overshoot can stress LEDs and shorten capacitor life.
Step 2: Add an in-line fuse. Cut the positive wire a few inches from the adapter’s barrel jack or terminal block. Install an automotive blade fuse holder rated at about 1.5x the expected continuous current. For my 5A robot, I use a 7.5A fuse. The fuse sits before any switch so it protects the entire wiring harness.
Step 3: Install a master power switch. A rocker switch rated for at least 1.5x the current breaks the positive line between the fuse and your robot’s power distribution. A lighted switch is nice because it tells you at a glance whether the robot is live.
Step 4: Wire the polarity protection diode. A Schottky diode in series with the positive rail drops about 0.3V to 0.5V but completely blocks reverse polarity. If you ever cross the wires by accident, the diode saves the motor controllers. Skip this step only if you are confident in your wiring.
Step 5: Connect the power distribution board. From the switched, fused, diode-protected positive line, run your distribution board. This is a simple board with several output terminals that share the same voltage. For multi-voltage robots, this is where your buck converters sit, one per voltage rail.
Step 6: Tie all grounds together. Every component, every buck converter, every motor driver needs to share a common ground. Star-ground to a single bus bar or screw terminal. Floating grounds cause weird resets, sensor noise, and mysterious motor stuttering.
Step 7: Test before connecting the robot. Power up the bare adapter, distribution, and fuses with no load. Measure the voltage at every output terminal. Then power down, connect the robot, and power up again. Watch the current draw on the first start; if anything spikes suspiciously high, power down immediately.
Essential Safety Precautions When Using Wall Adapters
Safety is the entire point of using a wall adapter in the first place. Follow these precautions every time and you will avoid the burned-out chargers, fried speed controllers, and tripped breakers that plague beginners.
Fuse Every Positive Rail
Every positive wire leaving your distribution board needs a fuse or polyfuse rated to the wire gauge and the expected current. A short circuit on an unfused 18AWG wire will heat the insulation to melting in seconds and can start a fire inside your robot chassis. Automotive blade fuses are cheap and easy to source.
Use Polarized Connectors
Anderson Power Poles and XT60 connectors can only be plugged in one way. If your robot ever gets unplugged and re-plugged in the field, polarized connectors prevent the cross-wiring that destroys motor controllers. Bare banana clips, screw terminals, and Dupont jumpers do not. Spend the few dollars for proper connectors.
Add Over-Current Protection
Beyond the main fuse, current-limiting features on your adapter protect stalled motors from drawing their full stall current indefinitely. Many modern switching supplies fold back current automatically. Linear supplies usually do not, so adding a polyfuse on each motor output is cheap insurance.
Respect Heat Sinks and Ventilation
Linear regulators and switching MOSFETs both generate heat. Mount your adapter (or any open-frame supply) where airflow is unobstructed. If you are running a 5A supply at 80% load continuously, expect the case to run warm to the touch. Hot is bad, warm is fine.
Never Bypass the Adapter’s Ground Pin
Three-prong plugs exist for a reason. The ground pin ties the metal chassis to mains earth ground, which shunts fault currents safely instead of through you. If you are using a bench supply with a metal case, the chassis should be earth-grounded. Cutting off the ground pin to fit a two-prong outlet can kill you.
Common Mistakes to Avoid When Powering Robots From the Wall
After years of helping forum users debug their first wall-powered robots, I have seen the same handful of mistakes repeatedly. Avoiding them will save you hours of troubleshooting.
Buying a 12V adapter for a 5V robot. Motors run on 12V, but logic runs on 5V. If your adapter outputs 12V and you feed it directly to your Arduino, you will let the magic smoke out within seconds. Always match the adapter output to the highest voltage your robot needs, then use buck converters for any lower rails.
Under-sizing for peak current. A 2A adapter on a robot that briefly draws 2.5A during motor stall will cause brownouts that look like software bugs. Always oversize your current rating by at least 50%.
Skipping the fuse to “save space.” I get it, blade fuses look bulky. They are also the difference between a recoverable short circuit and a chassis fire. Add the fuse.
Using phone chargers as robot supplies. Phone chargers are excellent chargers for phones, and poor supplies for motors. They are tightly regulated to 5V at 1A to 2.4A and have aggressive short-circuit behavior that resets on overload rather than limits current cleanly. Your robot needs power, not phone charging.
Forgetting the inrush current on big motors. When a DC motor first starts from a standstill, it can briefly draw 5x to 8x its running current. If your adapter folds back instantly on this spike, your motor never spins up. Choose an adapter with slow-start or current-limit behavior, or add an NTC thermistor in series to soften the inrush.
Troubleshooting Power Issues With Wall Adapter Setups
Even with perfect wiring, problems happen. Here are the three failures I see most often, and how I diagnose them quickly. If you are chasing recurring brownouts specifically, our guide on robot brownout and reset issues dives deeper into the symptoms and fixes.
The Robot Resets When Motors Start
Classic symptom: the microcontroller runs fine until a motor spins up, then everything reboots. The cause is voltage sag on a too-small adapter, or voltage drop on too-thin wires. Measure your supply voltage at the motor terminals under load, not just at the adapter. If you see more than 0.5V drop, increase the wire gauge or shorten the run.
The Adapter Shuts Down After a Few Minutes
Over-temperature protection is kicking in. Either you are running at the limit of the adapter’s rated current, or the ventilation is poor. Move the adapter to open air, drop the load, or upgrade to a higher-rated supply.
The Components Get Warm and a Faint Burn Smell Appears
Stop everything immediately. You have a wiring fault. Unplug the adapter and inspect the wiring for shorts, especially where wires pass through the chassis or near metal brackets. A single strand of stranded wire bridging two terminals can heat to red-hot within seconds.
If everything checks out visually, power up with a current meter in series on each rail. The reading tells you which subsystem is drawing more than expected.
FAQs
How do you power a robot from a wall outlet?
Connect a DC power supply sized to your robot’s voltage and current needs to a mains outlet, then run the regulated DC output through a fused and switched distribution to your components. Use a buck converter to step down voltage for any lower-voltage subsystems, and tie all grounds together.
Can I use a battery charger to power a robot?
Battery chargers are designed for charging, not continuous operation, and can spike above their rated voltage. Use a DC power supply instead, since chargers will burn out, send voltage spikes that damage electronics, and shut off randomly when no battery is connected.
What voltage do I need for my robot?
Match the highest voltage your robot uses, typically 12V for DC motors or 5V for logic, and use buck converters to step down for lower-voltage subsystems. A single 12V adapter can power both a motor driver and a 5V Arduino through a buck converter.
Can I use a 4.5 V adapter to power a 5V device?
No, a 4.5V adapter will cause undervoltage and brownouts on a 5V device. 5V devices usually need 4.75V to 5.25V to run properly, so you need a 5V regulated supply for any 5V component.
Final Thoughts on Powering Your Robot Safely From the Wall
Wall adapters are the safest, most reliable, and lowest-friction way to power stationary robots, bench test rigs, and development prototypes. Choose a regulated DC supply whose voltage matches the highest voltage in your robot, oversized by at least 50% on current. Add a fuse, a master switch, polarity protection, and proper connectors. Tie every ground together and test before connecting sensitive components.
Take the time to do this right on your first project and you will skip the burned chargers and fried motor drivers that derail most beginners. Browse our safe robot power wiring guide for the physical wiring details, then start building.