
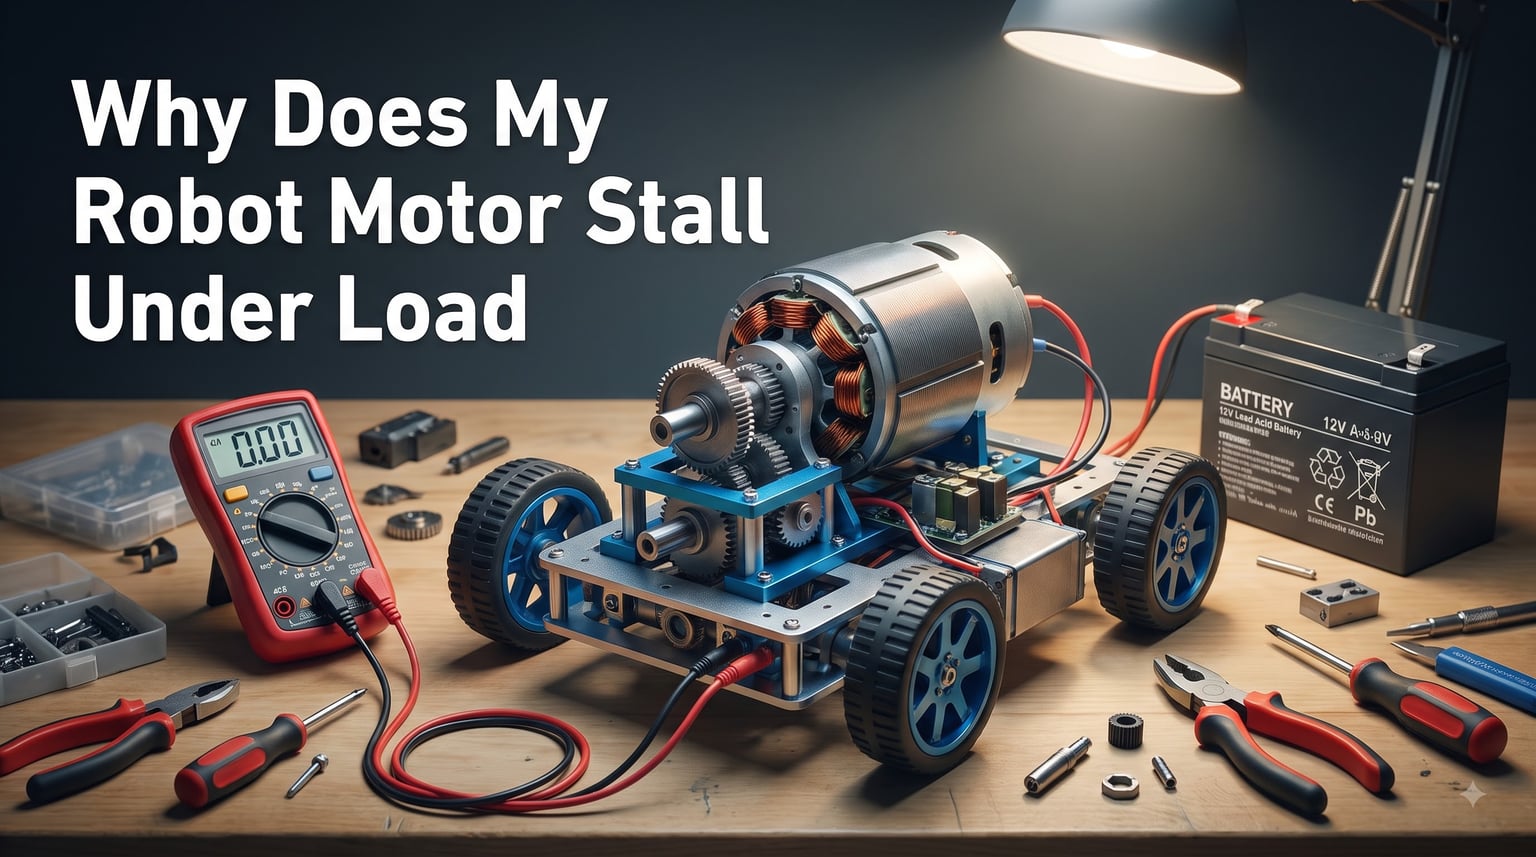
You build a robot, wire everything up, test it on the bench, and it runs perfectly. Then you put it on the ground, add some weight, and the motors freeze. If you have ever asked yourself why does my robot motor stall under load, you are dealing with one of the most common and frustrating problems in robotics.
A stalled motor is not just an inconvenience. It can destroy your motor windings, fry your motor controller, drain your battery in seconds, and trigger robot brownouts and resets that shut your entire system down. Competition teams in FTC, FRC, and VEX lose matches because of it. DIY builders burn through expensive hardware because of it.
The good news is that motor stalling is predictable and fixable once you understand the physics behind it. Every stall has a root cause, whether that is insufficient torque, battery voltage sag, mechanical binding, controller tuning, or thermal protection kicking in. In this guide, our team breaks down each cause with real-world robot examples and walks you through practical solutions you can apply today.
We have spent years building and debugging robots, from small Arduino wheeled platforms to heavy competition bots. Along the way, we have learned that most stall problems come down to a handful of mistakes that are completely avoidable with the right design choices. Understanding separate power systems for logic and motors is one piece of the puzzle, but there is much more to cover.
By the end of this article, you will know exactly what happens inside your motor during a stall, how to diagnose the specific cause, and how to engineer your robot so that stalling becomes a rarity instead of a regular occurrence.
Table of Contents
What Actually Happens When a Robot Motor Stalls
When a motor stalls, it stops spinning while power is still applied. That sounds simple, but the electrical consequences are dramatic. To understand why, you need to understand back EMF.
Back EMF, or back electromotive force, is the voltage a motor generates as it spins. A spinning motor acts like a generator, producing a voltage that opposes the supply voltage. This back EMF reduces the effective voltage across the motor windings, which limits the current flowing through them.
Here is the critical part. At full speed, back EMF can be nearly as high as the supply voltage, so only a small current flows. At zero speed, back EMF drops to zero, and the full supply voltage is applied directly across the motor winding resistance. This is what engineers call stall current, and it can be 10 to 50 times higher than the normal running current.
For a typical 12-volt DC motor with a winding resistance of 1.5 ohms, the stall current works out to roughly 8 amps. Under normal running conditions with back EMF, that same motor might draw only 1 amp. That sudden current surge is what causes all the downstream problems.
When your robot motor stalls under load, several things happen in rapid succession. The current spikes to stall levels, the battery voltage sags under the sudden high-current demand, the motor windings heat up fast, and if the stall persists, the motor controller may trip its overcurrent protection or fail entirely.
This is why a robot that runs fine on the bench can fail on the ground. The bench test has no real load, so back EMF stays high and current stays low. Add the weight of the chassis, friction from the floor, and mechanical resistance from gears, and suddenly the motor cannot maintain speed. Back EMF drops, current spikes, and the stall cascade begins.
Why Does My Robot Motor Stall Under Load: Root Causes
Every motor stall comes from one fundamental mismatch. The torque the motor can produce at its current operating point is less than the torque the load demands. The question is what causes that mismatch. In robots, there are five primary categories of root causes, and most real-world stall problems involve two or more of them working together.
Insufficient Torque for the Load
This is the single most common cause. The motor simply does not produce enough torque to move the load, and understanding calculating torque for robotics is the foundation of solving it.
Torque is rotational force. Every robot component creates a torque demand on the motor. The weight of the robot, the friction in the drivetrain, the gear ratio, the wheel radius, the incline angle, and the acceleration you want all combine into a total load torque. If the motor’s available torque at the given speed is less than this load torque, the motor slows down and eventually stalls.
Many builders make the mistake of looking only at the motor’s rated torque without considering torque margin. Torque margin is the difference between what your motor can produce and what the load actually requires. Without adequate margin, any small increase in load, like hitting a bump or pushing against an obstacle, will push the motor past its limit.
A practical rule from experienced builders is to design for at least a 2x torque margin. If your robot needs 2 Newton-meters of torque to move, your motors should be capable of producing at least 4 Newton-meters. This headroom absorbs variations in terrain, battery charge level, and mechanical wear over time.
Gear ratio selection is inseparable from torque. A gearbox trades speed for torque, so a higher gear reduction gives you more torque at the wheel but lower top speed. Many stalls happen because builders choose a gear ratio optimized for speed without leaving enough torque to handle real-world loads. We have seen FTC teams eliminate chronic stalling simply by switching from a 1:2 to a 1:4 gearbox ratio.
Load inertia is another factor that catches builders off guard. A heavy robot takes more torque to accelerate than to keep moving. The starting torque needed to get a stationary robot rolling from a dead stop is significantly higher than the torque needed to maintain speed. This is why robots often stall at startup but run fine once moving.
Battery Voltage Sag Under Load
In mobile robots, the battery is not a perfect voltage source. When motors draw high current, the battery voltage drops temporarily. This phenomenon, called voltage sag, reduces the voltage available to the motor, which reduces its torque output, which can cause a stall.
Battery voltage sag is particularly problematic because it creates a feedback loop. The motor needs more torque, so it draws more current. The higher current causes more voltage sag. The lower voltage reduces the motor’s torque capability. The motor slows down, back EMF drops, and current increases further. This spiral can push a borderline situation into a full stall in milliseconds.
The internal resistance of the battery determines how much sag occurs. A battery with high internal resistance might drop from 12 volts to 8 volts under a heavy motor load. That 33 percent voltage reduction cuts the motor’s available torque by more than half, since torque in a DC motor is proportional to current, and current is proportional to voltage.
This is why choosing the right battery for your robot matters so much for stall prevention. Lithium polymer batteries have lower internal resistance than older NiMH or NiCd packs, which means less voltage sag under load. But even with a good battery, wiring resistance, connector resistance, and trace resistance on your circuit board all add to the total voltage drop.
Competition teams frequently discover voltage sag the hard way. A robot that works perfectly with a fresh battery starts stalling after a few minutes of use. The battery voltage has dropped enough that the motors can no longer produce sufficient torque. Monitoring battery voltage during operation is one of the simplest diagnostic steps you can take.
Mechanical Resistance and Binding
Not all stall causes are electrical. Mechanical problems can create so much resistance that even an adequately sized motor cannot overcome the load. These issues are often the hardest to diagnose because they can be intermittent.
Bearing friction is a frequent culprit. Bearings that are overtightened, misaligned, or contaminated with debris create drag that increases the effective load on the motor. A shaft that is even slightly misaligned can turn a smooth-running system into one that jams under certain conditions.
Gearbox problems are equally common. Improperly meshed gears, worn gear teeth, insufficient lubrication, or debris inside the gearbox all add resistance. We have seen robots where simply cleaning and relubricating the gearbox eliminated stalling that had been blamed on the motor for weeks.
The chassis itself can be a source of mechanical drag, and understanding robot chassis design helps identify these issues. A frame that flexes under load can cause axles to bind. Wheels that rub against the chassis create constant friction. Tracks that are too tight on tracked robots add enormous drag.
Weight distribution plays a subtle but important role. If too much weight sits over the drive wheels, the motor has to work harder to turn them. If weight is unbalanced, some motors carry a heavier load than others, and those overloaded motors stall first. In multi-motor drive systems, uneven load sharing means one motor may stall while others are barely working.
Environmental factors add another layer. Robot motors that work on smooth concrete may stall on carpet, grass, or inclined surfaces. Cold temperatures increase bearing friction and grease viscosity. Wet conditions can cause rust and corrosion that increase mechanical resistance over time.
Motor Controller and Control Loop Problems
Your motor controller sits between the battery and the motor, and problems here can cause stalling even when the motor and battery are fine. Controllers have current limits built in, and if those limits are set too low, the controller will cut power to the motor when it tries to draw the current needed to handle a load increase.
This is especially common with motor controllers that have aggressive current limiting for thermal protection. The controller detects the current spike from a load increase and throttles back the motor to protect itself. The motor never gets the current it needs and stalls. This protection is important for preventing fires and component damage, but if the threshold is set without understanding the motor’s requirements, it causes unnecessary stalls.
Control loop tuning issues affect robots using closed-loop speed or position control. If the proportional gain is too high, the system overshoots and oscillates, which can cause the motor to reverse direction rapidly and effectively stall. If the integral term winds up during a stall, the controller may behave erratically when the stall clears.
PWM frequency matters more than most builders realize. A motor driven with low-frequency PWM experiences more current ripple, which can cause torque pulsations and make the motor more prone to stalling at low speeds. Higher PWM frequencies smooth the current and provide more consistent torque.
Stepper motors have their own controller-specific stall cause. If the controller steps the motor too fast, the rotor cannot keep up with the magnetic field, and the motor loses synchronization. This is not technically a stall but manifests as skipped steps, where the motor jumps and loses position. Reducing acceleration ramp rates and step speed prevents this.
Thermal Overload and Overheating
Motor windings heat up when current flows through them. Under normal operation, the motor dissipates this heat fast enough to maintain a safe temperature. During a stall or near-stall condition, the high current generates heat much faster than the motor can shed it.
As the motor heats up, the winding resistance increases. Higher resistance means the motor draws less current for the same voltage, which reduces available torque. This creates another feedback loop where heating reduces torque, which increases slip, which increases current, which generates more heat.
Many modern motor controllers include thermal protection that shuts down the motor when a temperature threshold is reached. This protection saves the motor from permanent damage, but it manifests as the motor stopping after a few minutes of operation. If your robot runs fine for a while and then the motors cut out, thermal protection is a prime suspect.
Some motors have built-in thermal switches called Positive Temperature Coefficient devices that increase resistance dramatically when they get hot, effectively cutting current. These can reset once the motor cools, creating an intermittent stalling pattern that is extremely confusing to diagnose.
The fix for thermal stalling is usually a combination of reducing the load, improving motor cooling, and using a motor with a higher temperature rating. In some cases, the motor is simply too small for the application and no amount of cooling will solve the problem.
Practical Solutions to Fix and Prevent Motor Stalling
Now that we have covered the root causes, let us look at specific fixes. Most stall problems require a combination of these solutions, so do not expect a single change to fix everything.
Right-Size Your Motor and Gearbox
The most effective stall prevention happens at the design stage. Calculate your actual torque requirements before buying motors. Factor in robot weight, wheel radius, desired acceleration, maximum incline angle, and an efficiency factor for drivetrain losses.
Start with the torque needed at the wheel. For a wheeled robot, the tractive force needed to move is the robot weight multiplied by the coefficient of rolling resistance plus any incline component. Multiply this force by the wheel radius to get the torque at the wheel.
Then divide by your gear ratio and efficiency factor to find the torque required from the motor. Choose a motor whose rated torque is at least double this calculated value. That 2x margin handles the unexpected loads and degradation over time that would otherwise cause stalling.
For gearbox selection, prioritize torque over speed unless your application demands high speed. A higher gear ratio gives you more torque headroom at the cost of top speed, and in most robot applications, torque is the more critical parameter. You can always add a second gear stage if you need both torque and speed.
Fix Voltage Drop Issues
Start by measuring the actual voltage at the motor terminals under load. Use a multimeter across the motor leads while the robot is trying to move. If you see a significant voltage drop compared to the battery voltage, you have found a major contributor to your stall problem.
Use thick, short wiring between the battery and motors. Wire resistance is a real factor at high currents, and long thin wires can drop a volt or more under stall conditions. Follow safe robot power system wiring practices to minimize voltage losses.
Upgrade to a battery with lower internal resistance. Lithium polymer batteries generally have the lowest internal resistance for a given size. Make sure the battery’s C-rating is high enough to deliver the stall current without excessive sag. A battery rated for 10 amps continuous will sag badly if your motors try to draw 30 amps during a stall.
Consider using separate power rails for logic and motors. When motors draw high current, the voltage drop affects everything connected to the same battery. Microcontrollers and sensors can brown out at voltages that motors can still operate at. Isolating the logic power prevents controller resets that make stall recovery impossible.
Reduce Mechanical Resistance
Inspect your entire drivetrain for sources of friction. Spin each wheel by hand with the motor disconnected. It should spin freely for several rotations. If it stops quickly, you have a mechanical problem to solve.
Check shaft alignment carefully. Even a small angular misalignment between the motor shaft and the driven component creates binding that loads the motor. Use flexible couplers where shafts meet, and verify that bearings are properly seated and not overtightened.
Clean and lubricate gearboxes regularly. Old grease picks up debris and becomes a drag source. Use the correct type of lubricant for your gear material and operating conditions. Too much grease is almost as bad as too little, as it creates fluid drag and can cause overheating.
Distribute weight evenly across your drive wheels. If your robot is tail-heavy or nose-heavy, redistribute components or add ballast. In multi-motor drive systems, make sure each motor carries an equal share of the load.
Program Stall Detection and Current Limiting
Smart motor control can prevent stalls before they happen. Implement current monitoring in your motor controller or microcontroller. When current exceeds a threshold for more than a brief period, back off the throttle or stop the motor to prevent a full stall.
Current limiting is one of the most effective software-based stall prevention techniques. Set the current limit to about 1.5 times the motor’s rated running current. This allows the motor to handle load transients while preventing the massive current spikes that cause stalling and overheating.
For autonomous robots, implement stall detection that monitors motor speed. If the motor is being commanded to run but is not moving, cut power immediately. This prevents the sustained stall condition that burns out motors and drains batteries.
Acceleration ramps prevent the sudden torque demand that causes startup stalls. Instead of commanding full speed instantly, ramp the motor speed up over 100 to 500 milliseconds. This gives the motor time to build speed and back EMF before the full load is applied.
Preventive Design Practices for Stall-Free Robots
The best stall fix is preventing the problem during the design phase. Our team has learned through painful experience that a few hours of design calculation can save weeks of debugging.
Always model your torque requirements before selecting motors. Create a simple spreadsheet that calculates the torque needed at the wheel based on your robot’s weight, wheel diameter, desired acceleration, and expected operating conditions. This takes 30 minutes and prevents the most common stall cause.
Build in torque margin from the start. Design for 2x the calculated torque requirement at minimum, and consider 3x for robots that will operate in unpredictable conditions or push against obstacles. The extra cost of a larger motor is always less than the cost of a burned-out motor and a failed project.
Choose batteries with generous current capacity. Calculate the maximum expected current draw from all motors combined and select a battery that can deliver at least 1.5 times that current without excessive voltage sag. Monitor battery voltage during testing to catch sag issues early.
Plan for thermal management. If your motors will run at high duty cycles, provide ventilation or heatsinking. In enclosed robot bodies, consider adding fans to circulate air over the motors. Test under realistic conditions and measure motor temperature to catch thermal issues before they cause failures in the field.
Test incrementally. Start with a light robot and no load. Add weight gradually and monitor motor current and temperature at each step. This approach reveals problems at a stage where they are easy to fix, rather than discovering them when the robot is fully assembled and weighted.
Quick Troubleshooting Checklist
When your robot motor stalls, work through this diagnostic sequence to identify the cause quickly.
Step 1: Measure battery voltage under load. If it drops more than 20 percent, you have a battery or wiring problem.
Step 2: Disconnect the motor from the drivetrain and test it with no load. If it runs fine, the problem is mechanical resistance in your drivetrain.
Step 3: Check motor current during operation. If it spikes to stall current levels, the motor is fighting an overload. Compare the actual current draw to your calculated load requirements.
Step 4: Inspect all mechanical connections for binding, misalignment, and excessive friction. Spin components by hand to feel for resistance.
Step 5: Check motor temperature after a stall event. If the motor is too hot to touch, thermal overload is contributing to the problem.
Step 6: Review your motor controller settings. Check current limits, PWM frequency, and control loop gains for misconfiguration.
FAQs
Why is my electric motor slowing down under load?
Your electric motor slows down under load because the torque required to move the load exceeds the torque the motor can produce at its current speed. As the motor slows, back EMF decreases, current increases, and the motor reaches a new equilibrium speed that is lower than the no-load speed. If the load torque exceeds the motor’s maximum torque, the motor stalls completely.
How do I fix a stalled robot motor?
To fix a stalled robot motor, first identify the cause. Check battery voltage under load for excessive sag. Inspect the drivetrain for mechanical binding. Verify the motor has adequate torque margin for the load. Reduce the gear ratio for more torque. Implement current limiting in your motor controller. Clean and lubricate gearboxes. Use thicker wiring to reduce voltage drop. Most fixes involve a combination of electrical and mechanical adjustments.
What causes an electric motor to stall?
Electric motors stall due to insufficient torque, voltage drop under load, mechanical resistance, controller current limiting, or thermal overload. In robots specifically, common causes include undersized motors, high battery internal resistance causing voltage sag, binding in the drivetrain, aggressive current limits, gear ratios optimized for speed instead of torque, and overheating from sustained high-current operation.
Why does my electric motor shut off after a few minutes?
Your electric motor shuts off after a few minutes due to thermal protection. When a motor operates near stall conditions, the high current generates heat faster than the motor can dissipate it. Once the winding temperature reaches the protection threshold, a thermal switch or the motor controller shuts off power to prevent permanent damage. This indicates the motor is overloaded and needs a higher torque rating or better cooling.
Can a stalled motor damage my robot?
Yes, a stalled motor can cause serious damage. The high stall current can burn out motor windings, fry motor controllers, and cause battery voltage drops that reset your entire robot. Sustained stalls generate enough heat to melt insulation and permanently reduce motor performance. Always implement current limiting and stall detection to protect your hardware.
How do I calculate stall current for my robot motor?
Calculate stall current by dividing the supply voltage by the motor winding resistance. For example, a 12-volt motor with 1.5 ohms winding resistance has a stall current of 8 amps. You can find the winding resistance in the motor datasheet or measure it with a low-resistance ohmmeter. Always ensure your motor controller and battery can handle this current level.
Conclusion
Understanding why does my robot motor stall under load comes down to recognizing the torque mismatch between what your motor can deliver and what your robot demands. Whether the cause is insufficient torque margin, battery voltage sag, mechanical resistance, controller misconfiguration, or thermal overload, the diagnostic approach is the same.
Measure first, then fix. Check your battery voltage under load, inspect your drivetrain for friction, verify your motor torque calculations, and monitor motor temperature. Most stall problems yield to this systematic approach within an hour of testing.
The best long-term strategy is preventive design. Calculate your torque requirements with generous margins, choose batteries with low internal resistance, select appropriate gear ratios, and implement current limiting in software. A few hours of design work saves weeks of debugging and hundreds of dollars in burned-out components. Build smart, test incrementally, and your robots will run stall-free.