
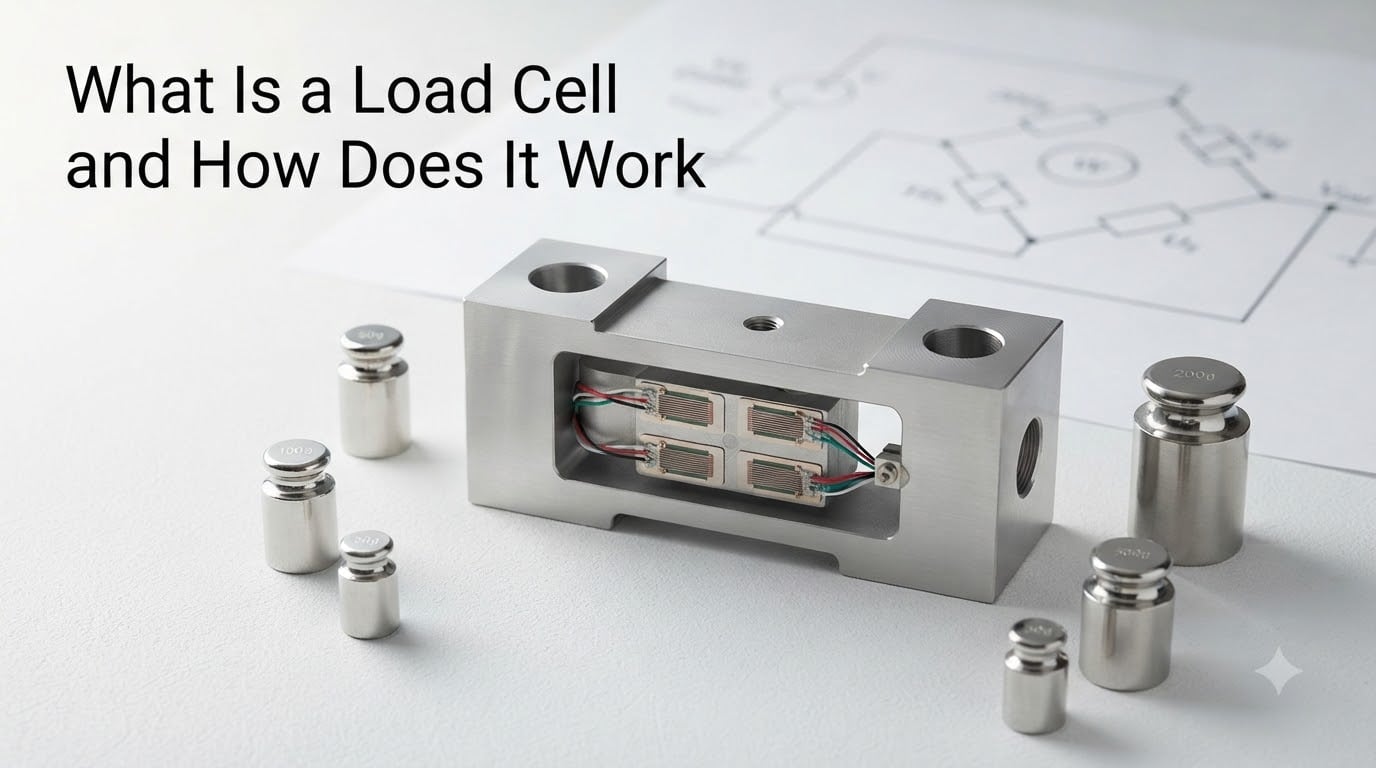
A load cell is a force transducer that converts mechanical force — such as tension, compression, pressure, or torque — into a measurable electrical signal. Engineers and robotics builders rely on load cells every day to turn real-world pushes and pulls into clean data their systems can read.
I’ve spent the last decade wiring load cells into test rigs, robot arms, and weigh scales. In that time I’ve learned what makes these sensors tick, why they sometimes lie, and how to get reliable readings from them. This guide walks you through what a load cell is, how it works at the physical and electrical level, the main types you’ll meet, and where each one shines in robotics and industrial settings.
If you’ve ever asked yourself how a bathroom scale knows you weigh 80 kilograms, or how a robot arm feels the resistance of a part it’s gripping, you’re about to find out. By the end, you’ll know the strain gauge principle, the Wheatstone bridge circuit, and the practical details you need to pick, wire, and troubleshoot a load cell in your own project.
Table of Contents
What Is a Load Cell
A load cell is a sensor that measures force or weight and turns it into an electrical signal a controller or display can read. The word “load” refers to the force being measured, and “cell” reflects the fact that it is one self-contained sensing unit.
Load Cell as a Force Transducer
In engineering terms, a load cell is a force transducer or force sensor. A transducer takes one form of energy and converts it into another, and a load cell specifically turns mechanical strain into an electrical output. The output is almost always a small analog voltage, typically in the millivolt range, that scales with the applied force.
You can also see load cells called weight sensors, since weighing is by far the most common use. The internal mechanism is the same whether the cell sits inside a kitchen scale, a truck weighbridge, or the foot of a humanoid robot.
Why Load Cells Matter
Load cells are the backbone of modern measurement. They show up in industrial scales, process control, batch mixing, automated packaging, robotics, research labs, and even sim racing pedals. Anywhere you need a precise, repeatable number for a push, pull, or weight, there’s almost certainly a load cell behind it.
Without load cells, a factory could not weigh ingredients accurately, a robot could not sense how hard it is gripping a part, and a crash test dummy could not record impact forces. They are quiet, unglamorous components that make a remarkable amount of modern automation possible.
How Does a Load Cell Work
A load cell works by using strain gauges bonded to a metal body. When force is applied to the body, it deforms very slightly. That deformation stretches or compresses the strain gauges, changing their electrical resistance. The resistance change is measured by a Wheatstone bridge circuit and turned into a small voltage signal proportional to the applied force.
That is the short version. The rest of this section breaks the process into three pieces: the strain gauge principle, the bridge circuit, and the signal conditioning that makes the output useful.
The Strain Gauge Principle
A strain gauge is a thin metallic foil pattern, often shaped like a long zigzag, that is bonded to the surface of a load-bearing element. The foil is made from a material whose electrical resistance changes predictably when it is stretched or compressed.
When force pushes on the load cell body, the body flexes. The strain gauge flexes with it. Even a tiny deformation — often less than a micron — causes the foil to lengthen slightly or shorten, which raises or lowers its resistance.
The relationship is governed by the gauge factor, a number that tells you how much resistance changes per unit of strain. Most metallic strain gauges have a gauge factor around 2.0, meaning a 1% stretch produces about a 2% change in resistance.
Because the change is so small, you cannot read it directly with a typical analog-to-digital converter. That is where the next stage comes in.
The Wheatstone Bridge Circuit
Four strain gauges are usually arranged in a Wheatstone bridge, a classic four-resistor circuit that converts tiny resistance changes into a measurable voltage difference. Two gauges are stretched when force is applied, and two are compressed, so the bridge is always in an active state.
The bridge is powered with a stable excitation voltage, often 5V, 10V, or 12V. Under no load, the bridge is balanced and the output reads close to zero. As force is applied, the resistance imbalance produces a small differential voltage, usually on the order of millivolts.
The output is rated in mV/V, which is millivolts of output per volt of excitation. A common 2 mV/V cell with 10V excitation will give you 20 mV at full rated load. That tiny number explains why amplifiers matter so much.
From Microvolts to Meaningful Data
The raw signal from a load cell is rarely usable on its own. It is small, sensitive to noise, and changes with temperature. A signal conditioner or load cell amplifier — like the popular HX711 module used with Arduino — boosts the signal, filters noise, and often adds temperature compensation.
After amplification, an analog-to-digital converter (ADC) samples the voltage. To learn more about how ADCs work, check out our What Is an ADC and How Does It Work guide.
Finally, software converts the reading from raw counts into engineering units, like kilograms, newtons, or pounds. A calibration step, where known weights are applied and the readings are recorded, maps voltage to actual force.
Types of Load Cells
Load cells come in several distinct types, each with its own operating principle, strengths, and ideal applications. The four most common categories are strain gauge, hydraulic, pneumatic, and capacitive load cells, with a handful of specialty designs filling specific niches.
The comparison table below summarizes the key differences.
Strain Gauge Load Cells
Strain gauge load cells are by far the most common. They use the bonded-foil strain gauges and Wheatstone bridge described above, attached to a precision-machined metal body. They are accurate, affordable, and available in capacities from a few grams to several thousand tons.
Common shapes include S-type, button, canister, single-point, and beam load cells. Each form factor suits different mounting situations. Single-point cells are popular in retail scales, S-types handle tension and compression, and canister cells take the heavy loads in weighbridges.
Hydraulic Load Cells
A hydraulic load cell uses a piston and fluid-filled chamber. Applied force pushes the piston, raising the fluid pressure. A pressure gauge or transducer reads that pressure and converts it into a force reading.
Hydraulic cells are inherently robust and intrinsically safe, which makes them a strong choice for hazardous environments, underground mining, and very heavy industrial applications like crane weighing.
Pneumatic Load Cells
Pneumatic load cells work like hydraulic ones but use air instead of liquid. Force is balanced against a regulated air pressure, and the flow rate or pressure change is measured.
These cells are clean, explosion-proof, and well suited to food processing, pharmaceutical, and laboratory environments. They tend to be slower and less precise than strain gauge types.
Capacitive Load Cells
Capacitive load cells measure the change in capacitance between two plates when force is applied. The load-bearing element moves slightly, varying the gap or overlap area, and the resulting capacitance change is read electronically.
Capacitive designs are rare in heavy industrial use but show up in precision laboratory balances and some low-capacity medical scales. They offer good temperature stability and low power consumption.
Other Load Cell Types
A few specialized designs deserve a mention. Vibrating wire load cells measure the change in resonant frequency of a tensioned wire, which is highly stable over long periods. Piezoelectric load cells generate a charge when compressed and are excellent for capturing fast, dynamic forces like impact testing. Each fills a niche where standard strain gauge cells would struggle.
Load Cell Applications in Robotics and Industry
Load cells show up wherever force and weight must be measured precisely. Robotics, industrial weighing, material testing, and a few specialty fields dominate the use cases.
Robotics and Automation
In robotics, load cells provide the force feedback that lets a robot interact with the world safely. A robot arm uses force sensors at its wrist or fingertips to know how hard it is gripping a part. Mobile robots put load cells in their wheels or feet to measure ground reaction forces, balance, and payload weight.
Six-axis force-torque sensors, which are essentially multi-axis load cells, sit between a robot arm and its end effector and report force in three directions plus three torques. If you are building a humanoid or a collaborative robot, you can read more about how a robot chassis works for a related deep dive.
Industrial Weighing
Truck scales, hopper scales, batching systems, and checkweighers all rely on load cells. Multiple cells are usually mounted under the platform and summed electronically so uneven loading does not cause errors.
For a small platform, a single point load cell is often enough. For a truck weighbridge, four to twelve compression cells are arranged in a platform, with each one handling a share of the total load.
Material Testing
Universal testing machines use load cells to measure the strength of materials under tension, compression, and fatigue. S-type and button load cells dominate this space, paired with high-resolution data acquisition. HBM (now HBK) is widely trusted in these applications, especially in aerospace and structural testing.
Sim Racing and Specialty Uses
Sim racing enthusiasts install load cells in their brake pedals to capture pedal pressure directly, rather than relying on pedal travel alone. Unlike Hall effect sensors, which measure position or magnetic field, a load cell measures the actual force applied, giving a more realistic feel. The trade-off is dealing with spike loading from sudden, hard pedal inputs.
Load Cell Wiring, Amplifiers, and Integration
Most load cells use a standardized color-coded wiring scheme. A four-wire cell has red and black for excitation and white and green for signal output. Six-wire cells add sense wires that compensate for voltage drop in long cable runs.
Excitation and Output Signals
Excitation voltage is the power you feed the bridge, usually 5V to 15V. The output is a small differential voltage proportional to excitation and applied force. Rated output is given in mV/V, with 2 mV/V and 3 mV/V being the most common values.
Because the output is so small, a clean, regulated excitation source is critical. Any noise on the excitation rail shows up directly in the output signal.
Amplifiers: Why You Need One
Yes, a load cell almost always needs an amplifier. The millivolt output is too small for most ADCs to resolve with useful precision, and an amplifier boosts the signal to a level where noise becomes less of a problem. The HX711 module is the most popular breakout for hobby work, while industrial systems use dedicated load cell signal conditioners from brands like FUTEK, ANYLOAD, and Flintec.
An amplifier also typically includes a temperature compensation stage and a low-pass filter to reject mechanical and electrical noise.
Connecting to Arduino and Microcontrollers
For a quick Arduino load cell project, the HX711 paired with a 1 kg or 5 kg straight bar load cell is the most common starting point. The HX711 handles amplification and 24-bit ADC conversion, and Arduino libraries make calibration straightforward.
Wire the red and black leads to HX711 E+ and E-, white and green to A+ and A-, and read the output through the library. Calibration involves placing known weights on the cell, noting the raw reading, and computing a scale factor in your code. For an introduction to the platform, see our What Is an Arduino and How Does It Work guide.
Common Problems With Load Cells and How to Solve Them
Even a well-installed load cell can give you trouble. Here are the issues I see most often and the fixes that have saved me the most time.
Drift and Zero Balance
Over time, a load cell can drift as its internal strain gauges age, as the mounting hardware settles, or as temperature shifts. A periodic zero balance — where you remove all load and re-tare the system — keeps the reading accurate. For high-precision work, install the cell where temperature swings are small and let it warm up before taking measurements.
Spike Loading and Impact Damage
Sudden impact loads are the number one killer of load cells. Shock loads far above the rated capacity can permanently deform the elastic element or break a strain gauge bond. Mechanical stops, snubbers, and dampers in series with the cell absorb spike energy before it reaches the sensor.
Noise and Temperature Effects
Electromagnetic noise from motors, variable frequency drives, and long cable runs can swamp the tiny mV output. Twisted pair shielded cable, proper grounding, and a low-pass filter on the amplifier all help. Temperature changes affect both the gauge resistance and the elastic modulus of the body, so look for cells with built-in temperature compensation if your environment is not stable.
Calibration Mistakes
The most common calibration error is using a single calibration weight, which does not check linearity. A proper calibration uses at least three points — typically zero, half scale, and full scale — with known reference weights. Re-calibrate any time you change the mechanical mounting or the cable routing.
Frequently Asked Questions
What is a load cell used for?
A load cell is used to measure force or weight and convert it into an electrical signal. It shows up in industrial scales, robotics, automation, material testing, checkweighers, and many other applications where precise force feedback is required.
Does a load cell need an amplifier?
Yes, in almost all cases a load cell needs an amplifier. The raw output is only a few millivolts, which is too small for most analog-to-digital converters to read accurately. An amplifier like the HX711 boosts the signal, filters noise, and often adds temperature compensation.
How many load cells do I need?
The number of load cells you need depends on the size of the platform and how the load is distributed. A small kitchen scale might use one single-point cell. A truck weighbridge typically uses four to twelve compression cells, with their outputs summed electronically. For a robot arm gripper, a single cell is usually enough.
What are the common problems with load cells?
The most common load cell problems are drift and zero balance shift, spike loading or impact damage, electrical noise and temperature effects, and calibration mistakes. Mechanical stops, shielded cabling, proper grounding, and regular re-calibration fix most of these issues.
How to use a load cell for weight measurement?
To use a load cell for weight measurement, mount it where the load will be applied, wire it to an excitation source and a load cell amplifier like the HX711, and connect the amplifier output to a microcontroller or display. Then calibrate the system by applying known weights and recording the readings to compute a scale factor.
What is the difference between a load cell and a force sensor?
There is no real difference — the terms are often used interchangeably. Both describe a device that converts mechanical force into an electrical signal. Load cell is more common in industrial weighing, while force sensor is more common in robotics and test and measurement contexts.
Conclusion
A load cell is a force transducer that turns mechanical force into a small electrical signal, and the working principle is the same whether you are weighing a truck or giving a robot arm a sense of touch. The strain gauges bonded to an elastic body flex under load, the Wheatstone bridge measures the resulting resistance change, and an amplifier turns those millivolts into something your electronics can read.
If you are building a project in 2026, start by picking the right load cell type for your force range and environment, add a quality amplifier like the HX711, and spend time on a proper three-point calibration. Treat the cell gently, protect it from spike loads, and it will give you accurate readings for years.
For more on the electronics behind these sensors, read our guides on ADCs and Arduino to round out your understanding.