
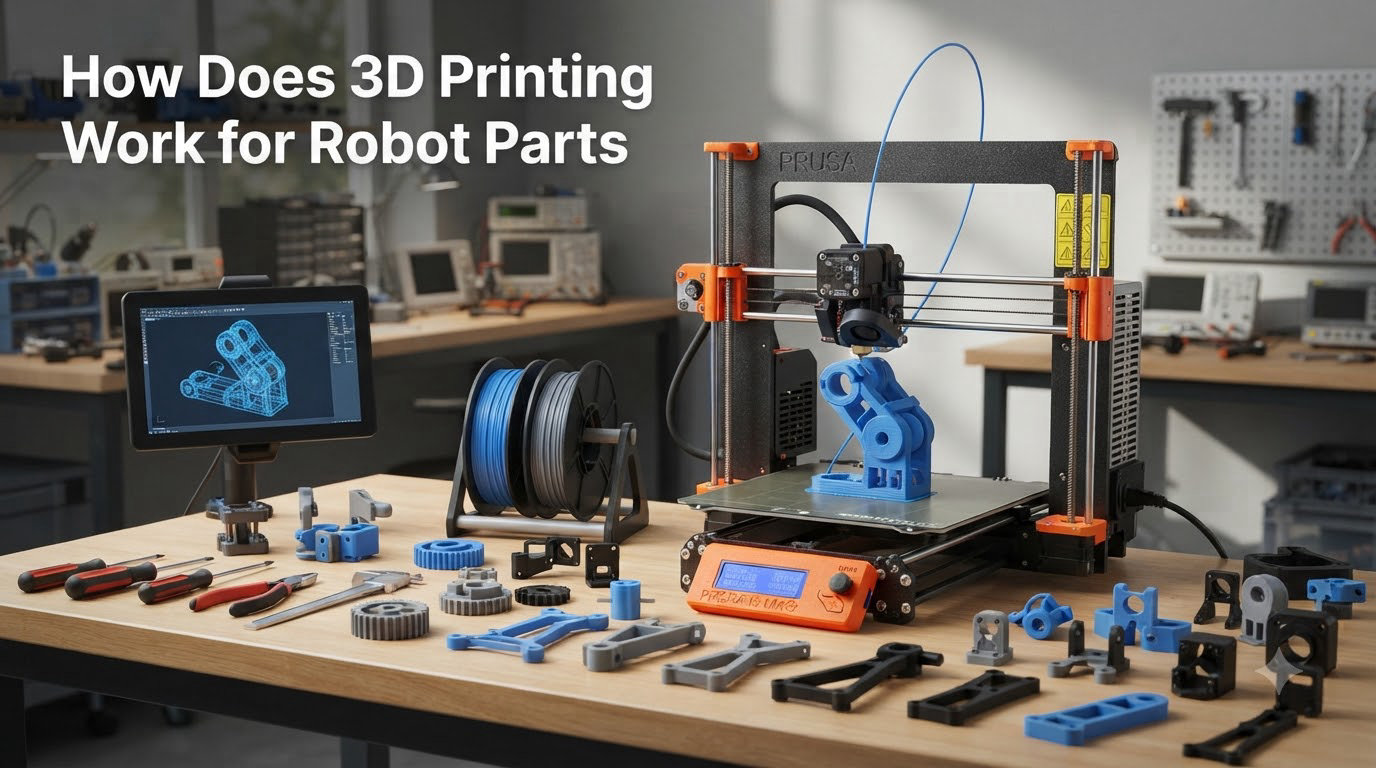
If you’ve ever wondered how does 3D printing work for robot parts, the short answer is this: a digital CAD file is sliced into thin horizontal layers, then a printer builds your part one layer at a time from plastic, resin, or powder. I run a small robotics workshop in my garage, and this process has let me design a custom four-bar gripper, print it overnight, and have it mounted on an arm the next morning. The same workflow powers factory-scale robot production at companies you have heard of.
3D printing, also called additive manufacturing, is now one of the most important tools in any robot builder’s kit. Whether you are prototyping a new end effector, printing replacement gears for a hobby bot, or producing a low-volume run of brackets for a mobile platform, the process is fast, cheap, and surprisingly accessible. In this guide, I’ll walk through exactly how 3D printing works for robot parts, the technologies behind it, the materials that hold up best under stress, and the design tricks our team has learned the hard way.
If you are new to robotics more broadly, our piece on Wi-Fi control is a good primer on another essential subsystem.
Table of Contents
What Is 3D Printing in Robotics?
3D printing in robotics is the use of additive manufacturing to build robot components layer-by-layer from digital designs. Instead of cutting or molding material away (subtractive manufacturing), a printer adds material only where it is needed, which is why 3D printing wastes so much less raw stock than CNC milling.
For robot builders, this matters because robots are full of one-off parts. A custom gripper jaw, a sensor mount that only fits your specific chassis, a gearbox cover that nobody sells — these are the parts 3D printing was made for. Traditional manufacturing wants you to commit to 10,000 units; 3D printing is happy to make exactly one.
According to industry coverage from sources like 3Dnatives, grippers at the end of robotic arms are the parts that benefit most from rapid iteration. Designers can test three or four finger geometries in a single weekend, then refine the winner. The cycle that used to take weeks with a machine shop now takes hours on a desktop printer.
How 3D Printing Works for Robot Parts: The Step-by-Step Process
Our team runs roughly thirty 3D-printed robot builds a year, and every single one follows the same five-step pipeline. Here is exactly how 3D printing works for robot parts from idea to finished component.
Step 1: Design the part in CAD software. We use Fusion 360 for most robot parts, though FreeCAD and OnShape are great free alternatives. The CAD model is a precise 3D representation of your part, with every dimension and tolerance defined. For a robot gripper, this means modeling the fingers, the body, the pivot pins, and the actuator mount as separate files or as one assembly.
Step 2: Export the model as an STL or 3MF file. These formats describe the surface of your part as a mesh of triangles. Most modern CAD tools export directly. 3MF is the newer, more reliable format; STL is still the universal fallback.
Step 3: Slice the model in slicing software. A slicer like Cura, PrusaSlicer, or Bambu Studio takes your mesh and chops it into hundreds or thousands of horizontal layers, typically 0.1 to 0.3 mm thick. The slicer also generates the toolpath the printer will follow and calculates things like wall count, infill percentage, and support structures.
Step 4: Print the part. The printer reads the G-code file and builds the part layer-by-layer. For a desktop FDM printer running PLA, a small robot bracket takes 45 minutes to 2 hours. A full-size robotic arm housing can take 12 to 20 hours.
Step 5: Post-process and assemble. Remove supports, sand critical surfaces, tap threads or heat-set inserts where you need to bolt other components on, and fit the part to your robot. This is where most beginners underestimate the time investment.
3D Printing Technologies Compared: FDM, SLA, and SLS
Not all 3D printers work the same way, and choosing the wrong technology is the fastest way to print a part that fails. Here is how the three main technologies compare for robot parts.
FDM (Fused Deposition Modeling) extrudes melted thermoplastic filament through a heated nozzle. It is the most common and affordable technology. FDM is great for structural robot parts like chassis plates, brackets, and gear housings. The downside is layer lines and anisotropic strength — parts are much weaker between layers than within them. Our go-to FDM printer for robot work is a Bambu X1C running PETG or nylon.
SLA (Stereolithography) uses a UV laser to cure liquid resin layer-by-layer. SLA produces parts with very fine detail and smooth surfaces, which is why it is the favorite for small precision gears, sensor housings, and cosmetic covers. The catch: standard SLA resins are brittle and not great for parts that take impact loads. Tough resins and engineering resins fix this but cost more.
SLS (Selective Laser Sintering) fuses nylon powder with a laser. SLS is the technology you reach for when strength matters most. Because the powder supports the part during printing, you can print complex geometries like lattice-filled gripper fingers with no support structures. SLS parts are nearly isotropic, meaning they are almost as strong in every direction.
For most hobby robot builders, FDM covers 80% of the work, SLA handles the precision details, and SLS is reserved for parts that absolutely cannot fail. A common setup is an FDM printer for big structural components and an SLA printer for gears and small actuators. If you are building a robot that uses planetary gearboxes, SLA or SLS is the better choice for the housing.
Materials for 3D Printed Robot Parts
Material choice is the single biggest factor in whether your printed part survives a week or a year. Here is the breakdown of what actually works for robotics.
PLA (Polylactic Acid) is the easiest to print and great for prototyping geometry, but it gets soft at 60°C and is brittle. We use PLA for fit checks and visual mockups only. If a PLA gear sits near a motor, it will deform.
PETG (Polyethylene Terephthalate Glycol) is the workhorse material for most of our functional robot parts. It has decent strength, good layer adhesion, and resists humidity better than ABS. PETG is our default for brackets, covers, and structural mounts. Food-safe grades exist, which is why a PETG cup is safe to drink from once it has been printed on a clean machine — the FDA-cleared base resin is the same plastic used in water bottles.
ABS (Acrylonitrile Butadiene Styrene) is tougher than PETG and handles heat up to 100°C, but it warps badly during printing and smells terrible. We only use ABS when we specifically need its temperature resistance, like a motor mount that sits next to a hot gearbox.
Nylon (PA6, PA12) is the material you reach for when strength and toughness matter. Nylon absorbs some moisture, which makes printing trickier, but the resulting parts are flexible, impact-resistant, and excellent for wear surfaces like gears. SLS uses nylon powder; FDM nylon requires a heated bed and ideally an enclosed printer.
Carbon fiber-infused filaments (PLA-CF, PETG-CF, Nylon-CF) add chopped carbon fiber to a base polymer. The result is stiffer, lighter, and stronger in tension. A community-validated favorite on Reddit’s r/3Dprinting for robot arms is carbon-fiber nylon. It is abrasive, though, so you need a hardened steel nozzle.
Polycarbonate (PC) is for the highest-stress parts. It is incredibly strong but requires a printer that can reach 290°C and an enclosed build chamber. We use PC for parts that take real impact loads, like mobile robot bumpers.
Common Robot Parts You Can 3D Print
Pretty much any non-electronic robot component can be 3D printed. The most common parts our community prints include gripper jaws, finger linkages, sensor mounts, gearbox covers, motor brackets, wheel hubs, chassis plates, battery holders, cable management clips, and end effector adapters. You can print a complete rolling robot chassis at home, and many kits like the popular Arduino-based two-wheeled bots ship as just electronics and fasteners plus a handful of printed plates.
Full humanoid robots and quadrupeds are still mostly out of reach for home printers due to size and strength, but subassemblies like a head shell, a forearm, or a tail are absolutely printable. The Instructables community alone has hundreds of validated robot builds where 3D printing is the backbone of the project. One Reddit user put it well: “Table-top manipulators to 50+ lbs mobile robots all use 3D printing.”
Yes, you can 3D print a robot. The frame, the covers, the brackets — all of it. What you cannot 3D print at home is the electronics, the motors, and the fasteners. Plan to source those separately.
Design Considerations for Strong, Functional Parts
Most 3D printed robot parts fail at the design stage, not the printing stage. Here are the design rules our team follows on every project.
Mind the print orientation. A part printed on its side is far weaker in the direction perpendicular to the layers. For load-bearing parts, orient the part so the primary load is along the layer plane, not against it. This is the #1 reason printed parts break.
Use fillets instead of sharp corners. Sharp internal corners are stress concentrators. A 2 mm fillet at every internal corner will double the lifespan of most printed brackets.
Set wall count and infill deliberately. Three or four perimeter walls with 20% to 40% infill is the sweet spot for most structural parts. Higher infill does not always mean stronger — the perimeters are doing most of the work.
Account for tolerances. A 3D printer cannot hit 0.1 mm tolerances reliably. Design holes 0.2 mm to 0.4 mm larger than nominal for press fits, and use heat-set inserts or self-tapping screws instead of trying to print threads directly. If your design includes an ADC board, leave room around the pins for manufacturing variation.
Avoid large flat bases. They warp. Either chamfer the corners, add a brim in your slicer, or orient the part at an angle.
Plan for assembly before printing. If your robot browns out under load, the fix might be a beefier wire, not a redesigned mount — but the redesigned mount is still worth doing. Our piece on brown-out troubleshooting covers the electronics side.
Post-Processing and Finishing Techniques
A raw print is rarely a finished part. Post-processing is what turns a 3D-printed blob into a real robot component.
Support removal and sanding. Snip away supports flush with the part, then sand critical mating surfaces with 120, 220, and 400 grit. Sanding is the difference between a part that fits the first time and a part that needs a mallet.
Threaded inserts. Heat-set brass or stainless inserts give you reusable, strong threads in a printed part. We use a soldering iron set to 200°C to press inserts into pre-printed holes. They are cheap, they save your prints, and they are reusable after assembly.
Annealing. Heating a printed part to just below its glass transition temperature for an hour increases strength and reduces warping over time. PETG parts benefit noticeably from annealing.
Painting and sealing. A coat of filler primer hides layer lines for cosmetic parts. For functional parts that need to grip or wear against another surface, leave the surface raw — paint changes the dimensions and can flake off.
Cost, Time, and When to Choose 3D Printing Over CNC
For low-volume and prototype work, 3D printing wins on cost almost every time. A robot gripper that would cost 800 dollars to CNC out of aluminum can be printed in PETG for under five dollars in filament. Lead times drop from weeks to hours.
CNC machining still beats 3D printing when you need tight tolerances, parts that handle high continuous stress, or production runs over a few hundred units where the per-part cost of injection molding becomes attractive. As a rule of thumb, if you need under 50 parts and tolerances above 0.2 mm, 3D print. If you need tighter tolerances, structural metal, or large production runs, send it to a machine shop.
For hobbyists, the cost calculus is even simpler. A 1 kg spool of PETG runs about 25 dollars and prints roughly 30 to 40 medium-sized robot parts. That same spool is a year of building for most makers.
Frequently Asked Questions
Can you 3D print a robot?
Yes. You can 3D print almost every structural and cosmetic part of a robot, including chassis plates, grippers, brackets, gears, housings, and covers. What you cannot 3D print at home are the motors, electronics, sensors, and fasteners. Many hobby robots are built with nothing more than a 3D printed frame, an Arduino or Raspberry Pi, motors, and some off-the-shelf hardware.
How does a 3D printer actually make parts?
A 3D printer makes parts by following these steps: 1) A 3D model is created in CAD software. 2) The model is exported as an STL or 3MF file. 3) Slicer software cuts the model into thin horizontal layers and generates a toolpath. 4) The printer builds the part one layer at a time by extruding melted plastic (FDM), curing liquid resin with UV light (SLA), or fusing powder with a laser (SLS). 5) The finished part is removed, supports are taken off, and the part is post-processed as needed.
How do I 3D print a robot at home?
To 3D print a robot at home, follow these steps: 1) Pick a robot design from a community source like Instructables, Thingiverse, or Printables. 2) Download the STL files. 3) Choose a printer — FDM is fine for most beginners. 4) Print the parts in PETG or PLA depending on the load requirements. 5) Source the motors, electronics, battery, and fasteners from the project’s bill of materials. 6) Assemble the printed parts with the electronics. 7) Program the microcontroller and test. A first robot build typically takes a weekend for printing plus a day for assembly.
Is anything illegal to 3D print?
In most places, you can legally 3D print almost anything, including robot parts. However, there are restrictions: you cannot print functional firearms, parts that infringe patents, items that violate copyrights, or certain regulated items like gun components in jurisdictions that ban them. For robot parts specifically, there are no general legal restrictions. Always check local laws if you are unsure about a specific part.
What is the strongest material for 3D printed robot parts?
For FDM printing, polycarbonate (PC) and carbon-fiber-reinforced nylon are the strongest options. For SLA printing, tough engineering resins like those from Siraya Ten or Formlabs offer high impact resistance. For SLS printing, nylon PA12 is the industry standard and produces nearly isotropic parts that perform like injection-molded nylon. The best material for your project depends on the specific loads, temperatures, and tolerances your robot parts must handle.
Final Thoughts: 3D Printing and the Future of Robot Building
So, how does 3D printing work for robot parts in practice? It is a five-step pipeline from CAD to assembled component, powered by one of three main technologies (FDM, SLA, or SLS) and a growing library of engineering materials. The process is fast enough to iterate overnight, cheap enough that a 1 kg spool of PETG will build dozens of parts, and accessible enough that a complete beginner can produce a working robot arm on their kitchen table.
If you are starting out, my advice is simple. Get a reliable FDM printer, learn Fusion 360 or OnShape, start with PETG, and pick a community-validated build to learn from. The robotics community shares designs openly, and printing someone else’s proven design is the fastest way to learn what works.
The next wave of 3D printing in robotics is already arriving: multi-material printers that can print rigid and flexible sections in a single part, larger build volumes for full-size humanoid arms, and direct metal 3D printing for end-use structural components. If you are building robots in 2026, the tools have never been better, and the community has never been more willing to share what it has learned.