
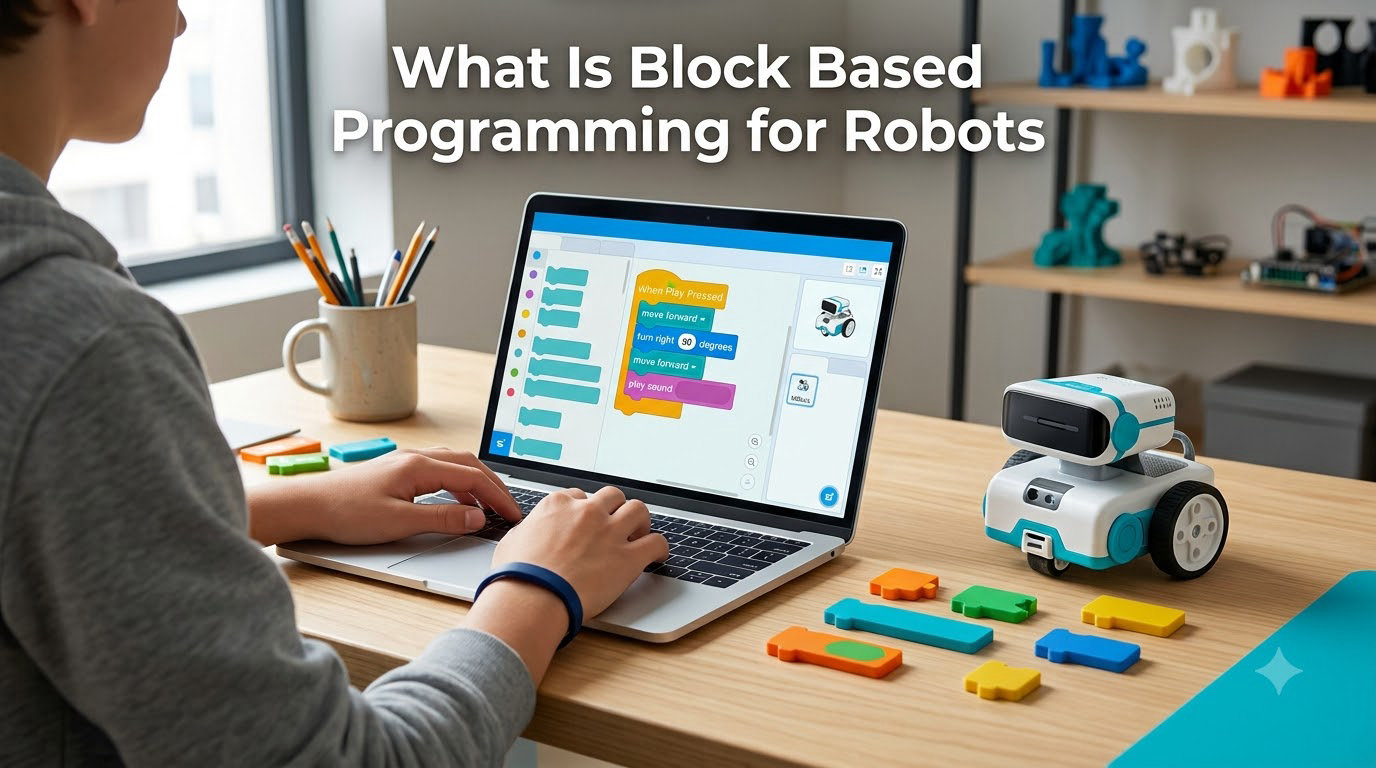
Block based programming for robots is a visual coding approach where users build robot behaviors by dragging and dropping graphical blocks instead of writing lines of text code. Each block represents a command, a sensor input, or a logic instruction, and they snap together like puzzle pieces to form complete programs.
This style of programming exists because traditional robotics code can be intimidating. A beginner who has never seen a semicolon can still build a robot that avoids walls, follows a line, or dances across the floor. The visual interface removes the two biggest obstacles newcomers face: memorizing syntax and hunting for typos.
I have spent time teaching robotics with both text editors and block environments, and the difference in early engagement is hard to ignore. Kids light up when they can stack four blocks and watch a robot move within minutes. That moment of success matters more than any textbook definition.
In this guide I will walk you through what block based programming for robots actually is, how it works under the hood, which platforms dominate the space, and how it is being used in real robotics applications. We will also look at the honest limits of block coding and how to transition to text-based languages when the time comes.
Table of Contents
What Is Block-Based Programming for Robots
Block-based programming for robots is a visual programming method that lets users control robot behavior by snapping together graphical blocks instead of typing text-based code. Each block represents a single action, condition, or variable, and the blocks physically connect in ways that mirror how a program should flow.
You can think of it as programming with Lego bricks. A “move forward” block connects to a “wait 2 seconds” block connects to a “turn right” block. The visual connections make the logic of the program obvious, even to someone who has never written a line of code.
For robotics specifically, block environments go beyond general coding tools. They include purpose-built blocks for motor control, sensor reads, servo positioning, and LED patterns. A beginner can command a real robot arm to grip a cup without learning a single line of C++.
Three ideas sit at the heart of this approach:
- Visual representation replaces text with shapes and colors that signal what each block does.
- Constraint-based assembly prevents broken code because only compatible blocks fit together.
- Immediate feedback shows results on a connected robot within seconds of running the program.
This combination is why block coding has become the default entry point for robotics in classrooms, maker spaces, and even some industrial training programs. According to research from the University of Maryland, block-based environments can cut the time beginners take to write their first working robot program by more than half compared to text-based languages.
How Block-Based Programming Works for Robots
Block-based programming works by providing a visual workspace where users drag commands from a palette and snap them into logical sequences that the software then translates into instructions the robot can execute. Under the hood, every block carries metadata that defines its inputs, outputs, and how it combines with neighboring blocks.
Let me break that down into the moving parts.
The Visual Workspace
Every block editor has the same three-zone layout. The left side holds a categorized palette of available blocks grouped by function. The center is the canvas where you assemble your program. The right side often shows a simulation, a connected robot view, or a live readout of sensor values.
The palette usually includes categories like Motion, Looks, Sound, Events, Control, Sensing, Operators, and Variables. For robotics-specific tools, you will also see sections for Motors, Servos, Sensors, Communication, and Display.
Block Shapes Encode Meaning
Block shapes are not decoration. They tell you how each block behaves.
- Hat blocks sit at the top with a rounded top edge. They start a script, like “when program starts” or “when button is pressed.”
- Stack blocks have notches on top and bumps on the bottom. They run sequentially in the order you place them.
- Boolean blocks have pointed ends. They fit into condition slots to drive if/else logic.
- Reporter blocks have rounded ends. They return a value like a sensor reading or a number.
- C-blocks wrap around other blocks. They create loops, conditionals, and function bodies.
These shapes force correct usage. You cannot accidentally place a “wait” block where a condition belongs. The system guides you toward valid programs before you ever press run.
How Blocks Become Robot Actions
When you click run, the platform converts your block stack into text code behind the scenes. Most beginner tools compile blocks into Python, JavaScript, or C++ before sending them to the robot.
The translation step is invisible to the user. You might never see the generated code, but it is there, waiting to be inspected. This hidden bridge is what makes block coding such a useful stepping stone to text-based languages later on.
The compiled code is then either flashed to a microcontroller on the robot or sent over a serial, Bluetooth, or Wi-Fi connection for real-time execution. The robot interprets each instruction in order, just as if you had written the code by hand.
Sensor and Motor Blocks
Robotics block environments include domain-specific blocks that go beyond generic programming. These handle the messy physical side of working with hardware.
For motors you get blocks like “set motor speed to 50,” “run motor for 2 seconds,” or “stop all motors.” For sensors, you get blocks like “read distance sensor,” “is light level below 30?,” or “line sensor sees black.” For servos, common blocks include “set servo angle to 90 degrees” or “sweep servo from 0 to 180.”
These robot-specific blocks connect programming concepts to physical reality. You can read more about the underlying hardware in our guide on how servo motors work in robots.
Popular Block-Based Programming Platforms and Tools
The block-based programming ecosystem for robots has matured significantly over the past decade. Several platforms now dominate classrooms, maker projects, and even industrial training. Here are the most widely used options in 2026.
Scratch and Scratch 3.0
Scratch is the grandfather of block programming. Developed at MIT, it launched in 2007 and has since grown into a global phenomenon with more than 100 million users. While Scratch itself targets general programming education, dozens of robotics extensions connect it to real hardware.
Scratch extensions exist for LEGO Mindstorms, micro:bit, Makeblock, mBot, and many other educational robots. Students can write a Scratch program, connect to a robot over Bluetooth, and watch the script run on physical hardware.
For learners under 12, Scratch is often the smoothest entry point. The interface is friendly, the community is enormous, and the free price tag removes barriers for parents and schools.
Google Blockly
Blockly is Google’s open-source block programming library. It is not a finished product but a framework that developers use to build their own block-based tools. Many robotics platforms, including some industrial training interfaces, are built on Blockly.
What makes Blockly powerful is its flexibility. Developers can define custom blocks for specific robot capabilities, and the library automatically generates clean code in Python, JavaScript, PHP, or other languages. The same block program can be exported as runnable text code, which makes the transition to text-based programming much smoother.
LEGO Mindstorms and SPIKE Prime
LEGO Education’s robotics kits ship with their own block-based environments. The original Mindstorms EV3 used a LabVIEW-based visual tool, while the newer SPIKE Prime uses a Scratch 3.0-based interface called the SPIKE App.
These platforms are tightly integrated with LEGO’s hardware. Blocks for motors, sensors, and even the hub’s built-in accelerometer appear in the palette automatically. Students in thousands of schools worldwide use these tools to learn robotics fundamentals.
LEGO’s environments are particularly strong for younger learners because the hardware is forgiving. Motors and sensors connect with simple cables, and the parts survive drops and rough handling that would destroy more delicate kits.
Makeblock mBlock
mBlock is Makeblock’s block programming environment, built on Scratch 3.0 with extensions for the company’s robots like mBot, Codey Rocky, and mBot Ranger. The platform adds blocks for line-following sensors, ultrasonic distance sensors, and RGB LEDs.
One standout feature of mBlock is its dual-mode editor. You can switch between block view and Python view at any time, which makes it a useful bridge tool for students ready to step into text-based coding.
Arduino Blocks (ArduBlock and mBlock for Arduino)
Arduino’s text-based IDE is a rite of passage in maker culture, but beginners often find C++ syntax intimidating. Several block-based tools wrap the Arduino experience in a friendlier interface.
ArduBlock was an early effort, though it is no longer actively maintained. mBlock also supports Arduino boards like the Uno and Mega, making it a current option for visual Arduino programming.
These tools let beginners flash real Arduino boards with block programs, which opens the door to thousands of existing Arduino projects. If you want to understand the power side of these robots, our article on why robots use separate power for logic and motors is a useful companion read.
Petoi Coding Blocks
Petoi offers a free block-based curriculum aimed at their quadruped robot dog, the Bittle. Their Petoi Coding Blocks environment is browser-based and supports both simulation and real-robot modes.
The platform is a strong example of how block coding now extends to complex multi-servo robots. A Bittle has 9 to 12 servo motors, and the block palette includes blocks for gait control, posture transitions, and even tricks like “play dead” or “push up.”
Petoi also publishes a free curriculum that walks beginners through 10 progressive projects. It is one of the more complete educational packages available for serious robotics learners.
ROS2 Block-Based Tools
The Robot Operating System (ROS2) is the dominant middleware for advanced robotics research and commercial deployment. Until recently, it had no visual programming layer. That is changing.
Projects like PlotJuggler, BlocklyROS, and various custom tools now expose ROS2 nodes, topics, and services as visual blocks. Researchers and even industrial teams can prototype robot behaviors visually before committing to full Python or C++ implementations.
This development is significant because it brings block programming into the world of professional robotics. We are likely to see more ROS2 visual tools emerge over the next few years.
Comparison of Leading Block-Based Robotics Platforms
Here is a side-by-side look at the most widely used block-based platforms in 2026:
- Scratch 3.0 – Free, browser-based, huge community, requires extensions for robotics. Best for ages 8 and up.
- Google Blockly – Open-source framework, not standalone, highly customizable, generates Python and JavaScript. Best for developers building custom tools.
- LEGO SPIKE Prime – Commercial kit with software, extremely durable hardware, Scratch-based. Best for classroom use ages 8-14.
- Makeblock mBlock – Free with paid hardware, dual block/Python view, Makeblock robot focus. Best for ages 10 and up.
- Petoi Coding Blocks – Free, browser-based, quadruped robot focus, full curriculum. Best for ages 12 and up interested in legged robots.
- BlocklyROS – Open-source, ROS2 integration, advanced feature set, steeper learning curve. Best for university and research users.
Robotics Applications of Block-Based Programming
Block-based programming for robots spans far beyond classroom toys. The same visual approach now powers serious applications in education, research, and even industrial automation. Here is where the method is making a real difference.
Classroom and STEM Education
The biggest impact of block-based robot programming has been in K-12 education. Students who would have bounced off traditional coding in week one are now writing working robot programs in week one. Engagement numbers tell the story clearly: schools that adopt block-based robotics see participation from a much broader range of students, including those who would never have signed up for a coding class.
The skills students build translate directly to computational thinking. They learn decomposition (breaking big problems into smaller blocks), pattern recognition (repeating a turn for a square path), abstraction (using a “move forward” block without thinking about motor PWM), and debugging (running the program, seeing what goes wrong, and fixing it).
These are the same skills used by professional software engineers. The fact that they come from drag-and-drop blocks rather than typed text does not make them less real.
Maker Projects and Hobby Robotics
Hobbyists have embraced block programming for rapid prototyping. Building a working line-follower used to require hours of C++ coding and debugging. With block environments, a maker can have a working prototype in an afternoon and refine from there.
This speed boost is not just convenient. It changes the creative process. When iteration is fast, makers try more ideas. The block environment removes friction, and friction is the enemy of creative exploration.
Industrial Robotics Training
This is the application that surprises most people. Major robot manufacturers including Universal Robots and FANUC have explored block-based or visual programming interfaces for their industrial cobots. The reason is simple: factory workers are not always programmers.
Industrial cobot training programs increasingly use block-based tools to teach workers how to teach robots new tasks. The worker physically moves the cobot through a desired motion, captures the points using a block-based interface, and saves the program. No code, no syntax, no engineering degree required.
One well-known case study comes from a 14-year-old who programmed an industrial cobot using a block interface during a robotics summer camp. The same approach is now used in adult retraining programs for factory workers entering the era of human-robot collaboration.
For more on how autonomous robots are evolving, see our report on advances in autonomous mobile robots.
Research and Prototyping
Researchers use block programming to prototype robot behaviors before committing to full implementations. A graduate student can sketch a control loop in blocks, run it on a real robot, and see if the idea has merit before spending weeks on a polished version.
This kind of rapid prototyping is especially valuable in human-robot interaction research, where ideas need to be tested with real users quickly. Block tools let researchers adjust robot behavior between participant sessions in minutes, not days.
Multi-Robot Coordination
Coordinating multiple robots is one of the hardest problems in robotics. Block-based tools are starting to tackle this with shared message-passing blocks and synchronization primitives.
While advanced multi-robot coordination still requires text-based code, beginners can now experiment with simple swarming behaviors and synchronized motion using block environments. That early exposure builds intuition that pays off when students later tackle more serious systems.
Two-Armed Robot Programming
Academic research has explored block-based programming for two-armed robots, where coordination between the two arms is essential. The Duplo environment, described in published research, lets end users program bimanual manipulation tasks by composing blocks that represent grasp, move, release, and hand-off actions.
This work is part of a broader push to make robot programming accessible to people who are not specialists. As robots become more common in daily life, the pool of people who need to program them grows far beyond professional engineers.
Benefits and Advantages of Block Coding for Robots
Block-based programming for robots offers a set of practical advantages that explain its rapid adoption in education, hobby, and increasingly industry. The benefits go beyond just “easier syntax.”
Zero Syntax Errors
Text-based programming languages are unforgiving. A missing semicolon, a misspelled function name, or an extra space can stop a program dead. Beginners often spend more time chasing typos than actually writing logic.
Block environments eliminate this problem entirely. Only valid combinations of blocks fit together, so syntax errors simply cannot occur. Beginners can focus on what their program should do rather than how to spell the commands.
Faster Time to First Success
In my own workshops, students using block environments typically run their first working robot program within 20 minutes. Students using text-based Python or C++ in the same workshops take 90 minutes or more to reach the same milestone.
That early win matters. It tells beginners that they can do this, and it sets the tone for the rest of the learning journey. A learner who believes they can succeed is far more likely to stick with the challenges ahead.
Visual Logic Mapping
When you write text code, you have to mentally simulate what the program does. With blocks, the program’s structure is visible at a glance. Loops, conditions, and sequences are all shapes you can see and point to.
This visual mapping makes debugging easier too. If a robot is supposed to turn left but turns right, you can scan the block stack and immediately find the wrong block. With text code, the same bug requires reading line by line and tracking variable states in your head.
Lower Barrier to Entry
Block coding welcomes learners as young as 8 years old, including students who struggle with reading or have learning differences. The colors, shapes, and images communicate meaning beyond words.
This accessibility has real social impact. Robotics programs that use block coding reach students from a wider range of backgrounds than those that start with text-based languages.
Built-In Hardware Abstraction
Robotics is hard because it combines software and hardware. A beginner who tries to read a sensor in C++ has to learn about I2C addresses, register bits, and timing diagrams before getting a single reading.
Block environments handle this complexity behind the scenes. A “read distance sensor” block gives you a usable value without any of the low-level pain. Beginners can build working robots and then, if curious, dig into the underlying details later.
Rapid Iteration
Change a block, click run, see the result. The cycle is so fast that beginners can experiment freely, which is how real learning happens. In text-based environments, the same cycle includes compile time, error scanning, and upload time that can stretch to minutes per attempt.
Honest Limitations of Block Coding
No discussion of benefits is complete without acknowledging the trade-offs. Block coding is not perfect, and honest users eventually hit walls.
The first wall is complexity. Block programs can get unwieldy once they grow past a few dozen blocks. Scrolling through a 200-block stack to find one bug is painful, and the visual workspace starts to feel cramped.
The second wall is customization. Most block environments only ship with a fixed set of blocks. When you want to do something the platform authors did not anticipate, you usually cannot. Power users eventually need text-based code for that flexibility.
The third wall is performance. Block-generated code is often less efficient than hand-written code. For educational robots the difference is invisible. For industrial applications that demand microsecond-level control, the gap can matter.
None of these limits make block coding “fake” or “not real programming.” They just mark the boundary of where this approach makes sense.
Getting Started with Block-Based Robot Programming
Ready to try block-based robot programming for yourself? Here is a practical roadmap that works whether you are a parent, a teacher, a student, or a curious hobbyist.
Step 1: Pick a Robot and Platform
Start by choosing a robot kit and a block environment that match your goals. For absolute beginners, the LEGO SPIKE Prime or Makeblock mBot kits are forgiving choices with strong educational support. For learners interested in more advanced robots, Petoi’s Bittle or a micro:bit-based kit offers more challenge.
You can also start without any hardware at all. Scratch 3.0 runs in any browser, and many platforms include simulators that let you test programs on a virtual robot. This is the lowest-cost entry point and a great way to try block coding before investing in equipment.
Step 2: Set Up the Software
Most block-based robotics platforms run in a modern web browser. Close any heavy browser tabs, plug in your robot if you have one, and visit the platform’s website. Most tools will walk you through connecting to your robot over USB, Bluetooth, or Wi-Fi.
If you choose a kit-based platform like SPIKE Prime or mBot, install the manufacturer’s app on a tablet, Chromebook, or laptop. These apps typically include tutorials that appear the first time you launch them.
Step 3: Run Your First Program
Every block platform has a “hello world” project. Usually it looks like this: drag a “when green flag clicked” block, add a “move forward” block, add a “wait 1 second” block, add a “turn” block, then add another “move forward” block. Press run. Watch the robot trace a small path.
This tiny program teaches you the core workflow without overwhelming you. Once it works, you have proven the connection between your computer and the robot.
Step 4: Add a Sensor
The next step is making the robot react to its environment. Add an “if distance less than 20 cm” block, then place a “stop” block inside it. Run the program and move your hand toward the robot. When the sensor detects your hand, the robot stops.
That single experiment teaches conditional logic, sensor reading, and reactive behavior, all in about five minutes. It is a powerful demonstration of what block coding makes accessible.
Step 5: Build a Real Project
Now that you know the basics, pick a small project and build it. Good starter projects include:
- A line-following robot that uses a downward sensor to track a dark line on white paper.
- A maze solver that uses ultrasonic or infrared sensors to navigate a small cardboard maze.
- A sumo robot that tries to push another robot out of a ring while staying inside.
- A dancing robot that performs a sequence of moves in time with music.
Pick a project that excites you. Finishing a real project is the best motivator for continuing to learn.
Step 6: Explore Community Resources
Once you have completed a project, the learning accelerates when you engage with the community. Most block-based platforms have forums, Discord servers, or YouTube channels full of project walkthroughs and troubleshooting tips.
For the Scratch ecosystem, the Scratch website itself has a vibrant project-sharing community. For LEGO robotics, the FIRST organization runs competitions worldwide. For Makeblock, the company’s forum and project gallery host thousands of user submissions.
Age-Specific Recommendations
Different ages benefit from different starting points. Here is a rough guide for parents and educators:
- Ages 5-7: Bee-Bot or Cubetto. These screen-free tools use physical blocks to program robot movement without any computer. Perfect for pre-readers.
- Ages 8-10: Scratch 3.0 with a simple robot like mBot or LEGO WeDo. Focus on basic sequencing and simple sensor reactions.
- Ages 11-14: LEGO SPIKE Prime, Makeblock mBot Ranger, or Petoi Bittle. More complex projects with multiple sensors and motors.
- Ages 15+: Arduino with mBlock, BlocklyROS, or any platform with dual block/text view. Start introducing text-based code alongside blocks.
Transitioning from Block Coding to Text-Based Languages
Eventually, many learners outgrow block coding. The transition to text-based languages like Python and C++ is a major milestone, and it goes much smoother when handled deliberately.
When to Make the Move
Signs that a learner is ready to transition include: their block programs becoming too long to manage easily, hitting limits they cannot work around with available blocks, or expressing curiosity about what the underlying code looks like.
There is no single right age or moment. Some learners transition at 12, others stay comfortable in blocks through high school. The key is responding to the learner’s own readiness rather than forcing a switch.
Why Python Is the Natural Next Step
Python is the most common “second language” for block coders because of its readable syntax. A block that says “move forward at speed 50” translates to Python code like “robot.move(speed=50)” with very little abstraction.
Many block platforms including mBlock and Petoi Coding Blocks can show you the generated Python in real time. This is a powerful learning feature because you can build a program in blocks and then read the equivalent Python line by line, building intuition about how text code expresses the same logic.
For more on the block-versus-Python comparison, our article on block coding vs Python explores this transition in detail.
A Gradual Transition Plan
The smoothest transitions follow a pattern:
- Dual-mode exposure: Use a platform that shows both block and text views of the same program.
- Read-along practice: Have the learner narrate what each block does in plain English, then find the equivalent line in the generated code.
- Modify first, write later: Ask the learner to change a small detail in the generated text code, like adjusting a speed value or a delay, and run the modified program.
- Build from scratch: Once the learner is comfortable reading generated code, try writing a small program entirely in text, then compare it to a block version.
This gradual path respects the learner’s existing knowledge while building the skills needed for the next stage. Jumping straight from blocks to a blank text editor usually ends in frustration.
Real Talk About the Transition
I have watched many students hit a wall during this transition. The most common problem is overconfidence. Learners see the generated text code and think “this looks easy,” then freeze when faced with writing it from scratch. Real programming requires skills block coding does not build, like memory management, debugging without visual cues, and the patience to read error messages carefully.
Expect this difficulty. Plan for it. The block environment was a launching pad, and the launch has worked. The next phase takes work, but the foundation is solid.
For learners interested in where modern robotics is heading, our piece on Reimagine Robotics shows how robots are starting to learn on the job, a frontier where programming conventions are still being written.
Frequently Asked Questions
What is block-based programming?
Block-based programming is a visual coding method that uses drag-and-drop graphical blocks to build programs. Each block represents a command, condition, or value, and they snap together in specific ways to form valid programs. This approach removes the need to memorize syntax and is widely used to teach coding to beginners.
Which programming is used in robotics?
Robotics uses many programming languages, including C++, Python, Java, MATLAB, and ROS-specific frameworks. For beginners and educational settings, block-based languages like Scratch, Blockly, and mBlock are also common. Industrial robots often use vendor-specific languages, while research and advanced projects lean on C++ and Python with ROS2.
Is block coding easier than Python?
Yes, block coding is generally easier than Python for absolute beginners. Blocks remove syntax errors and make program structure visible at a glance, so learners can focus on logic rather than spelling. Python becomes more useful once learners outgrow blocks and need more flexibility, custom functions, or hardware-level control.
Is block coding real coding?
Block coding is real coding. It teaches the same computational thinking skills as text-based programming, including decomposition, pattern recognition, abstraction, and debugging. The difference is the interface. Many professional programmers started with block coding, and the underlying logic is identical to what you would write in text.
What age is block-based programming appropriate for?
Block-based programming works for a wide age range, starting as young as 5 with screen-free tools like Bee-Bot. Most browser-based platforms like Scratch target ages 8 and up. The visual interface scales surprisingly well, and even university students use block tools for prototyping complex robot behaviors.
Can block programming control real robots?
Yes, block programming can control real robots. Platforms like mBlock, LEGO SPIKE, Petoi Coding Blocks, and BlocklyROS all send commands to physical hardware. The blocks are translated into text code behind the scenes and either flashed to a microcontroller or streamed over a wireless connection.
Final Thoughts on Block-Based Programming for Robots
Block based programming for robots is no longer just a classroom toy. It is a serious, growing approach to making robotics accessible to millions of people who would never have touched a traditional programming language. From kindergarteners programming their first Bee-Bot to factory workers programming industrial cobots, block coding is changing who gets to control robots.
The platforms have matured. Scratch, Blockly, mBlock, Petoi Coding Blocks, and the new wave of ROS2 visual tools cover an impressive range of use cases. The hardware they target has expanded from LEGO kits to quadruped robot dogs to industrial arms. The community around block-based robotics is large, active, and welcoming to newcomers.
If you are a parent, a teacher, a hobbyist, or a curious professional, the path forward is simple. Pick a platform, pick a robot, and start dragging blocks together. You will be surprised how quickly you can build something that moves, reacts, and does what you told it to do.
That first moment when your block program makes a real robot move is worth all the setup. It is the moment you become a robot programmer, regardless of whether you ever write a line of C++.