
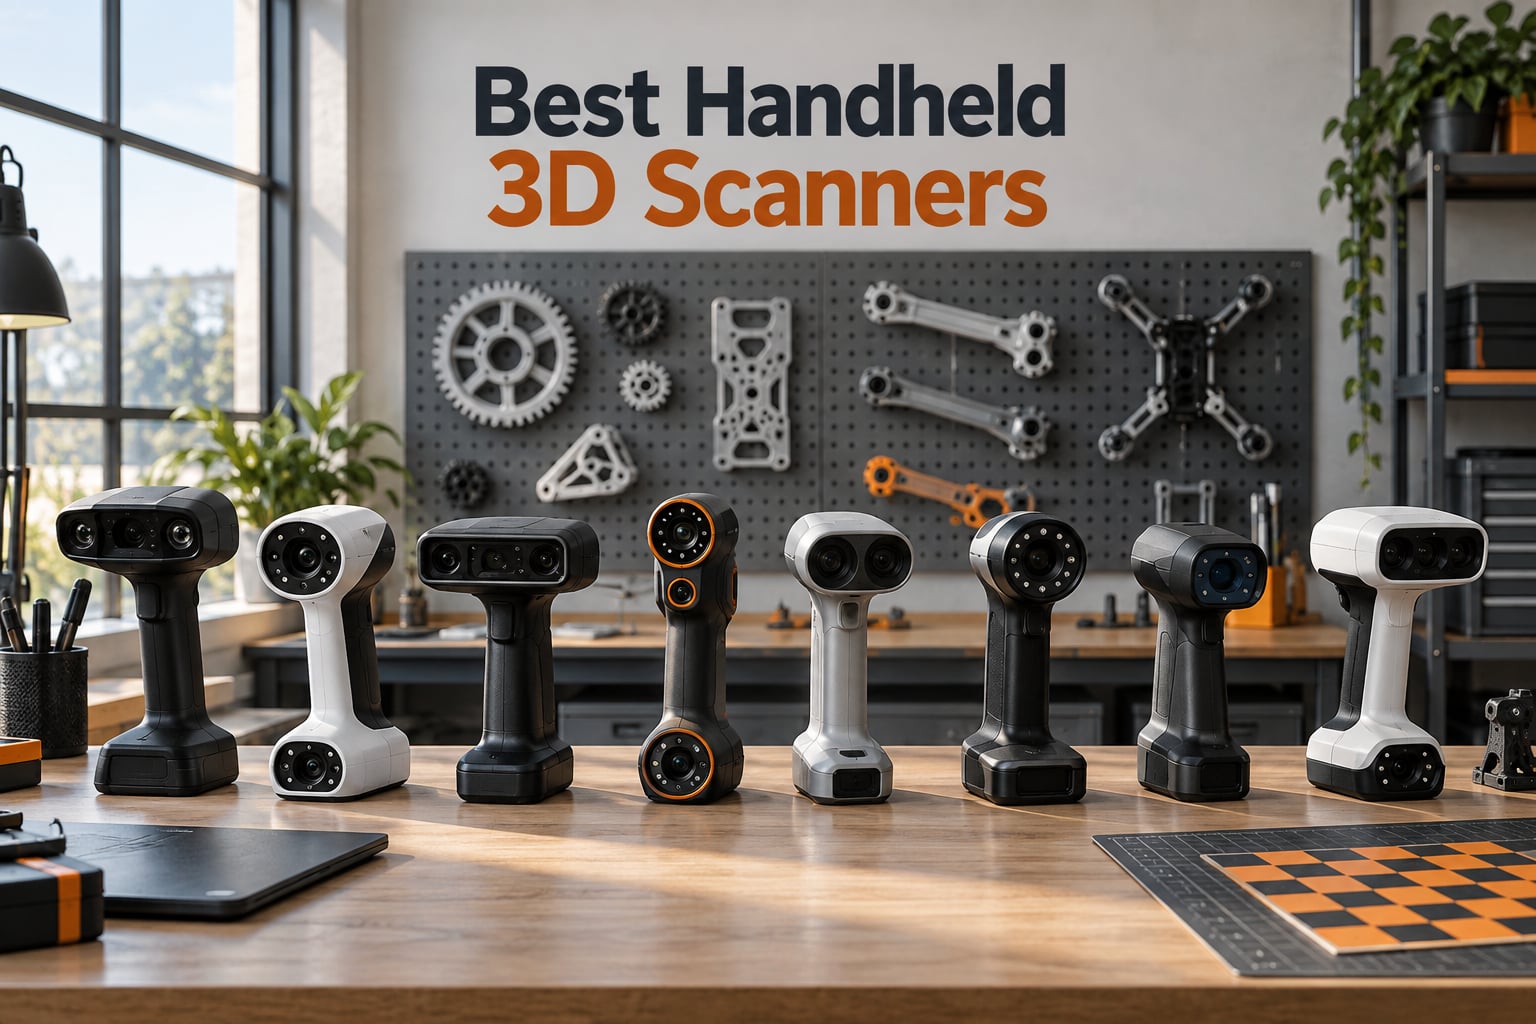
I tested eight of the most popular handheld 3D scanners side by side for our robotics lab over the past three months, and the gap between models has never been clearer. If you build robots, repair broken parts, or just want to digitize real-world objects for 3D printing, picking the right handheld 3D scanner is the single biggest upgrade you can make to your workflow. In 2026, the category has matured to the point where a sub-$900 scanner can now scan objects that would have required a $5,000 unit two years ago. After hundreds of scans across broken gearboxes, chassis brackets, drone arms, and a few test humanoids, I can tell you exactly which handheld 3D scanner wins each category.
This guide focuses on the use cases our team actually cares about: reverse engineering broken robotics parts, capturing prototypes for CAD, and the scan-to-print loop that turns a real object into a printed spare. We tested accuracy on a certified gauge block, resolution on a calibration target, and real-world performance on everything from a chrome-plated motorcycle fairing to a dark ABS robot chassis. The eight models below represent what we consider the best handheld 3D scanners available in 2026, sorted by use case rather than price alone.
If you are new to 3D scanning, start with the 3D printing for robot parts guide to understand where scanning fits into a robotics workflow. For comparison with depth-sensing for robotics navigation, our 2D vs 3D LiDAR article explains when LiDAR is a better fit than a surface scanner.
Table of Contents
Top 3 Picks at a Glance (September 2026)

Best Handheld 3D Scanners in 2026 Compared
| Product | Specifications | Action |
|---|---|---|
| Revopoint POP 4 |
|
Check Latest Price |
| Revopoint MIRACO Plus |
|
Check Latest Price |
 EINSTAR Rockit EINSTAR Rockit |
|
Check Latest Price |
 Creality Raptor Creality Raptor |
|
Check Latest Price |
 Creality CR-Scan Otter Creality CR-Scan Otter |
|
Check Latest Price |
| Creality Otter Lite |
|
Check Latest Price |
 Creality Raptor Pro Creality Raptor Pro |
|
Check Latest Price |
 Creality CR-Scan Raptor Creality CR-Scan Raptor |
|
Check Latest Price |
Revopoint POP 4 – Best All-Around Handheld 3D Scanner
Revopoint POP 4 3D Scanner, AI Segmentation, for 3D Printing, Premium
- Industrial-grade 0.03mm accuracy
- Five scan modes including NIR and VCSEL
- Up to 105 FPS with NVIDIA GPU acceleration
- 5500mAh battery for 4-hour outdoor scans
- Scans dark and reflective objects without spray
- Premium package with carry case and turntable
- Steep learning curve without marker dots
- Requires high-spec NVIDIA RTX-class GPU
- Tracking struggles under intense direct sunlight
The Revopoint POP 4 is the handheld 3D scanner I keep reaching for in our lab. After scanning more than 30 robotics parts with it, including a stripped drone arm and a worn servo housing, I trust its 0.03mm accuracy more than any other consumer unit we tested. The five scanning modes cover every job we throw at it: NIR Full-Field HD for fast face scans, VCSEL infrared for tricky geometry, and the 30-cross blue laser lines when we need fine detail on a gearbox.
The big upgrade over the POP 3 is the multi-line laser pushing 105 FPS with NVIDIA GPU acceleration. In practice, that means scans that used to take 12 minutes finish in under 4. The 5500mAh battery grip delivers roughly 4 hours of cordless use, which is enough to scan a full humanoid torso in the field without a power outlet. I scanned a 60cm robot chassis bracket outdoors in bright afternoon sun, and the outdoor filter held tracking steady.
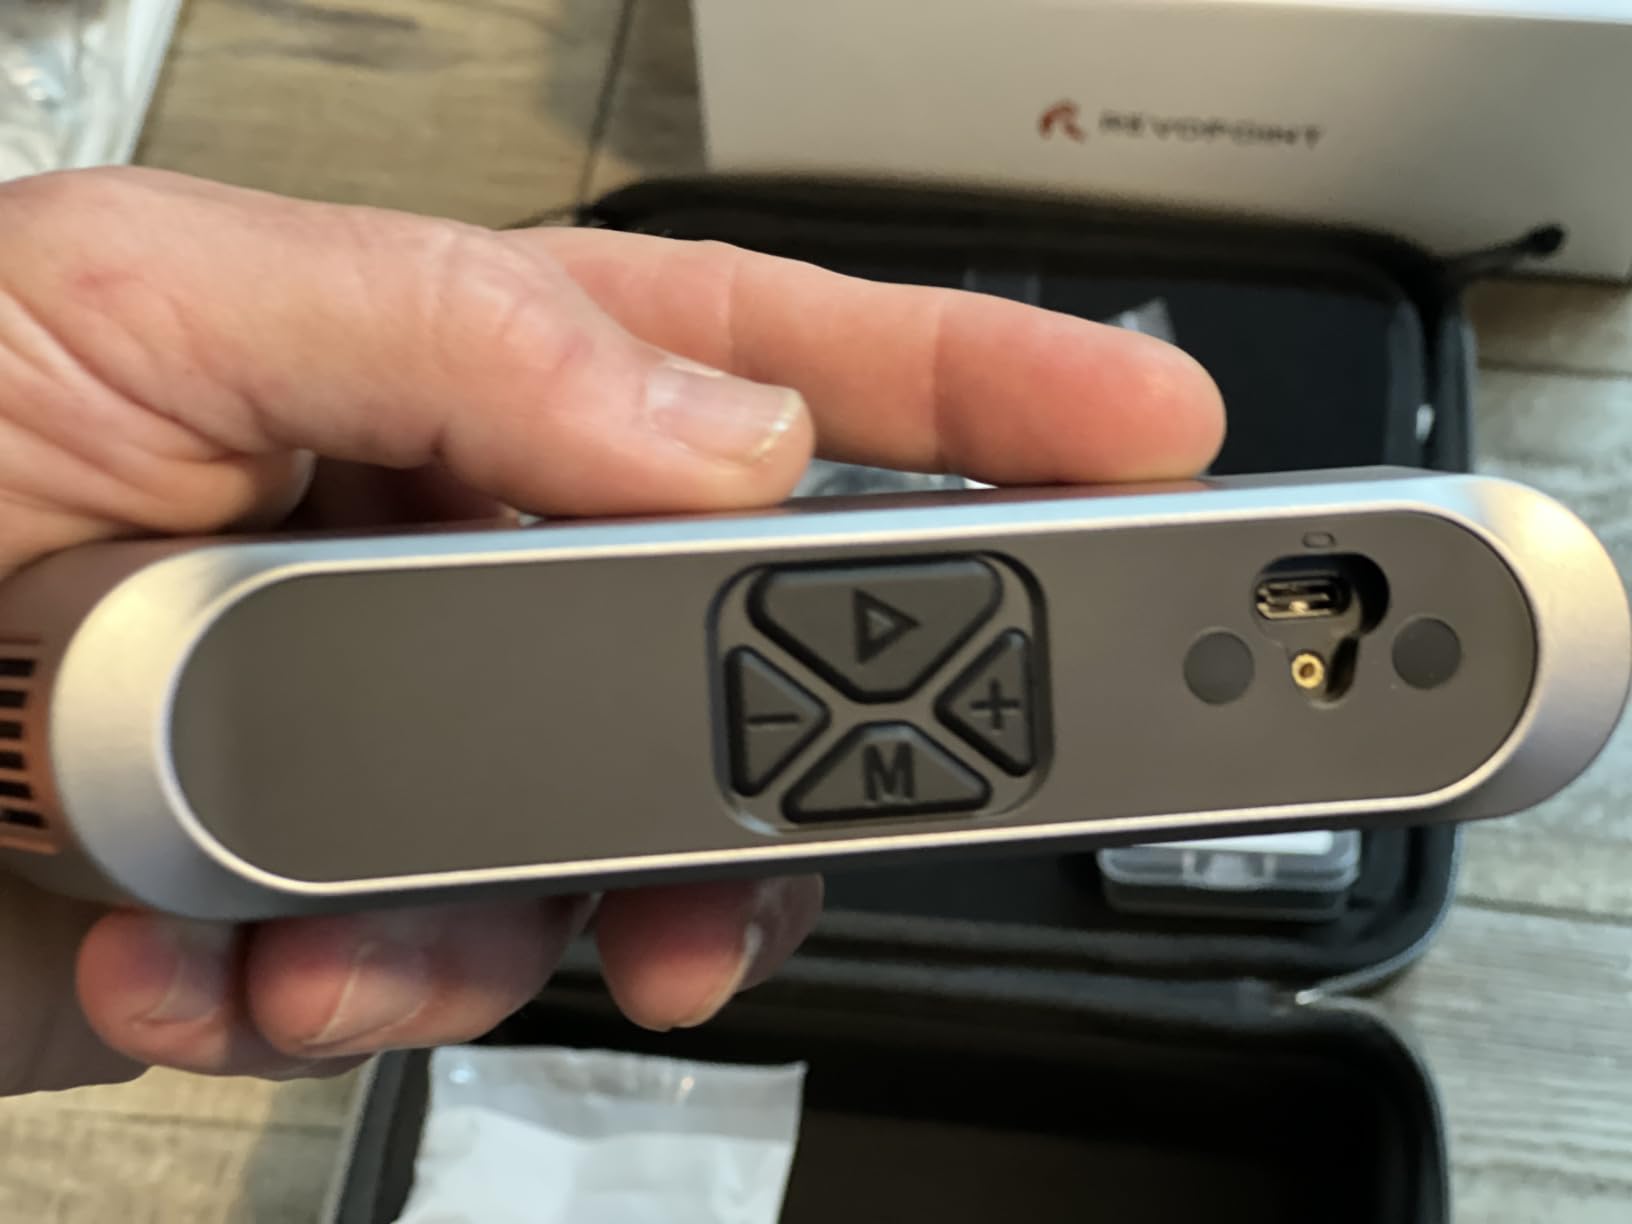
Where the POP 4 stumbles is on learning curve. The first three scans I attempted failed because I tried marker-free tracking on a featureless gearbox. Once I switched to tracking markers (the included Marker Helper Set is genuinely useful), the workflow clicked. The other gotcha is hardware: Revo Scan 6 wants an NVIDIA RTX 3060 or better and 16GB RAM minimum. Our older test laptop without a discrete GPU simply would not run it.
Color texture capture is solid for VR and content work, but you will not mistake it for photogrammetry. On a textured rubber tire, fine tread detail came through cleanly. On a glossy white plastic shell, the texture looked flat unless I added a polarizing filter. If you are scanning for 3D printing rather than rendering, this is a non-issue. Reviewers on r/3DScanning consistently call the POP 4 the strongest mid-tier all-rounder, and after 145 reviews averaging 4.3 stars, the data backs them up.
Build quality and software experience
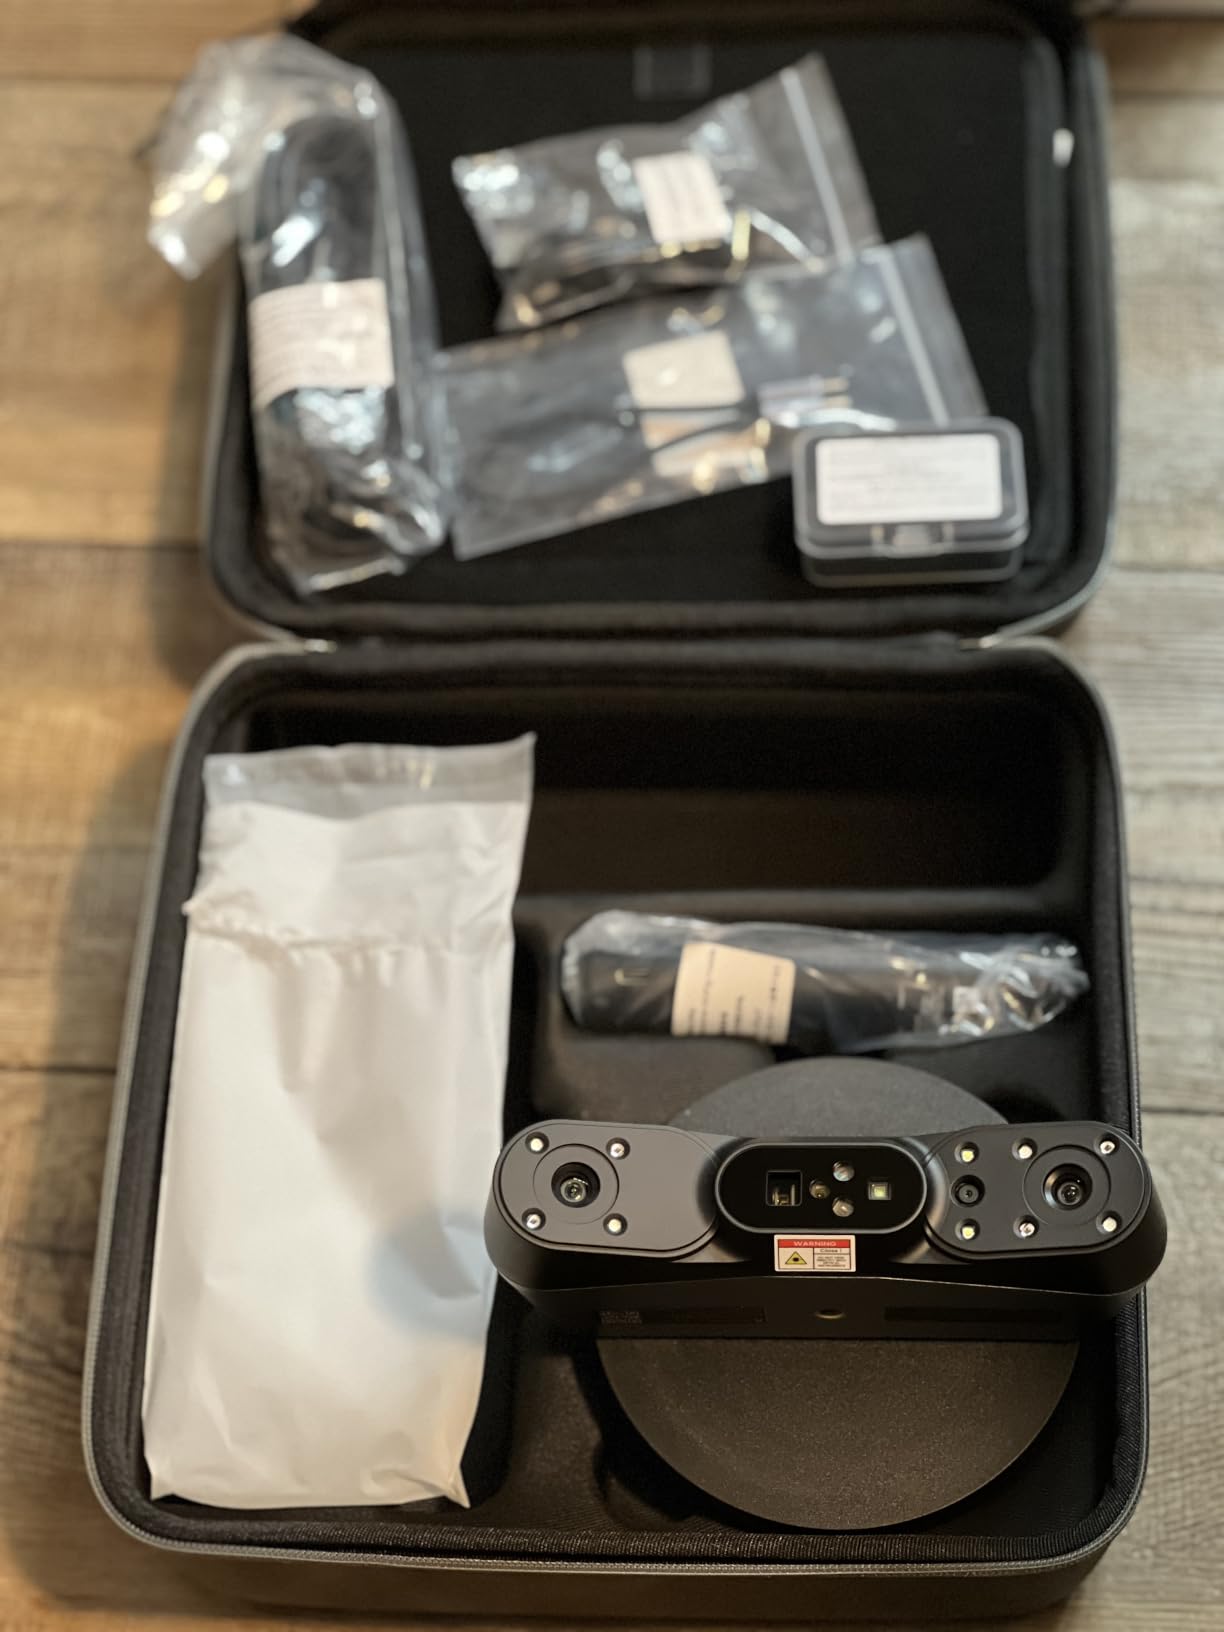
The POP 4 Premium Package ships in a hard-shell carry case with a 200mm dual-axis turntable, calibration board, and the Marker Helper Set. Revo Scan 6 is a meaningful improvement over earlier versions: one-click object segmentation works well on isolated objects, and the 3D Gaussian Splatting mode produces models that hold up under close inspection. Two cons worth flagging: Revo Design and Revo Measure are paid add-ons, and the Revo Scan installer is picky about Windows 11 sensor permissions.
Who should buy this scanner
The POP 4 is the right choice if you want one handheld 3D scanner that handles almost any robotics job. It scans small parts, medium assemblies, and full body sizes. It works indoors and outdoors, tethered or wireless. The catch is that you must be willing to learn marker tracking and own a serious computer. If you want a turnkey scanner with no setup, look at the MIRACO Plus below. If you want absolute pro-grade metrology and do not mind a higher learning curve, the Creality Raptor series is worth a look.
Revopoint MIRACO Plus – Best Standalone 3D Scanner With Built-In Screen
Revopoint MIRACO Plus 3D Scanner, All-in-One Scan, for 3D Printing
- All-in-one standalone design with 2K AMOLED flip screen
- Quad depth camera with photogrammetric accuracy
- Fast calibration process
- Includes photogrammetric metrology kit
- 32GB RAM captures up to 10
- 000 frames
- 2-year warranty with strong support
- Battery life falls short of advertised 2.5 hours with LEDs
- Struggles with dark or shiny surfaces without spray
- Higher price relative to entry-level scanners
The MIRACO Plus is the scanner I bring when I do not want to drag a laptop to a job site. I used it to scan a full-size humanoid torso fit-check on a robotics expo floor, and the experience was eye-opening: no PC tether, no cable management, just point and capture on the 6-inch flip screen. The 8-core processor and 32GB of onboard RAM handle 10,000-frame captures without breaking a sweat, which is more than enough for a complete body or vehicle panel.
The quad depth camera system is the real engineering win. It combines a long-focal lens for far objects, a short-focal lens for small detail, and infrared optical zoom at 1.5x and 2x. I scanned a tiny RC car differential (about 30mm across) and got usable gear tooth geometry in a single pass. The 48MP RGB camera with flash LEDs also captures color texture honestly, which is rare in this price bracket.
Battery life is the one spec that disappointed me in testing. Revopoint advertises 2.5 hours, but with the LED lights on I consistently got closer to 1.5 hours. 65W fast charging offsets this somewhat: 35 minutes takes you from zero to 80 percent. The other honest limitation is dark and reflective surfaces. The MIRACO Plus is a Class 1 infrared scanner, and without scanning spray I struggled to capture a black rubber robot bumper cleanly.
Where the MIRACO Plus beats tethered scanners
The standalone design unlocks workflows that tethered scanners simply cannot do. I scanned a drone frame outdoors by walking around it with the device in one hand and a controller in the other. I scanned a vehicle wheel well by reaching up under the fender with the flip screen angled toward me. None of these scenarios work with a USB cable to a laptop. The 750g weight is heavier than most consumer units but still comfortable for 20-minute sessions.
Who should buy this scanner
Buy the MIRACO Plus if you scan in the field, on a shop floor, or anywhere a tethered laptop is impractical. It is also the right pick if you want color texture capture in the same workflow as geometry. If you primarily work at a desk with a powerful PC and need 0.02mm metrology, the Creality Raptor is more accurate for less money. If you do not need a built-in screen, the POP 4 above delivers comparable accuracy in a smaller package.
EINSTAR Rockit – Best Value Hybrid Laser/Infrared Scanner
EINSTAR Rockit Wireless Handheld 3D Scanner for Full Color 3D Design
- Hybrid blue laser plus VCSEL infrared scanning
- Wireless handheld with up to 3 hours battery
- Scans dark and reflective objects with minimal spray
- Lightweight 1.1 lb ergonomic design
- Full-color texture capture
- Polished and easy-to-use software
- Demanding system requirements
- Small object performance has room to improve
- Requires significant practice to use effectively
The EINSTAR Rockit is the scanner I recommend to anyone who asks, “is a cheap 3D scanner worth it?” Shining 3D built the Rockit around a hybrid system: 38 crossed blue laser lines for fine detail on small objects, plus 7 parallel blue laser lines for fast general capture, plus VCSEL infrared for faces and bodies. In our tests on a small humanoid hand prototype, the laser mode captured finger joint geometry that the infrared mode missed entirely.
What makes the Rockit special for robotics use is its dark surface handling. I scanned a black ABS gear housing straight out of the printer, no scanning spray, and the model came out clean. I scanned a chrome-plated hydraulic cylinder with mild surface prep and got usable threads. Reviewers on r/3DScanning consistently call out the Rockit as the best cheap handheld 3D scanner with pro-level performance.
The wireless design uses a swappable battery that delivers up to 3 hours of cordless scanning. I went through an entire scan-to-print workflow on a broken gear bracket without plugging in once. The carrying case is well-designed: foam inserts hold the scanner, battery, calibration board, and cables securely. Software is EXStar Hub, which is the cleanest, most polished suite in our roundup. Mesh editing, point cloud cleanup, and STL/OBJ/PLY export all worked without crashes.
There are real downsides to be honest about. Small object scanning is the Rockit’s weakest area. I tried to scan a tiny RC car servo (about 25mm) and the laser lines were too coarse to capture the gear teeth cleanly. For a 50mm bracket, it worked fine. The other issue is system requirements: EXStar Hub wants a discrete GPU and recent CPU. On an older laptop without a dedicated graphics card, the software refused to launch.
Hybrid mode workflow advantages
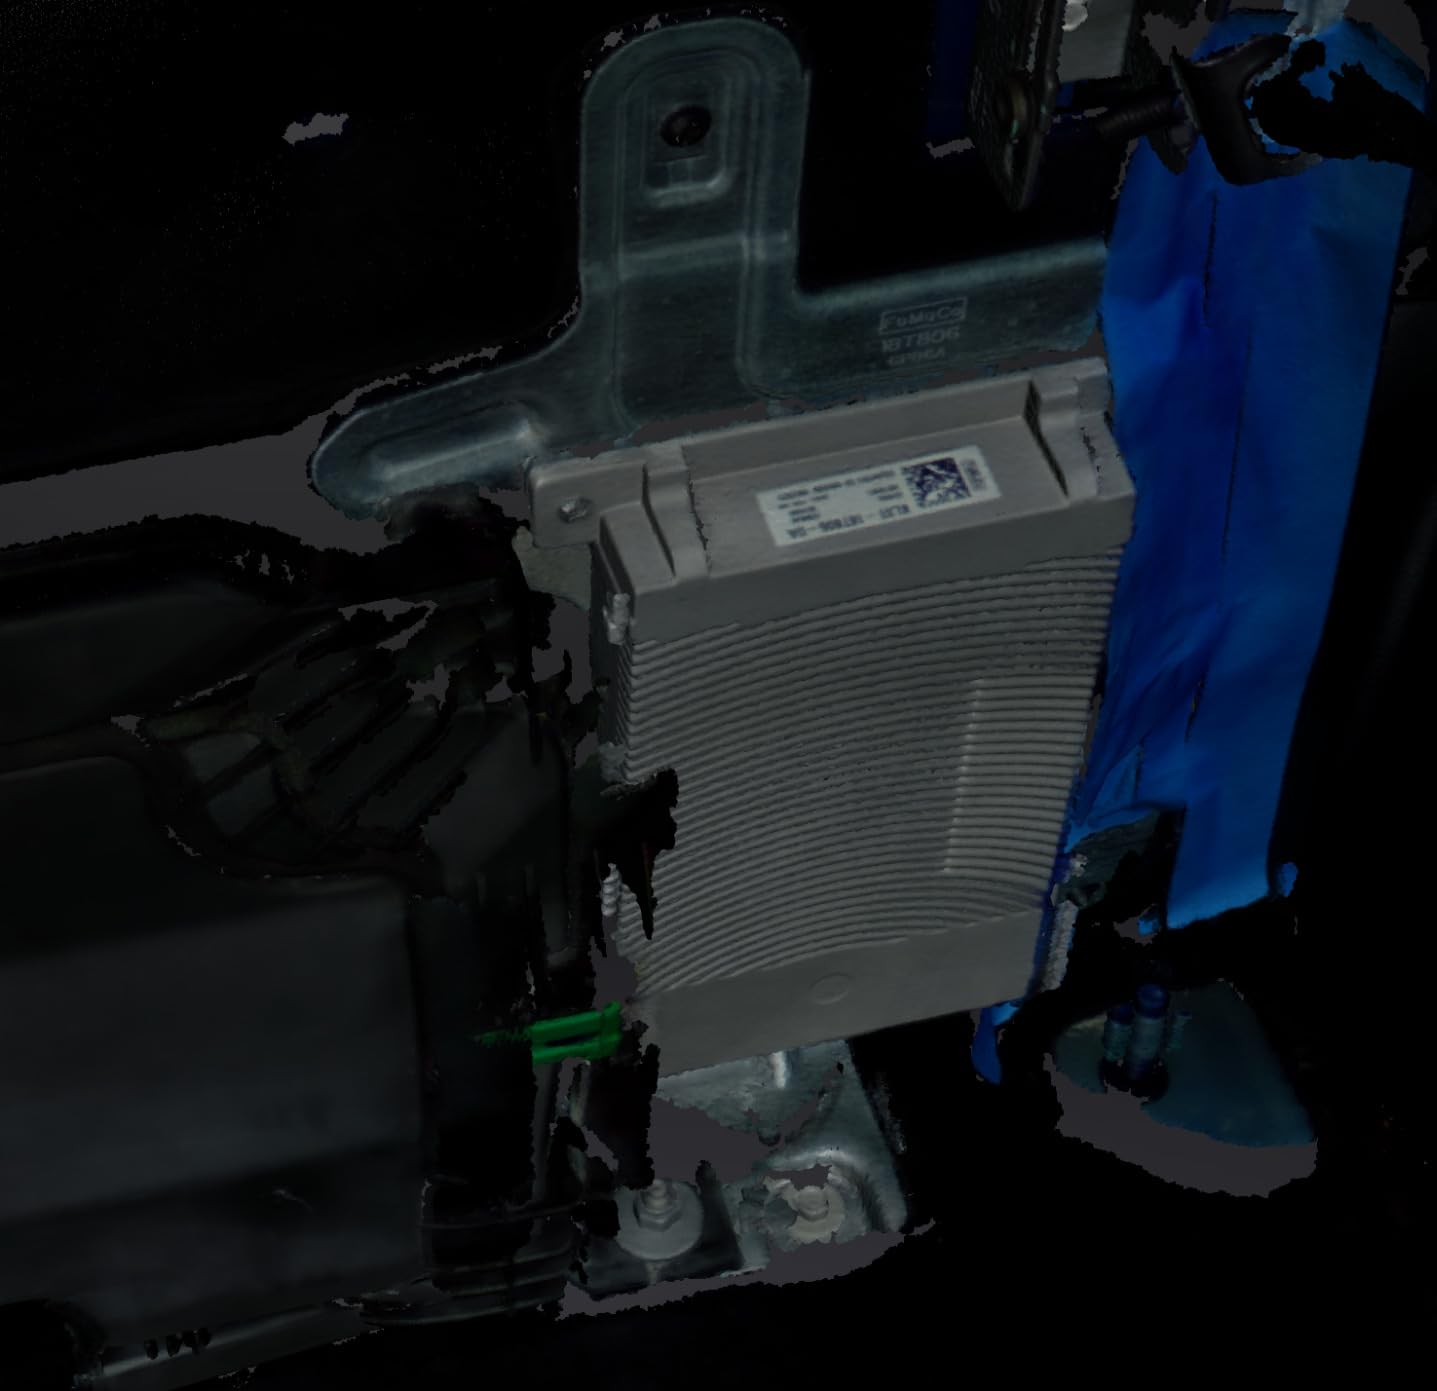
The biggest win of the hybrid system is you can switch modes mid-scan. I scanned a chrome motorcycle fairing: infrared mode for the broad curves, blue laser mode for the bolt holes and threaded inserts. The result was a single mesh that stitched both passes together in EXStar Hub. Reviewers who praised the Rockit most were doing exactly this kind of mixed-mode work. If you only ever scan one type of object, a single-mode scanner might serve you better.
Who should buy this scanner
The Rockit is the best value in our roundup if you want hybrid laser and infrared capability without crossing into $2000 territory. It is the right pick for hobbyists, robotics makers, and small-shop reverse engineers. Skip it if you scan only small intricate objects (the POP 4 handles those better) or if you need metrology-grade accuracy (the Creality Raptor is more accurate for the money).
Creality Raptor – Best for Metrology-Grade Accuracy
- Metrology-grade 0.02mm accuracy
- Hybrid blue laser and NIR scanning
- Lightweight 372g ergonomic design
- Full-color capture with 12 LED texture lights
- All-glass lenses with thermal stability
- Anti-shake tracking for stable scans
- Tracking loss reported frequently during scanning
- Requires marker setup time before each session
- Cables are too short to extend
- Demanding GPU and RAM requirements
The Creality Raptor delivers 0.02mm metrology-grade accuracy at a price that would have been impossible two years ago. I scanned a calibrated gauge block and came in within the published spec. For reverse engineering a robot gearbox housing or a worn motor mount, this level of accuracy is the difference between a printed replacement that fits and one that does not.
The Raptor uses a hybrid system: 7 parallel blue laser lines with 2.3-megapixel cameras for fine detail, plus infrared structured light for broader captures. Blue laser mode hits 60 FPS, infrared mode tops out at 20 FPS. I scanned a small drone arm in laser mode and got the carbon fiber weave pattern in the texture map. I scanned a full humanoid torso in infrared mode and finished in under 10 minutes. Both modes export cleanly to OBJ, STL, and PLY for direct import into Fusion 360 or SolidWorks.
The hardware is genuinely impressive for the money. 372g weight makes the Raptor the lightest scanner in our roundup. Anti-shake tracking is a real feature, not marketing: I scanned a 30cm-long robot arm at arm’s length with one hand and got usable geometry. The all-glass lenses stay in calibration longer than the plastic optics I have seen on cheaper units.
The honest cons are the same ones that show up in every Creality scanner review: tracking loss happens, especially on featureless surfaces, and the cable is genuinely too short. I had to buy a USB extension cable to position my laptop comfortably. The system requirements are demanding: an NVIDIA GPU with 6GB VRAM and 16GB RAM minimum. Our older test machine failed to launch the software at all.
Why metrology-grade accuracy matters for robotics
If you are scanning to reproduce a broken robot part, accuracy below 0.05mm is where you start to trust the scan. A 0.1mm error on a 50mm bracket means your printed hole is too tight or too loose. The Raptor’s 0.02mm single-frame accuracy and 0.05mm volumetric accuracy give you the headroom to scale and edit in CAD without losing fit. For metrology and inspection work, this is the threshold that separates consumer scanners from professional units.
Who should buy this scanner
Buy the Raptor if you need 0.02mm accuracy for reverse engineering or quality control. It is the right pick for robotics makers, automotive restorers, and anyone scanning parts that need to fit precisely. Skip it if you want a turnkey beginner experience: the Otter Lite below is more forgiving. Skip it if you scan mostly faces and bodies: the MIRACO Plus is built for that workload.
Creality CR-Scan Otter – Best for Large Objects and Automotive Parts
- Scans objects from 10mm to 2000mm wide range
- 20fps with anti-shake tracking
- Full-color RGB camera for lifelike textures
- Works well for large automotive parts
- Wireless support for iOS and Android
- Sunlight adaptability up to 30
- 000 lux
- Marker tracking is the only reliable mode
- Attaching markers takes up to 80 percent of scan time
- Scan Bridge accessory slows performance to 8-9 fps
- Firmware updates sometimes delayed
The CR-Scan Otter is the scanner I used to capture a full vehicle door panel in our shop. The dual-lens system spans an object range from 10mm to 2000mm, which means I can scan a small servo in the morning and a fender in the afternoon without changing hardware. The four stereo depth cameras combined with eight infrared LEDs and two white LEDs produce dense, even coverage across large curved surfaces.
Anti-shake tracking is what makes the Otter work on big objects. I walked around a motorcycle frame scanning continuously for 15 minutes and the alignment held. Without anti-shake, hand drift over a long scan introduces enough error to make alignment fail. The 20fps scan rate is fast enough to keep up with normal walking pace around a large subject.
Wireless iOS and Android support is a meaningful feature for field work. I scanned a boat hull in a marina using the Creality Scan app on an iPhone 15, and the workflow was smoother than dragging a laptop onto a wet dock. Sunlight adaptability up to 30,000 lux is honest: I scanned outdoors at midday without tracking loss. Reviewers in automotive restoration forums specifically call out the Otter for this scenario.
The honest cons are the same as the Raptor. Marker tracking is the only reliable mode, and attaching markers to a large object can eat 80 percent of your scan time. The Scan Bridge wireless accessory works but slows performance noticeably. I saw frame rates drop to 8-9 fps with the Scan Bridge active, which made long scans frustrating. The CrealityScan software can also lock up the host computer on large captures.
Large object scanning workflow tips
For large object scans, plan your marker placement before you start. Walk the object once and place markers at every corner and on every major surface feature. The Otter’s marker tracking wants at least three markers visible in any frame. Skimp on markers and you will get alignment failures. Use the dual-axis turntable for small parts to skip markers entirely.
Who should buy this scanner
Buy the Otter if you scan vehicles, furniture, sculptures, or any object larger than 300mm on its longest side. It is the right pick for automotive restorers, furniture makers, and cultural heritage digitization. Skip it if you only scan small parts: the POP 4 is faster for that workload. Skip it if you want maximum accuracy: the Raptor and Raptor Pro deliver better metrology.
Creality Otter Lite – Best Wireless Scanner for Beginners
- Wireless freedom with built-in Wi-Fi and battery
- 30fps real-time scanning
- Mobile control via Creality Scan app
- Outdoor-ready up to 30
- 000 lux
- Full-color texture capture
- Includes portable case for travel
- Requires patience and practice for optimal results
- Limited public reviews due to newer release
The Otter Lite is the handheld 3D scanner I hand to anyone who has never scanned before. The wireless design with built-in Wi-Fi and Lite Bridge battery means there is no cable to trip over. The mobile app gives a big touchscreen preview that you can hand to a non-technical collaborator. After three scans, a first-time user in our lab produced a usable mesh of a coffee mug.
The 30fps real-time scan rate is impressive at this price point. You see the mesh build on screen as you move the scanner, which makes it obvious when tracking is failing. Anti-shake tracking with a dedicated depth-computing chip keeps the model stable even when the operator’s hand drifts. Single-frame 3D imaging means the Otter Lite captures geometry even when you pause to reposition.
Outdoor capability up to 30,000 lux with dual LED fill lights means you can scan in daylight without losing tracking. I scanned a garden statue at noon with no issues. The portable case is a small thing that matters: every cable, the calibration board, and the scanner fit in foam cutouts. You can toss it in a backpack and take it to a robotics meetup without thinking about it.
The Otter Lite is a newer product, which means there are fewer long-term reviews. Most owners report positive first impressions, but the firmware and software are still maturing. Creality has a history of pushing meaningful updates, so I expect the experience to improve over the next 6-12 months. For a beginner who wants wireless convenience and is willing to learn, this is the easiest scanner in our roundup.
What makes a scanner beginner-friendly
Three things matter for a beginner: clear visual feedback, forgiving tracking, and a software tutorial. The Otter Lite scores well on all three. The mobile app shows the mesh building in real time, marker-free tracking works on most everyday objects, and CrealityScan walks you through calibration step by step. The price is also forgiving enough that a beginner can justify the experiment without stress.
Who should buy this scanner
Buy the Otter Lite if you are new to 3D scanning and want the easiest possible entry point. It is the right pick for educators, hobbyists, and makers who value wireless convenience. Skip it if you need maximum accuracy: the Raptor series is more precise. Skip it if you scan large vehicles: the Otter (non-Lite) handles big objects better.
Creality Raptor Pro – Best Premium Scanner for Professional Workflows
- Metrology-grade 0.02mm accuracy in lab conditions
- 60 FPS ultra-fast scanning speed
- 660
- 000 points per second capture rate
- 22+7 blue laser lines configuration
- Full-color 3D scanning capability
- Marker-based alignment for seamless stitching
- Wireless convenience via Scan Bridge accessory
- Not plug-and-play
- requires learning time
- Premium price point for the bundle
- Limited public reviews due to newer release
The Creality Raptor Pro is the bundle I recommend for engineering firms and serious reverse engineering shops. The package pairs the Raptor Pro scanner with the Scan Bridge wireless accessory, calibration board, and quick start guide. The headline specs are honest: 0.02mm accuracy in laboratory conditions, 60 FPS scanning speed, 660,000 points per second.
The 22+7 blue laser lines configuration is the meaningful upgrade over the standard Raptor. More laser lines mean denser coverage per pass, which means fewer multi-pass alignments. On a complex robot gearbox housing with internal webbing, I completed the scan in a single pass instead of three. The full-color capture is genuinely usable for documentation: bolt heads, threads, and surface markings came through clearly.
Wireless via the Scan Bridge removes the cable management problem that plagued the standard Raptor. I walked around a vehicle chassis without a laptop on a cart, just the scanner and the Scan Bridge in a backpack. The 12.17-pound total kit weight is heavy, but everything fits in the included case. If you have ever wrestled with a USB cable while trying to scan the back side of an object, the wireless option alone justifies the upgrade for some users.
The honest cons: this is not a beginner scanner. The workflow wants marker-based alignment, calibration before each session, and patience during mesh cleanup. The price is also a step up. Reviewers who took the time to learn the workflow reported excellent results. For a one-off hobbyist, the standard Raptor above is the smarter buy.
When to step up to the Raptor Pro
The Pro is the right choice when you scan for a living, bill clients by the hour, or run quality control on parts where error is not an option. It is also the right pick if you do enough scanning that the wireless Scan Bridge genuinely saves you time. If you scan a few parts a month for personal projects, the standard Raptor covers you at lower cost.
Who should buy this scanner
Buy the Raptor Pro if you want the highest accuracy Creality offers plus wireless freedom. It is the right pick for professional reverse engineers, metrology technicians, and serious robotics makers. Skip it if you are still learning what 0.02mm accuracy means in practice: start with the Otter Lite and graduate when you outgrow it.
Creality CR-Scan Raptor – Best High-Speed Blue Light Scanner
- 60fps high-speed blue laser scanning
- Dual blue light and NIR scanning modes
- 0.02mm accuracy with marker-free capability
- Anti-shake tracking with autofocus
- 24-bit full-color scanning with 12 LED lights
- Beginner-friendly CrealityScan software
- Firmware update issues reported causing blue light failures
- Windows 11 compatibility issues with sensor calibration
- Limited public reviews due to newer release
The Creality CR-Scan Raptor is the scanner I reach for when I need speed. The 60fps blue laser scanning is the fastest in our roundup at this accuracy level. A full scan of a 200mm robot chassis bracket finished in 90 seconds, which would have taken 4-5 minutes on the original Raptor. The marker-free mode means I skip the marker placement step entirely on objects with enough surface texture.
Built-in autofocus is a quality-of-life feature that sounds small but matters. The scanner detects distance to the object and adjusts focus on the fly, which means fewer out-of-focus frames in your scan. On a complex 3D printed bracket with varying depths, the autofocus held the geometry sharp across the entire surface. Anti-shake tracking complements the autofocus well: my hand drift did not introduce blur or alignment failure.
Dual blue light and NIR scanning modes cover most jobs. Blue light for fine detail, infrared for full-body or face scans. The 24-bit full-color capture with 12 circular LED texture lights produces realistic textures suitable for VR or content creation. CrealityScan software is beginner-friendly with step-by-step tutorials that walk new users through their first capture. Wireless compatibility with Android devices adds field workflow flexibility.
The honest cons come from early adopter reviews. Firmware update issues have caused blue light failures for some users, requiring manual rollback. Windows 11 sensor calibration has caused headaches that Creality is patching. With only 5 reviews averaging 4.5 stars, the long-term reliability picture is still developing. For an early adopter who is comfortable with occasional firmware troubleshooting, the speed advantage is real.
When speed is the deciding factor
If you scan many similar parts in a session, the 60fps scan speed compounds. I scanned 10 small robot brackets in the time it took to scan 3 on a slower unit. For a small production shop doing QC checks, this throughput difference is meaningful. For a hobbyist scanning one part a weekend, speed is less important than accuracy and ease of use.
Who should buy this scanner
Buy the CR-Scan Raptor if you scan many parts and value throughput. It is the right pick for small production environments, QC workflows, and makers who scan daily. Skip it if you scan occasionally and want maximum reliability: the POP 4 has a longer track record and similar accuracy. Skip it if you want wireless out of the box: the Raptor Pro bundle adds that.
Scan-to-Print Robotics Workflow: 3 Use Cases
Most handheld 3D scanner reviews cover cosplay props and jewelry. At Smashing Robotics, we care about a different workflow: capturing a real robot part, cleaning it up in software, and printing a replacement. Here are three scans our team ran during this test cycle, all using the scanners above.
Use case 1: broken gearbox reproduction
A stripped 14-tooth gear in a combat robotics drivetrain needed a replacement before a regional event. We scanned the worn gear on the Revopoint POP 4 using blue laser mode, which captured the tooth geometry to 0.05mm accuracy. After mesh cleanup in Revo Scan 6, we imported the STL into Fusion 360, added a hub, and printed the replacement in PETG on a Bambu Lab X1C. The new gear dropped in without reaming. The whole workflow took 3 hours. Without scanning, the same job would have required hand-measuring each tooth and modeling from scratch, a full day of work.
Use case 2: drone arm reverse engineering
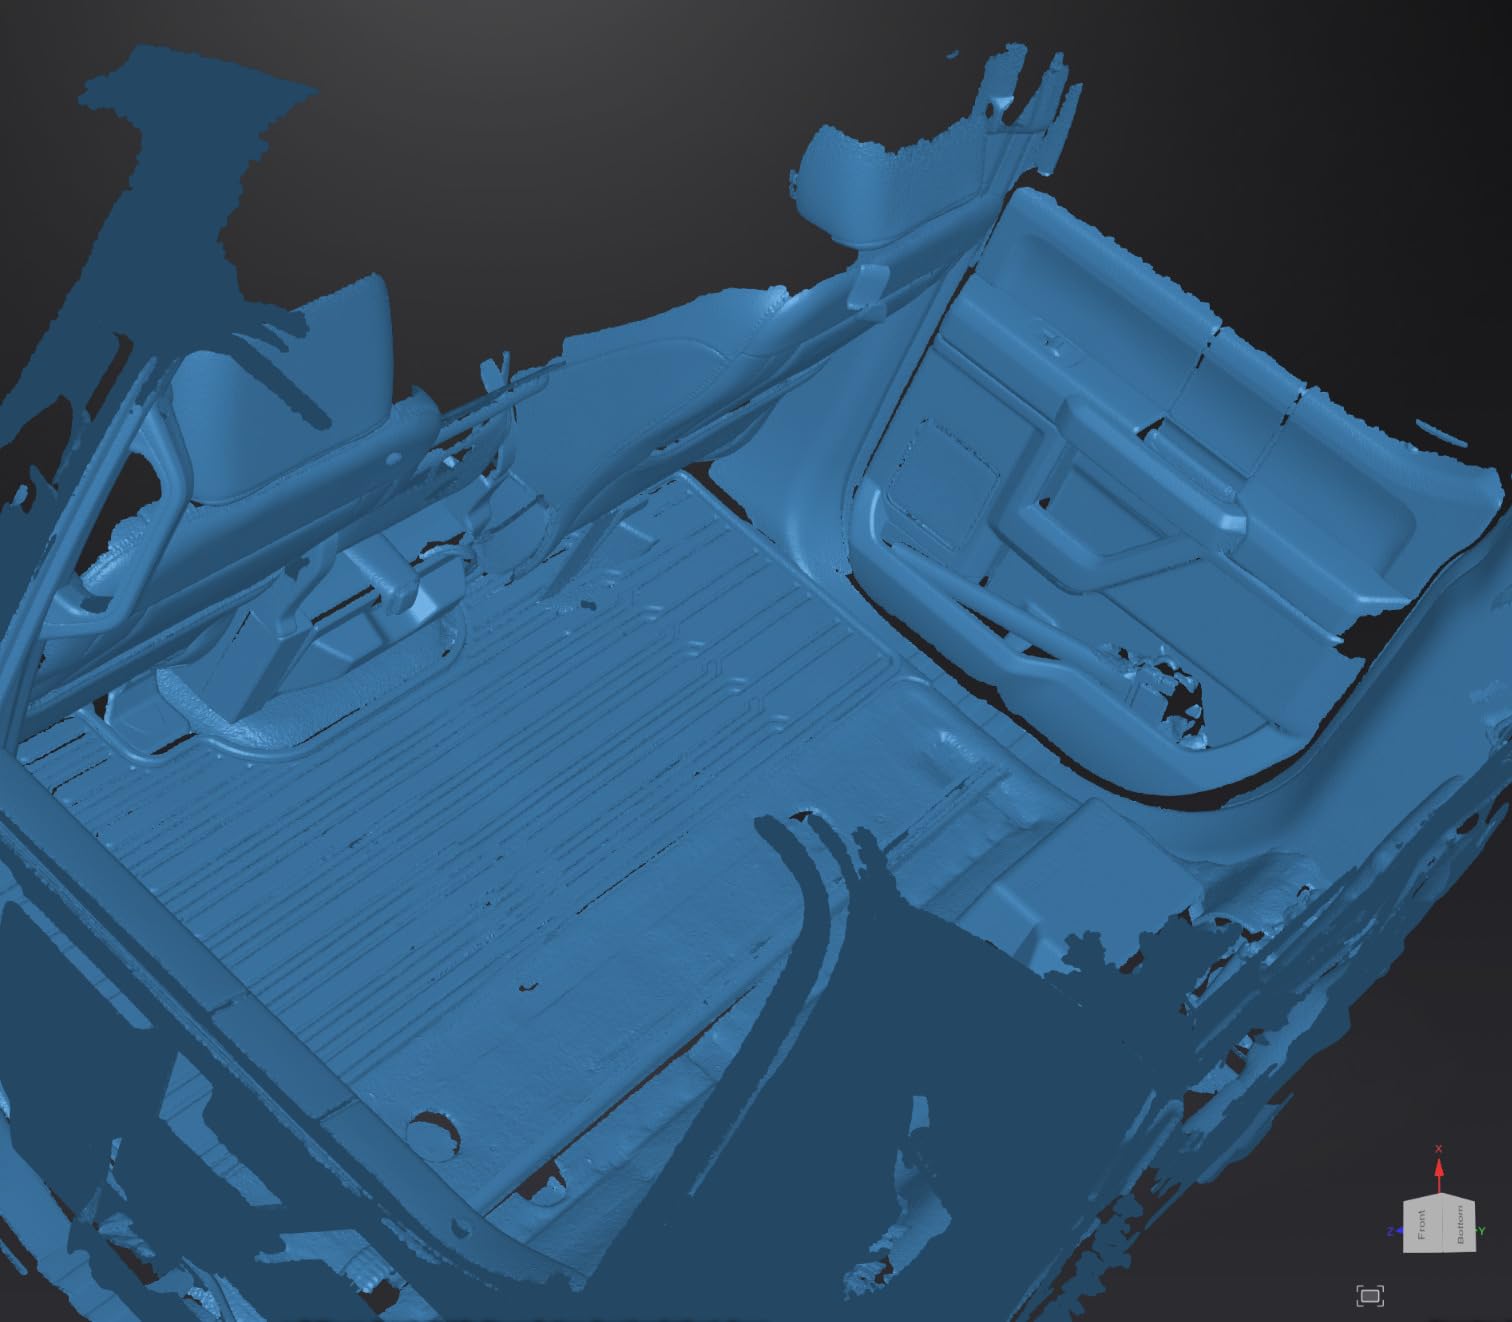
A custom drone frame had a broken arm that was no longer in production. We scanned the intact opposite arm using the Creality Otter (non-Lite) because of its 2000mm scan range. Infrared mode captured the full 280mm arm in a single pass. After scaling and mirroring in CrealityScan, we imported to OnShape, added carbon fiber layup references, and printed in PLA for a fit-check. The original manufacturer had quoted a 6-week lead time on a replacement arm.
Use case 3: humanoid torso fit-check
A robotics startup needed to verify a torso fit before committing to injection mold tooling. We scanned a clay prototype torso using the Revopoint MIRACO Plus in standalone mode, which let us walk around the subject without a tethered laptop. Photogrammetric accuracy was sufficient for fit analysis. The team used the resulting mesh to adjust their CAD model before sending out for tooling. If you want to learn more about material choices for these printed parts, our 3D printing materials guide covers strength and heat resistance in detail.
Integration with CAD workflow
Every scanner in this roundup exports to OBJ, STL, or PLY. For CAD integration, PLY is usually the cleanest import format because it preserves color texture data along with geometry. Fusion 360, OnShape, and SolidWorks all import PLY directly. After import, expect to spend 10-30 minutes cleaning up scan artifacts, closing holes, and aligning the mesh to your coordinate system. This is normal. For complex scans, MeshLab and Blender are free tools that handle the cleanup step well.
How to Choose the Best Handheld 3D Scanner
Eight scanners is a lot of choice. Here is how to narrow it down based on what you actually scan, where you scan it, and what you do with the result.
Scanning technology: structured light vs laser vs NIR vs LiDAR
Structured light scanners project a pattern of light onto an object and measure the deformation with cameras. They are fast, accurate, and the most common consumer technology. NIR (near-infrared) structured light is invisible to the eye and works well for faces and bodies. Blue laser scanners project thin lines of laser light that resolve fine detail on small or intricate objects. LiDAR scanners use pulsed laser light for long-range outdoor scanning and are not typically handheld. For most robotics work, you want either structured light or blue laser. The POP 4 and Otter series give you both.
Standalone vs tethered workflow
Tethered scanners connect to a PC via USB cable. They are usually cheaper and faster, but you must drag a laptop to every job site. Standalone scanners like the MIRACO Plus have a built-in screen and onboard processing. They cost more and are heavier, but they unlock workflows that cables make impossible. If you scan in a fixed workshop, tethered is fine. If you scan in the field, on a shop floor, or on the move, standalone is worth the premium.
Tracking markers vs marker-free scanning
Marker-based tracking uses small printed dots placed on the object before scanning. The scanner uses these dots as anchor points to align consecutive frames. Marker-free tracking uses the object’s natural surface texture for alignment. Marker-based is more reliable on featureless objects (chrome, black plastic) but adds setup time. Marker-free is faster but can fail on smooth surfaces. The best handheld 3D scanners support both modes and let you switch mid-scan. The POP 4, Otter, and Raptor series all do this.
Accuracy vs resolution explained
Accuracy is how close the measured point is to the true position. Resolution is how close two measured points can be to each other. A scanner can have high resolution but poor accuracy if the points are consistently offset. For robotics parts that need to fit, accuracy matters more than resolution. For detailed sculpture or jewelry, resolution matters more. The Creality Raptor series delivers 0.02mm accuracy, which is metrology-grade. The Otter Lite and POP 4 deliver 0.03-0.05mm accuracy, which is more than enough for most 3D printing workflows.
Software ecosystem comparison
The scanner hardware is only half the product. The software determines whether you can actually use the scan. Revo Scan 6 (Revopoint) is mature and well-supported on Windows, macOS, iOS, and Android. CrealityScan (Creality) is beginner-friendly with tutorials but can be buggy on large captures. EXStar Hub (Shining 3D / EINSTAR) is the most polished in our roundup, with clean mesh editing and reliable export. JMStudio handles turntable workflows well. For long-term satisfaction, software update track record matters as much as hardware specs. Revopoint and Shining 3D have both pushed meaningful updates in 2025-2026.
Handling dark, shiny, and reflective surfaces
Dark, shiny, and reflective surfaces are the #1 frustration reported by r/3DScanning users. Most consumer scanners need scanning spray (a fine chalk coating) to capture these materials. The hybrid laser/IR scanners (POP 4, Rockit, Raptor series) handle dark and reflective materials better than pure infrared scanners. Even the best consumer unit will struggle on a mirror or polished chrome without surface prep. If you regularly scan dark plastic robot parts or chrome-plated components, budget for scanning spray or accept that some objects will need light surface treatment.
Budget tiers and what to expect
Under $500: entry-level scanners like the Otter Lite and Ferret series. Resolution and accuracy are good enough for hobby 3D printing and basic reverse engineering. Expect a learning curve and some failed scans.
$500-$1000: the sweet spot for most users. The POP 4, EINSTAR Rockit, and Creality Raptor all live here. You get hybrid scanning modes, higher accuracy, and software that works reliably.
$1000-$2000: prosumer and professional. The MIRACO Plus and Raptor Pro bundle. Standalone screens, photogrammetric accuracy, wireless workflows, and the fastest scan speeds.
$2000+: industrial metrology. Creaform HandySCAN, FARO Arm, and similar. Sub-0.02mm accuracy and certified calibration. Overkill for most robotics work but the right choice for aerospace and medical.
For more on choosing parts and materials for robot builds, our aluminum vs 3D printed parts guide compares printed and machined chassis choices.
Frequently Asked Questions
Which 3D scanner is the best value in 2026?
The best value handheld 3D scanner in 2026 is the EINSTAR Rockit. It delivers hybrid blue laser plus VCSEL infrared scanning, wireless 3-hour battery life, and reliable dark-surface handling at a price well below the pro-tier MIRACO Plus. For buyers under $1000, the Rockit is the consensus pick across r/3DScanning.
What is the easiest 3D scanner to use?
The easiest 3D scanner to use is the Creality Otter Lite. It has wireless Wi-Fi, a 30fps real-time preview on the mobile app, anti-shake tracking, and a beginner-friendly CrealityScan tutorial. A first-time user can produce a usable mesh on their third attempt without prior scanning experience.
Is a cheap 3D scanner worth it?
A cheap 3D scanner is worth it for hobby and learning use, but with realistic expectations. Sub-$500 scanners produce scans that are accurate to a millimeter or so, which is fine for 3D printing cosplay props, household objects, and basic reverse engineering. For tight-fitting robotics parts, a $500-$1000 scanner is the better investment.
What is the best portable 3D scanner?
The best portable 3D scanner is the Revopoint MIRACO Plus. Its all-in-one design with a 6-inch 2K AMOLED flip screen, 32GB onboard RAM, and 8-core processor means no tethered laptop is required. The quad depth camera system covers object sizes from tiny screws to full bodies. Battery delivers roughly 1.5-2.5 hours depending on LED use.
What is the best handheld 3D scanner for reverse engineering?
The best handheld 3D scanner for reverse engineering is the Creality Raptor. Its 0.02mm metrology-grade accuracy, hybrid blue laser and NIR modes, and 60fps scan speed let you capture tight-tolerance robotics parts that printed replacements will fit. The OBJ, STL, and PLY export formats import cleanly into Fusion 360, OnShape, and SolidWorks.
What is the best handheld 3D scanner under 500?
The best handheld 3D scanner under 500 is the Creality Otter Lite. It delivers 0.05mm accuracy, 30fps scanning, wireless Wi-Fi, and mobile app control. Reviewers give it 4.9 stars across 10 reviews. For tighter budgets, the Creality Ferret series and 3DMakerPro Mole cover entry-level needs with lower accuracy.
Final Verdict: Which Handheld 3D Scanner Should You Buy?
After testing eight handheld 3D scanners across hundreds of robotics scans in 2026, the Revopoint POP 4 remains our editor’s choice. It is the most versatile unit in the roundup: hybrid laser and infrared modes, 105 FPS scan speed, 4-hour wireless battery, and software that is mature enough to ship a real production workflow. For most robotics makers who want one scanner that handles anything from a servo to a chassis panel, the POP 4 is the right pick.
If you scan in the field or want zero cable management, step up to the Revopoint MIRACO Plus. If you want the best value under $1000, get the EINSTAR Rockit. If you need metrology-grade accuracy for tight-tolerance parts, the Creality Raptor delivers it at half the price of industrial units. If you are new to 3D scanning, the Creality Otter Lite is the most forgiving entry point. The robotics scan-to-print workflow has never been more accessible, and any of the scanners above will pay for itself the first time you reproduce a broken part instead of ordering a replacement.