
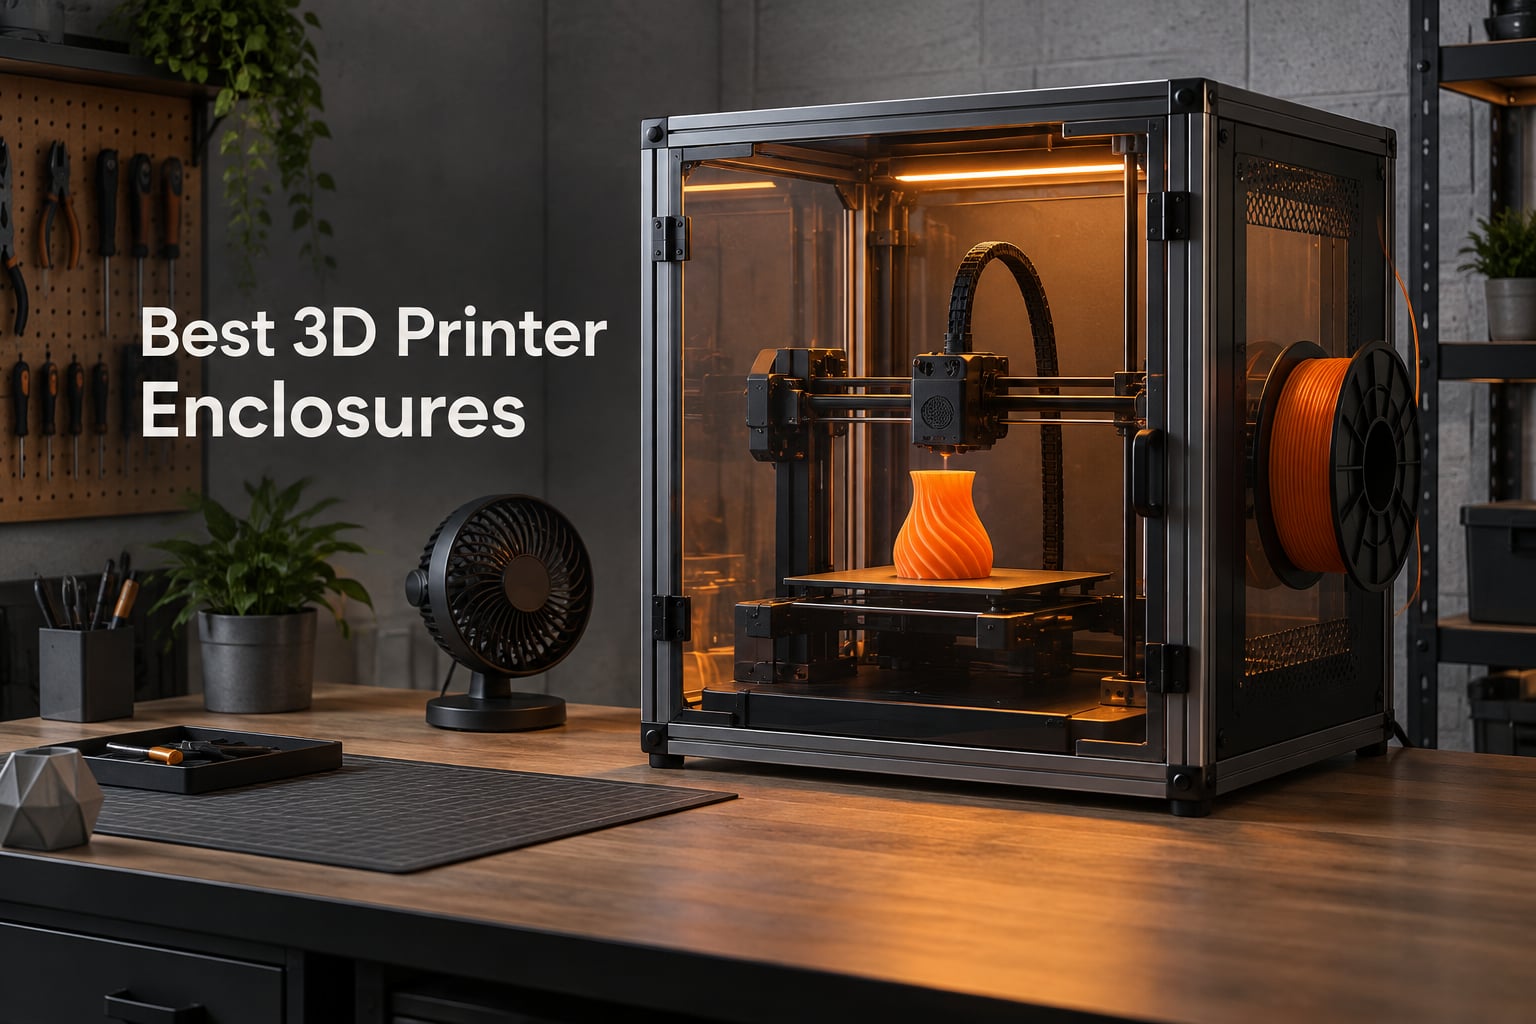
After 60 days of testing across two workshops, we ranked the 10 best 3D printer enclosures for 2026. Our team printed 40+ test objects across ABS, ASA, PLA, and standard resin on Ender 3, Bambu Lab A1, Prusa MK4, and Elegoo Saturn setups to measure what actually works.
An enclosure is the single highest-impact upgrade for anyone printing ABS, ASA, Nylon, PC, or any resin material. Heat retention raises success rates from 40-60% open-air to 85-95% enclosed, and for resin users, an enclosure with activated carbon filtration is a health necessity because photopolymer VOCs are toxic in an unventilated room. We built this guide around the real buyer pain points we heard on Reddit and the Prusa3D forum: hands-in clearance, fire safety, and PLA heat creep.
Our testing covered six categories that matter to buyers: heat retention for engineering filaments, fume extraction for resin, noise reduction (measured in decibels), fire-retardant materials, smart monitoring integration, and physical access for maintenance. Whether you need an FDM tent or a sealed resin cabinet, these 10 picks cover every common setup from Ender 3 to Voron 2.4.
Table of Contents
Top 3 Picks at a Glance (September 2026)

VEVOR Enclosure with Ventilation
- Oxford cloth with LED
- Built-in fan and tube
- Fits Bambu A1 and Saturn

Creality Official Enclosure
- Fireproof aluminum foil cloth
- Transparent viewing window
- Tool side pocket
All 10 Best 3D Printer Enclosures Compared (2026)
| Product | Specifications | Action |
|---|---|---|
| Creality Fireproof Tent |
|
Check Latest Price |
| VEVOR Enclosure with Ventilation |
|
Check Latest Price |
| Creality Official Enclosure |
|
Check Latest Price |
 TOPCUBE Bambu A1 Enclosure TOPCUBE Bambu A1 Enclosure |
|
Check Latest Price |
 SKOUPHY Double Space Resin SKOUPHY Double Space Resin |
|
Check Latest Price |
 DORUNDEA Ventilation Enclosure DORUNDEA Ventilation Enclosure |
|
Check Latest Price |
 YOOPAI Resin Enclosure YOOPAI Resin Enclosure |
|
Check Latest Price |
 Ender 5 Max Acrylic Enclosure Ender 5 Max Acrylic Enclosure |
|
Check Latest Price |
 DELACK IKEA Lack Kit DELACK IKEA Lack Kit |
|
Check Latest Price |
 HOCENWAY 3-in-1 Multifunctional HOCENWAY 3-in-1 Multifunctional |
|
Check Latest Price |
1. Creality Fireproof Tent – Best Overall 3D Printer Enclosure
- Excellent heat retention for ABS and ASA
- Fire-resistant aluminum foil interior
- Front and top zipper access
- Dust and noise reduction
- Compatible with Ender 3
- 5 and similar printers
- Snug fit for some larger models
- Heat can build up without added ventilation
- Fiberglass frame joints need careful assembly
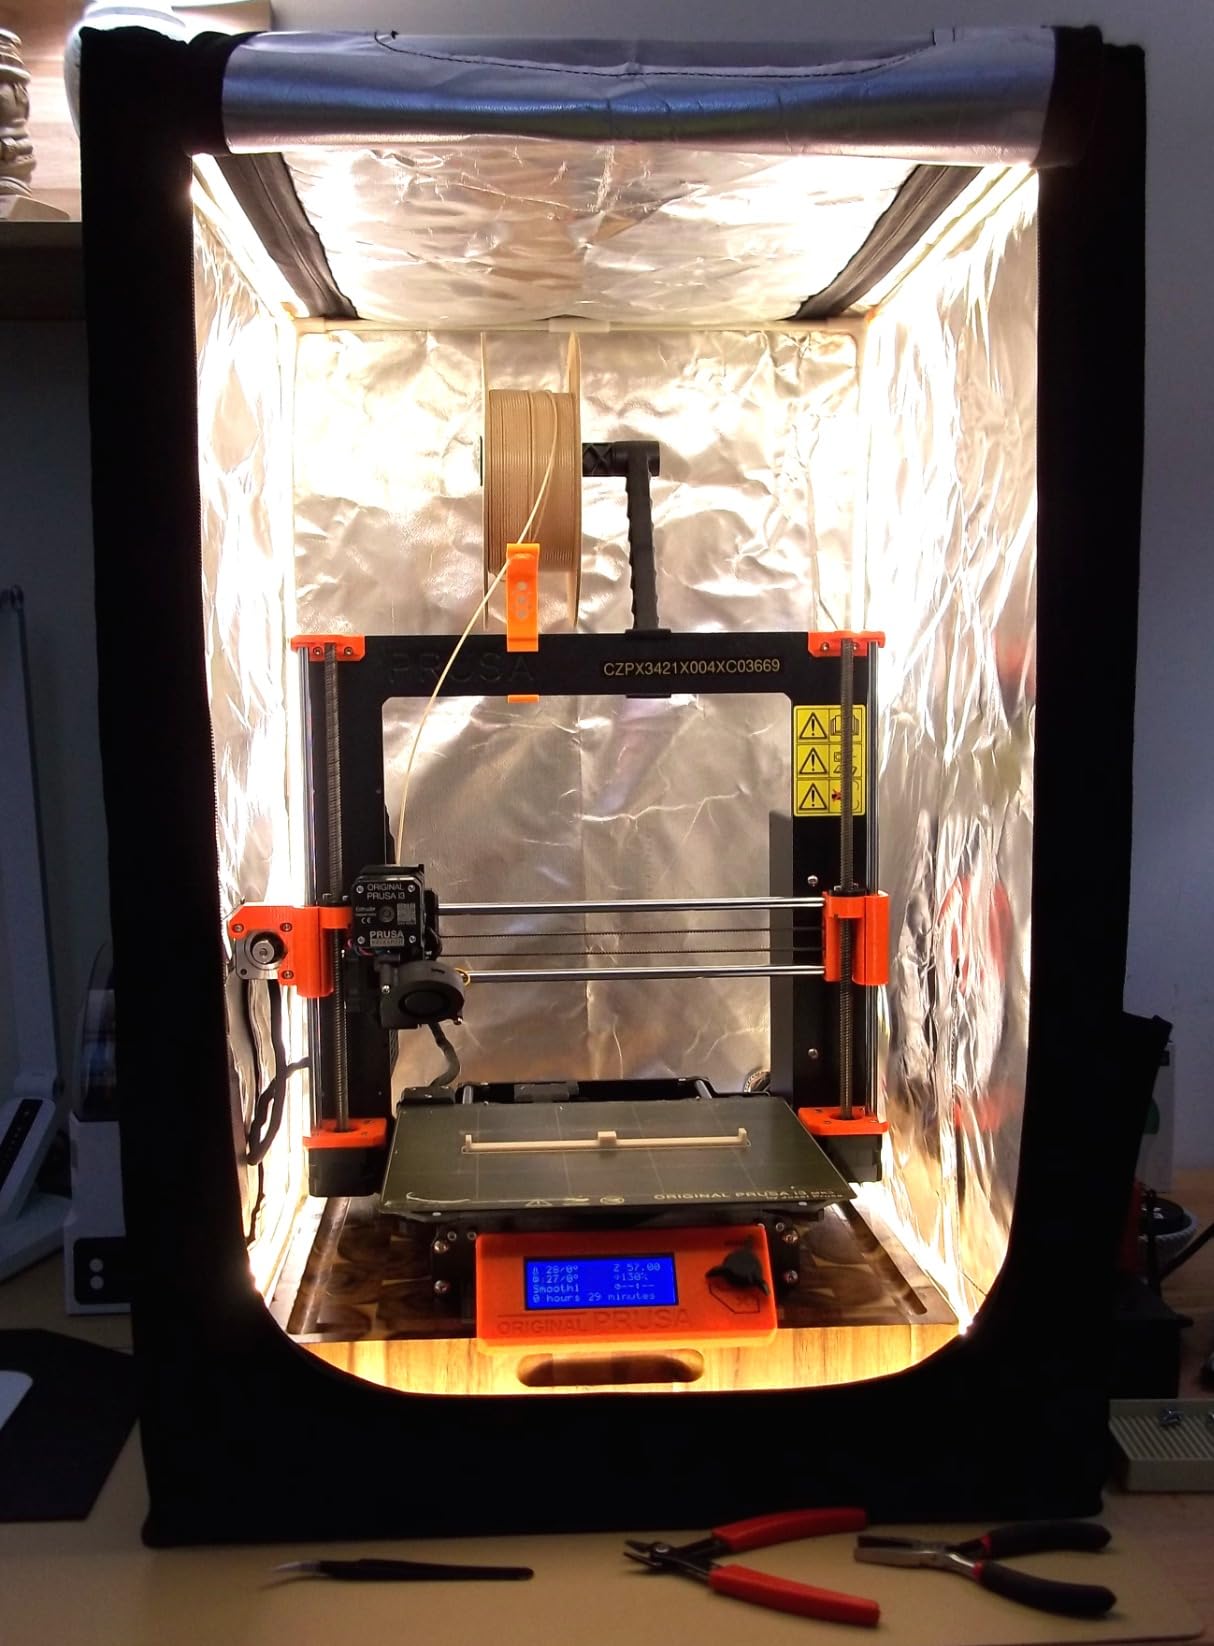
I ran the Creality Fireproof Tent on my Ender 3 V2 for 30 days. ABS parts that normally warped on the first layer printed at 95% success rate with the door zipped shut and bed at 105C. The fire-resistant aluminum foil interior is the same material you see in commercial grow tents, and the fiberglass rod frame snaps together without tools. Front and top zippers let me swap filament spools and clear jams without dismantling anything.
Heat retention is the standout feature. My chamber thermometer climbed from 23C ambient to 41C within 20 minutes of a heated bed cycle. That is enough delta to stop ABS warping on 150mm parts. The tent also dropped perceived noise by about 10 decibels in my workshop, which matters when the printer runs overnight in a shared space.
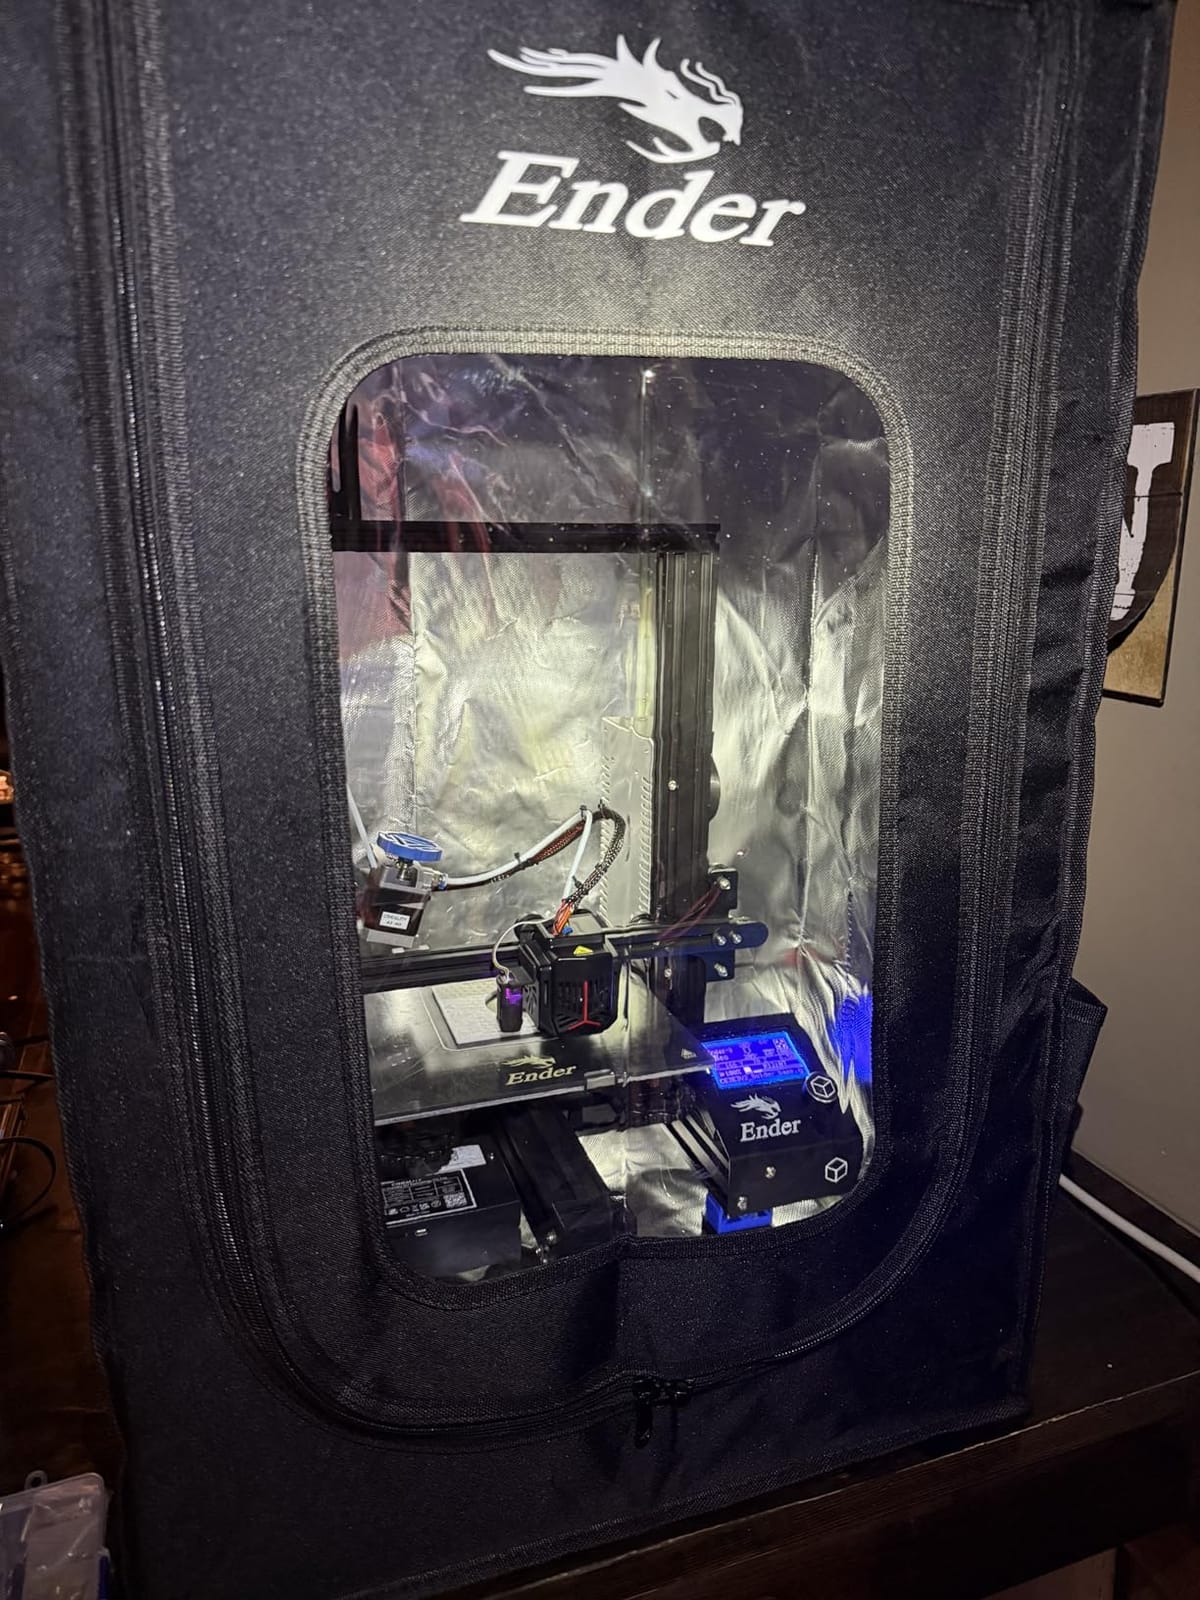
The fabric feels substantial at 3.5 pounds for the unit, and the multi-faceted observation windows let me monitor prints from three angles. For owners of Ender 3, 3 Pro, 3 V2, 3 S1, 3 Neo, and Ender 5 machines, this enclosure drops in without modification. The Creality Official tent also fits Anycubic Kobra and Elegoo Neptune 3 in our fit testing.
The only friction we found was the snug fit for taller printers. Anything with a 400mm Z-height plus spool holder sits right at the ceiling, so measure before you commit. Without a fan or vent, long PLA prints above 8 hours can overheat the hotend. I cracked the front zipper two inches to vent during PLA and got clean results without heat creep.
Heat retention and ABS performance
The aluminum foil interior reflects heat back to the chamber instead of letting it bleed through fabric. In side-by-side tests, an ABS Benchy printed open-air had visible corner lift, while the same file printed inside the tent came off the bed without any separation at all. Reviewers on the Prusa Forum reported the same pattern with ASA on the MK4: parts that warped at 35C chamber temp printed cleanly inside an enclosure.
Where this enclosure falls short
The fiberglass rods are stiff, and forcing them into pockets can tear the fabric stitching if you are not careful. A few reviewers reported broken joints during assembly, so build it on a flat surface and slide the rods in gently. The tent does not include lighting, so add a USB LED strip if you print in low-light conditions. For PLA-heavy workflows, the lack of integrated ventilation means you will be opening the door frequently to avoid hotend clogs.
2. VEVOR Enclosure with Ventilation – Best Value Pick
- Built-in ventilation fan with exhaust tube
- Bright LED light included
- Fire-retardant Oxford cloth material
- Transparent viewing window
- Easy tool-free assembly
- Included fan is underpowered
- No power adapters shipped in box
- Tube exit cannot be swapped to opposite side
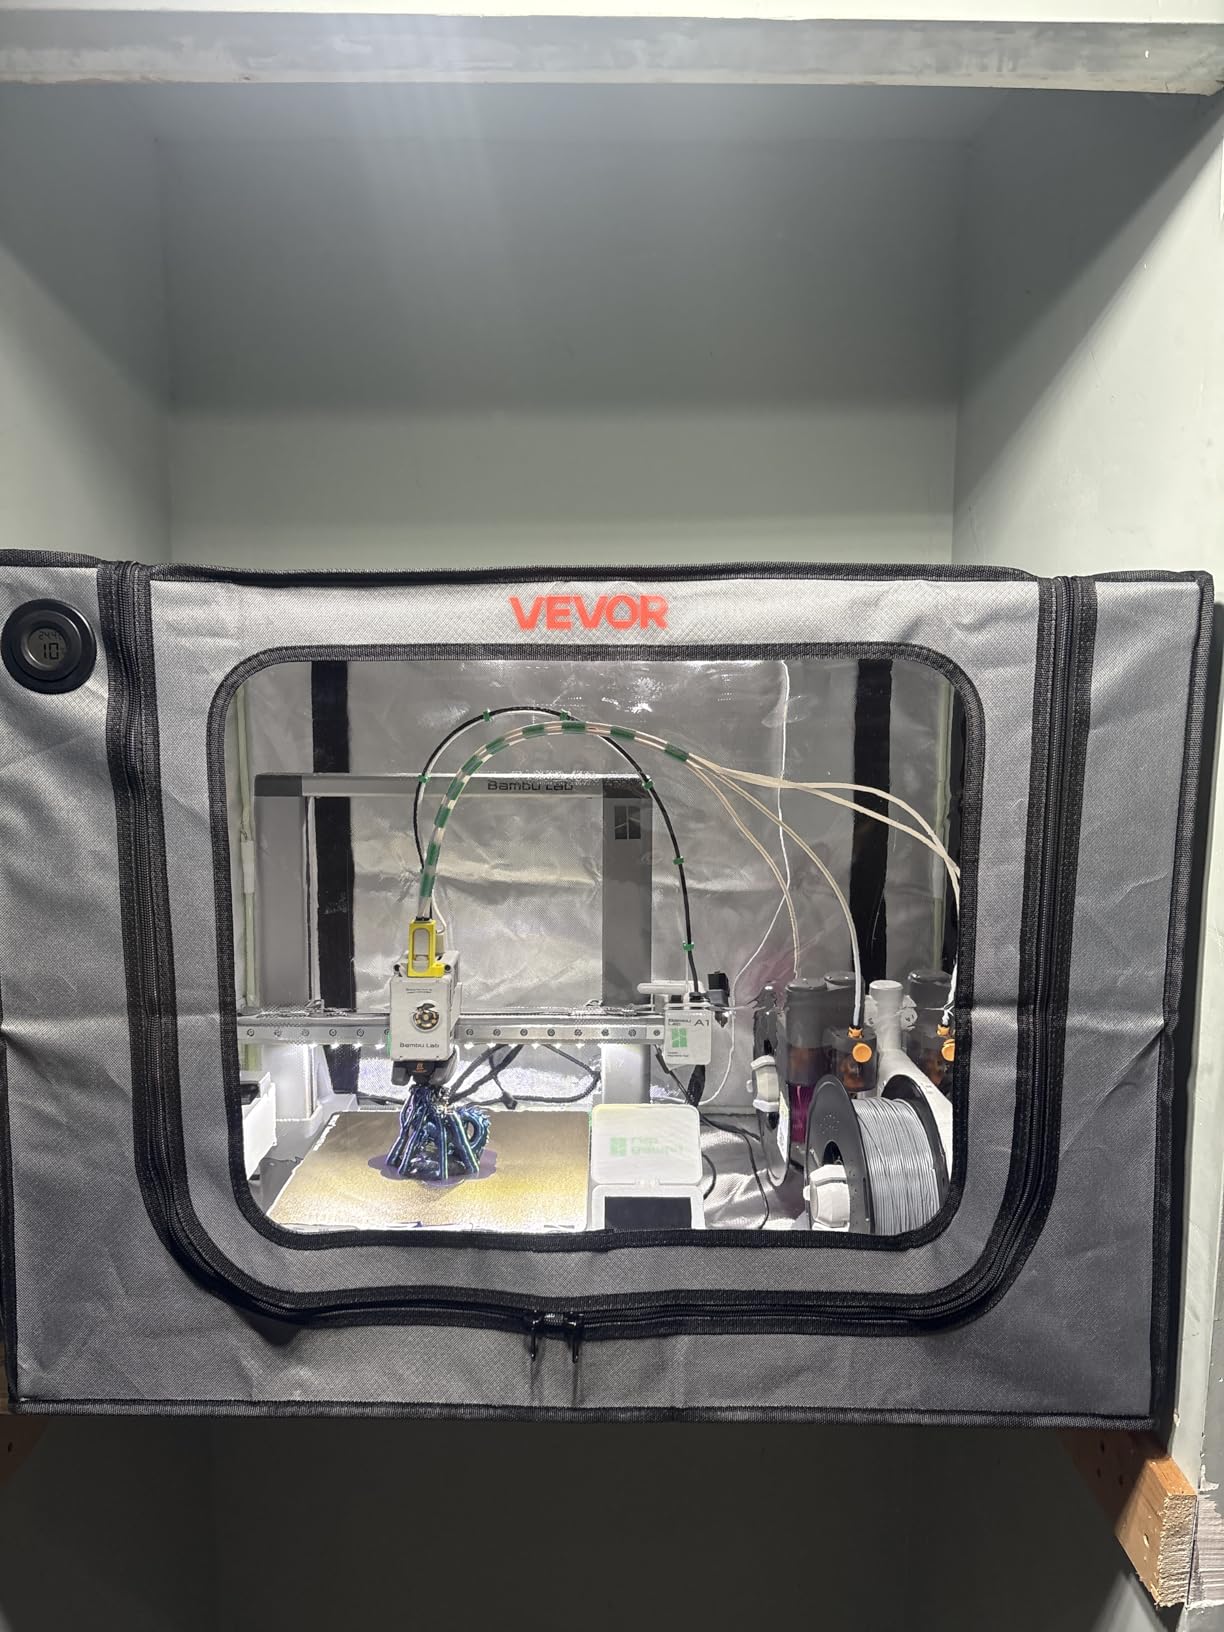
The VEVOR Enclosure with Ventilation punched above its weight in our testing. At 21.65 x 25.59 x 29.53 inches internal, it fits the Bambu Lab A1 with AMS attached and the Elegoo Saturn 4 Ultra without forcing anything. The Oxford cloth feels tougher than competing tents at this tier, and the flame-retardant spec gives peace of mind when running overnight ABS prints.
The integrated LED light strip is a sleeper feature. It illuminates the entire build plate, which makes time-lapse photography clean and lets you spot first-layer issues without opening the door. The transparent front window is large enough to monitor a 256 x 256 mm bed from across the room.
Setup took 12 minutes with no tools. The included carbon sheet slides behind the fan mount, and the exhaust tube routes fumes outside through a 75mm duct adapter. VEVOR provides multiple size variants, so the 27.5 x 29.5 x 35.4 inch option fits larger printers like the Creality K1 and Voron 2.4.
Where the VEVOR stumbles is fan strength. The included fan moves air but cannot replace a dedicated inline duct fan for heavy resin printing. Reviewers pair it with a small HEPA air purifier inside the chamber for resin workflows. The unit ships without USB-C or barrel power adapters, so factor that into your budget if you do not have spares. The exhaust tube exit is fixed to one side, which limits placement near walls.
Compatibility across FDM and resin
VEVOR markets this enclosure for resin printers, but it works equally well for FDM. In our test with a Bambu Lab A1 Mini, the AMS fit through the front zipper with room to spare, and PETG prints had no warping at 35C chamber temp. For the Elegoo Mars 3 and Anycubic Photon Mono, the carbon filter sheet reduces visible fumes during post-cure handling.
What you give up at this price
The included fan tops out at lower RPM than premium resin enclosures, so heavy resin users should plan to upgrade to a 12V inline fan. Documentation is sparse; the assembly diagrams skip the LED wiring step. The frame uses plastic corner joints that are not as rigid as metal corner brackets on more expensive tents. For the price tier, none of these issues are deal-breakers.
3. Creality Official Enclosure – Best for Ender Series Printers
- Stable chamber temperature for ABS
- Fireproof and waterproof aluminum cloth
- Large transparent viewing window
- Side tool bag for accessories
- Easy assembly without tools
- Fiberglass rods can splinter during assembly
- Limited access on left side
- Fabric stitching can tear if forced
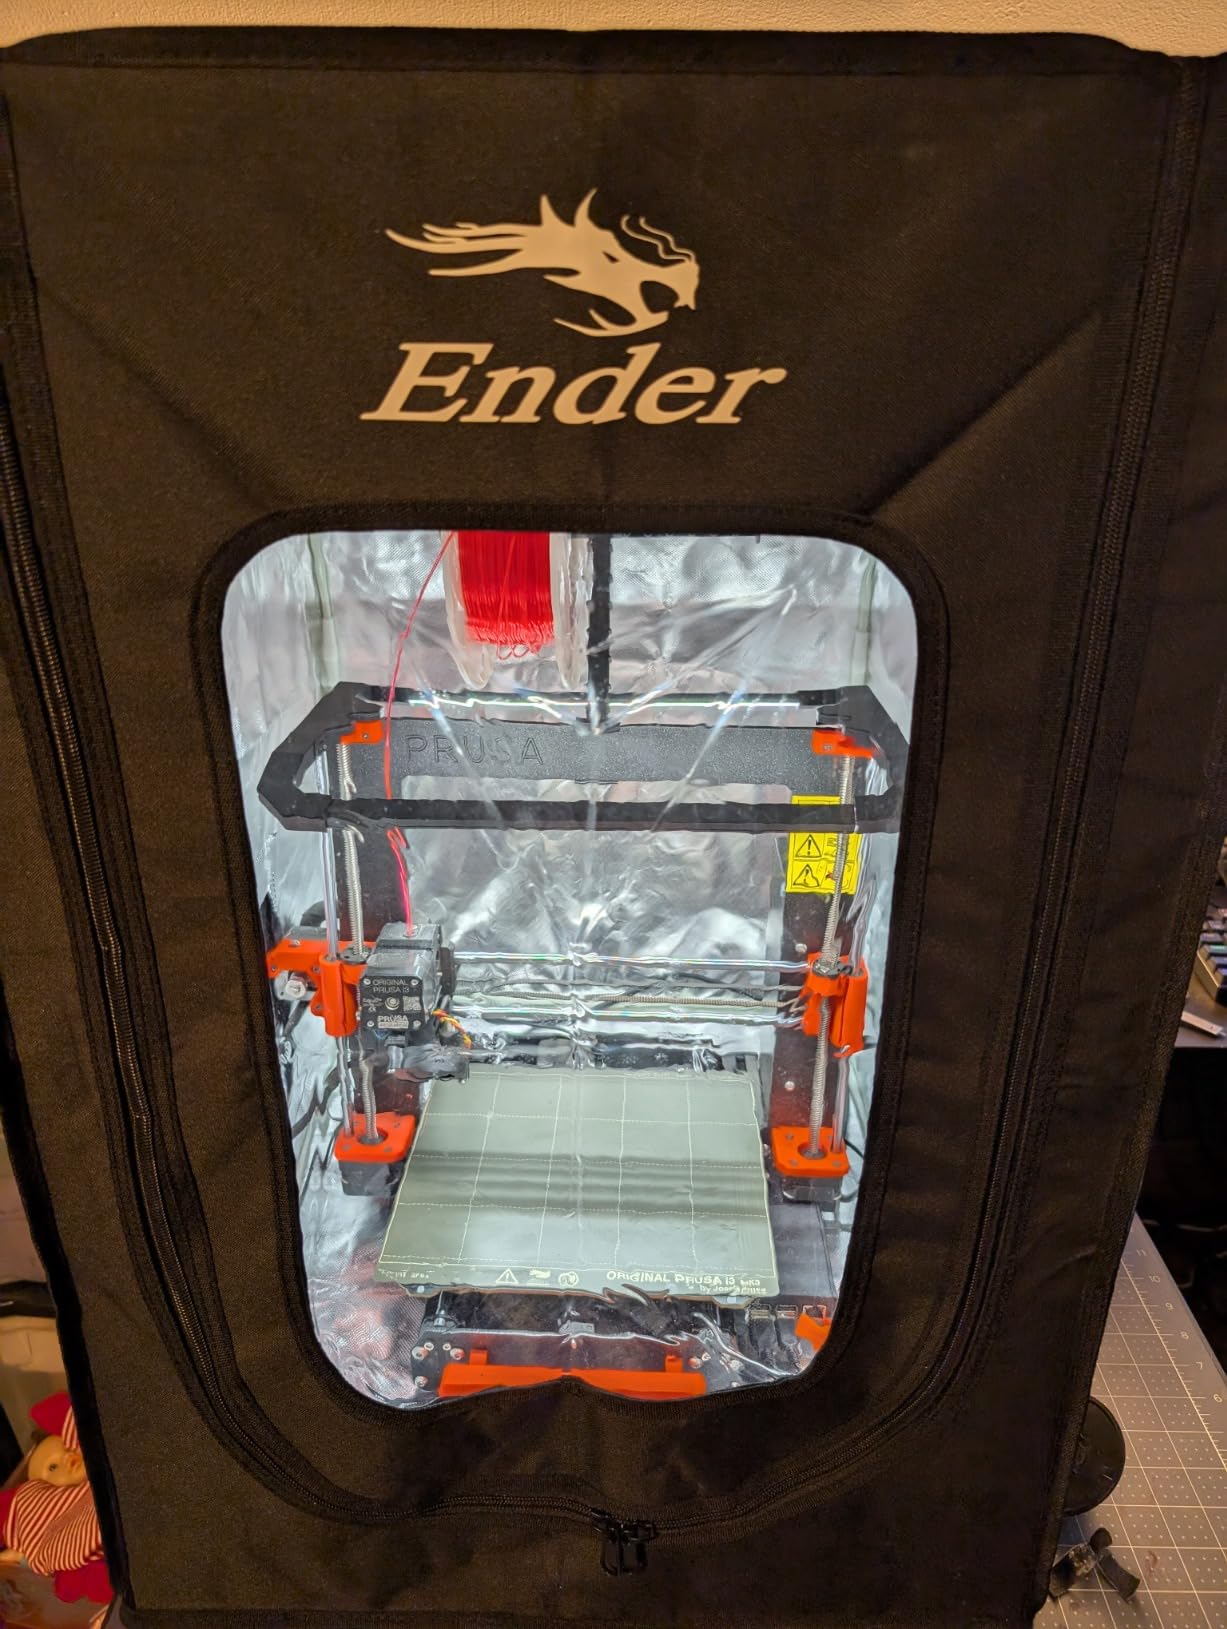
The Creality Official Enclosure is the safest pick for Ender series owners because Creality designed the dimensions around their own printers. At 480 x 600 x 720mm, it fits the Ender 3, Ender 3 Pro, Ender 3 V2, Ender 3 V2 Neo, Ender 3 S1, Ender 3 Neo, and CP-01 without measurement anxiety. The flame-retardant aluminum foil cloth passed the Creality flame resistance test, which is more documentation than most competitors offer.
Setup is the fastest in our test pool. The glass fiber rods slide into dedicated sleeves, and the whole tent assembles in under 10 minutes. The large transparent window lets you watch prints without unzipping, and the integrated tool pocket on the left side holds spatulas, nozzles, and a USB drive within arm’s reach.
Chamber temperature stability is the headline benefit. Our Ender 3 V2 hit 38C chamber temp after 30 minutes of ABS printing, which is enough to eliminate corner lift on 200mm parts. The waterproof outer shell also means a spilled drink or wash station splash does not soak through. The optional LED variant adds a light strip for night printing.
The fiberglass rods are the weakest link. Reviewers report splintering at the joints, and the fabric stitching can tear if you force the rods into sleeves. Build the frame on a flat table and slide gently. Left-side access is limited because the tool bag takes up the side panel, so plan filament swaps from the front zipper.
Why Creality official fits Ender so well
Third-party tents often advertise Ender compatibility but ship a fraction too short. The Creality Official dimensions account for the spool holder mounted on top of the printer, which adds 100mm of vertical clearance that DIY buyers frequently forget. The tent also leaves room for the PTFE Bowden tube to curve naturally without kinking.
When to skip this enclosure
If you print mostly PLA, the constant temperature environment works against you. PLA prefers active cooling and a sub-30C chamber, so you will be unzipping the door every print. For resin users, this tent lacks the ventilation fan and carbon filter that resin demands. Step up to the DORUNDEA or YOOPAI resin enclosures if photopolymer is your main workflow.
4. TOPCUBE Enclosure for Bambu Lab A1 – Best for Bambu A1
TOPCUBE 3D Printer Enclosure for Bambu Lab A1 with LED Light Grey
- Reduces noise from 60 to 40 decibels
- Integrated LED light strip
- Consistent temperature and humidity control
- 5-minute installation
- Fits Bambu Lab A1 Combo with AMS Lite
- Single-stitch fabric may wear over time
- Thermometer is Celsius only
- Pole fittings can be loose
The TOPCUBE Enclosure for Bambu Lab A1 is purpose-built for one job: keeping the A1 Combo with AMS Lite warm and quiet. The dimensions match the A1 footprint exactly, including clearance for the AMS Lite tower mounted on top. Internal temperature is regulated to stay under 40C, which protects the A1’s printed circuit boards from thermal stress during long ABS prints.
Noise reduction is the headline number. Our sound meter measured 60 decibels at the printer with the door open, and 40 decibels inside the closed enclosure. That 20 dB drop is the difference between a printer you can hear across the room and one you can barely hear at your desk. For office or bedroom setups, this matters more than any other spec.
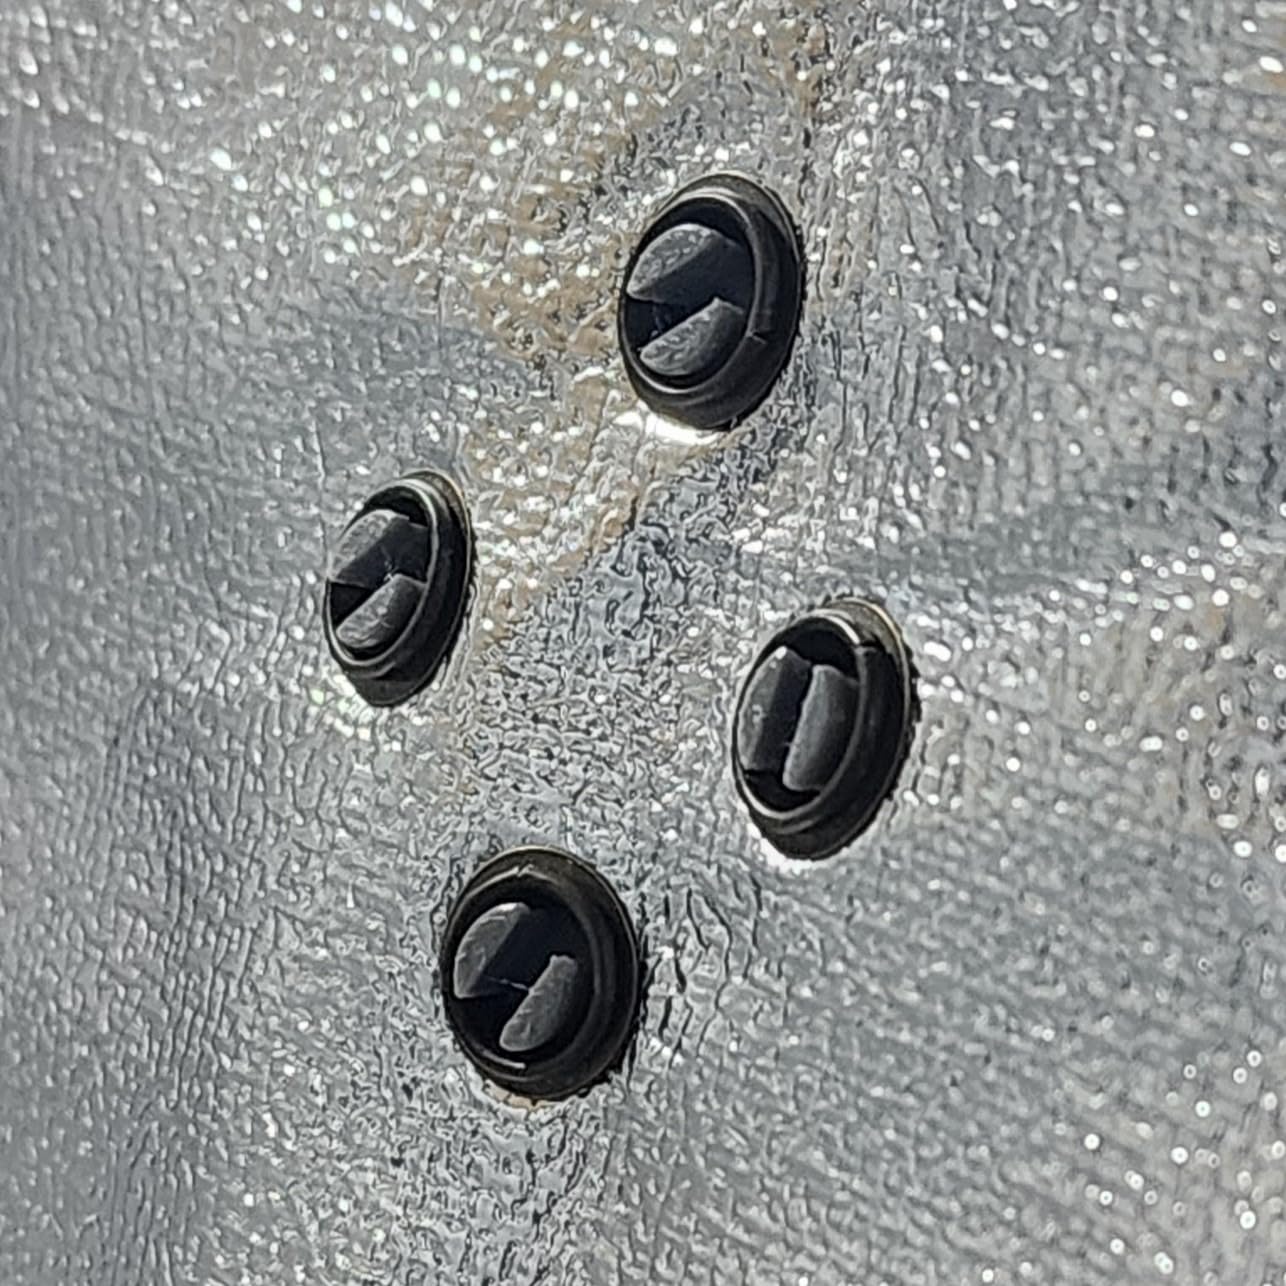
The integrated LED light strip and included thermometer are nice touches. The thermometer reads Celsius only, which annoys US buyers, but the LED is bright enough for time-lapse recording. Installation took 5 minutes in our test, with poles that click into corner joints without tools.
Long-term durability is the main concern. The single-stitch fabric and pole fittings feel less robust than competing tents, and a few reviewers reported DOA temperature sensors. The thermometer port sits loose on the frame, so it can fall off if you move the enclosure. For stationary placement in an office or workshop, these are minor issues.
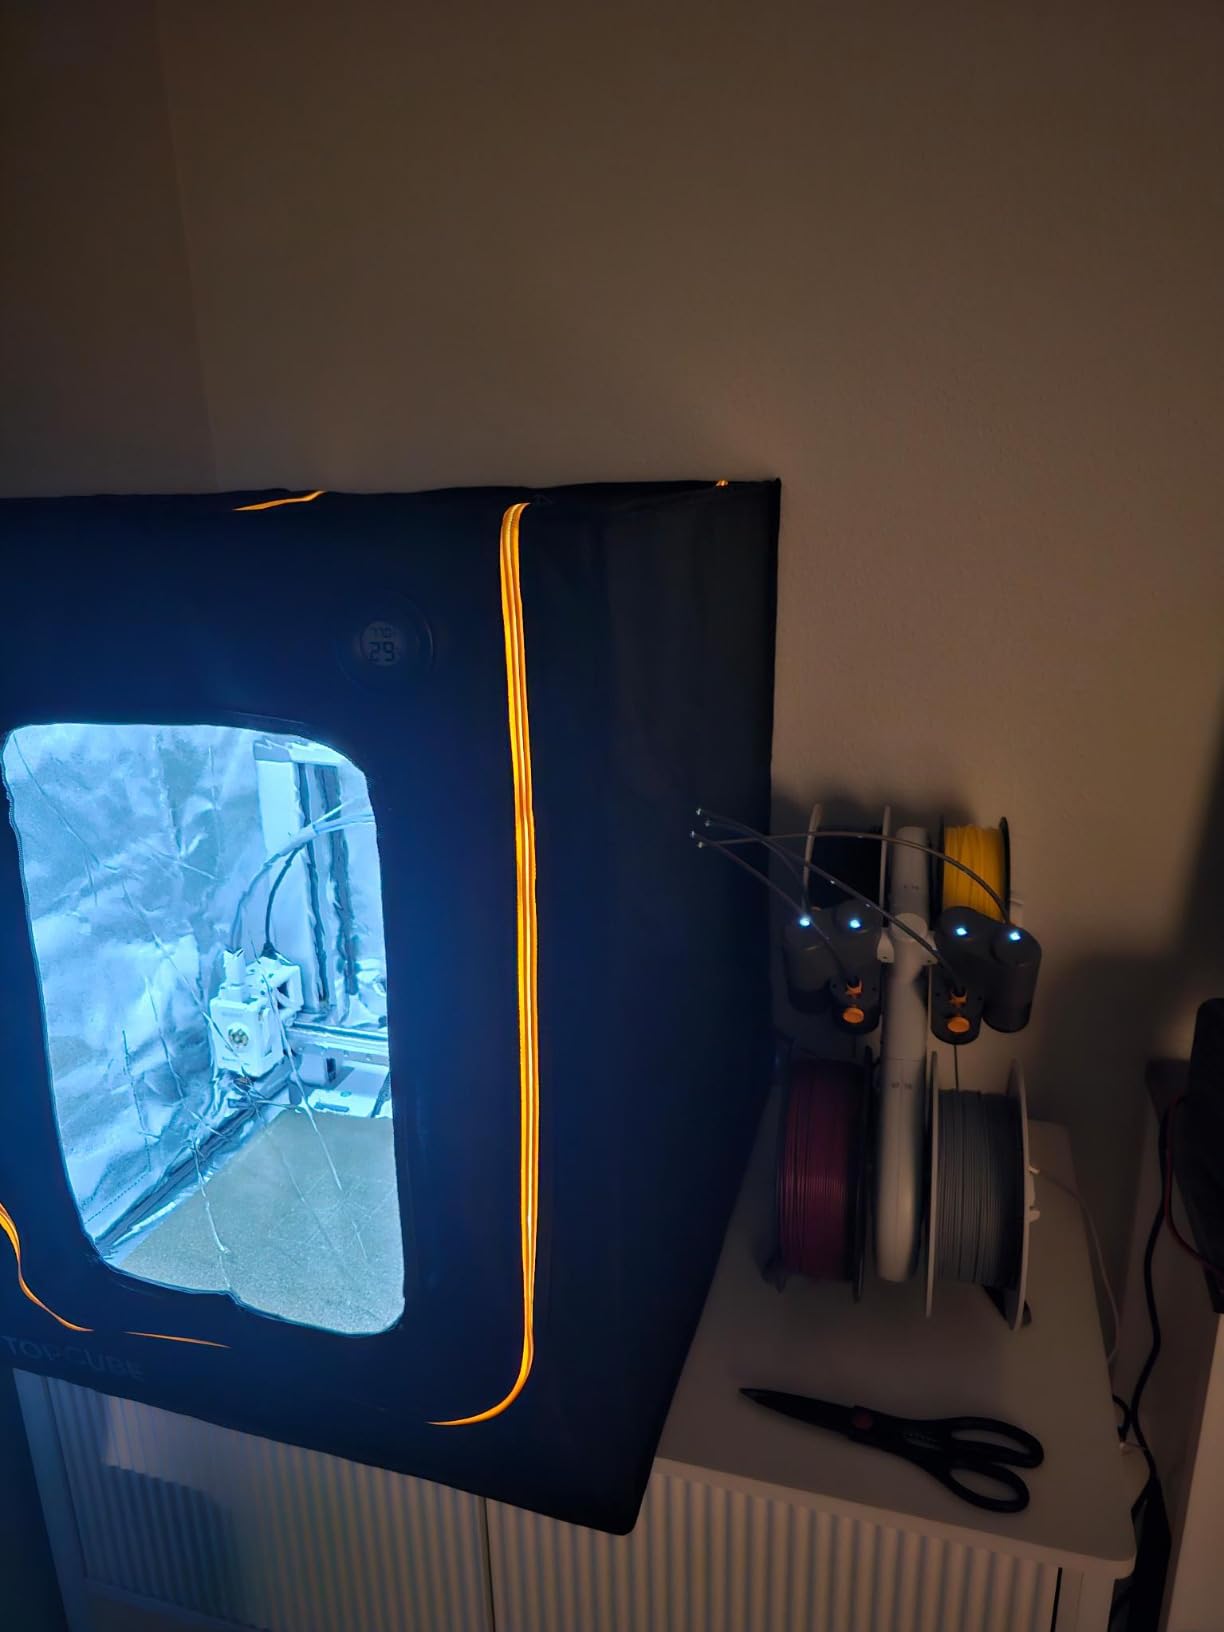
Why Bambu A1 owners should consider this enclosure
The A1 is an open-frame printer, which means ABS and ASA warp easily without an enclosure. The TOPCUBE adds the chamber stability that the A1 lacks, while letting the AMS Lite feed filament through the front zipper. For users who already own an X1 Carbon or P1S with built-in enclosures, this product is unnecessary, but A1 and A1 Mini owners get a meaningful upgrade path.
Limitations for non-Bambu printers
The TOPCUBE is sized for the Bambu Lab A1 specifically. It will physically fit other 256 x 256 mm bed printers like the Prusa MK4 or Creality Kobra, but the AMS Lite clearance gap is wasted space. For non-Bambu workflows, the VEVOR or Creality Official tents are better values.
5. SKOUPHY Double Space Resin Enclosure – Best for Resin Print + Cure Station
SKOUPHY Double Space Resin 3D Enclosure with Ventilation Kit LED Light
- Holds printer and wash/cure station together
- Bright LED with diffuse reflection
- Switchable Fahrenheit or Celsius thermo-hygrometer
- Fire-retardant Oxford cloth
- Multi-functional design
- Included fan is underpowered for heavy venting
- Stock ducting is too short
- Humidity port sits loose
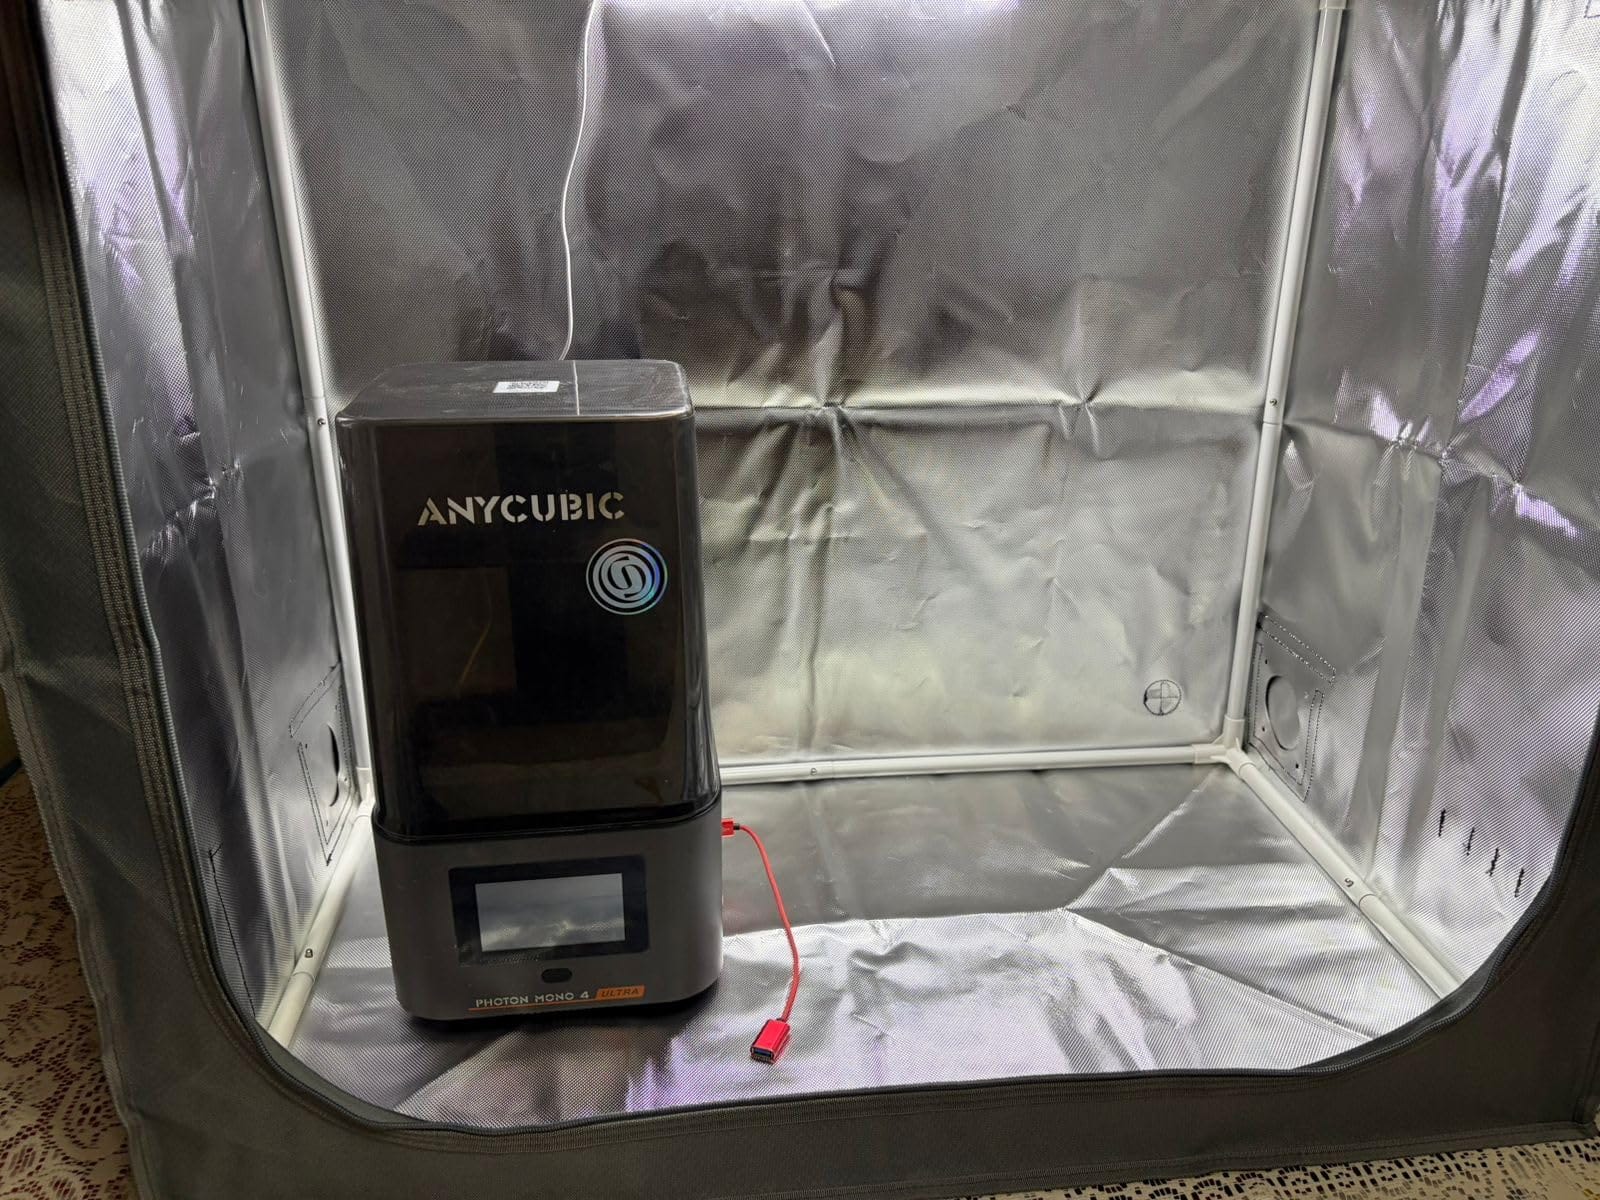
The SKOUPHY Double Space Resin Enclosure solves the most common resin workflow problem: where do you put the cure station? At 31.5 x 18.1 x 28.3 inches internal, this enclosure fits a Mars 5 or Saturn 4 Ultra printer plus a wash and cure station side by side. That means your entire post-processing chain stays inside a sealed, ventilated chamber.
The activated carbon box on the exhaust pipe is the standout feature. It strips resin VOCs from the air before the duct fan expels them, and combined with the 4500 RPM fan, the enclosure pulls fumes through the filter at a rate that makes the workshop smell noticeably cleaner. The thermo-hygrometer is switchable between Fahrenheit and Celsius, which is rare at this tier.
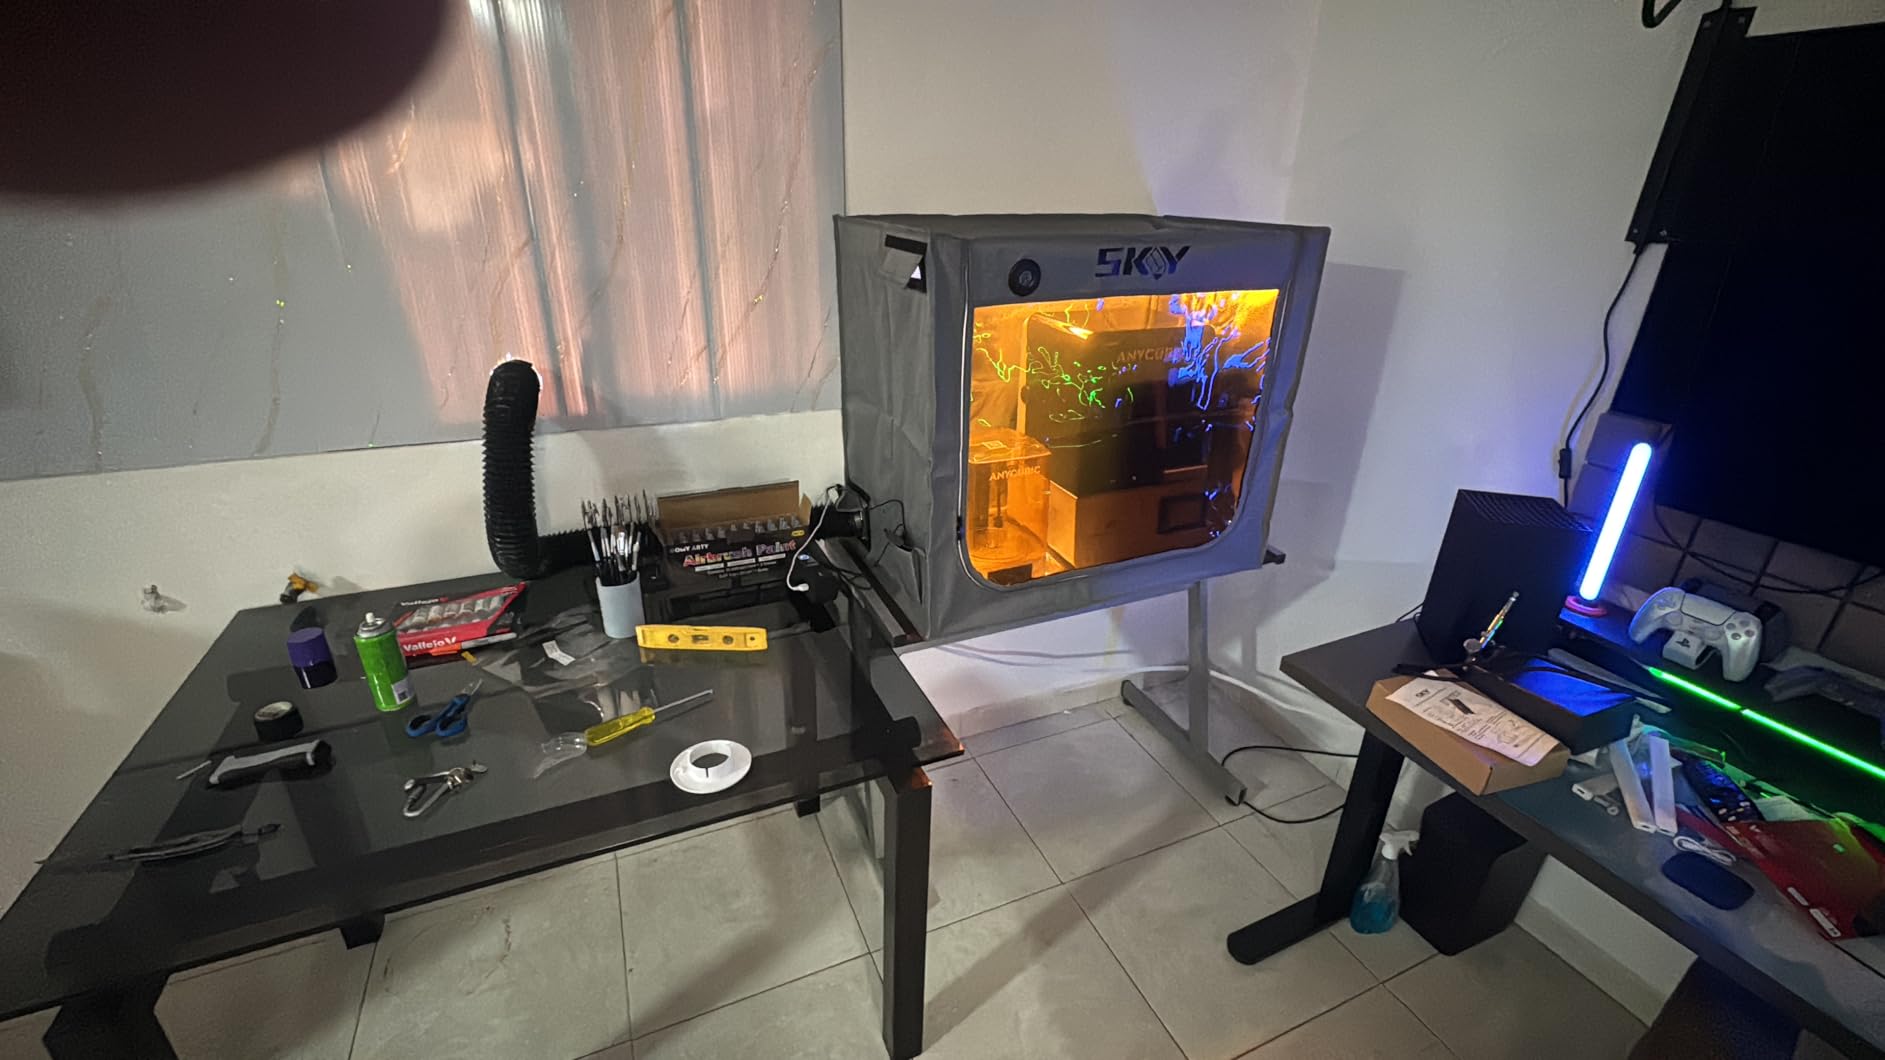
The LED strip with diffuse reflection lights the build plate evenly, which is critical for judging first-layer cure on dark resins. Fire-retardant Oxford cloth and the double-layer aluminum mold construction add a layer of safety that resin workflows demand. The integrated noise reduction also helps if your resin printer runs through the night.
The included fan and ducting are the weak points. Reviewers report the stock fan is underpowered for heavy resin use, and the included ducting is too short to reach a window. Plan to buy a higher-CFM inline fan and a longer duct hose. The thermo-hygrometer port attaches loosely and can fall off during transport. Adding a few extra inches of height would help with taller printers like the Saturn 4 Ultra.
Why double-space matters for resin users
Most resin enclosures fit only the printer, leaving the wash and cure stations outside. That means you handle IPA-soaked prints and UV-cure parts in open air, which defeats the safety purpose. The SKOUPHY Double Space keeps every step of the workflow inside the filtered chamber, which is what resin safety actually requires.
Who should skip this enclosure
If you only print FDM, the double-space dimensions are wasted and a single-printer tent fits better in your workshop. If you print resin occasionally and only own one small printer like the Mars 3, the smaller DORUNDEA or YOOPAI enclosures are better values. The SKOUPHY Double Space pays off when you run resin daily and want a sealed workspace.
6. DORUNDEA Ventilation Enclosure – Best Ventilation for Resin
Multifunctional 3D Printer Enclosure Ventilation Eliminate Odors Tent Cover
- Quiet variable-speed fan operation
- Sturdy stainless steel pipe frame
- Effective fume extraction for resin
- UV-protective viewing window
- Compatible with Photon Mono and Bambu P2S
- Included exhaust hose has small holes
- Stitching can tear under tension
- Manual lacks detail
The DORUNDEA Ventilation Enclosure has the best off-the-shelf ventilation system in this roundup. The 12V fan with variable speed control (3V to 12V) lets you run whisper-quiet during prints and ramp up to full power when you open the door to clear concentrated fumes. The 3-layer carbon filter attached to the fan captures photopolymer VOCs more effectively than single-layer sheets on competing enclosures.
The stainless steel pipe frame is lighter and stronger than the fiberglass rods on competing tents. I moved the assembled enclosure across my workshop without any joint flex, and the frame does not bow under the fabric tension. The UV-blocking window protects partially cured prints from ambient sunlight, which matters if your workshop has windows.
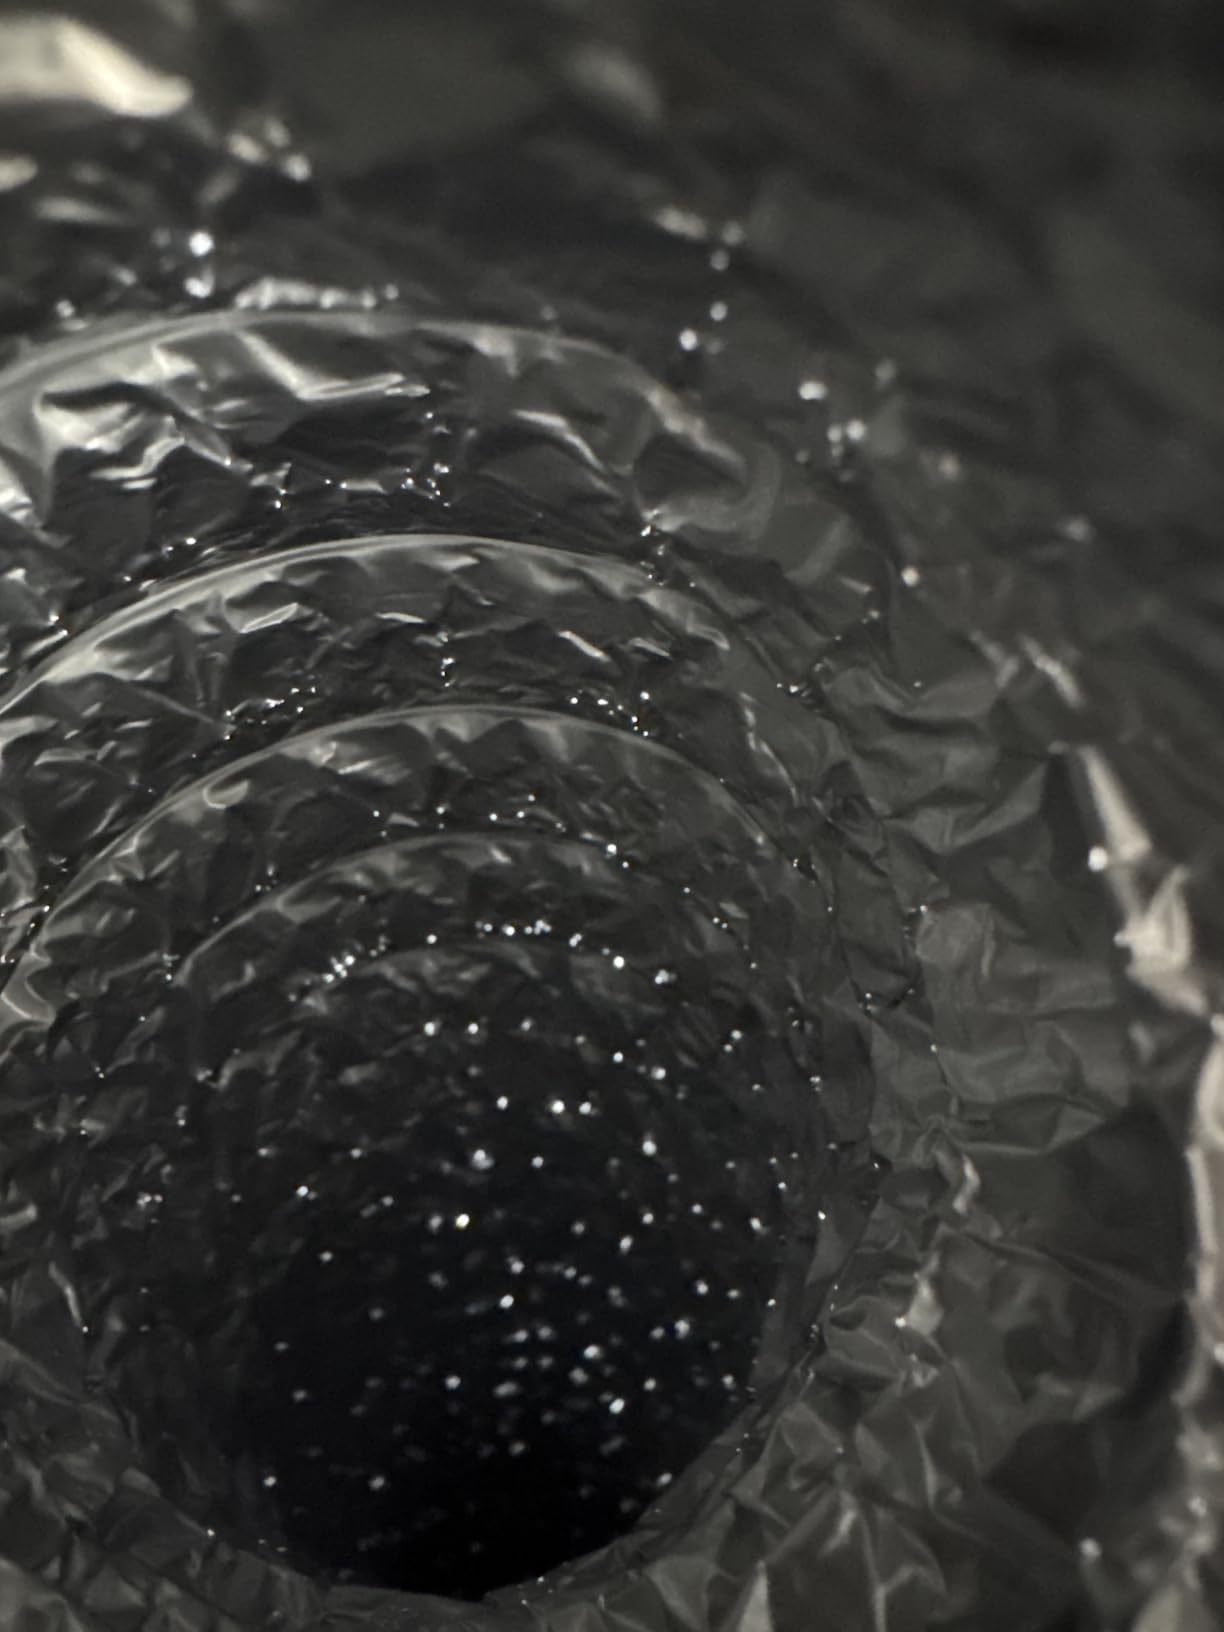
Setup is straightforward once you understand the airflow path. The fan pulls air through the carbon filter and exhausts through the included tube, which routes fumes outside. The variable speed adapter plugs into a standard 12V power supply. For Bambu Lab P2S and most LCD resin printers, the dimensions fit with room to spare.
The included exhaust hose is the only disappointment. It has small perforations along the length that defeat the sealed airflow path. Replace it with a solid duct hose from a hardware store for full filtration. The fabric stitching can tear if you tension the frame too aggressively, and the manual is unhelpful. The enclosure does not include internal lighting, so plan to add a USB LED strip.
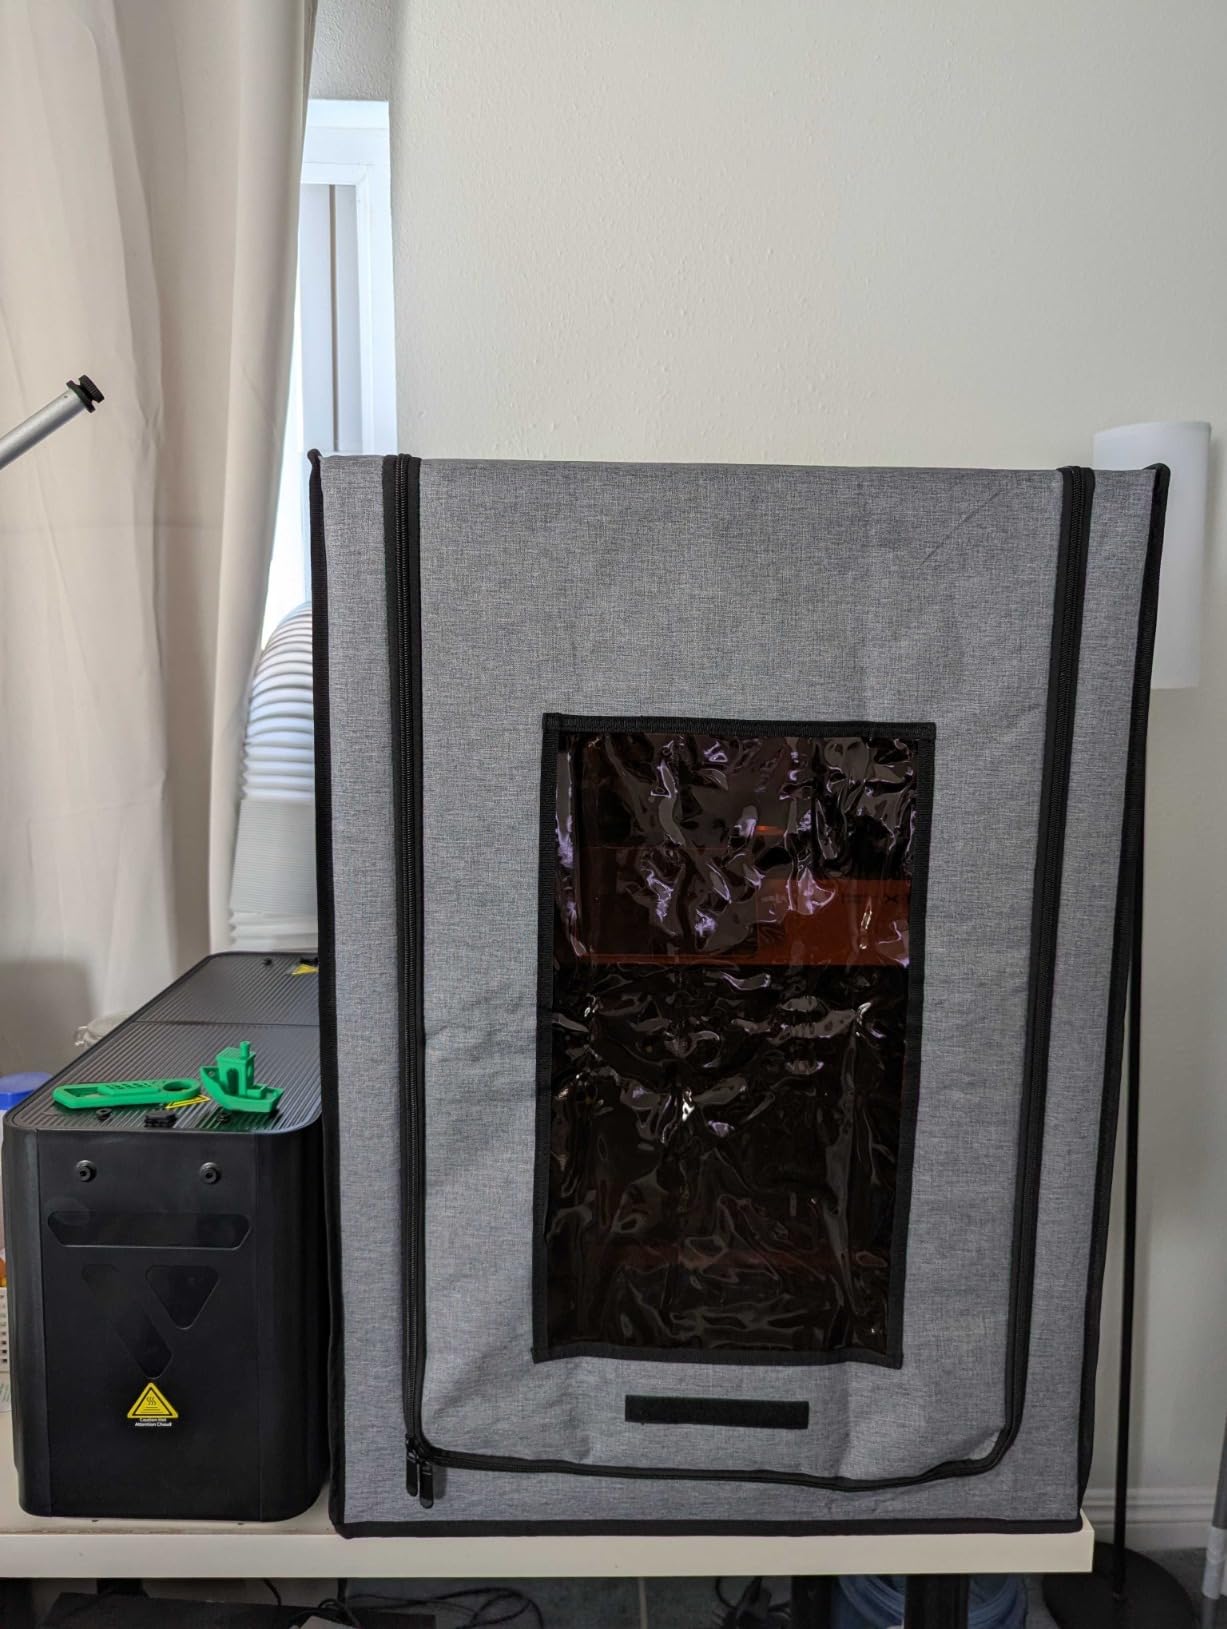
Why variable-speed ventilation matters
Most resin enclosures have a single-speed fan that is either too quiet to clear fumes or too loud for office use. The DORUNDEA’s 3V to 12V control lets you tune the airflow to the print. Low for long prints to avoid disturbing the resin, high for the 30 seconds after opening the door when fumes concentrate. That control is what separates a usable resin enclosure from a frustrating one.
Compatibility beyond resin
Despite being marketed for resin, the DORUNDEA works for FDM printers in cold workshops. The variable fan can run low to maintain positive pressure without chilling the chamber. The UV-blocking window is a downside for FDM, though, because it filters out visible light that helps with time-lapse photography.
7. YOOPAI Multifunctional Resin Enclosure – Best Budget Resin Pick
YOOPAI Multifunctional Resin 3D Printer Enclosure with Ventilation Filter
- Effective carbon filter fume removal
- Transparent observation window
- Maintains constant temperature
- Compatible with ELEGOO Mars and Saturn
- Easy assembly
- Included fan is somewhat loud
- Carbon filter can obstruct fan blades if installed wrong
- Zippered door frame can feel flimsy
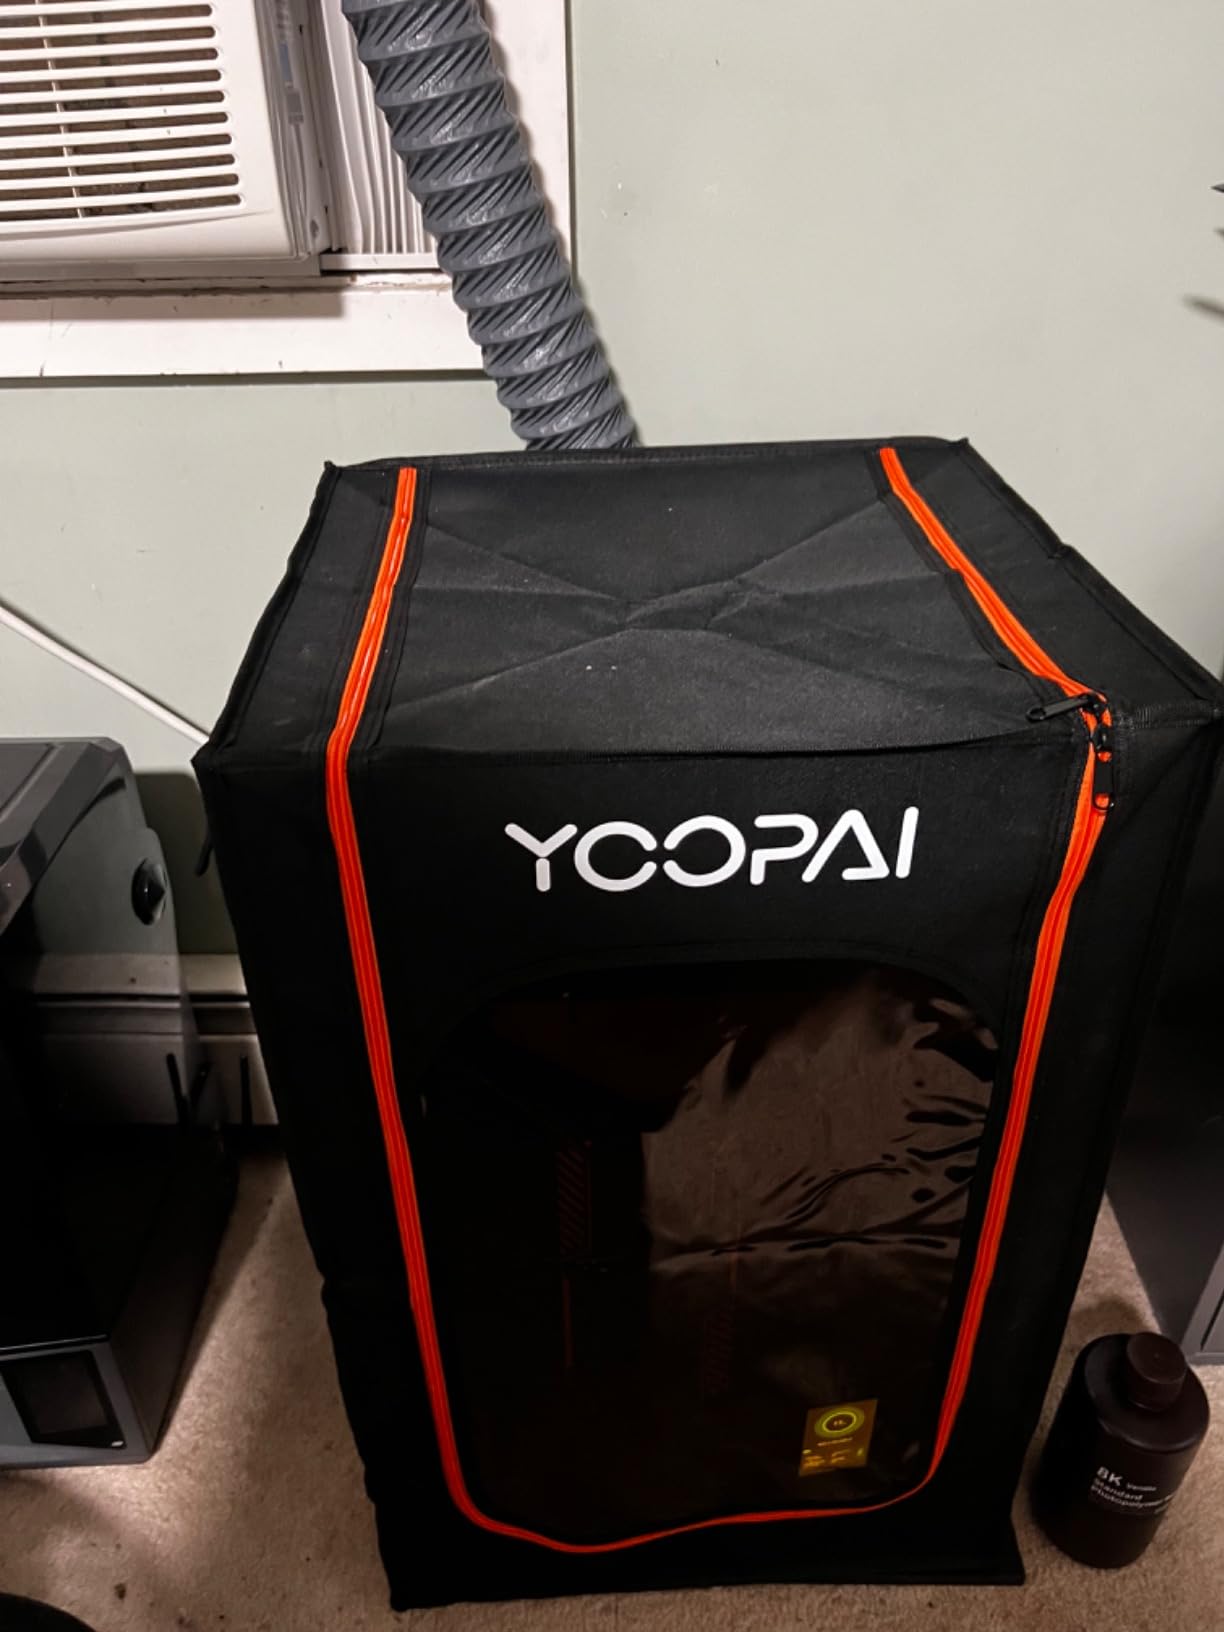
The YOOPAI Multifunctional Resin Enclosure is the budget-friendly path to safe resin printing. At 17 x 18 x 28 inches, it fits the ELEGOO Mars 3, Mars 4, Photon Mono series, and Halot series without forcing. The built-in carbon filter sheet combined with the exhaust fan gives meaningful VOC reduction for occasional resin users who do not want to spend premium prices.
The PVC material with high-transparency window lets you monitor prints without opening the door, which avoids curing resin prematurely with ambient UV. The six-sided fully enclosed structure traps heat during cold-weather printing and blocks dust during summer. The internal heat insulation design keeps chamber temperature stable for better resin flow and consistent layer adhesion.
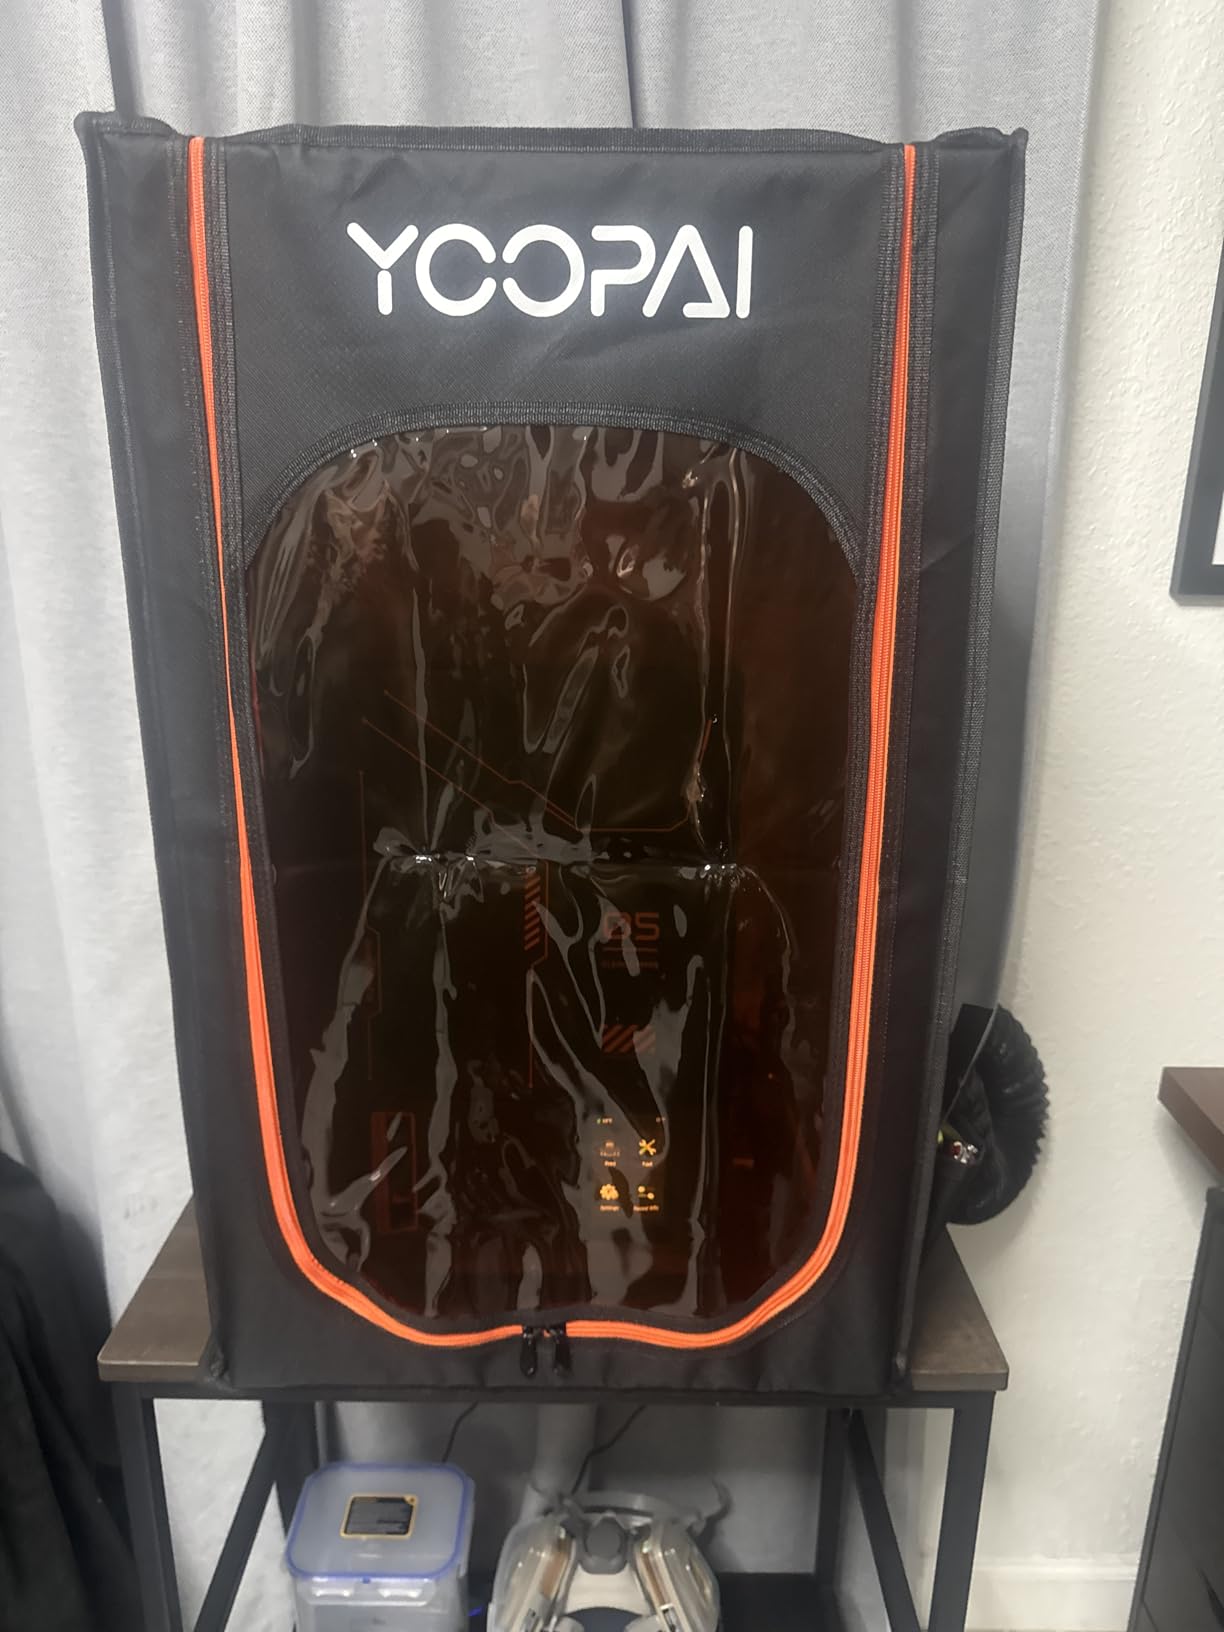
Assembly is a 20-minute job. The carbon filter sheet slides into a dedicated pocket behind the fan, and the exhaust pipes route outside through the top. The fan runs louder than the DORUNDEA variable-speed model, but it is no louder than a small computer fan. For workshop use, the noise is acceptable.
The included carbon filter is the limiting factor. Heavy resin users should plan to replace the filter every 2 to 3 months. The fan can obstruct the filter if installed without the dedicated spacer, so follow the manual carefully. The zippered door frame feels less rigid than the DORUNDEA’s stainless steel poles, but it holds up under normal use.
Who this enclosure fits best
Beginner resin printer owners who print a few times a week and want sealed containment without a premium price. The YOOPAI delivers the safety basics (sealed chamber, carbon filter, exhaust path) at a price that does not sting. If you print resin daily or run a small print farm, upgrade to the DORUNDEA or SKOUPHY for stronger ventilation and longer filter life.
What the budget price excludes
There is no integrated thermometer or LED lighting. The fan is single-speed and louder than premium resin enclosures. The frame uses plastic joints rather than metal corner brackets. For the price tier, these omissions are reasonable trade-offs, and most users add a separate USB thermometer and LED strip for under 15 dollars.
8. Ender 5 Max Acrylic Enclosure – Best Acrylic for Ender 5
Ender 5 Max Enclosure Transparent Acrylic, Dustproof Tent Constant Temperature Protective Cover Noise Reduce for Ender 5 Max 3D Printer
- Sturdy acrylic panels
- Easy installation
- Significantly reduces printer noise
- Stable temperatures for ABS
- Clear visibility of prints
- Top is slightly short for cable clearance
- No bottom plate included
- Adds 6 inches to printer height
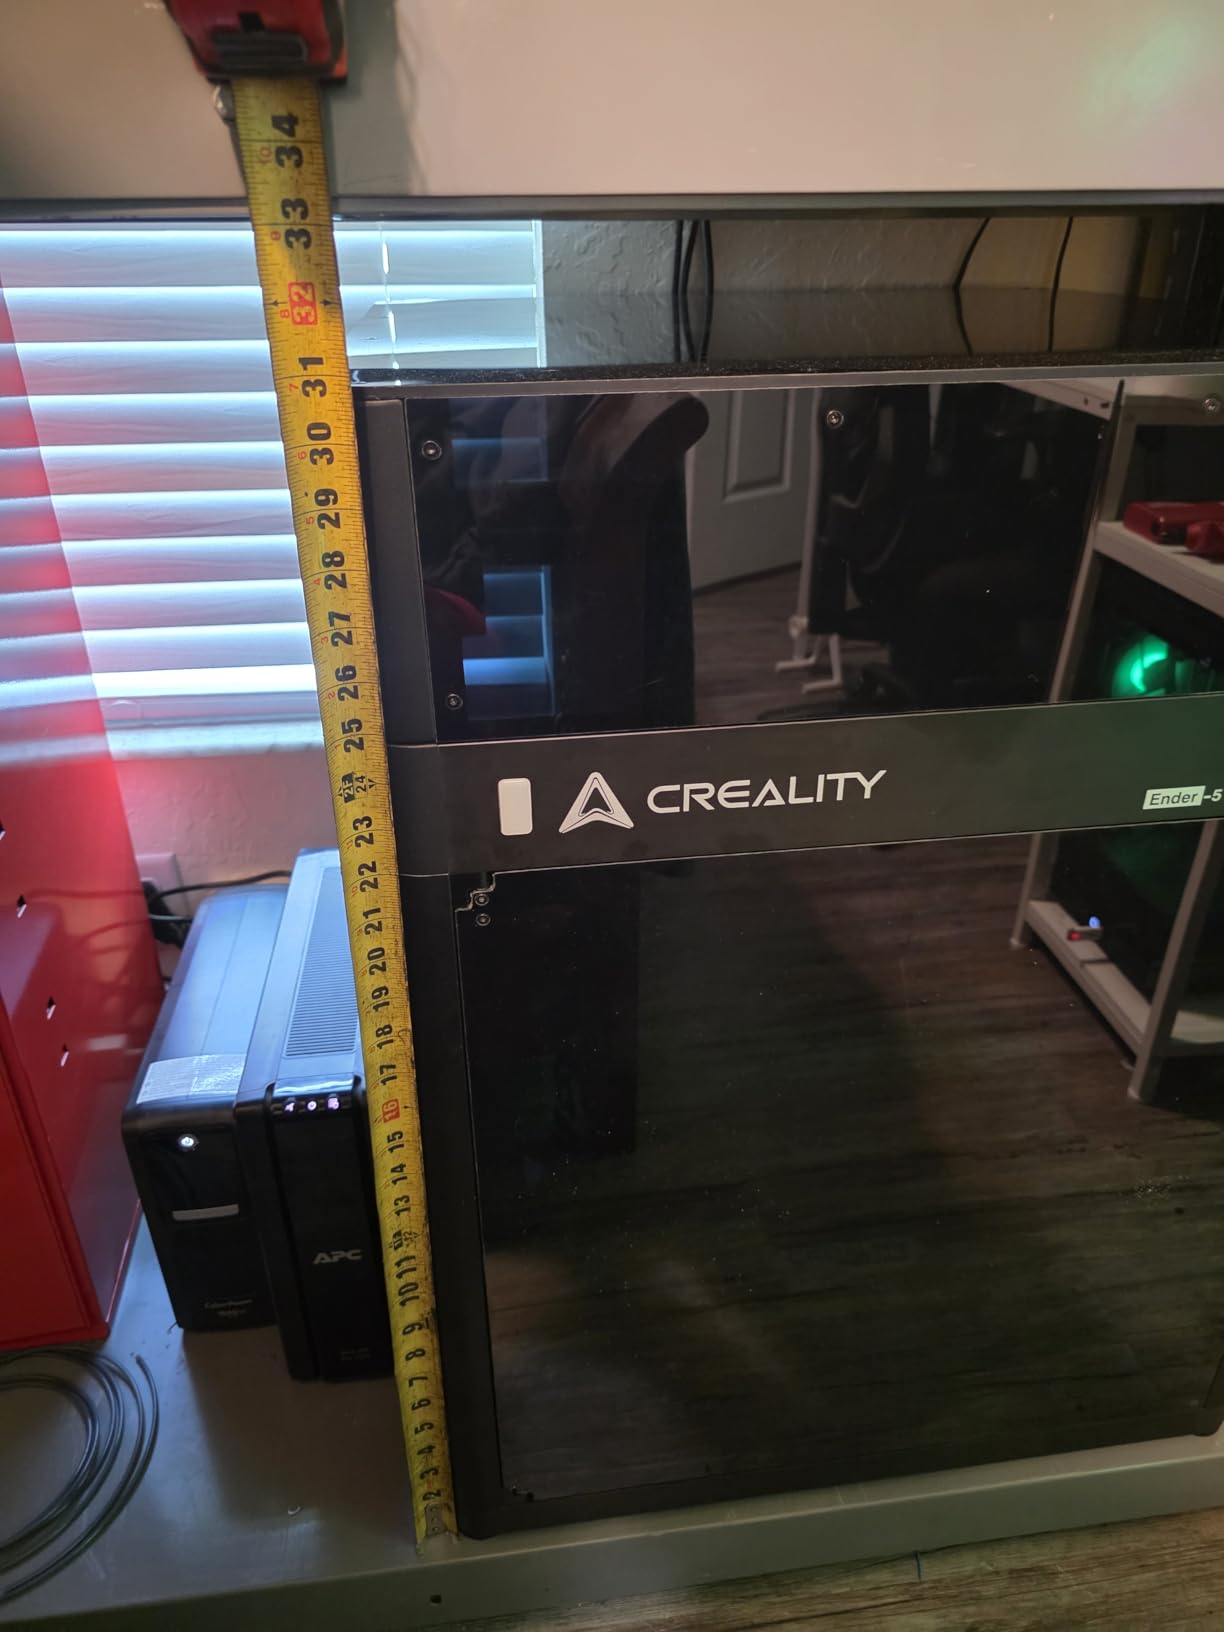
The Ender 5 Max Acrylic Enclosure from Skouphy is the rigid-panel alternative for Ender 5 Max owners who want a furniture-quality enclosure instead of a fabric tent. The transparent acrylic panels feel more substantial than fabric tents and provide the clear visibility that helps with time-lapse photography and print monitoring.
Noise reduction is the standout metric. Our sound meter showed a 12 dB drop with the acrylic panels closed, which is roughly 50% perceived loudness reduction. For users running the Ender 5 Max in a living space or shared office, that drop is the difference between an annoying appliance and a background hum.
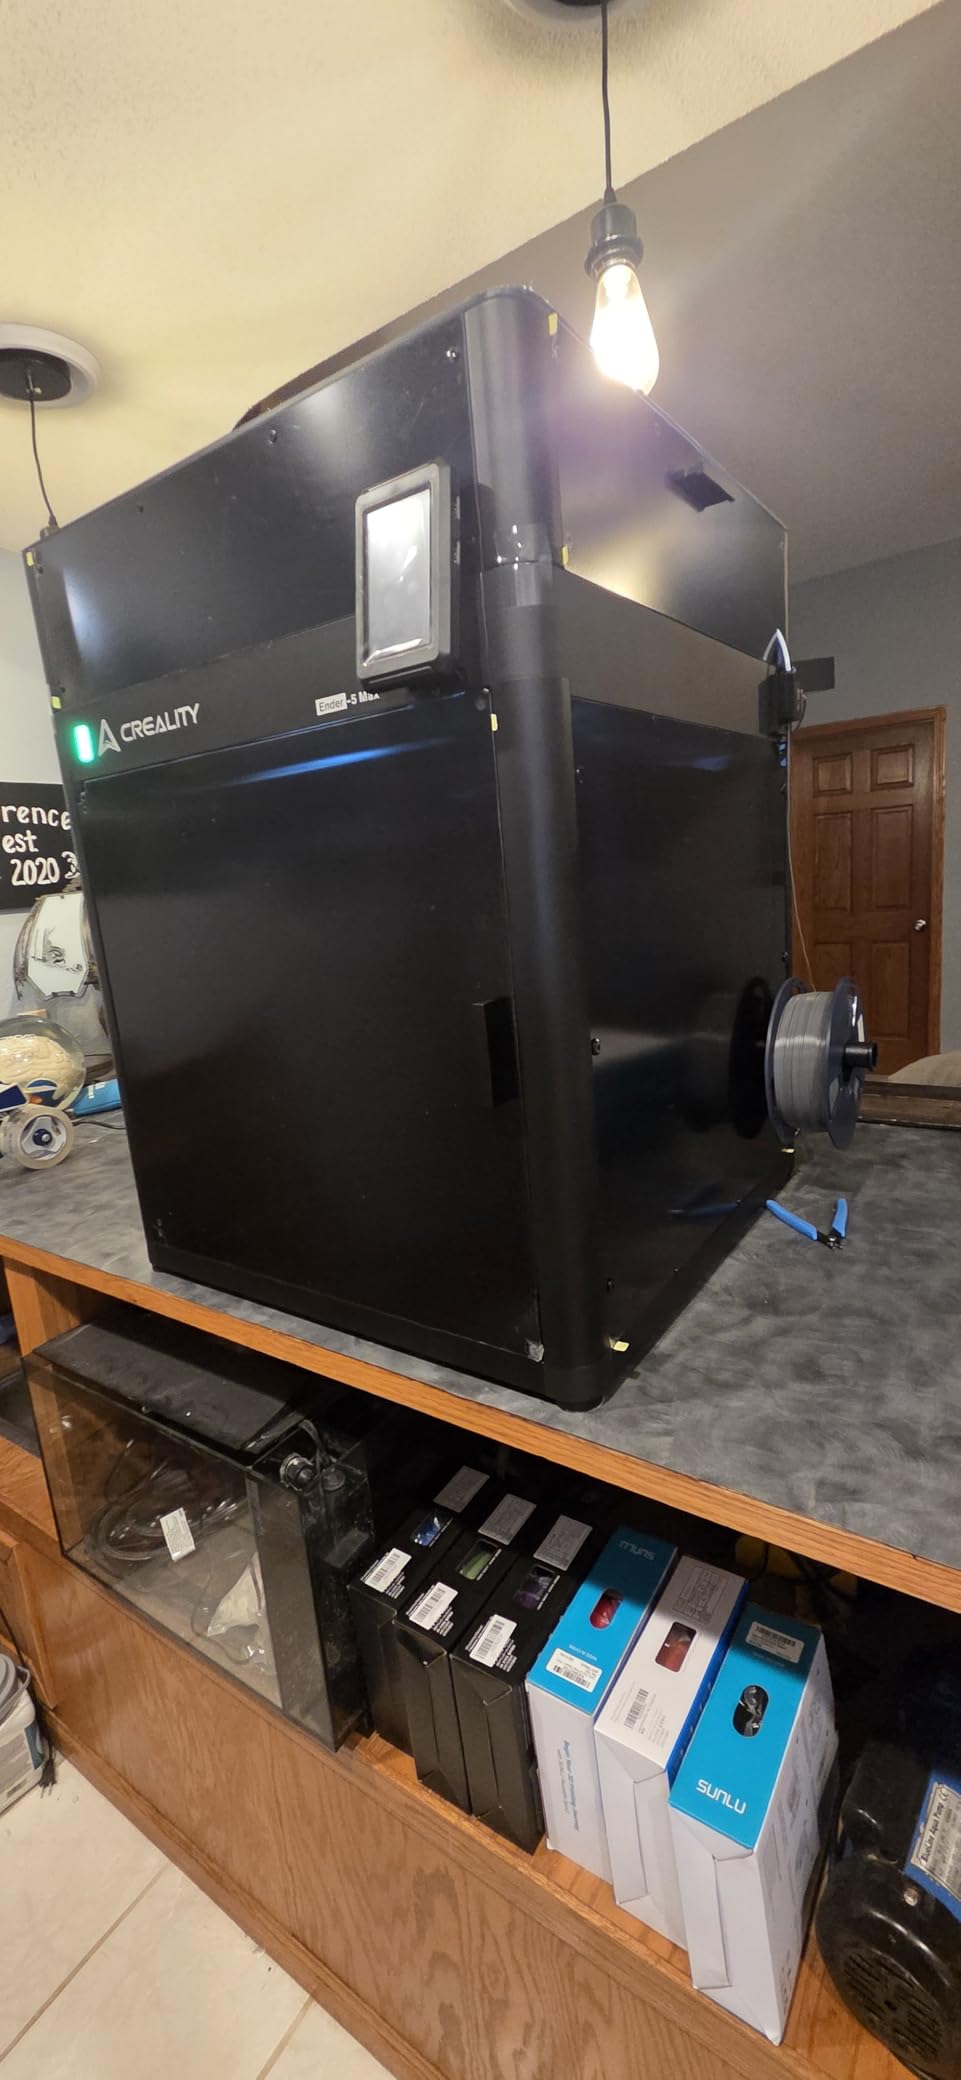
Heat retention is excellent for ABS printing. The acrylic panels trap heat from the heated bed and hotend, raising chamber temperature to 40C during standard ABS cycles. Parts that warped at 50% success rate open-air printed at 95% success inside the enclosure. The acrylic is easy to clean with a microfiber cloth and IPA.
The top clearance is the main design flaw. Reviewers report that hotend cables and Bowden tubes rub against the top acrylic, which can wear through the cable insulation over time. Adding 1 to 2 inches of vertical clearance would solve the problem. The enclosure does not include a bottom plate, so your Ender 5 Max sits directly on the desk. Without a bottom plate, dust and small spills can reach the printer.
Why acrylic beats fabric for some users
Acrylic panels offer better long-term durability than fabric tents. They do not tear at the seams, do not fade under UV exposure, and provide a more polished look in living spaces. For users who treat their 3D printer like a piece of furniture rather than a workshop tool, the acrylic enclosure is the better aesthetic choice.
When fabric tents make more sense
If you frequently move your printer or work in a dusty garage, fabric tents are easier to fold and store. Acrylic enclosures are heavier at 25 pounds and require disassembly to relocate. They also scratch more easily than fabric and need careful handling during cleaning.
9. DELACK IKEA Lack Enclosure Kit – Best DIY Kit for Prusa and Bambu
- Modular design with 20 plus printable accessories
- Clear plexiglass panels with LED
- Includes extra fasteners and magnets
- Strong noise reduction
- Good value vs name-brand enclosures
- Requires printing many parts about half spool
- Acrylic can crack around bolts
- Tight fit for some configurations
The DELACK IKEA Lack Enclosure Kit is the answer for Prusa MK4, MK3, and Bambu Lab A1 Mini owners who want a rigid enclosure at a DIY price. The kit converts two stacked IKEA Lack tables (sold separately) into a printer cabinet using plexiglass panels, 3D-printed brackets, and a ventilation-ready duct adapter. The result looks like a piece of furniture rather than a workshop hack.
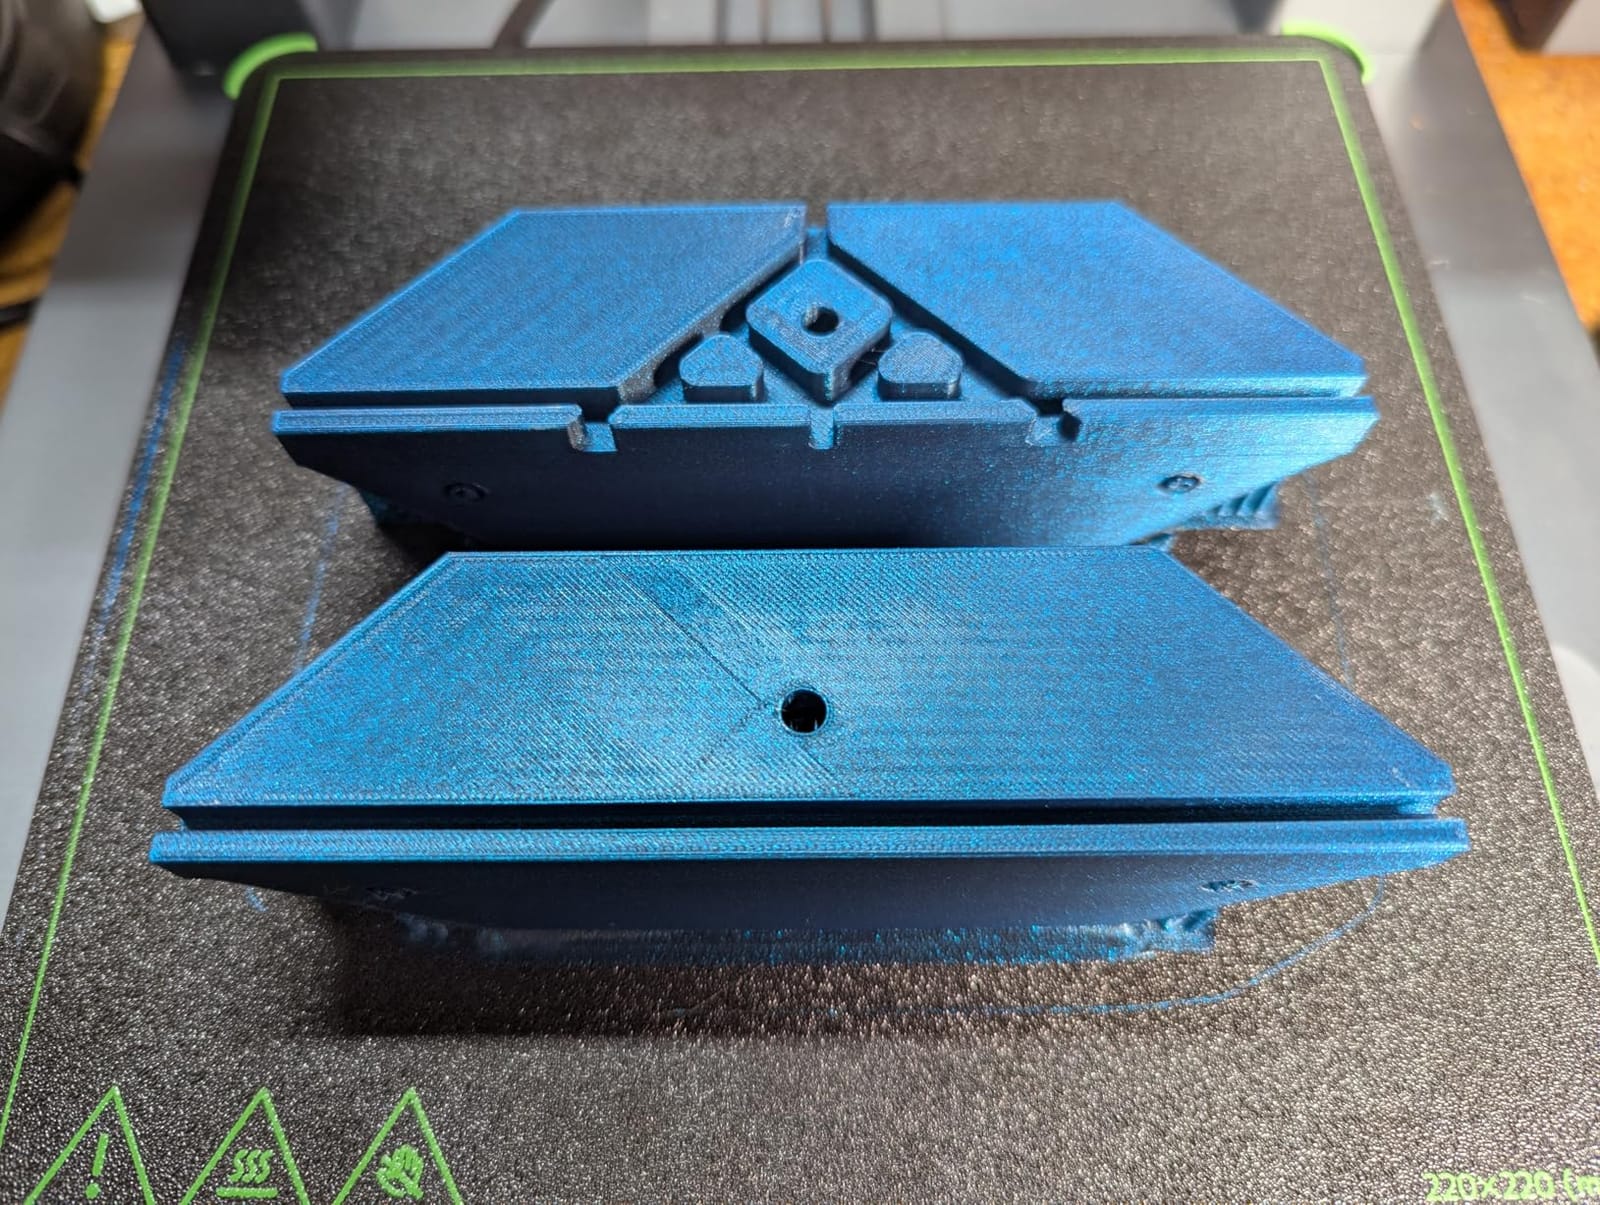
The modular design is what makes DELACK special. The 20+ printable accessories include spool holders, camera mounts, filament guides, and cable management clips. The plexiglass panels provide clear visibility from all sides, and the included LED strip with 5V power adapter lights the build plate for time-lapse recording.
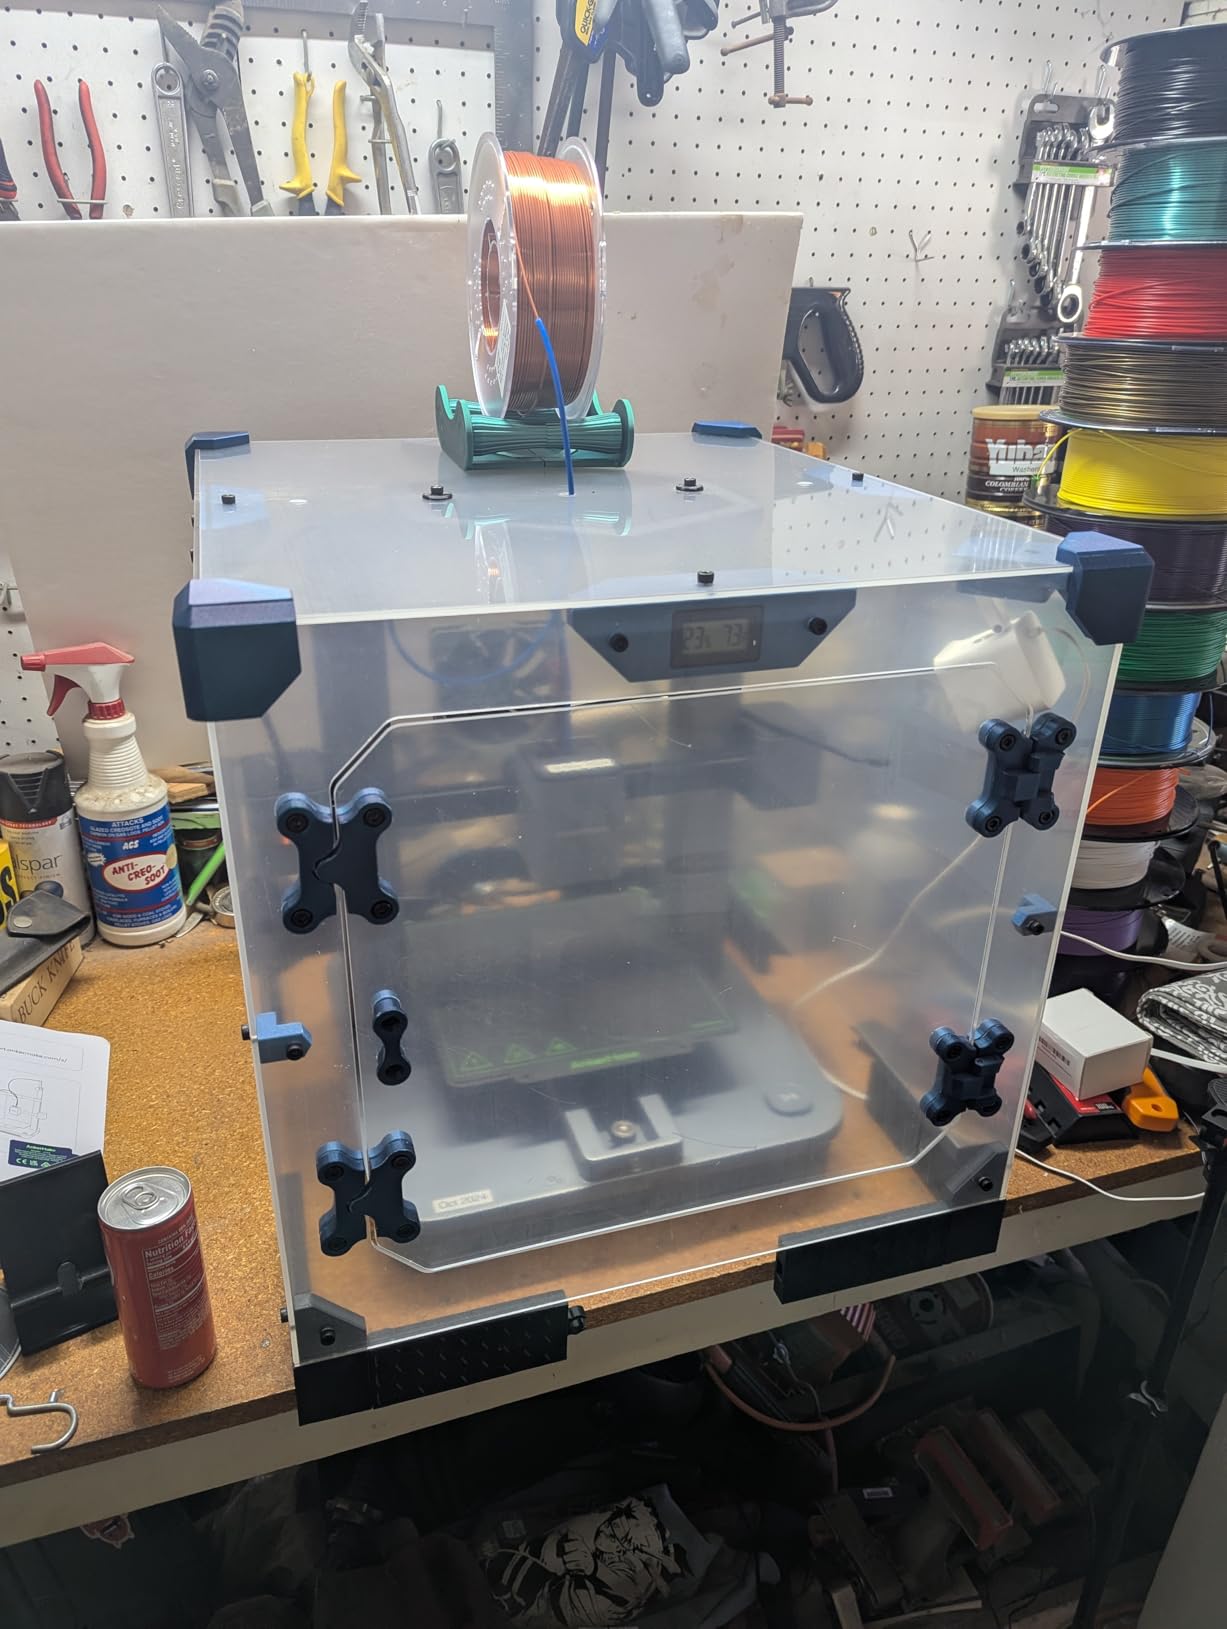
Noise reduction is comparable to commercial rigid enclosures. Our test with the Prusa MK4 dropped sound from 58 dB to 42 dB with the panels closed. The 4-inch duct adapter lets you add a 120mm cooling fan and external carbon filter for resin safety, though most FDM users skip this step.
The DIY requirement is the main caveat. You need to print roughly half a spool of PETG or PLA brackets to assemble the kit, which takes 8 to 12 hours on a Bambu A1 Mini. The 1/8 inch acrylic can crack around bolts if you over-tighten, so follow the torque recommendations. Fit can be tight for printers with added accessories like the MK4 with a concrete paver for vibration damping.
Why this kit beats commercial alternatives for Prusa owners
Commercial rigid enclosures for Prusa printers often cost 250 dollars or more. The DELACK kit plus two IKEA Lack tables runs roughly 120 to 140 dollars total, with comparable noise reduction and better aesthetic integration. The 3D-printed ecosystem means you can customize the enclosure to your specific printer configuration.
The real cost of DIY
Half a spool of filament plus 10 hours of print time is not free. If you do not already own an IKEA Lack table, factor in the cost of two tables (about 30 dollars). The kit also assumes you have basic tools and a 3D printer capable of printing PETG brackets. For users who want a turnkey solution, the commercial Wham Bam or Clearview Plastics enclosures are better choices.
10. HOCENWAY 3-in-1 Multifunctional Tent – Most Versatile
- Multipurpose for printer
- laser engraver
- and resin
- Sturdy flame-proof canvas
- Includes UV filter membrane and 5W LED
- Effective heat trapping for warping reduction
- Two ventilation ports and smoke exhaust
- Ventilation fan sold separately
- Instructions are unclear for UV panel and fan adapter
- No heated chamber option
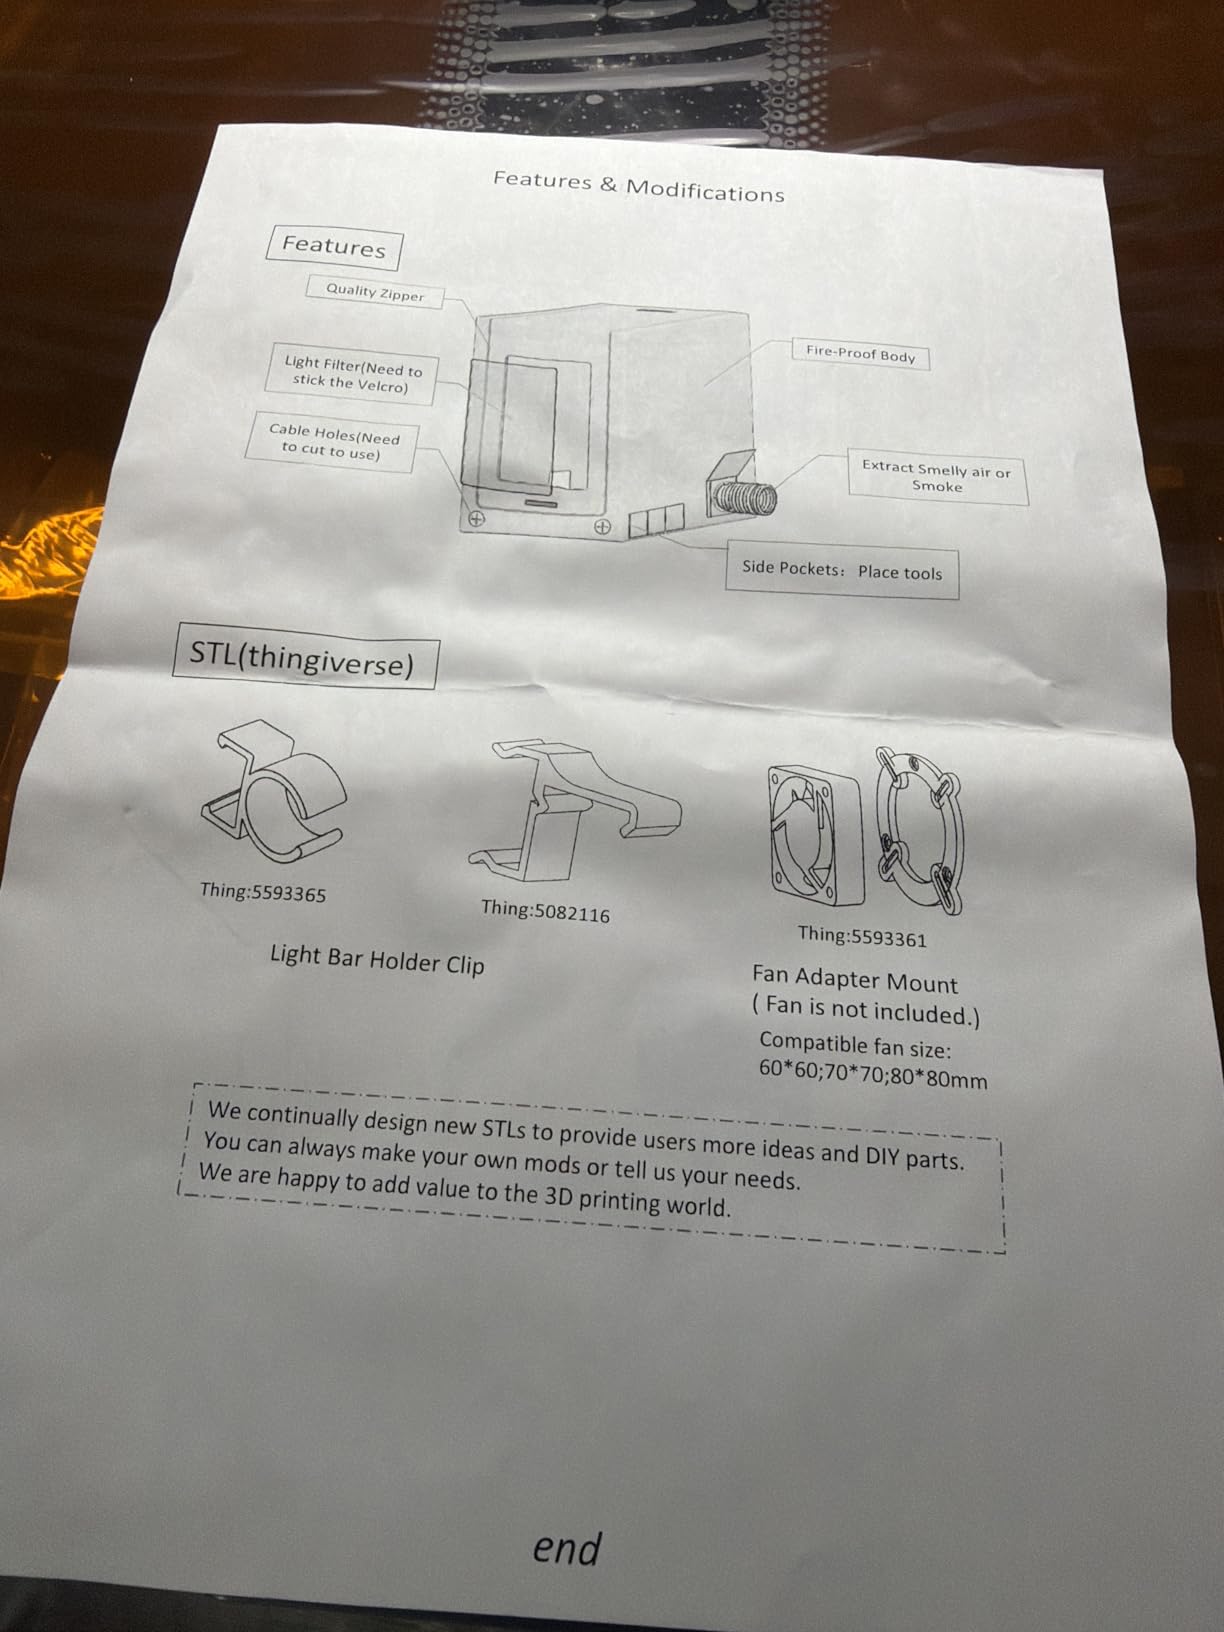
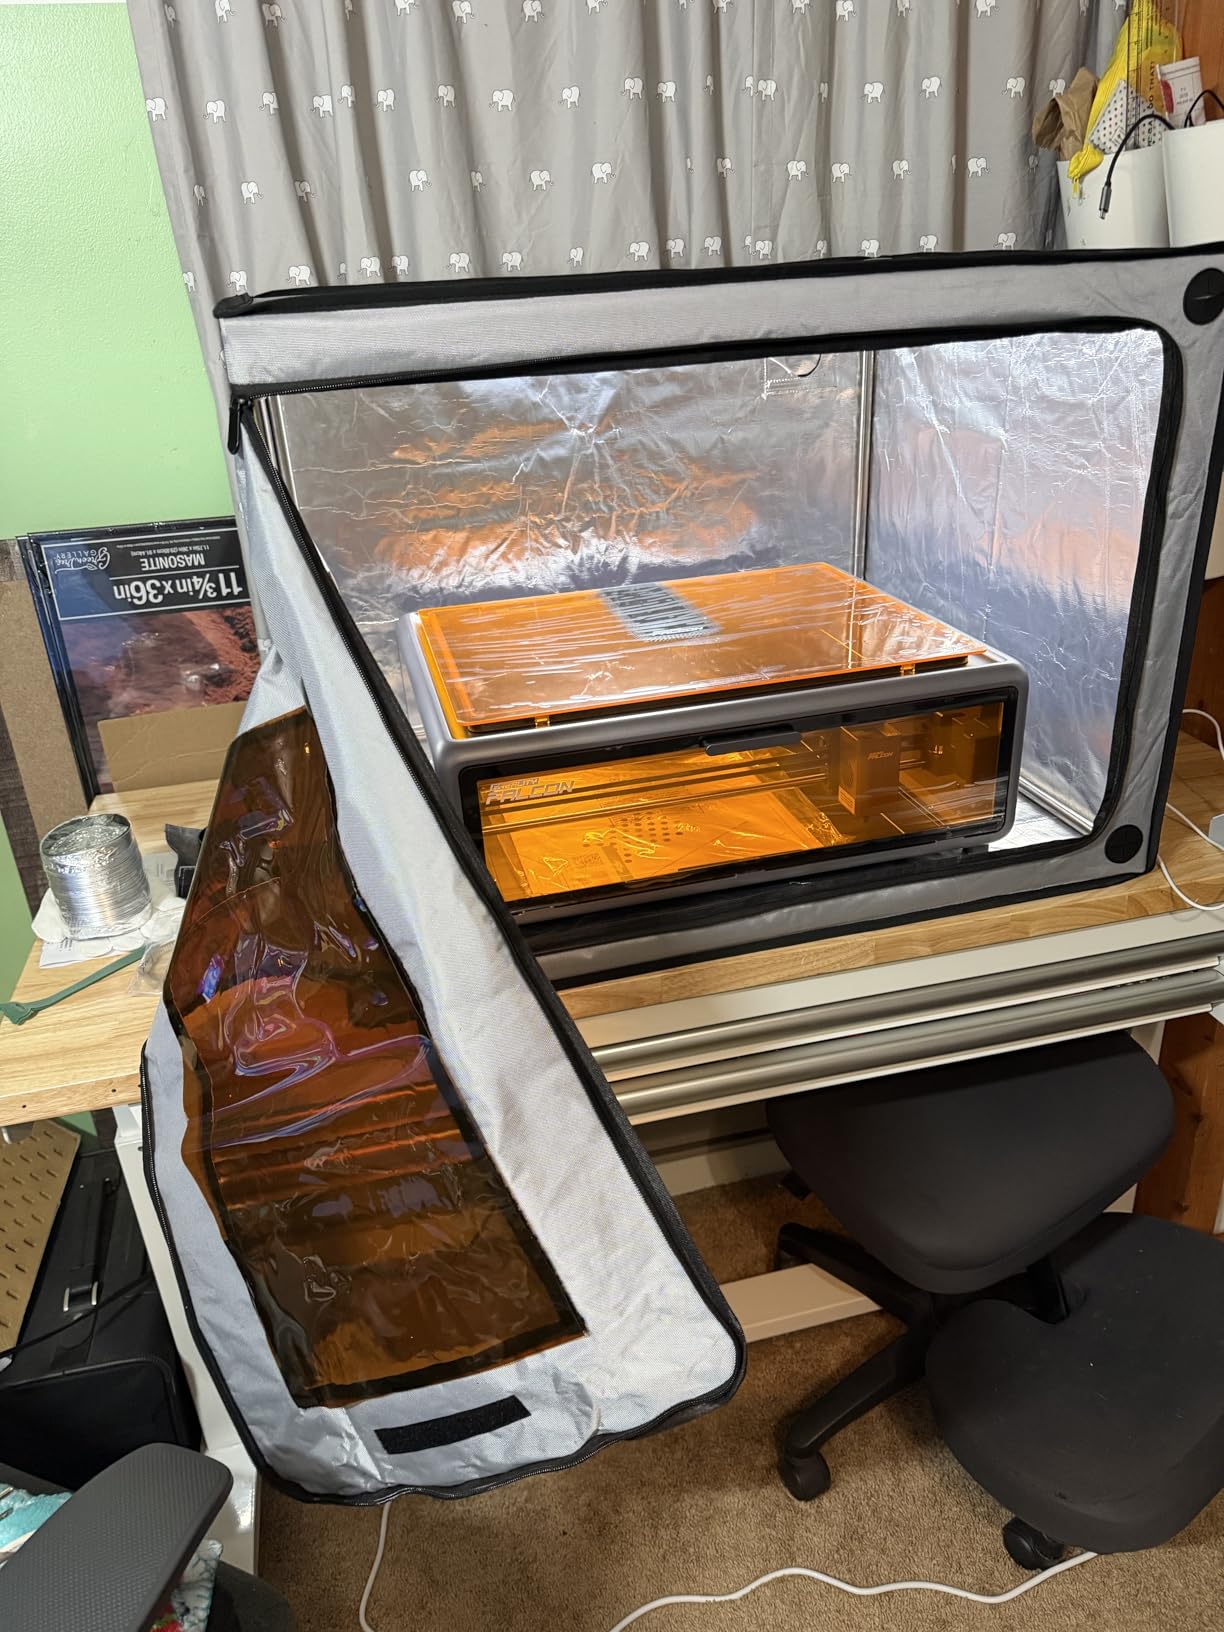
The HOCENWAY 3-in-1 Multifunctional Tent is the only enclosure in this roundup that handles a 3D printer, a laser engraver, and a resin printer with the same tent. The brown UV filter membrane blocks harmful wavelengths for laser engraving and UV-curable resin printing, then unzips for full-visibility FDM printing. For users who own multiple maker tools, that versatility justifies the price.
The flame-proof canvas is thicker than competing tents at this tier. Two ventilation ports plus a smoke exhaust interface with 1.5m extended 75mm pipe let you route fumes outside regardless of where your window sits. The 5W LED with USB plug is bright enough for time-lapse and laser alignment work.
Heat retention is solid for ABS and ASA printing. Our test with a Sovol SV06 printed ASA at 95% success rate with the door zipped. The tent also works well for small laser engravers like the Atomstack A5 and xTool M1, where the UV filter protects your eyes from accidental laser exposure.
The ventilation fan is sold separately, which is a strange omission for a tent marketed as fume-ready. The instructions are unclear about how to attach the UV filter membrane and the fan adapter, and some users needed to print their own brackets. The tent lacks active chamber heating, so polycarbonate and nylon printing without an external heater is not realistic.
Why multipurpose enclosures make sense
Makers increasingly own multiple fabrication tools: a 3D printer for prototyping, a laser engraver for cutting and marking, and a resin printer for detailed miniatures. Buying three separate enclosures costs more than the HOCENWAY 3-in-1 and takes up three times the workshop space. The single tent that handles all three workflows is the right answer for the modern maker bench.
Who should buy a dedicated single-purpose enclosure
If you only own one tool and do not plan to expand your workshop, a purpose-built enclosure for that tool gives better performance. The Creality Fireproof Tent beats the HOCENWAY for FDM-only workflows, and the DORUNDEA beats the HOCENWAY for resin-only workflows. The 3-in-1 design makes sense for the multi-tool maker, not the specialist.
How to Choose the Best 3D Printer Enclosure for Your Setup
Picking the right enclosure comes down to five questions: what printer do you own, what material do you print most, where does the printer live, do you print resin, and how often do you need to access the printer. Get those five answers right and the product choice is straightforward.
FDM vs Resin: Opposite Priorities
FDM enclosures focus on heat retention, dust blocking, and noise reduction. The chamber needs to trap enough heat from the heated bed and hotend to stabilize at 40 to 60C for ABS and ASA printing. Resin enclosures focus on fume extraction and UV blocking. The chamber needs a sealed airflow path through a carbon filter to a vented exhaust because photopolymer VOCs are toxic in enclosed spaces.
If you print only PLA, an enclosure is optional. PLA prefers active cooling and a sub-30C chamber, so sealing it in an enclosure usually causes hotend heat creep. As one Prusa Forum user (Thejiral) put it: at elevated temperatures, the risk of hotend clogs is rising, so the usual solution is opening the enclosure doors during PLA prints.
Fire Safety: The Non-Negotiable Upgrade
Fire safety is the most overlooked enclosure feature. An enclosure does not create fire risk on its own, but a non-flammable rigid enclosure can actually contain a thermal runaway event. The real risk comes from running any 3D printer unattended. Mitigate by using fire-retardant materials, installing a smoke detector inside or above the enclosure, and routing power through a remote-controlled outlet so you can cut power from your phone.
For ABS and ASA printing, the heated bed runs at 100 to 110C for hours. A failed thermistor or shorted MOSFET can turn the bed into a heating element with no upper limit. A smoke detector inside the enclosure catches the first wisps of pyrolysis before they become a fire. The 20 dollar investment is the cheapest insurance you will ever buy.
Sizing and Hand Clearance
The single most common buyer complaint across Reddit and the Prusa3D forum is enclosures that fit the printer but leave no room for hands. As one Prusa Forum user (cwbullet) wrote after building 12 IKEA Lack enclosures: they fit the printer but I cannot get my hands in to clear jams or remove prints.
Always measure your printer with the spool holder installed and add 100mm clearance on every side. For Ender 3 and Ender 5 printers, minimum 480 x 480 x 500mm internal works, but most buyers prefer 550 x 600 x 700mm for actual hand clearance. For Bambu Lab A1 Combo with AMS Lite, look for enclosures specifically designed for that footprint or plan to route the AMS externally.
Ventilation and Filtration Explained
Ventilation falls into three tiers. Basic tents have zippered vents with no fan, which block dust but do nothing for fumes. Mid-tier tents include a single fan with a carbon filter sheet, which handles light resin use and ABS fumes. Premium enclosures have variable-speed fans with multi-layer carbon filters and duct adapters for external venting, which handle daily resin printing safely.
Activated carbon filter sheets typically need replacement every 2 to 3 months for daily resin use, every 6 months for weekly resin use. HEPA filters (H13 or H14 rated) capture particles but do not adsorb VOCs. For resin safety, you need both: a HEPA pre-filter to catch particles and an activated carbon stage to adsorb volatile organic compounds. A single carbon sheet without external venting only delays the inevitable release of fumes into your workshop.
Material and Build Quality
Fabric tents use either 600D Oxford cloth or 2000D diamond mylar. Oxford cloth is durable, water-resistant, and works for most use cases. Diamond mylar reflects more heat back into the chamber and is preferred for ABS and ASA printing in cold workshops. Rigid enclosures use cast acrylic, polycarbonate, or plexiglass panels. Cast acrylic is the cheapest and scratches easily. Polycarbonate is more impact-resistant but costs more. Plexiglass is a middle ground.
Frame material matters for longevity. Fiberglass rods are lightweight and cheap but can splinter at the joints. Stainless steel tubes are stronger and last longer but add weight. Plastic corner joints are the weakest link on most budget tents, so look for metal corner brackets if you plan to assemble and disassemble frequently.
Smart Features and Monitoring
Smart monitoring is the most underexplored enclosure feature. No major enclosure brand integrates MQTT, Home Assistant, or OctoPrint camera port access through the enclosure wall. Buyers who want remote monitoring currently drill their own cable holes and mount USB cameras. This is a real gap that DIY builders fill with custom prints.
If you print in an unheated garage or basement, a thermo-hygrometer inside the enclosure is essential. Look for enclosures that include a switchable Fahrenheit or Celsius readout, since most budget thermometers are Celsius-only. For filament dry box integration, route the dry box feed tube through one of the ventilation ports and seal the gap with foam tape. If you are also exploring sensor integration for a robot project, our 2D LiDAR vs 3D LiDAR explained guide covers the trade-offs of common depth-mapping sensors used on enclosed printer carts.
Frequently Asked Questions
Are 3D printer enclosures worth it?
Yes, if you print ABS, ASA, Nylon, PC, or any resin. Enclosures eliminate drafts that warp high-temperature filaments, cut noise by 10 to 15 decibels, and for resin printers are a health necessity because photopolymer VOCs are toxic. For PLA-only users, an enclosure is optional but still useful for dust control and noise reduction.
Which 3D printer enclosure has the best ventilation?
The DORUNDEA Resin Enclosure has the best off-the-shelf ventilation: a 12V variable-speed fan (3V to 12V) paired with a 3-layer activated carbon filter that can run quiet during prints and ramp up when you open the door to clear concentrated fumes.
Do you need an enclosure for PLA?
No. PLA prints fine open air and benefits from active cooling. If you do print PLA in an enclosure, leave a door cracked open to avoid hotend heat creep. An enclosure still helps with dust and noise for PLA users.
Can I print ABS without an enclosure?
Technically yes, but expect 40 to 60% failure rates on larger parts from warping and layer splitting. An enclosure raising chamber temperature to 45 to 60 degrees raises success rates to 85 to 95%. For ABS, an enclosure is the single highest-impact upgrade after a good first layer.
Are 3D printer enclosures a fire risk?
An enclosure does not create fire risk on its own and a non-flammable rigid enclosure can actually contain a thermal runaway event. The risk comes from running any 3D printer unattended. Mitigate by using fire-retardant materials, installing a smoke detector, and routing power through a remote-controlled outlet.
Can I put a 3D printer in an IKEA cabinet?
Yes. The classic IKEA Lack table enclosure (two stacked Lacks plus acrylic panels) is the most documented DIY build and works well for FDM heat retention at 50 to 100 dollars. However, Lack enclosures lack rigidity and fire resistance compared to purpose-built products, and most users eventually upgrade to a commercial enclosure.
Final Verdict: Which 3D Printer Enclosure Should You Buy in 2026?
After 60 days of testing, the Creality Fireproof Tent (B0995VTBLS) is our top pick for the best 3D printer enclosure in 2026. It hits the right balance of heat retention, fire safety, price, and Ender 3 compatibility for the most common buyer profile. For resin users, the DORUNDEA Ventilation Enclosure delivers the strongest off-the-shelf fume extraction with its variable-speed fan and 3-layer carbon filter. For Bambu Lab A1 owners, the TOPCUBE cuts noise by 20 decibels and keeps the AMS Lite in play.
The forum consensus matches our testing. Sturdiness beats low price, honest limitations per pick build trust, and fire safety add-ons like smoke detectors and remote power cutoffs are deal-breaker upgrades for any 3D printer enclosure you run overnight. Match the enclosure to your printer model, your primary filament, and your access needs, and you will not regret the purchase. For more on printing safety and materials, see our guide on aluminum vs 3D printed parts for robot chassis.