
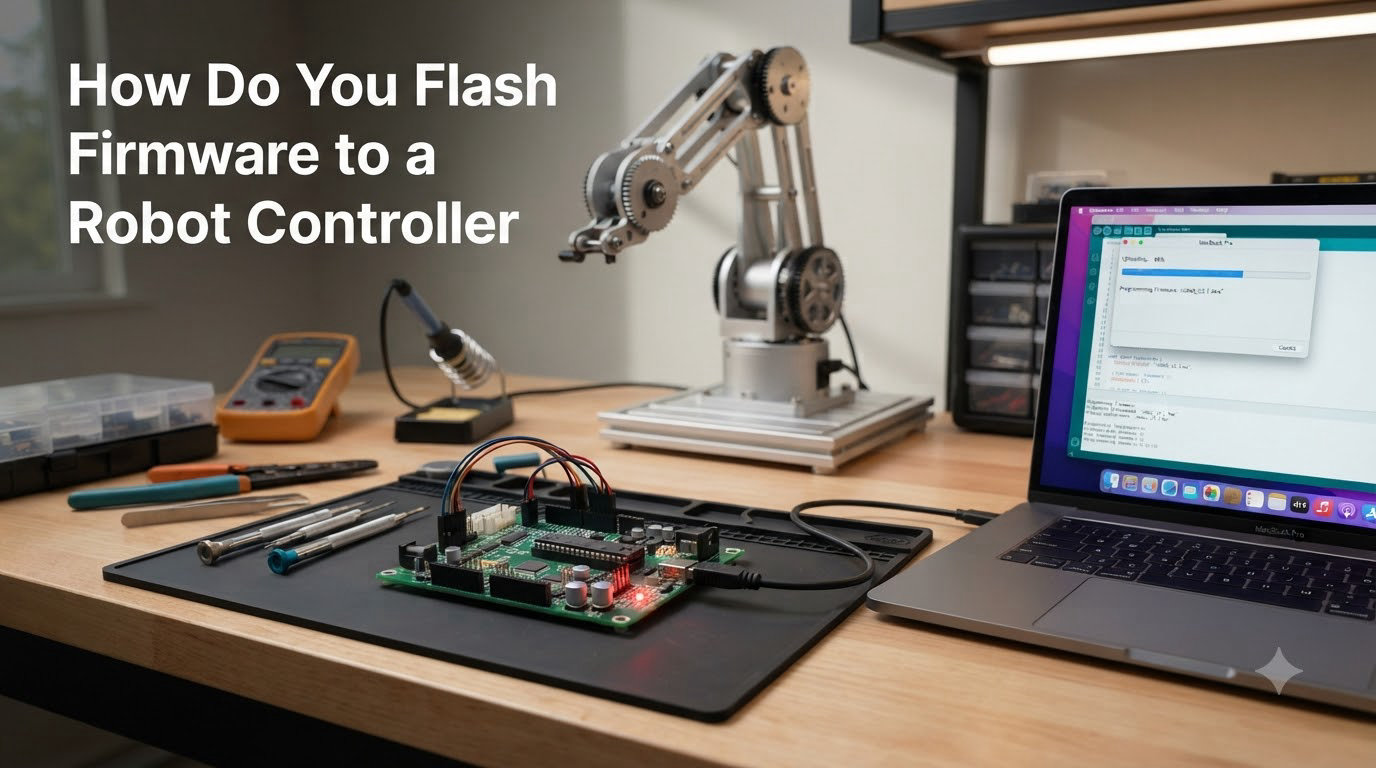
Flashing firmware to a robot controller sounds intimidating the first time, but it follows a predictable pattern once you understand the moving parts. I have flashed industrial arms, FTC control hubs, and a handful of custom robotic joints, and the workflow almost always boils down to: prep, connect, write, verify. In this guide I will walk you through how to flash robot controller firmware from start to finish, with the safety checks and recovery steps I wish someone had handed me earlier.
By the end you will know what firmware actually is, how to pick the right file, which connection method suits your hardware, and what to do when a flash goes sideways. I will also cover the safety precautions most tutorials skip and the recovery moves that can save a bricked controller. Whether you are running a Universal Robots cell, an FTC Control Hub, or a hobby BLDC controller, the principles transfer directly. For a deeper look at how firmware lives on a controller, see our Flash Memory vs RAM on a Microcontroller explainer.
Table of Contents
What Is Firmware and Why You Need to Flash It
Firmware is the low-level software permanently stored on a non-volatile memory chip inside your robot controller. Unlike your laptop operating system, firmware is tightly bound to the hardware it runs on. It tells the controller how to talk to motors, sensors, safety circuits, and the network. When you flash firmware, you overwrite that on-chip program with a newer version.
Manufacturers release new firmware for a few reasons. The first is bug fixes. A controller may have a glitch that causes a watchdog reset or an encoder misread that was caught only after thousands of hours in the field. The second is new features, such as a new motion-blending mode on a Universal Robots arm or a faster loop rate on a flight-style controller. The third is security patches, which matter once a controller touches a network. The fourth is compatibility, because a new vision module or gripper may need a newer USB stack to handshake cleanly.
Some teams hold off on firmware updates for fear of breaking a working system. That caution is reasonable, especially in production, but it has limits. If your controller has a known bug that the vendor already patched, you are paying a tax every shift. If you are running a competition robot under FTC rules, you may actually be required to stay on a specific firmware version, so flashing is not optional. Knowing when and how to flash is what separates a reliable robotics program from one held together with serial cables and prayer.
Pre-Update Checklist: What to Do Before You Flash
Every controller I have bricked shared one cause: I skipped the checklist. Before you start, work through these items.
1. Read the vendor release notes. Vendors publish a changelog with every firmware image. Read it. I look for breaking changes, deprecated APIs, and any required companion software versions. If the notes mention a newer driver or a newer configuration tool, install that first.
2. Back up your current configuration. Most controllers let you export the project, PID tuning values, I/O maps, and safety settings. Save that file to a known location. On industrial arms this is usually a URP or backup file. On FTC hubs it is a saved opmode and config. Treat the backup like insurance, because if the new firmware breaks your calibration, you want a quick path back.
3. Confirm power stability. A brownout mid-flash is the fastest way to turn a controller into a brick. Use a UPS if you have one, or at least make sure the controller is on a non-switched outlet. Disable any sleep timers on the host computer.
4. Use the right cable. For USB, a data-capable cable is mandatory. Many cables sold for charging only carry power. If the controller does not enumerate, swap the cable before you swap the firmware.
5. Close conflicting software. Other tools that grab the serial port or USB device will block the flash tool. Close any IDE, terminal, or device manager window that might be holding the port open.
6. Note the rollback path. Some controllers store a golden image in a recovery partition. Others do not. If yours does not, make sure the previous firmware file is still on hand so you can downgrade if needed.
How to Identify Your Robot Controller Model
The single most common reason flashing fails is the wrong file. Controller families share names across generations, and the firmware for one revision often will not run on another. Identifying the exact model is non-negotiable.
Start with the nameplate on the housing. Most controllers print a model number, a hardware revision, and sometimes a serial range. Write those down. Then open the vendor’s configuration tool and look at the About or Diagnostics tab. The tool will report the exact model string, the current firmware version, and the bootloader version. If those two readings disagree with the nameplate, trust the tool.
For REV Robotics users, the Control Hub and Expansion Hub each have their own firmware catalog. The model string begins with something like FH-0 or CH-0, and the wrong file silently flashes the wrong radio. For Universal Robots, the model is printed on the teach pendant’s About screen, and each e-Series generation uses a different image. For FANUC, the controller’s A-cabinet or B-cabinet designation matters because the firmware packages are not interchangeable.
Once you have the model, double-check the hardware revision. Vendors sometimes ship silent PCB revisions, and a release note will say things like “applies to Rev 3.2 and later.” If you cannot find your revision listed in the compatibility notes, stop and contact support. I have watched a team lose two days by flashing a newer image onto a board the vendor had not yet certified for it.
Downloading the Correct Firmware File
Always download firmware from the manufacturer’s official site, never from a third-party mirror. The official site verifies checksums and signs the package, and the vendor’s support team will not help you if you flashed a tampered image. Bookmark the download URL and check the SSL certificate, especially on older vendor portals that may still use HTTP for media files.
After downloading, verify the file. Vendors publish a SHA-256 or MD5 hash next to the download link. On Windows, run certutil -hashfile firmware.bin SHA256 from a command prompt. On macOS or Linux, use sha256sum. If the hash does not match, delete the file and redownload. A corrupt image is one of the leading causes of a failed flash, and a failed flash is what bricks controllers.
Pay attention to the file extension. Some vendors use .hex, others use .bin, .dfu, .upd, or a zipped package. The flashing tool will usually reject the wrong format, but some tools are permissive and will write garbage to the chip. If your tool asks which file type you are loading, match it against the vendor’s documentation.
For industrial controllers that take a USB stick, format the drive as FAT32. The FANUC 8.1 to 8.3 upgrade is a good example: the controller will not read an exFAT stick, and you will spend an afternoon wondering why nothing happens. Wipe the USB drive, copy only the firmware folder to the root, and eject it cleanly before pulling it out.
Connection Methods: USB, WiFi, and Ethernet
Robot controllers expose firmware updates through one of three channels. Picking the right one is mostly a function of hardware capability and convenience.
USB connection. The most universal option. You plug the controller into a host computer, the host sees a serial device or a DFU endpoint, and the flashing tool writes the image. USB is also the only reliable path for controllers stuck in a bad state, because most bootloaders expose themselves over USB even when the main application is corrupt. Industrial controllers like FANUC and Universal Robots support USB, as do most hobby flight-style boards and FTC hubs.
WiFi connection. Common on REV Control Hubs and some newer industrial controllers with a built-in access point. You connect your laptop to the controller’s WiFi, open a browser or vendor app, and push the firmware over the air. WiFi is convenient when the controller is mounted in a hard-to-reach spot, but it can be flaky in a metal-rich robot cell. It is also slower than USB for large images.
Ethernet connection. Used by larger industrial controllers and by anyone scripting fleet updates. Ethernet gives you the bandwidth and the stability to push firmware to dozens of controllers from a single workstation. It also lets you use TFTP or SCP for automated rollouts, which is how most plants handle firmware at scale.
Whichever channel you pick, the controller must be in a state that accepts the image. Most controllers enter flashing mode automatically when they detect a host on the USB port, or when you select the update option from a menu. Others require you to hold a button combination at boot to enter the bootloader. FANUC’s Controlled Start is the textbook example: hold FCTN and press START on the pendant to boot into the firmware loader. If the controller boots into its normal application instead of the loader, your flash will silently no-op.
How to Flash Firmware to a Robot Controller Step by Step
Below is the workflow I use for the most common case: a controller that flashes over USB or WiFi using a vendor tool. The exact menus change between vendors, but the sequence holds.
Step 1. Power the controller and connect it. Plug in the controller, give it 30 seconds to fully boot, then connect via USB or WiFi. On the host, confirm the device shows up. On Windows, open Device Manager and look under Ports (COM and LPT) or Universal Serial Bus. On macOS, run ls /dev/tty.usb* in a terminal. The vendor tool will refuse to proceed if it cannot see the device.
Step 2. Launch the vendor flashing tool. Open the official configuration tool. For REV users, that is the REV Hardware Client. For Universal Robots, the URCaps package and the UR Software Update wizard. For FANUC, the update menu is reached through the Controlled Start path. Avoid generic third-party tools unless the vendor explicitly supports them.
Step 3. Select the firmware file. Browse to the firmware image you downloaded and verified. The tool will usually display the version string. Confirm it matches the target model and the intended release.
Step 4. Enter flashing mode if required. Some controllers enter flashing mode automatically. Others need a button combination, a jumper, or a menu option. On REV Control Hubs, you connect the computer via WiFi to the hub and click the Manage tab, then scroll to Update REV Hub Firmware. On FANUC, you boot into Controlled Start with FCTN plus START. Read the vendor’s page for the exact sequence, because getting it wrong means flashing nothing.
Step 5. Start the update and wait. Click the update button. A confirmation prompt usually appears, and on REV’s tooling the prompt reads “Update Hub Firmware” in a blue box. Click it, then wait. Do not unplug, do not close the tool, do not reboot your laptop. Updates can take anywhere from 10 minutes on a small hub to several hours on a large industrial controller, and the progress bar may stall for long stretches. Patience is part of the procedure.
Step 6. Watch for errors. If the tool reports a checksum error, a timeout, or an “error 10” style code, stop. The error message usually points to the cause: a bad file, a wrong model, a dropped connection, or a power blip. Do not retry blindly. Address the error first, then re-attempt.
Step 7. Let the controller reboot itself. Once the flash completes, the controller will restart. On industrial arms, the teach pendant may stay on a black screen for a couple of minutes while the new image boots and reinitializes the safety board. Resist the urge to power-cycle unless the vendor’s documented timeout has passed.
Verifying a Successful Firmware Update
The update tool saying “complete” is not the same as the firmware being correct. I always run a verification pass before I trust the controller.
Open the vendor tool’s About or Diagnostics screen. Confirm the new firmware version matches what you intended. If you flashed the wrong file, this is where you find out. Then check the bootloader version, because some firmware images require a specific bootloader. A mismatch here is the most common cause of a controller that boots but refuses to run user code.
Next, exercise the controller’s basic functions. Run a simple test routine: home the joints, read a digital input, command a low-speed motion. If the controller responds correctly, run a slightly more demanding routine. I like to use the vendor’s self-test or calibration routine because it probes every subsystem in one pass.
Compare the live configuration to your backup. Open the saved project file and walk through the key parameters. If anything looks off, restore from the backup. I have seen new firmware reset I/O mapping defaults, which looks like a hardware fault until you realize pin 3 is no longer mapped to your gripper solenoid.
Finally, document the change. Write down the date, the firmware version, the operator, and the verification result. A clean firmware log is one of the most useful pieces of evidence when a controller starts acting up months later, because you can immediately rule out a recent flash as the cause.
Troubleshooting Common Firmware Flash Errors
Even with a perfect checklist, things can go wrong. Here are the errors I see most often, and how I work through them.
The tool cannot see the controller. Nine times out of ten, this is a cable or driver issue. Swap the USB cable, try a different port, and reinstall the vendor’s USB driver. On Windows, an unrecognized device often shows up with a yellow triangle in Device Manager; right-click and update the driver manually if the auto-update fails. For WiFi connections, confirm you are on the controller’s access point and that the host firewall is not blocking the connection.
The flash stalls partway through. Do not unplug. The tool may still be writing to flash memory, and a premature disconnect is the surest path to a bricked controller. Wait at least 15 minutes past the last progress update. If the tool reports a timeout, close it, power-cycle the controller only if the vendor’s documentation says it is safe, and retry. If the controller is unresponsive, jump to the recovery section below.
The controller boots but reports the old firmware. Either the flash did not actually write, or the bootloader is reading from a recovery partition. Open the About screen, confirm the bootloader version, and re-run the update through the correct path. Some controllers have a separate bootloader update that must be flashed first.
Error code 10 or a similar generic code. Vendors differ on what the codes mean, but a generic communication error usually points to either a bad file or a connection that dropped. Re-verify the file hash, swap the cable, and retry from a different USB port.
The new firmware breaks a feature you rely on. First, check the release notes for known issues. Second, check the vendor’s forum or support portal, because most regressions get patched within a few weeks. Third, if the regression is blocking, roll back to the previous version. Industrial controllers almost always support a downgrade; hobby controllers vary, so check the documentation before you flash up.
Compatibility issues with peripherals. A firmware update can change how the controller talks to expansion modules, vision systems, or grippers. If a peripheral stops working, check its firmware too. Many vendors ship companion updates for their accessories. For REV robotics users, the radio firmware, the motor firmware, and the servo firmware are all separate files, and a single mismatch can knock out half the robot. Reading through our robot chassis guide can help you map which components share firmware with the controller.
Safety Precautions During a Firmware Update
Firmware flashing is one of the few maintenance tasks that can take a working robot offline permanently. Treat it with the same seriousness you would give a wiring change inside a live panel.
Disconnect the robot from its work before you start. If the controller is on a moving arm, move the arm to a safe pose and lock it out. If the controller drives an AGV, park the vehicle on flat ground with the wheels chocked. If the controller sits behind a safety fence, lock the fence. Firmware flashes can trigger unexpected reboots, and a reboot mid-motion is dangerous.
Remove any peripherals that the controller does not need for the flash. USB dongles, Bluetooth adapters, and external drives confuse the host tool and can cause conflicts. I have watched a single wireless mouse dongle stall a flash for an hour because the tool kept trying to enumerate it.
Keep the host computer on stable power. Laptops should be plugged in, not running on battery. Disable sleep, hibernation, and automatic updates. The last thing you want is Windows Update rebooting your laptop while it is writing 200 MB to a controller’s flash chip.
Do not walk away. I know updates can be slow, and I know the temptation to grab coffee is real. Stay within earshot of the controller. If the tool produces an error, you want to react while the controller is still in a recoverable state. If a controller emits smoke, unusual heat, or repeated clicking, pull power immediately and stop the update.
Verify the firmware file came from a trusted source. Third-party firmware can include backdoors, malware, or simply broken code. In a competition setting, third-party firmware may also be illegal. Stick with the vendor’s signed images, and verify the hash every time.
Recovery Methods for a Bricked Controller
A bricked controller is one that no longer boots, no longer responds to the normal flash tool, or boots into a loop. The good news is that most controllers have a recovery path, and most bricked boards I have seen were saved with the steps below.
Step 1. Try a forced reboot into the bootloader. Most controllers expose a button or jumper that forces the bootloader to run on next power-up. On REV Control Hubs, holding the small button on the side during a power cycle enters recovery mode. On Universal Robots, the boot menu on the pendant lets you select the recovery image. On FANUC, the Controlled Start combination puts the controller in the firmware loader without loading the main application.
Step 2. Re-flash from the bootloader. Once the bootloader is active, the normal flash tool usually works again. Re-run the update, but this time use a known-good firmware file. If the original file was corrupt, redownload and re-verify the hash. If the file was correct, the brick was probably caused by an interrupted previous flash, and the second pass completes the write.
Step 3. Try a different host. If the bootloader is running but the flash still fails, the issue may be the host. Try a different computer, a different USB port, or a different cable. USB power management on some laptops drops below the threshold that the controller needs, and a desktop will behave differently.
Step 4. Use the vendor’s recovery image. Industrial vendors like Universal Robots and FANUC ship a recovery image on a USB stick or a separate download. These are stripped-down firmware versions designed to bring a bricked controller back to life, after which you can re-apply the regular firmware. Keep the recovery image on hand if you flash often.
Step 5. Contact support with logs. If the controller is still under warranty, contact the vendor. Most have a return process, and the support engineers can sometimes pull logs that explain exactly where the flash failed. Provide the model, the firmware versions, the host OS, and the exact error messages. A clean log file is worth more than a long email.
For hobby boards with exposed boot pads, recovery sometimes means shorting a pad with tweezers while plugging in the USB cable. Betaflight and similar projects document this in detail. It feels sketchy, but it is a legitimate recovery path, and it has saved more than a few flight controllers in our shop. For more on the mechanical side of keeping a robot healthy, see our piece on planetary gearboxes in robot joints and our guide to backlash in robot gearing.
Frequently Asked Questions
How do I flash firmware?
Connect the controller to a host computer over USB or WiFi, open the vendor’s flashing tool, select the verified firmware file, and start the update. Wait for the tool to confirm completion, then verify the new version in the controller’s About screen before using the robot.
How to update firmware on a robot controller?
Download the correct firmware image from the manufacturer’s site, verify the file hash, and back up your current configuration. Then connect the controller to a host computer or WiFi network, launch the vendor’s update tool, and follow the on-screen steps. Do not power off the controller until the tool confirms success.
Is there a way to force a firmware update?
Yes. Most controllers expose a bootloader or recovery mode that can be triggered by holding a button during power-up or by selecting a recovery option from a menu. Once the bootloader is active, the vendor’s flash tool can write a fresh image even if the main application is corrupt.
How to manually update the firmware?
Manually updating means flashing the controller yourself rather than waiting for an over-the-air push. Download the firmware file, transfer it via USB stick or USB cable, and run the vendor’s flashing tool. Industrial controllers often use a FAT32-formatted USB stick and a controlled-start button combination to enter update mode.
What happens if a firmware update fails?
If the update fails midway, the controller may become unresponsive or brick. Most controllers have a recovery mode that lets you re-flash from a known-good image. Always keep a backup of your configuration and a copy of the previous firmware on hand so you can restore the system quickly.
Conclusion
Learning how to flash robot controller firmware is one of those skills that pays off the first time something goes wrong. The recipe is simple: identify the controller, download the right file, verify the hash, back up your settings, connect through the right channel, and let the vendor’s tool run to completion. The discipline is in the prep, not the flash itself.
Keep your checklists tight, your USB cables data-capable, and your recovery images handy. The next time a vendor ships a critical bug fix or a new feature you actually want, you will be able to flash with confidence instead of crossing your fingers. For more on keeping your robot’s hardware and software in sync, the rest of our Smashing Robotics archive has you covered.