
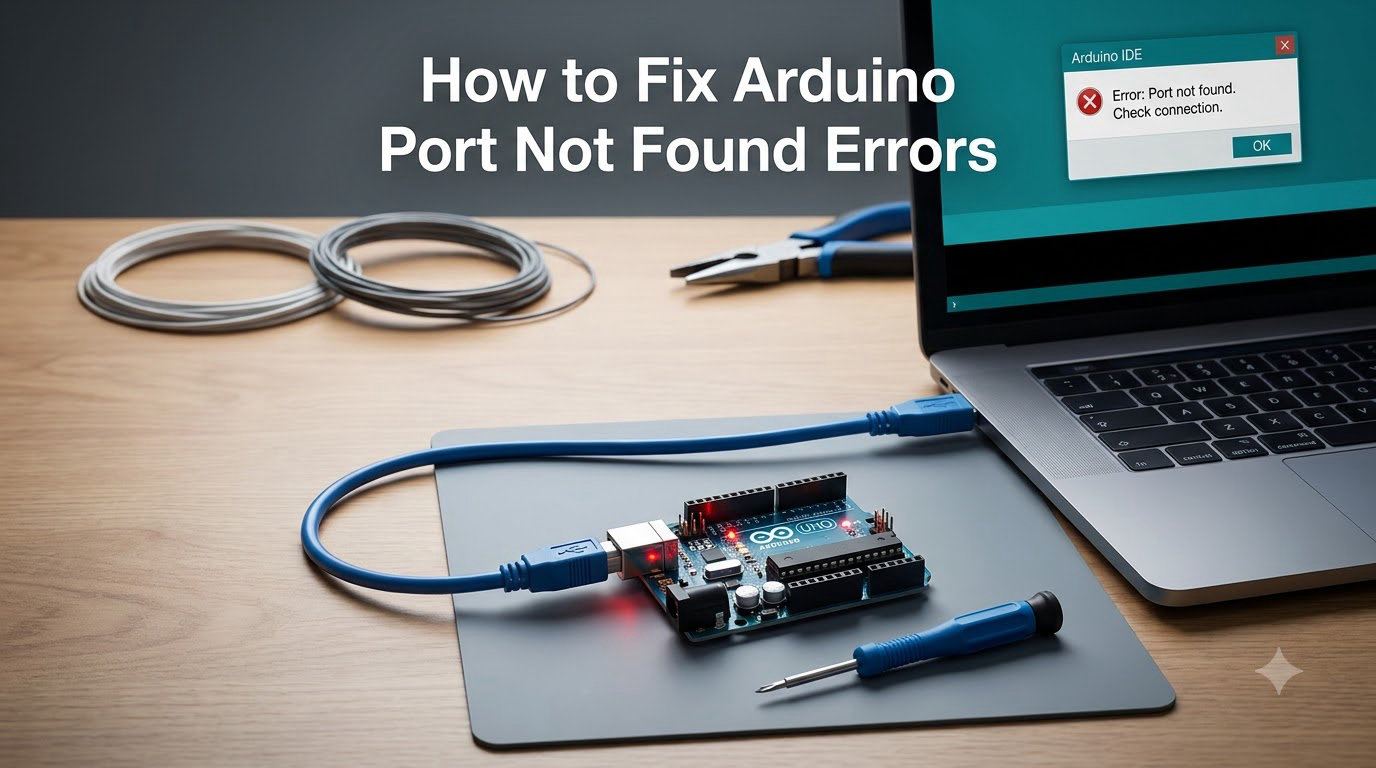
You plug in your Arduino, open the IDE, go to Tools, and the Port menu is greyed out or empty. Sound familiar? The Arduino port not found error is the single most common issue that stops beginners and experienced makers alike from uploading code to their boards.
I have spent years working with Arduino boards across student workshops, robotics competitions, and personal projects, and I have hit this exact wall dozens of times. After helping hundreds of people troubleshoot this problem on forums and in person, I can tell you that the fix is almost always something simple hiding in plain sight.
This guide walks through every possible cause of the Arduino port not found error, from charge-only USB cables to missing CH340 drivers, COM port conflicts, and operating system quirks. By the end, you will know exactly how to diagnose and fix your specific issue, plus how to prevent it from happening again. If you are also building a larger robot system, understanding robot chassis design can give you helpful context for how your Arduino fits into the bigger picture.
Table of Contents
Why Your Arduino Port Is Not Found: Common Causes
The Arduino port not found error happens when your computer fails to recognize the Arduino board as a valid serial device. When this occurs, the Arduino IDE cannot see a COM port (on Windows) or a serial device (on Mac and Linux) to send code through, so the Port menu stays empty or greyed out.
Six root causes account for nearly every instance of this problem:
1. Faulty or charge-only USB cables. Many USB cables that come with cheap electronics or phone chargers only carry power, not data. Your board lights up, but no data flows. This is the number one cause reported across Reddit, Stack Overflow, and the Arduino forums.
2. Missing or incorrect drivers. Clone boards use CH340 or FTDI USB-to-serial chips instead of the official Arduino ATmega16U2. Without the matching driver installed, Windows has no idea what the device is.
3. Loose USB connections. The USB-B jack on Arduino Unos and the micro-USB port on Arduinos can wear out or fail to seat properly. A cable that looks connected might not be making data contact.
4. Arduino IDE detection bugs. Arduino IDE 2.x has known issues where it fails to enumerate ports that IDE 1.8.x detects fine. Sometimes the IDE just needs a restart.
5. Operating system conflicts. Windows 11 driver signature enforcement, macOS updates breaking serial drivers, and Linux permission issues can all prevent port detection.
6. COM port conflicts and numbering issues. COM ports numbered above 9 can cause upload failures, and other USB serial devices can clash with your Arduino’s assigned port.
Quick Diagnostic Checklist: Identify Your Problem in 60 Seconds
Before diving into detailed fixes, run through this 60-second diagnostic checklist. It will point you toward the right solution based on your symptoms.
Step 1: Does your Arduino’s power LED light up when plugged in? If no, you likely have a dead USB port, a broken cable, or a damaged board. Try a different USB port on your computer first.
Step 2: Does the board appear in Device Manager (Windows), System Information (Mac), or lsusb (Linux)? If the board shows up with a yellow warning triangle, you have a driver problem. If it does not appear at all, you have a cable or hardware problem.
Step 3: Have you installed drivers for your specific board type? Genuine Arduinos use built-in drivers on most systems, but clone boards with CH340 or CP2102 chips require separate driver installation.
Step 4: Does the board work on another computer? If it does, your issue is software or driver related on the first machine. If it fails everywhere, suspect the cable or the board itself.
Step 5: Are you using Arduino IDE 2.x? Try installing Arduino IDE 1.8.19 as a test. If the older IDE detects your board, you have an IDE 2.x-specific detection issue.
Once you identify which step reveals your problem, jump to the matching fix below.
Fix 1: Replace or Test Your USB Cable (The Number One Culprit)
If I had to bet on a single cause for the Arduino port not found error, I would put my money on the USB cable every time. Forum data confirms this: charge-only cables are the most commonly reported issue across every Arduino community.
Here is the confusing part. A charge-only cable delivers power just fine, so your Arduino’s LED turns on and everything looks normal. But the cable lacks the internal data wires needed for serial communication. Your computer never sees the board.
How to Tell If Your Cable Is the Problem
The fastest test is simple: grab two or three other USB cables and try each one. According to multiple Reddit threads, this alone fixes the issue for a huge percentage of users. One community member put it bluntly: charge-only cables are the most common issue, so try 2 to 3 different cables before doing anything else.
Here is what to check:
Look at the cable’s purpose. Cables that came with power banks, cheap toys, or vape pens are frequently charge-only. Cables that came with phones, cameras, or external hard drives almost always carry data.
Try a cable you know works for data transfer. If you have a cable you use to transfer photos from a phone or camera to your computer, that cable carries data and is a good test candidate.
Push the cable in firmly. A common fix reported on the Arduino forum is simply pushing the USB cable further into the Arduino’s jack until you feel it click. Loose connections cause intermittent data contact even with a good cable.
Test Without Buying Special Equipment
You do not need a USB cable tester. Plug the cable into your phone and connect it to your computer. If your computer prompts you to transfer files or shows the phone as a storage device, the cable carries data. If it only charges the phone with no data prompt, you have a charge-only cable.
One more cable tip: USB hubs can also cause detection issues. Plug your Arduino directly into a USB port on your computer, not through a hub. Powered hubs are usually fine, but unpowered hubs can drop the data connection under load.
Fix 2: Install the Correct Drivers (CH340, FTDI, and Official)
Driver issues are the second most common cause of the Arduino port not found error, and they are especially common with clone boards. If you bought an Arduino Uno for $8 on a marketplace, it is almost certainly a clone using a CH340 USB-to-serial chip instead of the official ATmega16U2 chip.
The solution depends on which chip your board uses, and the first step is figuring that out.
Identify Your Board’s USB Chip
Look at the black chip nearest the USB port on your Arduino board. If it says WCH CH340G or CH340, you need CH340 drivers. If it says FTDI FT232, you need FTDI drivers. If it says Atmel ATmega16U2, you have a genuine Arduino (or a high-quality clone) and can use the built-in drivers on most operating systems.
You can also identify the chip in Windows Device Manager. A board with missing drivers shows up under Other Devices with a yellow warning triangle, usually labeled as “Unknown Device” or something like “USB-SERIAL CH340.”
Install CH340 Drivers (Most Clone Boards)
CH340 is by far the most common chip on clone Arduino boards, so this is the driver most people need.
Step 1: Download the CH340 driver from the official WCH website. Forum moderators repeatedly warn against random download sites, which often host outdated or malicious versions.
Step 2: Extract the downloaded file and run the installer. On Windows, right-click and select Run as Administrator to avoid permission issues.
Step 3: Click the Install button in the driver setup window. You should see a success message confirming the driver is installed.
Step 4: Unplug your Arduino, plug it back in, and check whether a new COM port appears in Device Manager under Ports (COM and LPT).
If the CH340 installer fails on Windows 11, the driver signature enforcement may be blocking it. See Fix 5 below for Windows 11 specific solutions.
Install FTDI Drivers (Older Clones and Some Nanos)
Some clone boards, particularly older Arduino Nano clones and certain Pro Mini boards, use FTDI FT232 chips instead of CH340.
Step 1: Download the FTDI VCP (Virtual COM Port) driver from the official FTDI website.
Step 2: Run the installer and follow the prompts.
Step 3: Reconnect your board and verify the COM port appears in Device Manager.
Use Zadig for Stubborn Driver Problems
If standard driver installation fails, the Zadig tool can force-install a compatible driver. Zadig replaces the current driver with a generic USB serial driver called libusb or WinUSB.
Step 1: Download Zadig from its official source.
Step 2: Open Zadig, select Options then List All Devices.
Step 3: Choose your Arduino or CH340 device from the dropdown.
Step 4: Select libusbK or WinUSB as the target driver and click Replace Driver.
Warning: Zadig replaces your existing driver, which can sometimes cause other USB devices to stop working. Use it as a last resort when standard driver installation fails.
Fix 3: Use Device Manager to Verify and Repair the Connection
Windows Device Manager is your best friend for diagnosing the Arduino port not found error. It shows you exactly what Windows sees when you plug in your board, which tells you whether the problem is the cable, the driver, or something else entirely.
Open Device Manager and Check for Your Board
Press the Windows key, type Device Manager, and press Enter. Plug in your Arduino and watch what happens in the device list.
Here is what each outcome means:
Your Arduino appears under Ports (COM and LPT) with a COM number. This means the driver is working and the board is recognized. Your issue is in the Arduino IDE settings, not the hardware. Jump to Fix 4.
Your Arduino appears under Other Devices with a yellow warning triangle. The board is detected physically, but the driver is missing or incorrect. You need to install the correct driver (see Fix 2).
Your Arduino does not appear anywhere in Device Manager. The computer does not see the device at all. This points to a cable problem, a dead USB port, or a damaged board. Try a different cable and USB port first.
Your Arduino appears briefly then disappears. This usually indicates a loose connection, a failing USB cable, or a power management issue where Windows turns off the USB port to save energy.
Fix Driver Issues Through Device Manager
If your board shows up with a yellow triangle, you can try updating the driver directly from Device Manager.
Step 1: Right-click the unknown device and select Update Driver.
Step 2: Choose Browse my computer for drivers.
Step 3: Navigate to the folder where you downloaded the CH340 or FTDI driver files.
Step 4: Let Windows install the driver, then reconnect your board.
If Windows insists the best driver is already installed but the device still shows an error, right-click it, select Uninstall Device, unplug the board, then plug it back in so Windows reinstalls the driver from scratch.
Disable USB Power Management
Windows has a feature that turns off USB ports to save power, which can cause your Arduino to disconnect intermittently or fail to be detected.
Go to Control Panel, then Power Options, then Change plan settings, then Change advanced power settings. Expand USB settings, then USB selective suspend setting, and set it to Disabled. This prevents Windows from cutting power to your USB ports, which can resolve intermittent port detection failures.
Fix 4: Resolve Arduino IDE Port Selection Issues
Sometimes the hardware is fine and the driver is correct, but the Arduino IDE itself fails to show or select the port. This is particularly common with Arduino IDE 2.x, which has had several reported bugs around port enumeration.
Restart the Arduino IDE After Connecting Your Board
The simplest fix that forum users recommend over and over: close the Arduino IDE completely, make sure your board is plugged in, then reopen the IDE. Sometimes the IDE scans for ports only at startup and misses boards connected after launch.
If this fixes it, the port should appear under Tools then Port. Select the correct COM port (Windows) or serial device (Mac or Linux) before trying to upload code.
Check Board and Port Settings
Even when a port appears, you still need to select the correct board type and processor. Go to Tools then Board and choose your exact board model (Arduino Uno, Arduino Nano, Arduino Mega, etc.). For Nano boards, also check Tools then Processor, as selecting the wrong processor version causes upload failures.
If the Port menu is completely greyed out, the IDE has not detected any serial ports at all. This usually means a driver or cable issue, not an IDE issue.
Try Arduino IDE 1.8.x If 2.x Fails
Multiple users on the Arduino forum report that IDE 2.x fails to detect boards that work perfectly in IDE 1.8.x. Arduino IDE 2.x is a complete rewrite built on the Eclipse framework, and its port detection works differently than the older Java-based version.
If you are running IDE 2.x and cannot get any ports to appear, download and install Arduino IDE 1.8.19 from the official Arduino website. It installs alongside IDE 2.x without conflict. If your board is detected in 1.8.x but not in 2.x, you have confirmed an IDE-specific bug.
The Arduino team is aware of these issues and releases regular patches. Make sure you are running the latest version of IDE 2.x, as port detection improvements are included in nearly every update.
Fix 5: Operating System Specific Solutions
Different operating systems handle USB serial devices differently, and some have quirks that specifically cause Arduino port not found errors. Here are fixes for the most common OS-specific issues.
Windows 11: Driver Signature and Security Issues
Windows 11 enforces strict driver signature requirements. Some CH340 driver versions, particularly older ones, are not properly signed and Windows blocks them silently. Your board shows up in Device Manager with an error, but the driver installation appears to have succeeded.
Step 1: Download the latest CH340 driver directly from the WCH website. The newest versions are properly signed for Windows 11.
Step 2: If the installer still fails, you can disable driver signature enforcement temporarily. Go to Settings, then Recovery, then Advanced startup, then Restart now. After the reboot, choose Troubleshoot, then Advanced options, then Startup Settings, then Restart. Press F7 or 7 to select Disable driver signature enforcement.
Step 3: Install the driver while signature enforcement is disabled, then reboot normally.
Windows 11 also has Memory Integrity (HVCI) which can block certain drivers. Go to Settings, then Privacy and security, then Windows Security, then Device security, then Core isolation details. Try toggling Memory integrity off temporarily to see if it resolves the driver conflict.
macOS: Permissions and Update Breakage
macOS generally handles Arduino drivers well for genuine boards, but macOS updates can break CH340 and FTDI driver compatibility. After a macOS upgrade, your previously working Arduino might suddenly stop appearing as a port.
Step 1: Open System Information (hold Option and click the Apple menu, then System Information). Look under USB to see if your Arduino or CH340 device appears at the hardware level.
Step 2: If the device appears in System Information but not in the Arduino IDE, reinstall the CH340 or FTDI driver for macOS. Reboot after installation.
Step 3: On macOS, the Arduino IDE may need permission to access USB devices. Go to System Settings, then Privacy and Security, and check if there is a prompt to allow the Arduino IDE to access USB or serial devices.
Linux: Dialout Group and udev Rules
Linux is generally excellent at detecting Arduino boards without extra drivers, but permission issues are the most common cause of port not found errors on Linux.
By default, regular users on Linux do not have permission to access serial ports. Your board shows up as /dev/ttyUSB0 or /dev/ttyACM0, but the Arduino IDE cannot open it.
The fix: Add your user to the dialout group so you have permission to access serial devices. Open a terminal and run: sudo usermod -aG dialout $USER
Log out and log back in (or reboot) for the change to take effect. This is one of the most commonly shared fixes on Linux Arduino forums.
If you are using a CH340-based clone on Linux and it is not detected at all, make sure the ch341 kernel module is loaded. Run lsmod | grep ch341 in a terminal. If nothing appears, try sudo modprobe ch341 to load the module manually.
Fix 6: Advanced Troubleshooting for Stubborn Cases
If none of the standard fixes have worked, the problem is likely more complex. These advanced solutions address the less common but well-documented causes of the Arduino port not found error.
Put Your Board Into Bootloader Mode (Double-Tap Reset)
Several boards, including the Arduino Leonardo, Micro, and many SAMD-based boards, use a bootloader that can get stuck. The fix is to double-tap the reset button.
Press the reset button twice in quick succession. The onboard LED should start pulsing, indicating the board is in bootloader mode. A new COM port should appear on your computer. The Arduino forum confirms this works for many cases where the board was previously unresponsive.
Once in bootloader mode, you can upload a simple sketch like Blink. After a successful upload, the board should return to normal operation and appear on its standard COM port.
Resolve COM Port Number Conflicts
COM ports numbered above 9 can cause issues with some software, including older versions of the Arduino IDE. If your Arduino has been assigned COM10 or higher, upload failures can occur even though the port is detected.
Step 1: Open Device Manager and find your Arduino under Ports (COM and LPT).
Step 2: Right-click and select Properties, then Port Settings, then Advanced.
Step 3: Change the COM port number to something between 1 and 9 that is not already in use.
Also check for conflicts with other USB serial devices. If you have a 3D printer, GPS module, or another Arduino connected, they might be competing for the same COM port. Disconnect all other USB serial devices and test with only the Arduino connected.
Check for Power Supply Problems
Insufficient or unstable power can cause your Arduino to behave erratically, including failing to maintain a USB connection. If your Arduino is powering motors, servos, or other high-draw components through the board’s 5V pin, voltage drops can reset the board or cause USB disconnection.
The solution is to use a separate power supply for motors and other high-current components. Our guide on separate power for logic and motors explains why this matters and how to implement it correctly. For selecting an appropriate power source, choosing the right battery can make a big difference in board stability.
Test for a Damaged Board
If you have tried every fix and your board is not detected on any computer with any cable, the USB-to-serial chip on the board itself may be damaged. This can happen from static discharge, reverse polarity, or physical damage to the USB connector.
For boards with a separate ATmega16U2 or CH340 chip, the main microcontroller might still be functional even if the USB interface is dead. You can sometimes program the board using an USBasp or another Arduino as an ISP programmer through the ICSP header, bypassing the USB interface entirely.
How to Prevent Arduino Port Issues in the Future
Once you fix your Arduino port not found error, a few habits can prevent it from coming back. Most of these take seconds to implement and save hours of frustration later.
Label your data cables. The number one prevention tip is also the simplest. Once you confirm a cable carries data, put a piece of tape or a label on it. Keep charge-only cables separate from your electronics workspace so you never grab the wrong one.
Use quality USB cables. Spend a few dollars on cables from reputable brands. Braided cables and cables rated for USB 2.0 data transfer are almost always data-capable. Avoid the thin, stiff cables that come in dollar-store electronics kits.
Keep your drivers updated. Check for CH340 and FTDI driver updates once a year. New operating system versions can break old drivers, and manufacturers release patches regularly.
Plug directly into the computer. Avoid USB hubs when working with Arduino, especially unpowered ones. If you must use a hub, use a powered hub with its own power supply.
Properly wire your power system. Power-related issues are a hidden cause of port detection failures. Following safe robot power wiring practices prevents voltage drops and electrical noise from disrupting your Arduino’s USB connection.
Handle the USB connector gently. The USB-B connector on Arduino Unos is soldered to the board and can crack with repeated rough handling. Support the connector when plugging and unplugging rather than torquing it sideways.
FAQ
Why does Arduino IDE say no ports discovered?
Arduino IDE says no ports discovered when it cannot detect any serial communication ports. The most common causes are charge-only USB cables that do not carry data, missing CH340 or FTDI drivers for clone boards, a loose USB connection, or an Arduino IDE 2.x detection bug. Start by testing a different USB cable, then verify the board appears in Device Manager.
How to fix USB port not detecting Arduino?
To fix a USB port not detecting Arduino, follow these steps: 1) Try a different USB cable known to carry data. 2) Plug the Arduino directly into the computer instead of a hub. 3) Try a different USB port. 4) Check Device Manager to see if the board appears at all. 5) Install the correct driver (CH340 for most clone boards). 6) Close and reopen the Arduino IDE with the board connected.
Why is my Arduino serial port not displaying?
Your Arduino serial port may not be displaying because the correct driver is not installed, the USB cable is charge-only, or the Arduino IDE has not scanned for ports since the board was connected. Close and reopen the IDE, verify the board appears in Device Manager, and ensure you have installed the driver matching your board’s USB-to-serial chip (CH340, FTDI, or official Arduino).
How to enable port in Arduino IDE?
To enable a port in Arduino IDE, connect your board, then go to the Tools menu and select Port. Choose the COM port (Windows) or serial device (Mac and Linux) that corresponds to your Arduino. If the Port menu is greyed out, the IDE has not detected any ports, which usually means a cable, driver, or connection issue that needs to be resolved first.
How do I know if my USB cable is data-capable?
To check if a USB cable carries data without special tools, plug it into your phone and connect to a computer. If the computer prompts you to transfer files or shows the phone as a storage device, the cable carries data. If the phone only charges with no data prompt, it is a charge-only cable. You can also test the cable with a device you know supports data transfer like a camera or external drive.
Which driver do I need for my Arduino clone board?
Most Arduino clone boards use a CH340 USB-to-serial chip and require the CH340 driver from the official WCH website. Some older clones, particularly Arduino Nano clones, use an FTDI FT232 chip and need the FTDI VCP driver. Look at the chip nearest the USB port on your board to identify which one you have. Genuine Arduinos use the ATmega16U2 and work with built-in drivers on most operating systems.
Why does my Arduino port appear then disappear?
If your Arduino port appears briefly then disappears, the cause is usually a loose USB connection, a failing USB cable, or Windows USB power management turning off the port. Try pushing the cable in firmly, testing a different cable, and disabling USB selective suspend in Windows Power Options. A failing USB-to-serial chip on the board can also cause this symptom.
Why does my Arduino work on one computer but not another?
If your Arduino works on one computer but not another, the second computer is likely missing the required driver (especially CH340 for clone boards), has different USB power management settings, or has a driver conflict. Install the correct driver on the second computer, try a different USB port, and check Device Manager for any error indicators on the Arduino device.
Conclusion
The Arduino port not found error is frustrating but almost always fixable with the right approach. The vast majority of cases come down to one of three things: a charge-only USB cable, a missing CH340 or FTDI driver, or a loose connection. Start your troubleshooting there and you will solve the problem faster than you might expect.
Remember the diagnostic order that works for most people. Test your USB cable first, because it is the cheapest and fastest thing to check. Then verify the board appears in Device Manager or your operating system’s equivalent. From there, install the correct driver for your board’s chip, and finally check for IDE-specific and OS-specific issues.
I have watched countless students and makers spend hours chasing complex software solutions when a five-dollar cable swap was all they needed. Do not skip the basics. The simple fixes work more often than the complicated ones.
Once you fix your port issue, set up good habits to prevent it from returning. Label your data cables, keep your drivers updated, power your motors separately from your logic, and handle your board’s USB connector with care. A few minutes of prevention saves hours of troubleshooting down the road, and keeps your Arduino projects moving forward without interruption.