
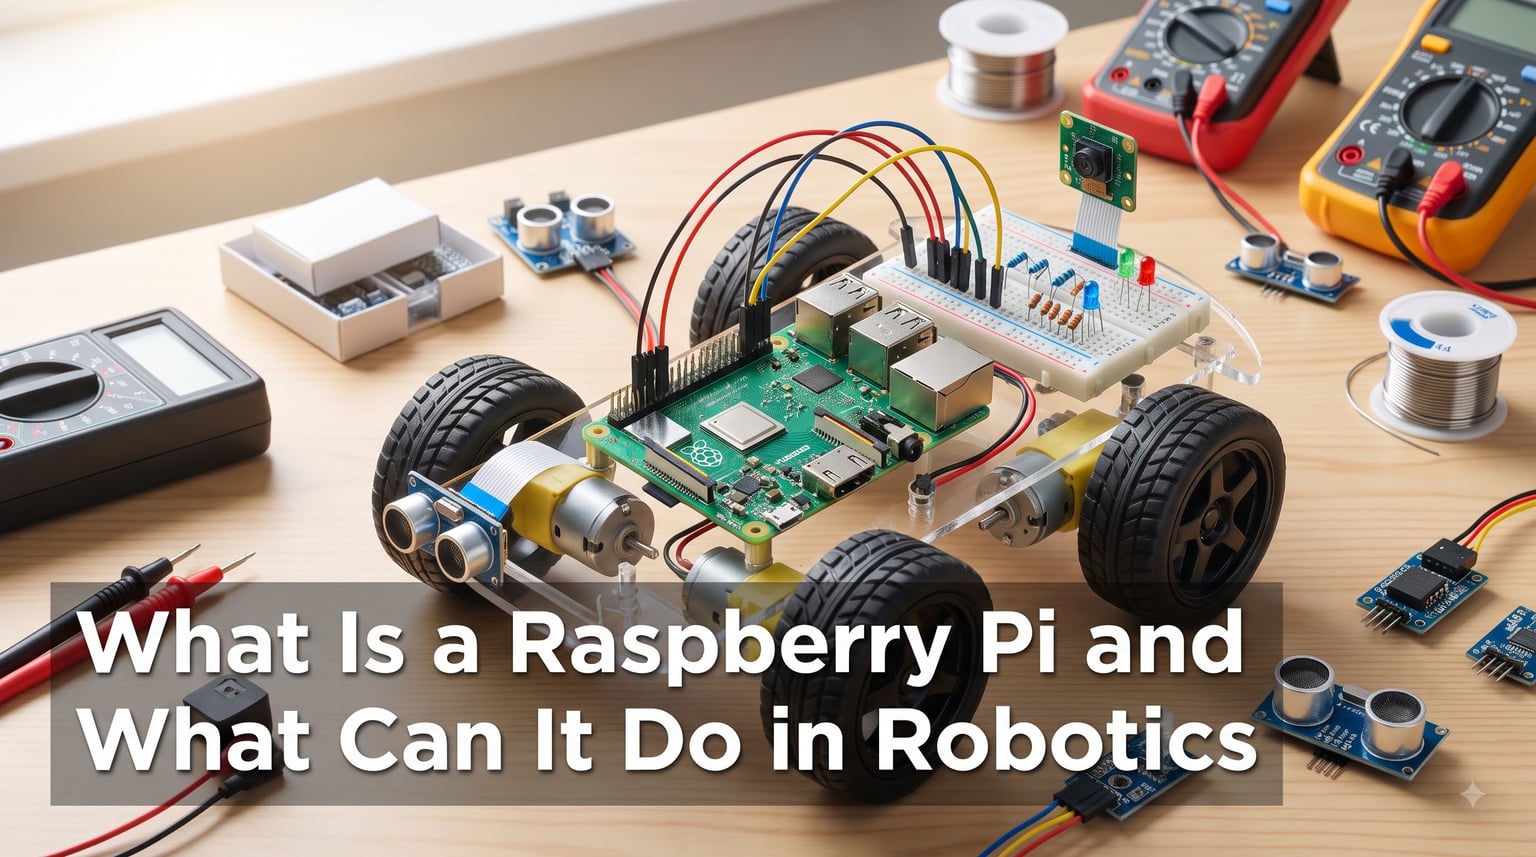
A Raspberry Pi is a credit card-sized single-board computer that runs a full Linux operating system and connects directly to motors, sensors, and cameras through its 40 GPIO pins. In robotics, it serves as the central brain of a robot, handling everything from basic motor control to advanced computer vision and AI processing that a standard microcontroller simply cannot manage on its own.
Our team has spent years working with Raspberry Pi boards in robotics projects ranging from simple line-following cars to autonomous navigation systems. What started as an educational tool has grown into one of the most popular platforms for building intelligent robots, and the gap between hobbyist and professional robotics has narrowed significantly because of it.
If you are wondering what a Raspberry Pi is and what it can do in robotics, this guide breaks down everything you need to know. We cover the hardware, the robotics applications, the technical capabilities, and practical steps to get your own project off the ground. For more robotics guides and resources, our homepage covers a wide range of topics from Arduino to AI automation.
Table of Contents
What Is a Raspberry Pi and What Can It Do in Robotics?
A Raspberry Pi is a low-cost, credit card-sized single-board computer developed by the Raspberry Pi Foundation in the United Kingdom. It was originally created in 2012 to promote computer science education in schools, but it quickly found a second life among hobbyists, engineers, and robotics enthusiasts who recognized its potential as an affordable robot controller.
Unlike a microcontroller such as an Arduino, a Raspberry Pi runs a complete operating system, typically a Linux distribution called Raspberry Pi OS (formerly Raspbian). This means it can handle multitasking, run high-level programming languages, connect to the internet, and process complex algorithms, all from a board that fits in the palm of your hand.
For robotics specifically, the Raspberry Pi excels because it bridges the gap between simple embedded control and full desktop-class computing. You can use it to read sensor data, run motor controllers, process camera feeds in real time, and even run machine learning models for object detection and autonomous decision-making.
Raspberry Pi Models for Robotics: A Quick Comparison
Several Raspberry Pi generations are relevant to robotics builders in 2026. Each model brings different levels of processing power, memory, and connectivity to the table.
Raspberry Pi 3 Model B+ has a 1.4 GHz quad-core processor, 1 GB of RAM, built-in WiFi and Bluetooth, and 40 GPIO pins. It remains a solid budget option for basic robotics projects.
Raspberry Pi 4 Model B upgraded to a 1.5 GHz quad-core processor with options for 2 GB, 4 GB, or 8 GB of RAM. It added dual micro-HDMI ports, gigabit Ethernet, and USB 3.0 support, making it significantly more capable for computer vision and ROS applications.
Raspberry Pi 5 introduced in late 2023 features a 2.4 GHz quad-core processor, up to 8 GB of RAM, and a redesigned I/O system. It delivers roughly two to three times the performance of the Pi 4, which matters enormously for AI inference, image processing, and running multiple robot subsystems simultaneously.
For most new robotics builds in 2026, we recommend starting with a Raspberry Pi 4 or 5. The extra processing headroom makes a real difference when you start adding camera modules, running ROS nodes, or doing any kind of computer vision work. Understanding robot chassis fundamentals alongside your board choice will help you plan how everything fits together physically.
What Makes Raspberry Pi Suited for Robotics?
Several design choices make the Raspberry Pi a natural fit for robot projects. The 40-pin GPIO header provides direct hardware interfacing for sensors, motors, and custom electronics. Built-in WiFi and Bluetooth enable wireless control and communication without extra dongles. The full Linux OS supports standard robotics software like ROS, OpenCV, and TensorFlow out of the box.
The board also accepts a Camera Serial Interface (CSI) cable for connecting official Raspberry Pi Camera Modules directly, which gives you low-latency video input ideal for computer vision tasks. Add the massive ecosystem of HATs (Hardware Attached on Top) expansion boards, and you have a platform that can scale from a $50 beginner kit to a sophisticated research-grade robot.
Why Use a Raspberry Pi for Robotics?
The Raspberry Pi has earned its place in robotics for several practical reasons. After testing it across dozens of builds, our team keeps coming back to the same core advantages that set it apart from other options.
1. Powerful Computing in a Small Package
A Raspberry Pi gives you desktop-class computing on a board the size of a credit card. You can run Python scripts, compile C++ code, host a web server for remote robot control, and process camera feeds all at the same time. A basic microcontroller cannot multitask at this level.
2. Full Linux Operating System
Running Linux means you have access to thousands of software packages through standard package managers. Need OpenCV for computer vision? Install it with one command. Want to run a TensorFlow Lite model for object detection? The libraries are ready and documented. This software ecosystem is what makes the Raspberry Pi so powerful for complex robotics work.
3. Built-In Connectivity
WiFi and Bluetooth come standard on the Pi 3, 4, and 5. This means you can control your robot from a phone app, stream live camera feeds to a laptop, or have your robot communicate with other devices on a local network without buying any additional hardware.
4. Massive Community and Open Source Support
The Raspberry Pi community is one of the largest in the maker and robotics world. When you run into a problem, chances are someone has already solved it and posted the answer on a forum, GitHub repository, or YouTube tutorial. This open source ecosystem means you are never building alone.
Forum users consistently highlight this community support as the single biggest reason they choose Raspberry Pi over alternatives. Extensive documentation, active subreddits, and thousands of project walkthroughs lower the barrier to entry dramatically.
5. Affordability
A Raspberry Pi board costs roughly $35 to $80 depending on the model. When you factor in the processing power you get for that price, it is remarkably cost-effective. Students, educators, and hobbyists can experiment with advanced robotics concepts without the budget of a research lab.
Raspberry Pi vs Arduino for Robotics: Which Should You Choose?
This is one of the most common questions in the robotics community, and the answer depends on what your robot needs to do. Both platforms are excellent, but they serve fundamentally different purposes.
An Arduino is a microcontroller designed for real-time, deterministic control. It excels at reading sensors and controlling motors with precise timing. A Raspberry Pi is a full computer designed for complex computation, multitasking, and running high-level software. It handles vision processing, AI, and networking but is not as reliable for hard real-time tasks.
When to Choose Arduino
Pick Arduino when your project requires precise timing for motor control, needs to run on very low power, or involves simple sensor reading without complex computation. Arduino boots instantly, consumes minimal power, and never crashes due to operating system overhead.
When to Choose Raspberry Pi
Pick Raspberry Pi when your robot needs computer vision, AI inference, internet connectivity, complex path planning, or the ability to run ROS. If you want your robot to see, think, and make decisions, the Pi is the right tool.
Why Not Both?
Many experienced builders combine both platforms. The Raspberry Pi handles high-level processing, vision, and decision-making, while an Arduino handles real-time motor control and sensor reading. The two boards communicate over serial or I2C. This hybrid approach gives you the best of both worlds and is a pattern we see recommended repeatedly in community forums.
Forum users note that beginners often struggle with real-time motor control on Raspberry Pi because Linux is not a real-time operating system. Offloading that work to an Arduino solves the problem cleanly while keeping the Pi free for higher-level intelligence.
What Raspberry Pi Can Do in Robotics: Key Applications
The Raspberry Pi powers an enormous range of robotics capabilities. Here is a breakdown of the major application areas where it truly shines.
Motor Control and Movement
The Raspberry Pi can control DC motors, stepper motors, and servo motors through its GPIO pins paired with motor driver circuits or HATs. While the Pi itself does not generate PWM signals with microcontroller-level precision, dedicated motor driver HATs handle the low-level signal generation while the Pi sends high-level commands.
Popular options include the Adafruit DC and Stepper Motor HAT, which can drive up to four DC motors or two stepper motors. For servos, dedicated PWM controller chips like the PCA9685 expand the capability to control 16 servo channels from a single board. This is how builders create robot arms, quadruped walkers, and wheeled robots with smooth, coordinated movement.
Sensor Interfacing and Data Processing
The 40 GPIO pins support multiple communication protocols that cover virtually every sensor type used in robotics. I2C connects multiple sensors on a two-wire bus. SPI handles high-speed data transfer for displays and certain sensor arrays. UART serial communication links the Pi to GPS modules, motor controllers, and other microcontrollers.
Common robotics sensors connected to Raspberry Pi include ultrasonic distance sensors for obstacle detection, IMU modules (accelerometers and gyroscopes) for balance and orientation, temperature and pressure sensors for environmental monitoring, and GPS modules for outdoor navigation. The Pi can read from all of these simultaneously, perform sensor fusion to combine the data, and make decisions based on the combined results.
Forum users frequently discuss sensor fusion on Raspberry Pi, combining IMU data with camera input and distance sensors to build a complete picture of the robot’s environment. This multi-sensor approach is fundamental to autonomous robotics.
Computer Vision and Image Processing
This is where the Raspberry Pi separates itself from basic microcontrollers. With a Raspberry Pi Camera Module connected via the CSI port, you can capture video at up to 1080p resolution and process it in real time using OpenCV, the industry-standard open source computer vision library.
Real robotics vision tasks that the Pi handles well include face detection and recognition, color and object tracking for following a ball or a line, QR code and AprilTag detection for navigation and localization, motion detection for security and monitoring robots, and lane detection for autonomous vehicle prototypes.
Forum builders report successfully streaming video from their robots and running object tracking simultaneously. The Pi 4 and Pi 5 handle these workloads significantly better than older models thanks to their faster processors and increased RAM. With the Pi 5, real-time object detection at usable frame rates is achievable without external accelerators.
AI and Machine Learning on Raspberry Pi
Yes, you can run AI on a Raspberry Pi. While it will not train large models, it can run pre-trained models for inference using frameworks like TensorFlow Lite, PyTorch Mobile, and Edge TPU with a Google Coral USB Accelerator.
Practical AI tasks on the Pi include real-time object detection and classification using lightweight models like MobileNet SSD, voice command recognition for hands-free robot control, anomaly detection for industrial monitoring robots, and simple reinforcement learning for maze-solving or navigation tasks.
The Raspberry Pi 5 with its 2.4 GHz processor and up to 8 GB of RAM handles AI inference noticeably better than previous generations. For serious edge AI work, pairing the Pi with a Coral USB Accelerator offloads the neural network processing to a dedicated TPU, enabling real-time inference at 30+ frames per second.
ROS (Robot Operating System) Integration
ROS is the industry-standard framework for robotics software development, and it runs on Raspberry Pi. ROS provides a collection of tools, libraries, and conventions for building complex robot behavior, including hardware abstraction, package management, message-passing between subsystems, visualization tools, and thousands of community-contributed packages for navigation, mapping, and manipulation.
Running ROS on a Raspberry Pi turns it into a node in a distributed robotics system. You can have one Pi handle camera processing while another controls motors, all communicating seamlessly over the ROS framework. ROS Noetic and ROS 2 distributions are both supported, with ROS 2 being the recommended choice for new projects in 2026.
Forum users confirm that running ROS on Raspberry Pi works well for navigation stacks (SLAM), which let robots build maps of their environment and navigate autonomously. Packages like Nav2 on ROS 2 enable autonomous path planning and obstacle avoidance using data from a camera or LIDAR sensor.
Technical Capabilities for Robotics
Understanding the technical specifications of the Raspberry Pi helps you plan what your robot can realistically achieve. Let us look at the key capabilities that matter for robotics builds.
GPIO Pins and Hardware Interfacing
The 40-pin GPIO header is the primary interface between the Raspberry Pi and the physical world of your robot. Of these 40 pins, 26 are programmable GPIO pins that can be configured as digital inputs or outputs. The remaining pins provide power (3.3V and 5V), ground, and standardized communication protocols.
The GPIO supports I2C (two-wire serial for sensors), SPI (four-wire serial for high-speed devices), UART (serial communication for GPS and motor controllers), and PWM (pulse-width modulation for servo and motor speed control). These protocols cover nearly every hardware interfacing need in robotics.
One important limitation: Raspberry Pi GPIO pins operate at 3.3V logic levels and are not 5V tolerant. Connecting a 5V sensor directly to a GPIO pin can damage the board. Always use level shifters when interfacing with 5V components.
Processing Power
The Raspberry Pi 5 runs a 2.4 GHz 64-bit quad-core ARM Cortex-A76 processor, which is a substantial jump from the Pi 4’s 1.5 GHz Cortex-A72. For robotics, this translates to faster image processing, smoother ROS node execution, and the ability to run multiple subsystems without lag.
With up to 8 GB of LPDDR4X RAM on the Pi 5, you can run memory-intensive applications like full OpenCV pipelines alongside a ROS navigation stack and a machine learning model without running out of memory. The Pi 4 with 4 GB of RAM remains viable for most projects and is a great value option.
Connectivity Options
The Raspberry Pi comes with impressive built-in connectivity. WiFi (802.11ac on the Pi 4 and 5) enables wireless control and data streaming. Bluetooth 5.0 lets you connect wireless game controllers, phones, or BLE sensors. Gigabit Ethernet provides reliable wired networking for stationary robots or development. USB 3.0 ports (on Pi 4 and 5) support external storage, webcams, and AI accelerators like the Google Coral.
HATs: Hardware Attached on Top
HATs are expansion boards that plug directly into the GPIO header, adding specific hardware capabilities without breadboard wiring. For robotics, popular HATs include motor driver HATs (like the Adafruit DC and Stepper Motor HAT), servo controller HATs, sensor HATs with built-in IMU and environmental sensors, and power management HATs that handle battery input and clean shutdown.
HATs dramatically simplify robot wiring. Instead of soldering motor drivers and voltage regulators onto a breadboard, you stack a HAT on top of the Pi and write a few lines of Python. This makes the platform accessible to builders at any skill level.
Power Management and Thermal Considerations
Power management is one of the most discussed topics in robotics forums, and for good reason. The Raspberry Pi 5 draws more power than previous models, requiring a 5V 5A power supply under full load. For mobile robots running on batteries, this matters a lot.
Common power solutions include USB power banks for simple builds, dedicated LiPo battery packs with voltage regulators for mobile robots, and power management HATs that handle battery monitoring, automatic shutdown at low voltage, and clean power delivery. Plan your power budget carefully, accounting for the Pi, motors, sensors, and any HATs.
Thermal management is another real concern. The Pi 4 and 5 generate significant heat under sustained load, especially during computer vision or AI processing. Active cooling with a fan (the official Pi 5 cooler works well) prevents thermal throttling that would slow your robot’s performance. Forum users consistently recommend adding a heatsink and fan for any robotics application involving continuous processing.
How to Get Started With Raspberry Pi Robotics
Getting started with Raspberry Pi robotics is more approachable than it might seem. Here is a step-by-step path we recommend based on our own experience and the most common advice from the community.
Step 1: Gather Your Essential Hardware
You need a Raspberry Pi board (Pi 4 or 5 recommended), a compatible power supply, a microSD card (at least 32 GB, high quality for reliability), a Raspberry Pi Camera Module if you plan to do computer vision, a motor driver or motor driver HAT, DC motors or servos, a chassis or frame, and a basic set of sensors (ultrasonic distance sensor is a great starting point).
Step 2: Install the Operating System
Download Raspberry Pi OS from the official website and flash it to your microSD card using the Raspberry Pi Imager tool. Choose the desktop version if you want a graphical interface, or the Lite version if you plan to run headless and connect via SSH. Enable SSH and WiFi during setup so you can control the Pi remotely.
Step 3: Set Up Your Programming Environment
Python is the most popular language for Raspberry Pi robotics, and it comes pre-installed with Raspberry Pi OS. Install the GPIO library (gpiozero for beginners, RPi.GPIO for more control), OpenCV for computer vision, and any specific libraries for your motor driver or sensors. If you plan to use ROS, follow the official ROS 2 installation guide for Raspberry Pi.
Step 4: Start With a Simple Project
Do not jump straight into an autonomous robot dog. Start with a wheeled robot that can follow a line or avoid obstacles. This teaches you motor control, sensor reading, and basic programming logic. Popular beginner kits like the GoPiGo3 or the Yahboom robot car provide everything you need in one package with step-by-step tutorials.
Step 5: Layer on Advanced Features
Once your basic robot moves and responds to sensors, add a camera and experiment with OpenCV. Try color tracking, then object detection. Move from basic motor control to ROS integration. Add an Arduino for real-time motor control if you notice timing issues. This incremental approach keeps you motivated and builds real skills.
Forum builders emphasize that the key to success is starting small and building incrementally. The community has produced thousands of tutorials, GitHub repos, and project walkthroughs that cover every step of this journey.
Real-World Raspberry Pi Robotics Projects
The proof of any platform is in what people actually build with it. Here are real-world examples that span hobbyist to professional applications.
Hobbyist Projects
Line-following and obstacle-avoidance robots are the most common first builds. They teach sensor integration and motor control in a satisfying, tangible way. Robot cars using camera modules for visual navigation are a natural next step, and the community shares dozens of open-source designs for 3D-printed chassis.
Robot arms built with servo motors and a Pi controller teach inverse kinematics and motion planning. Quadruped and bipedal walking robots push the platform further and often combine the Pi with dedicated servo controllers for smooth multi-joint movement.
Educational Use Cases
Schools and universities worldwide use Raspberry Pi in robotics curricula. Students learn kinematics, control theory, sensor fusion, and programming by building physical robots that respond to their code. The affordability means entire classrooms can be equipped for the cost of a single industrial robot arm.
Niryo, an educational robotics company, builds its Ned robot arm around a Raspberry Pi, running ROS and Python for a complete learning platform that mirrors industrial robotics at a fraction of the cost.
Industrial and Prototyping Applications
Professionals use Raspberry Pi for rapid prototyping before committing to custom hardware. It serves as a test platform for algorithms, sensor configurations, and user interfaces. Industrial users report using the Pi for quality inspection robots, warehouse navigation prototypes, and automated monitoring systems where the Pi handles camera processing and data reporting.
Forum discussions from industry professionals highlight the Pi as an excellent bridge between concept and production. You prove your software works, then port it to more specialized hardware if needed.
Challenges and Limitations of Raspberry Pi in Robotics
No platform is perfect, and being honest about the Raspberry Pi’s limitations helps you build better robots. Here are the challenges we and the community encounter most frequently.
Not a Real-Time System
Linux is not a real-time operating system. The OS can interrupt your robot control code at any moment to handle background tasks, which causes timing jitter in motor control. For applications that need precise, deterministic timing (like balancing a robot or controlling multiple coordinated servos), this is a real limitation. The standard solution is pairing the Pi with an Arduino or microcontroller for real-time tasks.
Power Consumption for Mobile Robots
The Raspberry Pi 5 under full load can draw up to 12 watts, which drains batteries quickly. A robot that needs to run for hours on battery power requires a substantial battery pack and careful power budgeting. This is a frequent pain point in forums, especially for builders transitioning from low-power Arduino projects.
SD Card Corruption
Raspberry Pi boots from a microSD card, and improper shutdowns (like pulling the power when a battery dies) can corrupt the card. This is one of the most common frustrations reported by robotics builders. Solutions include using high-endurance SD cards designed for dashcams, implementing proper shutdown procedures in your code, and using power management HATs that trigger a safe shutdown at low battery levels.
Heating Under Heavy Load
Sustained processing, especially computer vision and AI inference, generates significant heat on the Pi 4 and 5. Without adequate cooling, the processor throttles its speed to protect itself, which slows your robot’s performance. Active cooling is not optional for demanding robotics applications, it is essential.
Limited Analog Inputs
The Raspberry Pi has no built-in analog-to-digital converter, unlike many microcontrollers. If you need to read analog sensors like potentiometers or analog distance sensors, you need an external ADC chip like the MCP3008 or a HAT that includes one. This adds complexity and cost to certain sensor configurations.
FAQ
What does a Raspberry Pi actually do?
A Raspberry Pi is a credit card-sized single-board computer that runs a full Linux operating system. It functions as a complete mini-computer capable of browsing the web, running programs, controlling hardware through GPIO pins, processing camera feeds, and serving as the brain of a robot. In robotics, it handles tasks like motor control, sensor processing, computer vision, and AI inference.
Is a Raspberry Pi legal?
Yes, a Raspberry Pi is completely legal to own, buy, and use. It is a commercially manufactured single-board computer sold worldwide by the Raspberry Pi Foundation and authorized retailers. There are no legal restrictions on purchasing or using one for personal, educational, or commercial robotics projects.
What is the coolest thing you can do with a Raspberry Pi?
Some of the most impressive Raspberry Pi projects include building autonomous robots with computer vision that navigate on their own, creating AI-powered robot arms that recognize and sort objects, building walking quadruped robots, running full ROS navigation stacks for self-mapping robots, and deploying real-time object detection using machine learning at the edge. The coolest project is always the one that challenges you to learn something new.
Can you run AI off Raspberry Pi?
Yes, you can run AI and machine learning models on a Raspberry Pi. While it cannot train large models, it excels at running pre-trained models for inference using frameworks like TensorFlow Lite and PyTorch Mobile. Tasks like object detection, image classification, and voice recognition work well. Pairing the Pi with a Google Coral USB Accelerator adds a dedicated TPU that dramatically speeds up AI inference.
Is Raspberry Pi good for robotics?
Yes, Raspberry Pi is one of the best platforms for robotics available. It provides powerful computing, runs a full Linux OS with access to ROS and OpenCV, has 40 GPIO pins for hardware interfacing, supports built-in WiFi and Bluetooth, and costs a fraction of professional robotics controllers. Its massive community and open source ecosystem make it accessible for beginners and capable enough for advanced projects.
Can Raspberry Pi run ROS?
Yes, Raspberry Pi can run both ROS 1 (Noetic) and ROS 2. ROS 2 is the recommended choice for new projects in 2026 and runs well on the Pi 4 and Pi 5. You can run navigation stacks, SLAM mapping, sensor integration, and full distributed robot systems. Many builders combine ROS on the Pi with an Arduino for real-time motor control.
Conclusion
Understanding what a Raspberry Pi is and what it can do in robotics opens the door to building intelligent, capable robots without a massive budget. It is a credit card-sized computer that runs Linux, interfaces with motors and sensors through GPIO pins, processes camera feeds with computer vision, runs AI models, and integrates with ROS for professional-grade robotics software.
Whether you are building your first line-following robot or prototyping an autonomous navigation system, the Raspberry Pi gives you the computing power, software ecosystem, and community support to make it happen. Start small, build incrementally, and do not be afraid to combine it with an Arduino when you need real-time control.
Pick up a board, grab a motor driver HAT, and start building. The best way to learn robotics is one project at a time.