Technologies like 3D printing and CNC milling have been around for several decades, however in the last few years we have witnessed an explosive increase in popularity, especially for 3D printing which has made custom fabrication more convenient than ever. A variety of 3D printing solutions exist on the market, but why buy it when you can build it? According to a recent study, over 25 percent of the participants reported having used the original open-source RepRap 3D printer project, rather than commercial alternatives. This has been possible thanks to open-source and open-hardware platforms, backed by ever-growing online communities of enthusiasts and professionals sharing information like never before.

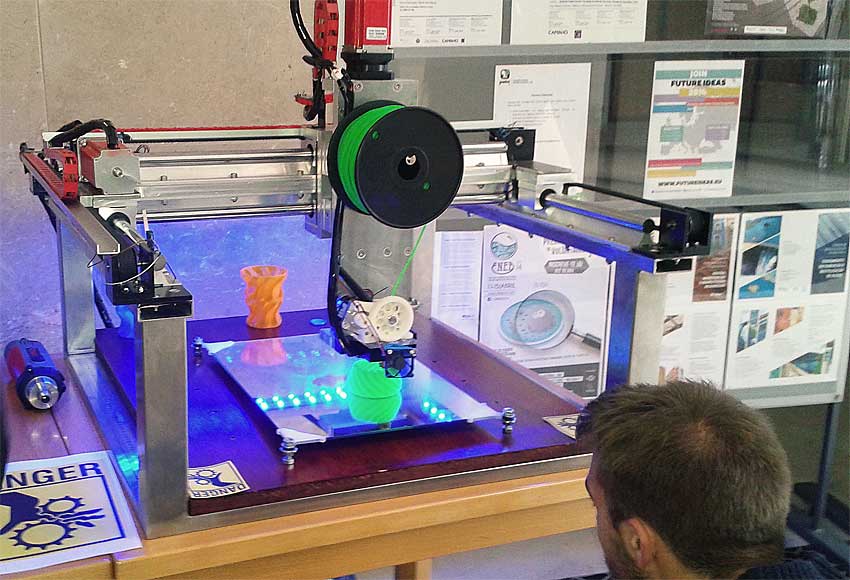
BuildersBot is exactly this, an open-source custom built CNC router that doubles as a 3D printer, controlled by an Arduino MCU. Created by Aldric Negrier, the project is indeed impressive in most aspects, it features a very robust structure, superb build quality, it also has a very attractive design and a huge 3D printing volume.
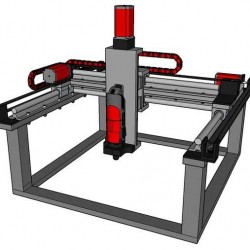
BuildersBot 3D model
Aldric Negrier released this week a very well documented guide of this build. It is not easy, Negrier states the project took about 6 months to design and build, with a cost adding up to about 1400 Euro (1900 US Dollars), depending on where the parts and materials are bought from. This price does not include of course the various tools required to manufacture and assemble the machine, a price of about 2000 Euro or close to 3000 US Dollars would be closer to reality.
An Arduino Mega MCU brings to life this excellent project, and the author recommends Repetier Host and firmware or Marlin Arduino Mega firmware for the complete 3D printing or CNC milling flow, from model to physical part. The extruder and hotend assembly is mounted to the carrier by using just 2 screws, to facilitate switching between CNC and 3D printer functionality.
BuildersBot parts inventory
MIG welding, drilling and cutting skills are required to put together this machine. Below you can find the parts inventory, as specified by the author, with approximate pricing for each item.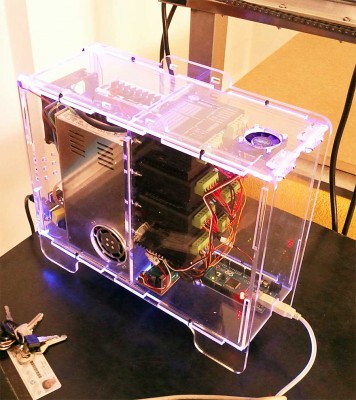
BuildersBot electronics enclosure
Electronics
- Arduino Mega MCU, ramps 1.4 board, 6 3-wire endstops – 30-90 Euro
- 4 Nema 23 stepper motors, 4 4.2A 128 MicroDrivers for the steppers, 2 36V power supplies – 300 Euro
- Wires, cables, tubs, connectors, plugs – 20 Euro
- Other electronics: 12V power supply, smart controller LCD
Chassis and mechanical
- Welded stainless steel frame – 100 Euro
- 4 calibrated 20mm round rails with support and 8 bearing blocks – 140 Euro
- 2 Calibrated 16mm round rails with support and 4 bearing blocks – 60 Euro
- 20mm ballscrew and ballnut – 100 Euro
- 6 pulleys and 3 1.8 meter toothed belts – 80 Euro
- Stainless steel marine grade nuts bolts and screws – 100 Euro
- 15mm Aluminum plate – 50 Euro
- Kress spindle and aluminium mount – 200 Euro
- 1 Extruder with 0.5mm J-head hotend and heat bed – 60 Euro
- Lock tight, lubricant, paint – 35 Euro
- CNC bed – 15 Euro
The chassis of the BuildersBot is a stainless steel frame, comprised of 11 rectangular tube segments, cut to size and welded together as specified in the step-by-step instructions.
The X-Y axes positioning system for the 3D printing/machining assembly is built using aluminium round rails and linear ball bearings. A layer of rubber, or similar material, is used for insulation between the positioning assembly and the stainless steel frame to prevent vibration propagation. Toothed belts and pulleys are used in transmission assemblies for the two axes.
The Z-axis positioning is accomplished by moving the build platform vertically. Again, aluminium parts, round rails and bearings are used in the assembly. Power from the motors is transmitted via a 25×30 mm coupling.
The electronics enclosure is build of 7 laser cut transparent acrylic parts fitted together, and it is nicely lit using blue LEDs. The machine working area is lit using RGB LED strips.
The complete step-by-step guide is available on Instructables.