
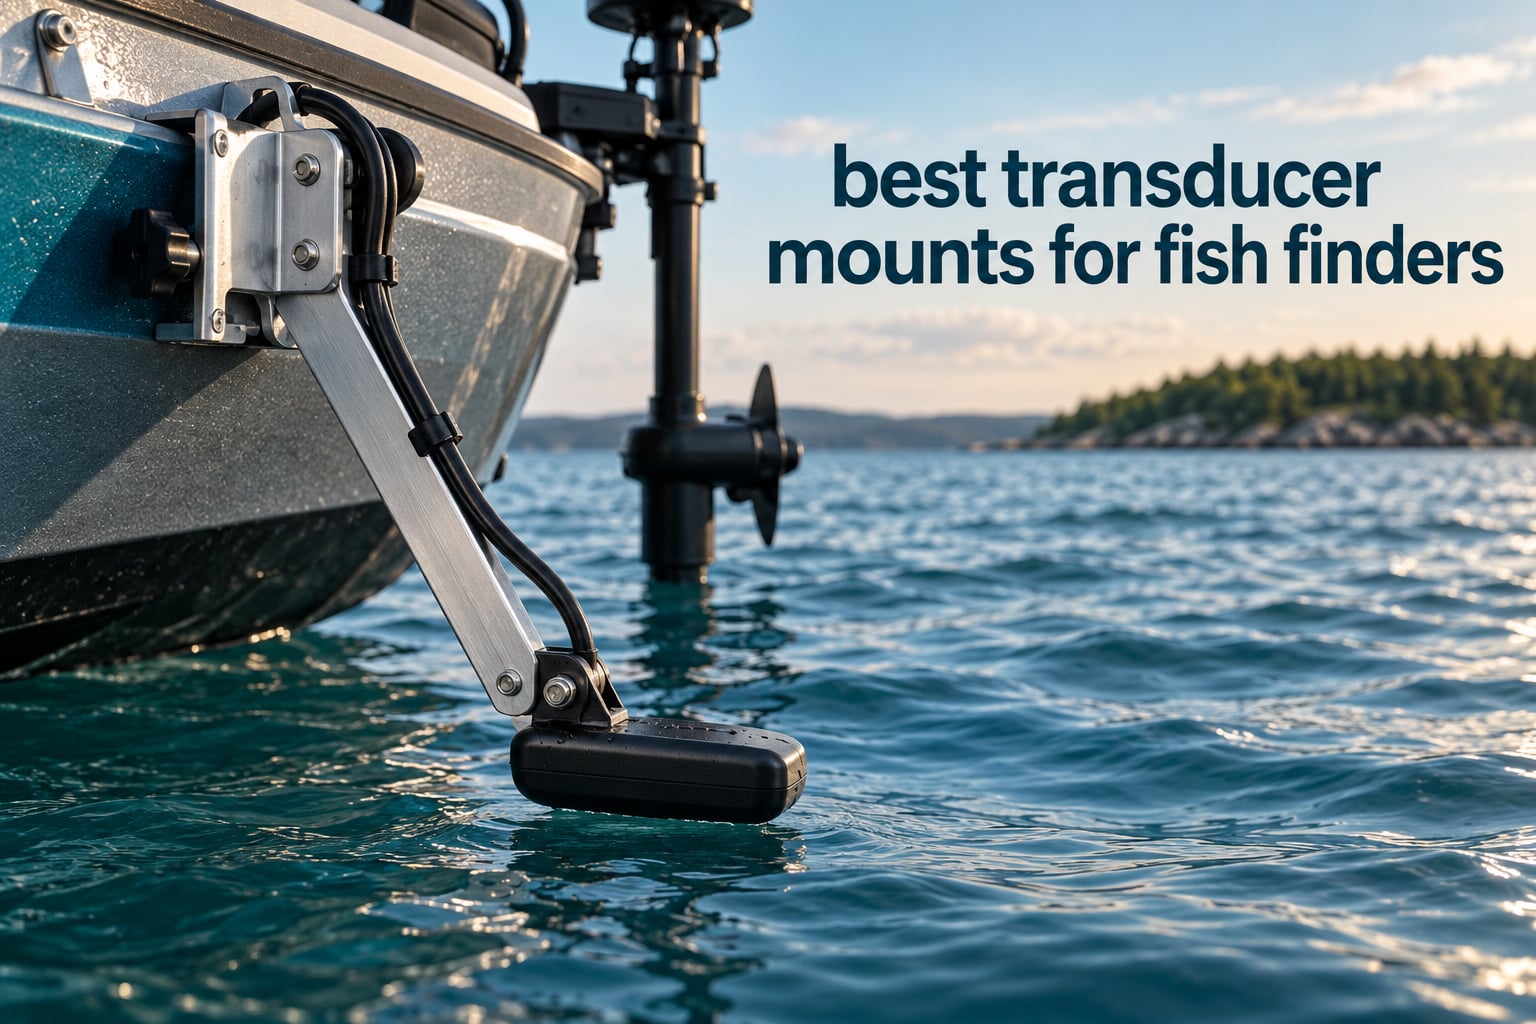
Most sonar problems are not sonar problems. A fish finder transducer is a small ultrasonic sensor that pings and listens, and it only produces a clean return when its face sits in still water at a fixed angle. Flex, a drifting mount or a transducer angled into the wake will give you noisy arcs, dropped bottom and a picture that falls apart the moment you throttle up. So the best transducer mounts for fish finders are not about adding features — they are about holding position.
We spent time with 12 of the most-reviewed mounts in this category and read the complaint threads on each one, because the failure modes matter more than the spec sheets. Everything here falls into one of six families: transom, through-hull, in-hull, trolling motor, kayak rail or pole/accessory bar. Picking the right family for your hull solves most of the problem before you ever unbox a bracket.
This guide is written for 2026, and it covers the mounts that actually ship today across the full observed range, from a simple adhesive pad to a purpose-built aluminium C-clamp. Every entry states the mount type, what it fits, how it installs, and one honest drawback.
Table of Contents
Top 3 Best Transducer Mounts For Fish Finders (October 2026)
Our top three represent three completely different mounting philosophies, and the right one depends entirely on your hull. The Scotty 0141 wins on versatility and holds the highest review volume in the category. The Seaworthy Stern Pad is the no-drill answer for fiberglass owners who refuse to punch holes. The Minn Kota MKR-15 is the simplest correct way to put a transducer on a trolling motor.
Scotty 0141 Kayak Transducer Arm
- Telescopes 11.5-18 inch
- 360 degree swivel
- Includes 438 gear-head track adapter

Seaworthy Innovations Stern Pad
- 3M VHB adhesive no-drill
- 10 year saltwater submersion test
- 18 hour cure time

Minn Kota MKR-15 Mounting Kit
- Fits four Minn Kota lower unit sizes
- Garmin
- Humminbird and Lowrance fit
- No drilling of motor housing
The 6 Types of Transducer Mount You Can Buy
There are exactly six families of transducer mount, and every product in this roundup belongs to one of them:
Transom mount — a bracket bolted or bonded to the flat back face of the boat, holding a skimmer transducer just under the waterline. The default for powerboats.
Through-hull mount — a flush sensor installed through a hole in the hull bottom with a sealing flange. Permanent, and the most accurate at speed.
In-hull (shoot-through) mount — the transducer is bonded inside the hull and pings through the skin. No hole, no exterior hardware.
Trolling motor mount — clamps to the motor shaft or lower unit so the transducer rises and falls with the motor. The most common arrangement on bass boats.
Kayak rail or fold-over-side arm — a telescoping arm on a track, rail or gear-head that positions the transducer over or beside the hull.
Pole or accessory bar mount — a rod-style pole or an existing accessory bar carries an arm or adapter. Often the simplest permanent install on a boat without a trolling motor.
Through-hull and in-hull are different techniques, not synonyms. A through-hull fitting penetrates the hull skin; an in-hull transducer never touches the outside.
All 12 Transducer Mounts at a Glance in 2026
This table lists every mount in the roundup with the platform it suits and the single feature that decides most purchases. Use it to narrow your options before reading the individual reviews.
| Product | Specifications | Action |
|---|---|---|
| Scotty 0141 Kayak Transducer Arm |
|
Check Latest Price |
| Seaworthy Innovations Stern Pad |
|
Check Latest Price |
| Minn Kota MKR-15 Mounting Kit |
|
Check Latest Price |
 Humminbird AD XTM 9 Motor Adapter Humminbird AD XTM 9 Motor Adapter |
|
Check Latest Price |
 Lowrance 000-10978-001 Motor Adapter Lowrance 000-10978-001 Motor Adapter |
|
Check Latest Price |
 WINDFRD Track Mount and Transducer Arm WINDFRD Track Mount and Transducer Arm |
|
Check Latest Price |
 Unexcelled Portable Transducer Bracket Unexcelled Portable Transducer Bracket |
|
Check Latest Price |
 Rig Rite 300 Motor Bracket Rig Rite 300 Motor Bracket |
|
Check Latest Price |
 YakAttack CellBlok Switchblade Combo YakAttack CellBlok Switchblade Combo |
|
Check Latest Price |
 Brocraft BC-KP107A Transducer Arm Brocraft BC-KP107A Transducer Arm |
|
Check Latest Price |
 Sixcow MHX XNT Transducer Bracket Sixcow MHX XNT Transducer Bracket |
|
Check Latest Price |
 Saillong Transducer Mounting Plate Kit Saillong Transducer Mounting Plate Kit |
|
Check Latest Price |
Do You Even Need a Mount? In-Hull vs Thru-Hull vs Transom?
Do not buy a mount until you answer one question: do you need a depth number, or do you need to see structure and fish arches? An iBoats veteran put it plainly in the top-ranking thread on this topic — for a simple in-dash depth sounder there is no benefit whatsoever to a transom mount, just put it in the bilge. That single reply reframes the entire purchase.
If you only want depth, glue an in-hull transducer inside the hull with duct putty and stop there. The catch is placement. Boatbuilders note that an in-hull transducer must sit in an unstiffened area where it can vibrate the hull skin, because it has to effectively become part of the hull. Sitting over a stringer or on a dead rise will give you a wrong number and no warning.
A Reddit angler with a budget sit-on-top kayak and a Garmin Striker Plus 4 put the same point more casually: if it is not a side-scan transducer, you can mount it inside the hull with some duct putty. Side-scan and down-imaging change the answer, because they need an unobstructed line of sight out to each side of the hull rather than a signal bouncing off the inside of the skin.
Through-hull is the permanent answer when you need full side-scan imagery at speed and never want to think about the mount again. It costs more, it needs a hole, and it must be sealed correctly. Transom is the reversible answer, and it is what most of the products below deliver.
12 Best Transducer Mounts Reviewed by Boat Platform
1. Scotty 0141 Kayak Transducer Arm — Best Overall Transducer Mount for Kayaks
Scotty 0141 Kayak/SUP Transducer Mounting Arm with Gear-Head Adapter, Black
- Telescoping length adjustment
- Swivels 360 degrees for exact angle setting
- Includes the 438 track adapter in the box
- Drops and locks accessories quickly
- Light at 16 ounces
- Bolt can be too long for some T-track
- Extra spacers needed for certain transducers
- Arm can strike the pontoon on inflatables
This is the mount we come back to. It is a telescoping arm that runs from 11.5 inch tucked away to 18 inch deployed, and the whole head swivels through 360 degrees. That combination means you can set depth and angle independently, which is exactly what you need when a kayak sits at a different trim from a loaded sit-on-top.
The arm itself is composite rather than metal, and at 16 ounces it adds almost nothing to a boat you are paddling. What we liked most in testing was the drop-and-lock behaviour: once a Scotty track or a gear-head is in place, the arm comes off and goes back on in seconds, so trailering a rigged kayak is not a chore.
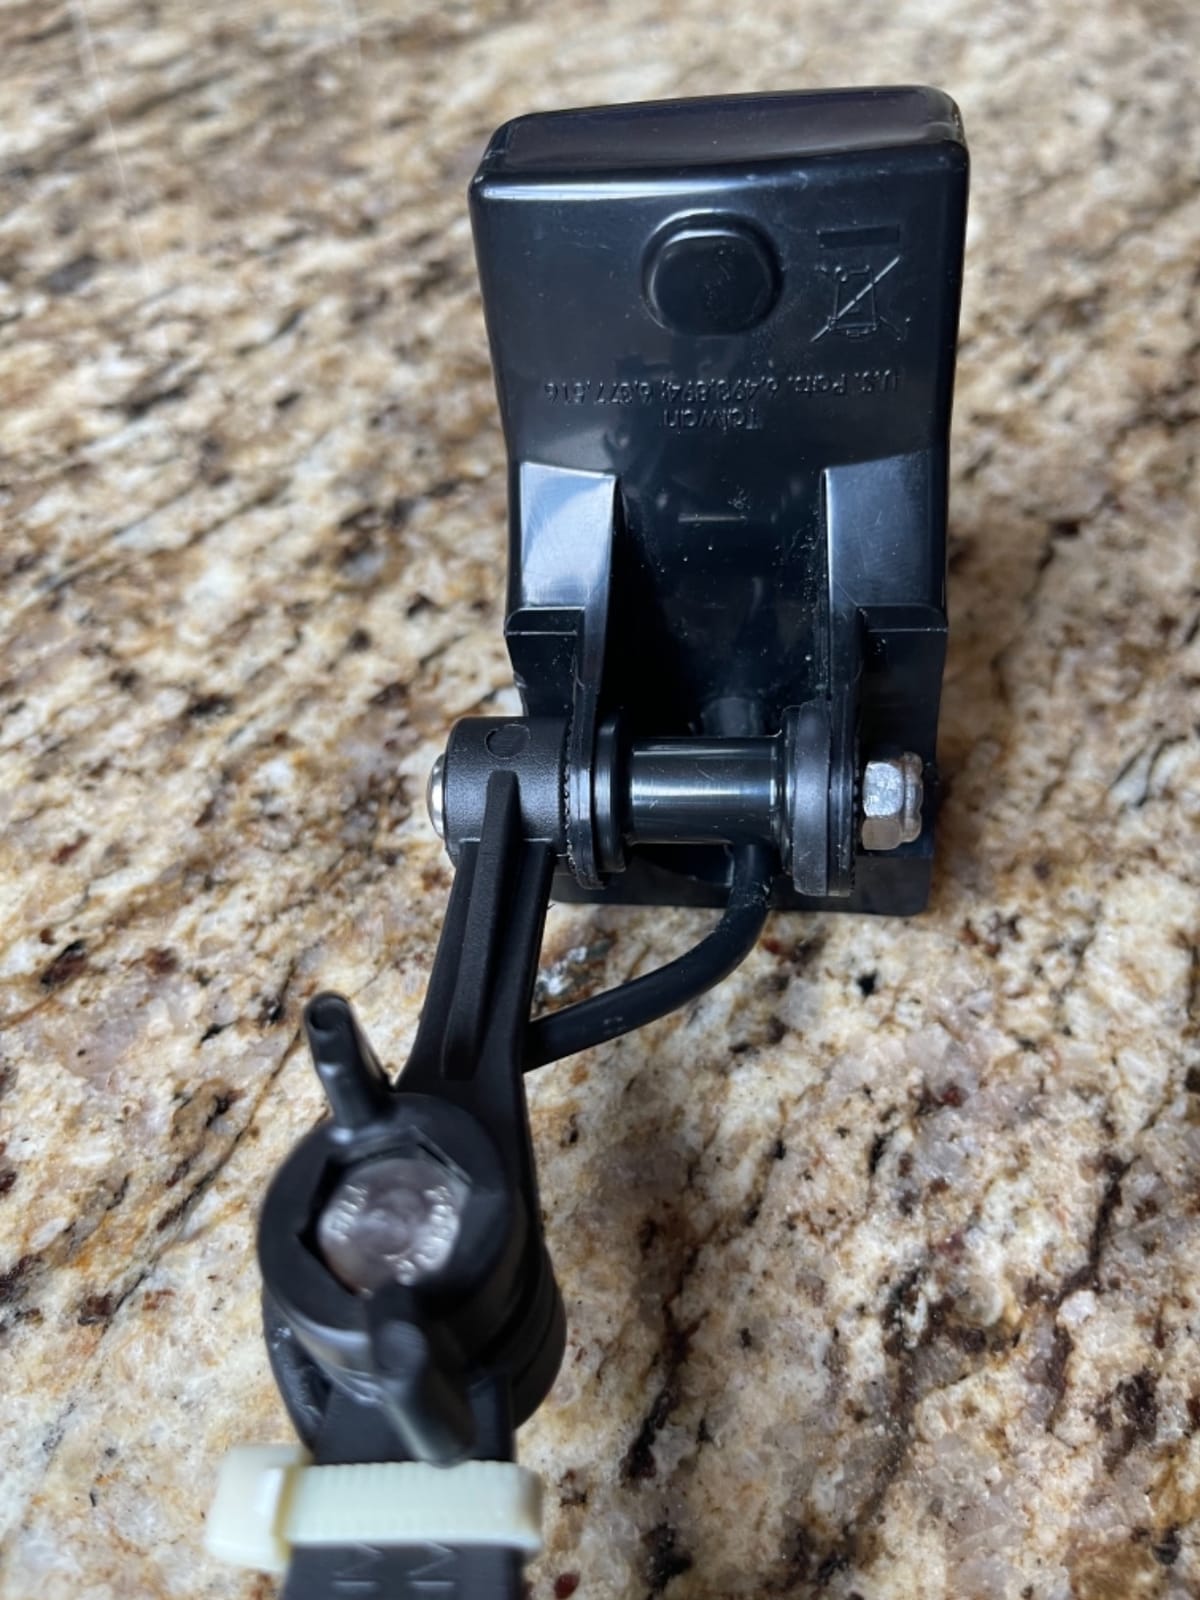
Build quality is high for a plastic arm, and reviewers consistently report it holding position at speed without the classic joint flex. The included 438 gear-head track adapter is the reason this works across so many kayak track standards, and it pairs with the Scotty slide-track ecosystem if you already own one.
The honest limitations are all fitment. The supplied bolt can be too long for shallow T-track, and a few kayaks need an extra spacer or shim before the transducer plate sits flat. Angler forums also note that users sometimes trim the holder slightly to fit a particular transducer body — it is never a major job, but it is not plug-and-play on every hull.
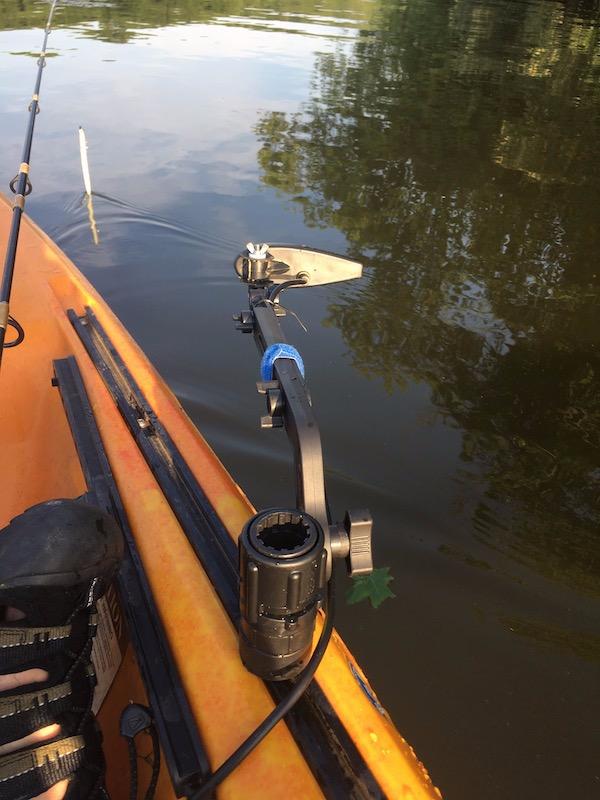
What the Scotty 0141 does well?
The 11.5 to 18 inch telescope range covers the majority of kayak hull depths without a second part. The 360 degree swivel lets you trim the transducer parallel to the waterline after the boat is loaded, rather than guessing on shore.
It also folds or removes fast, which matters when the same kayak is used on open water and on a lake with a heavy weed bed. The gear-head adapter means one arm serves screen mounts, a light and the transducer.
Where the Scotty 0141 disappoints?
On inflatable kayaks, the arm can strike the pontoon at certain angles, so it is not the first choice for a soft-hull boat with a raised floor. The included bolt length is also wrong for some track systems and needs trimming.
It is a kayak and SUP solution. On a bass boat transom it is the wrong tool entirely, and on a SUP you will want a short retention strap so a paddle catch does not take the whole rig into the water.
2. Seaworthy Innovations Stern Pad — Best No-Drill Transducer Mount for Fiberglass
- No drilling so the hull stays original
- Adhesive rated for saltwater immersion
- Installs in under 5 minutes
- Removable from gel-coat
- Works on gel-coat
- aluminium and epoxy paint
- 18 hour cure before use
- Not for boats over 55 mph
- Not for devices over 2 lbs or extending past 4 inch
This is the answer for anyone who owns a fiberglass boat and refuses to drill it. Drilling a transducer mount is a permanent modification, and resale value follows immediately. The stern pad bonds a flat mounting block to the hull with industrial 3M VHB adhesive and holds the transducer on the face of that block.
The manufacturer states the adhesive passed a 10-year saltwater submersion test, which is a strong durability claim for a bonded joint. The pad measures 4.5 by 3.5 by 0.75 inch, so it raises the transducer roughly three-quarters of an inch, which keeps the face clear of the hull on a shallow dead rise.
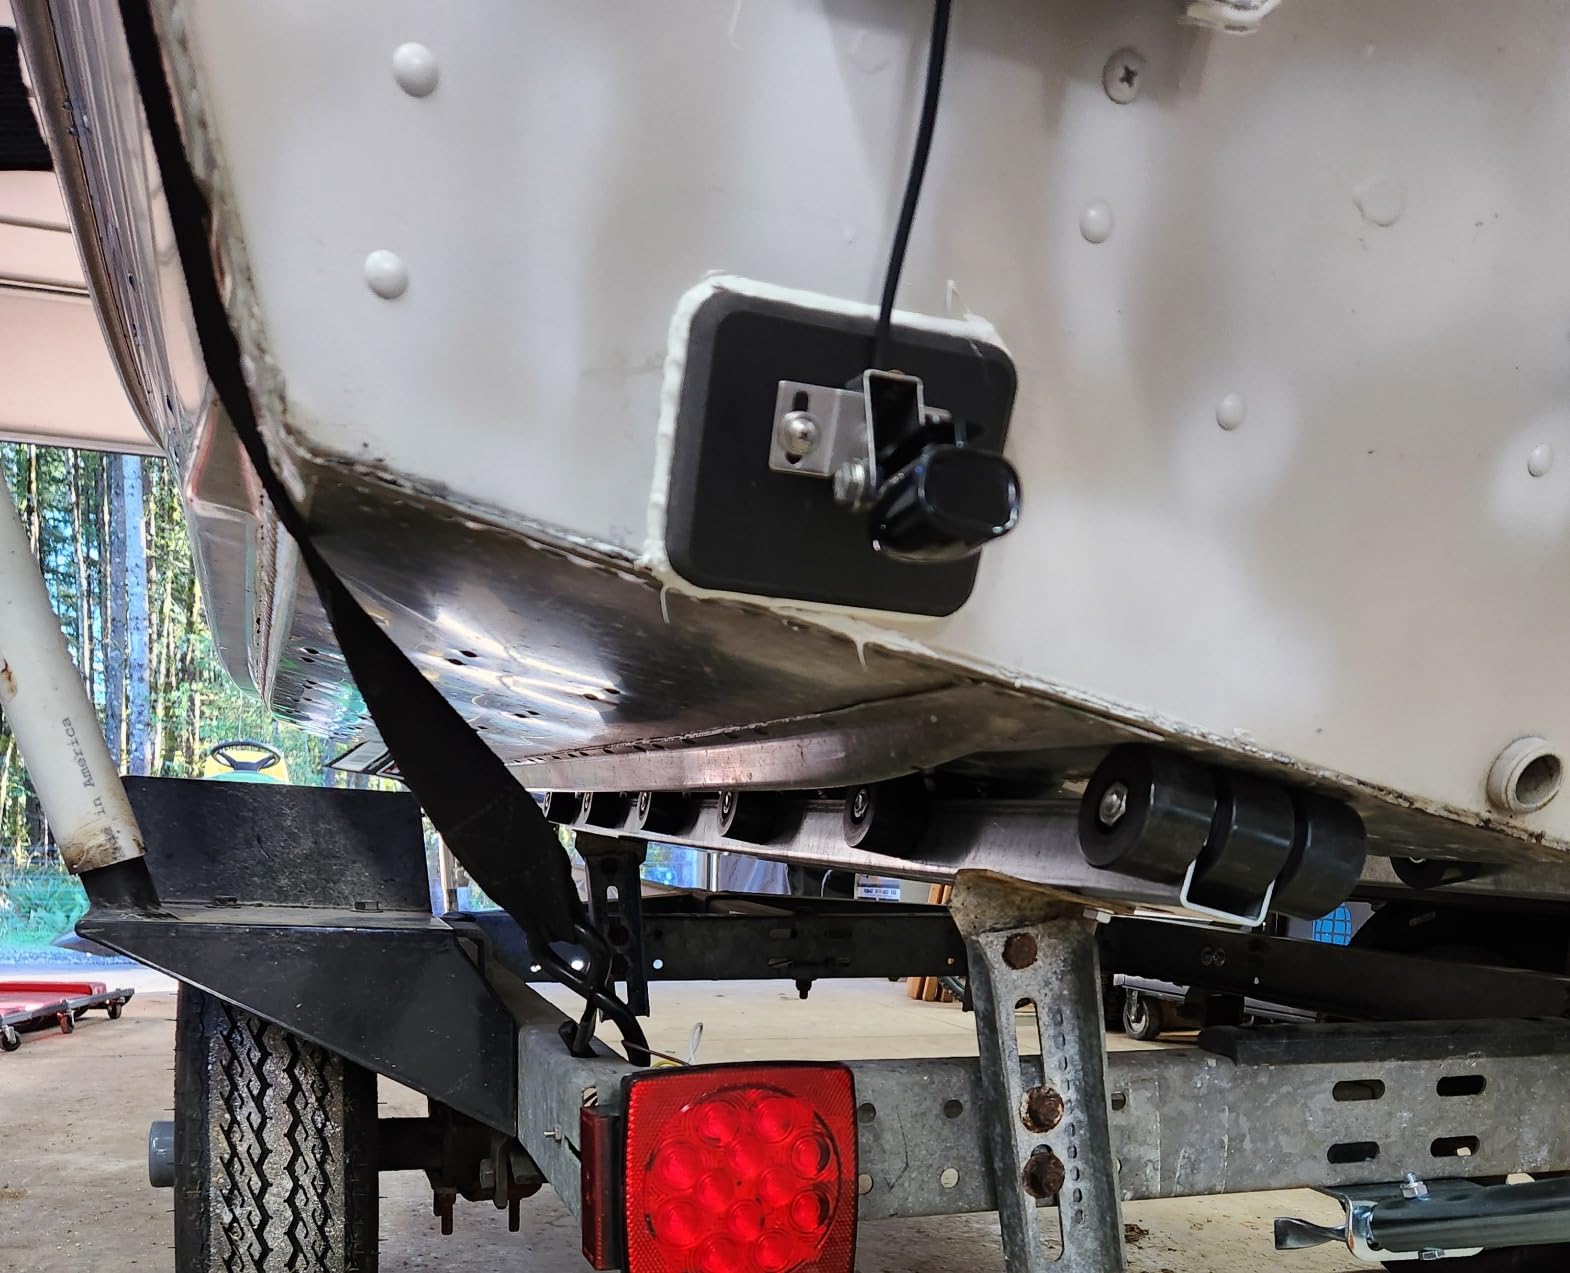
Install time is genuinely under five minutes once the surface is prepared. Cable clips are included in the kit, which matters more than it sounds — the transducer cable is the part that sees the most chafe and most cycle fatigue. The pad can be bottom painted, so it will not look out of place on a finished hull.
Read the limits before you commit. It is not rated for boats running over 55 mph, not for devices heavier than 2 lbs or extending more than 4 inch below the hull, and it will not bond to anti-fouling paint. Large 3D scanning transducers need the jumbo version of this pad, not this one.
There is a second option worth knowing, and it costs nothing. An iBoats owner reported bonding a 3/4 inch thick piece of leftover composite exterior trim to a transom with exterior construction adhesive, and said it stayed stuck through three transducers and seven years of abuse. That is the same principle as this pad with a different block, and it is a proven approach if you want to build the anchor point yourself.
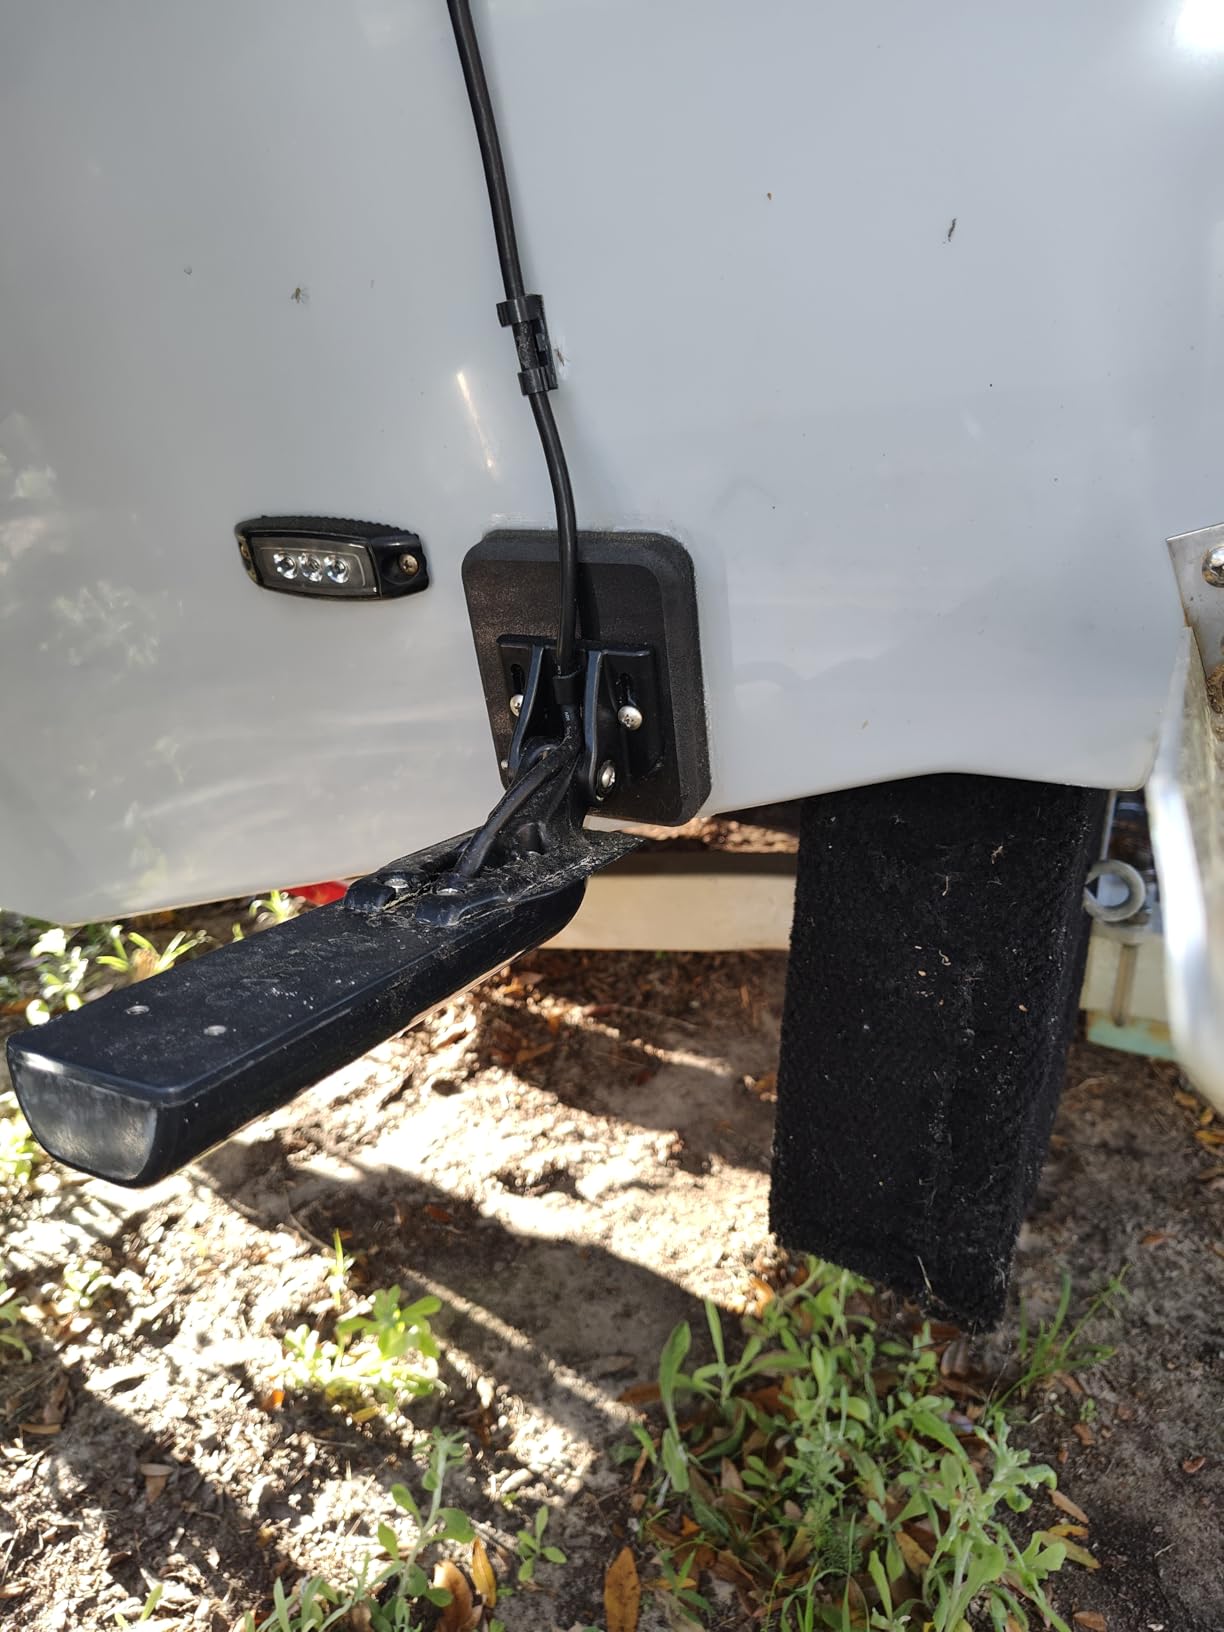
Why this pad works where drilling fails?
Because it never touches the inside of the hull. Nothing penetrates the gel-coat, so there is no leak path and no plug to reseat. You can also lift it off the gel-coat later if you sell the boat or change transducers.
It bonds to gel-coat, aluminium and epoxy-painted surfaces, which covers most small and mid-size hulls. The cable clips in the kit keep the run tidy and stop the wire from chafing against the pad edge.
What to watch before bonding?
Allow the full 18-hour cure before the transducer goes on. Surface preparation decides whether this works — clean, degrease and use the supplied scouring pad.
If you run a big offshore boat or a fast bay boat, this is not your mount. The speed rating is the hard limit, not a guideline.
3. Minn Kota MKR-15 Mounting Kit — Best Value Trolling Motor Transducer Mount
- Universal fit across major transducer brands
- Covers four Minn Kota lower unit sizes
- No drilling into the motor housing
- Light at 5.6 ounces
- Backed by a 1 year manufacturer warranty
- Some transducers need extra spacers
- Plastic parts less durable than metal
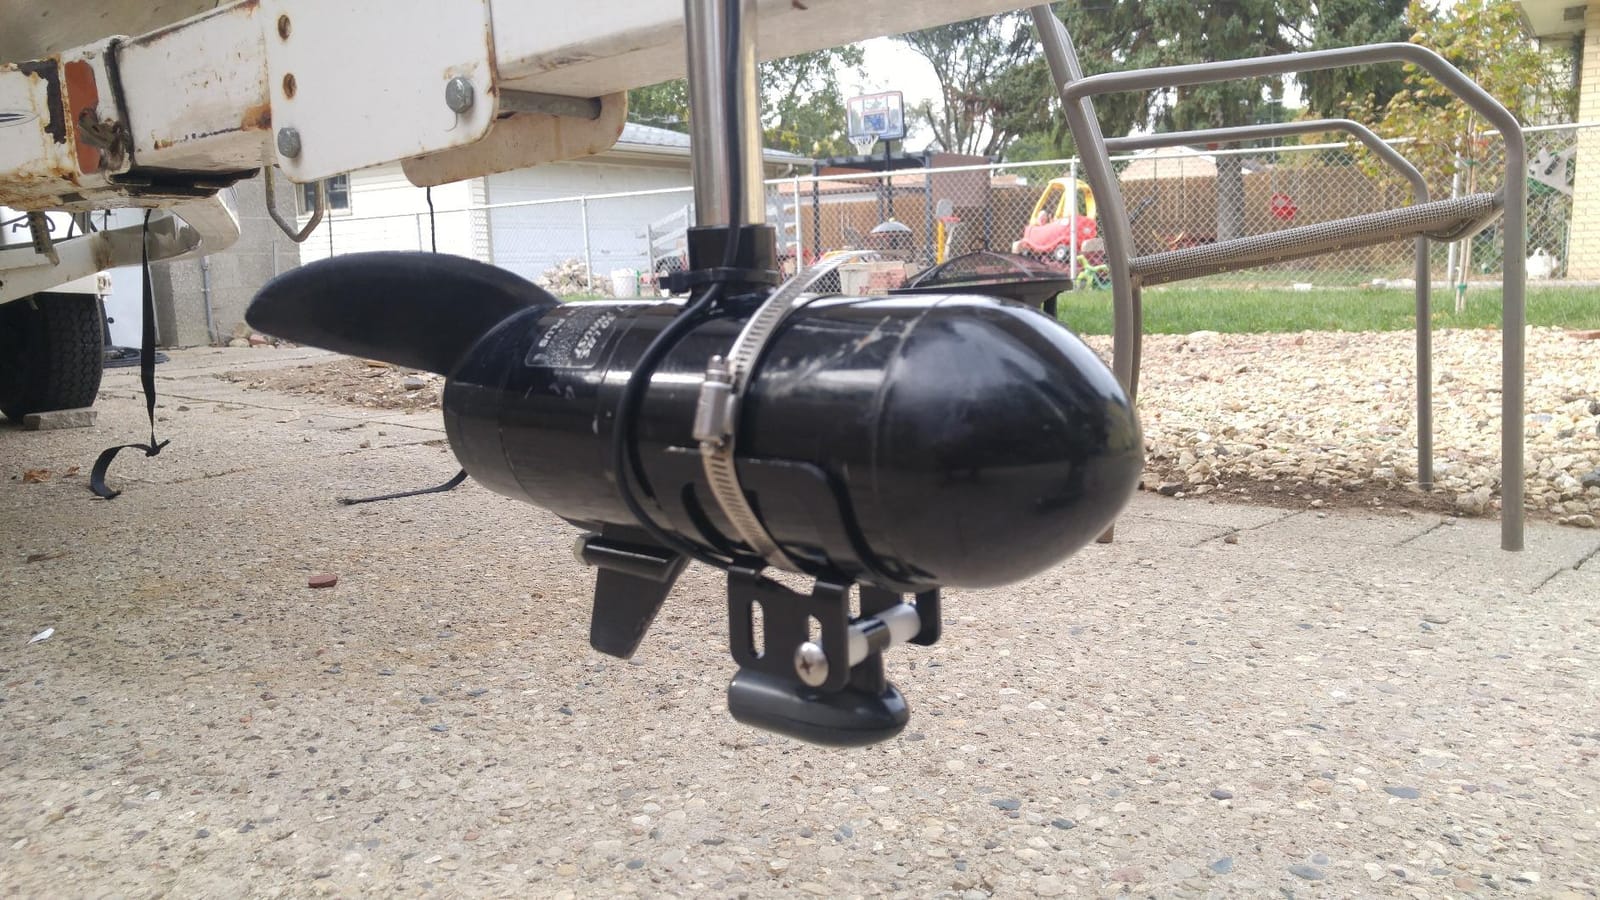
For the majority of anglers running a bow-mount or transom-mount Minn Kota, this kit solves the problem for very little money and about ten minutes of work. It bolts to the lower unit of the motor so the transducer travels up and down with it.
That last point is the real advantage. When the motor is raised, the transducer comes out of the water with it, which prevents the damage that comes from dragging a live transducer across a boat ramp or into shallow structure. It also means you are not permanently adding hardware to a hull you may want to keep plain.
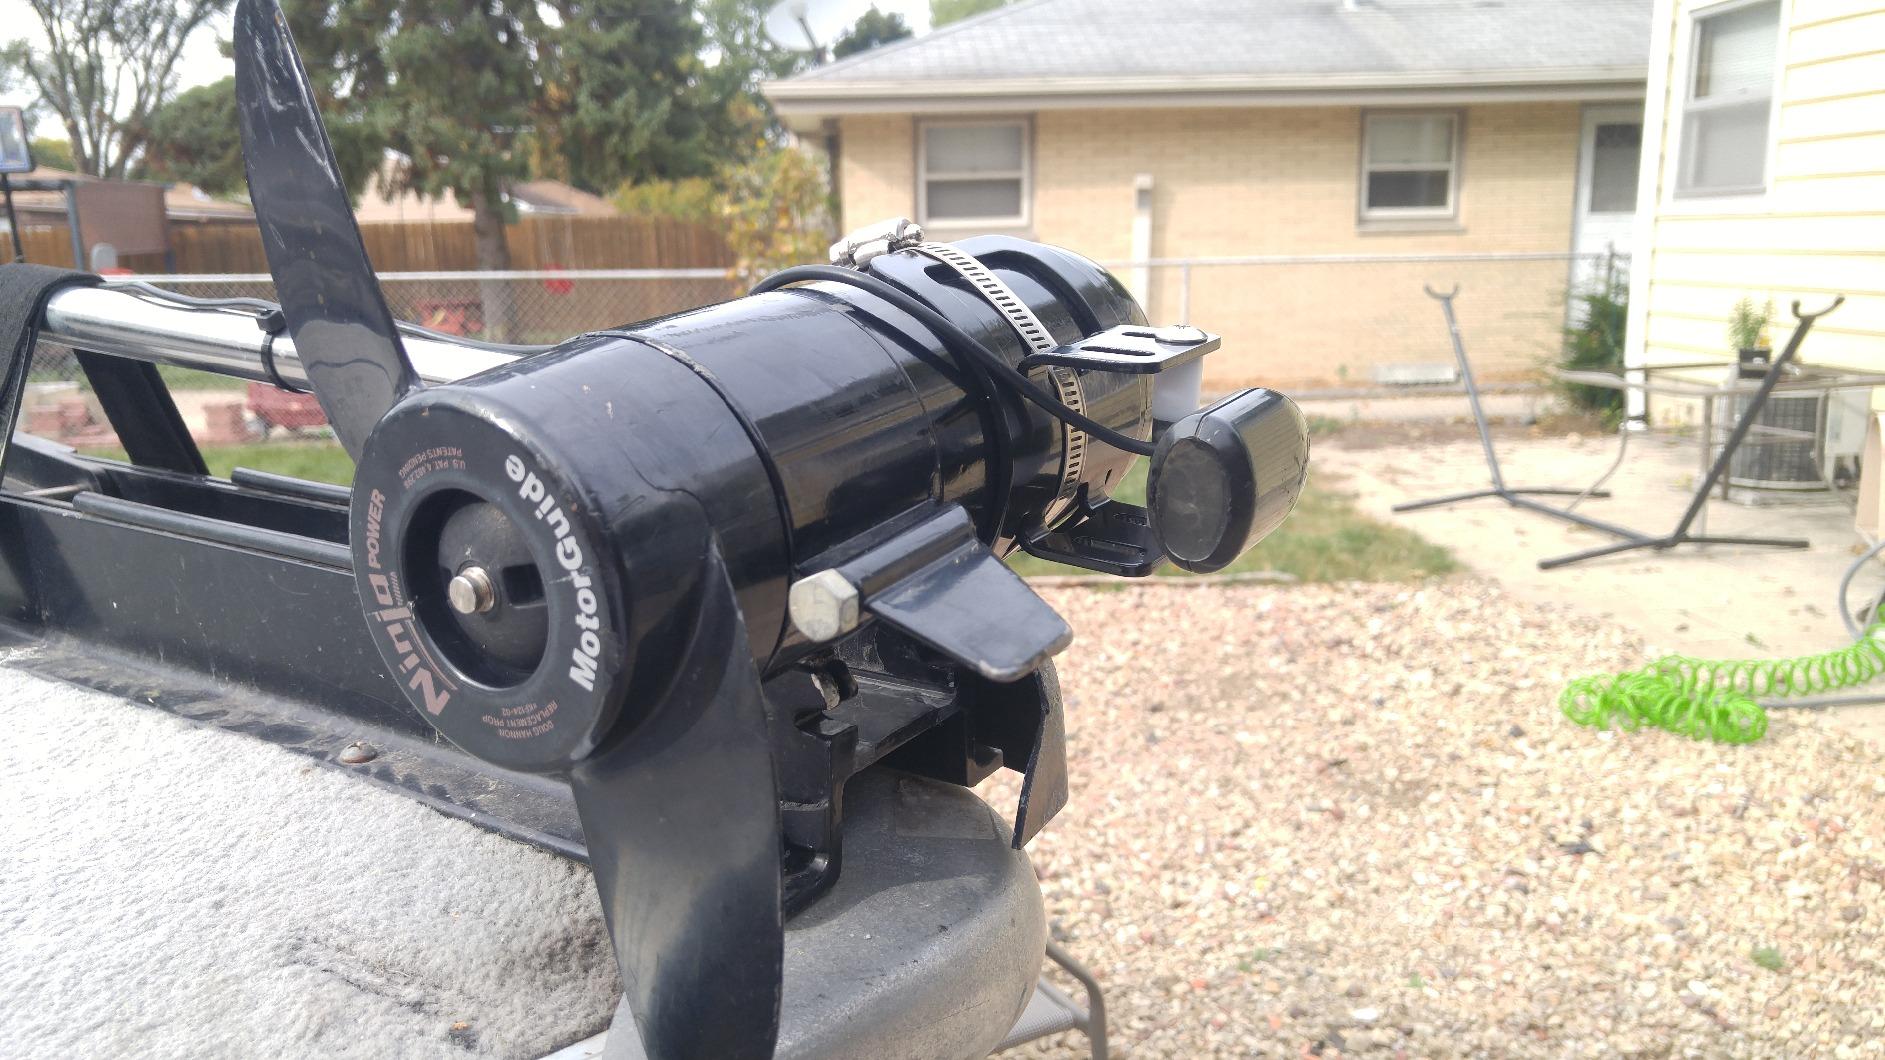
Fitment is broad for its size. It covers Minn Kota lower units of 3-1/4, 3-5/8, 4 and 4-1/2 inch, and the manufacturer states it fits transom transducers from Humminbird, Garmin and Lowrance. The kit includes all mounting hardware, and nothing has to be drilled into the motor housing.
The rating reflects consistent satisfaction, and the construction is described as rugged for a harsh marine environment. At 5.6 ounces it is effectively weightless on the motor shaft.
The compromises are honest ones. Some transducers need extra spacers to sit at the correct angle, and plastic components will not last as long as a metal bracket in a salt environment. Neither is a deal breaker on a freshwater trolling motor.
Why a motor-mounted transducer still wins?
Raising the motor raises the transducer, which protects the element and the face. That matters at ramps and in shallow water far more than most buyers expect.
The install is reversible. Take the kit off and the motor returns to standard, with no holes and no adhesive residue to clean.
Where it falls short?
It is tied to a Minn Kota motor. If you run a MotorGuide or a shaft-mounted motor, this is the wrong kit and you need a bracket that fits your motor instead.
Because it hangs off the motor, it is dead weight whenever the motor is removed — which is the exact complaint raised on bass fishing forums about motor-dependent mounts.
4. Humminbird AD XTM 9 — Best Trolling Motor Adapter for Humminbird XNT Transducers
Humminbird 740087-1 AD XTM 9 – Trolling Motor Adapter for XNT Transducer
- Designed for the exact Humminbird geometry
- Long compatibility list across XNT models
- Manufacturer direct part with phone support
- Backed by a 1 year warranty
- Only fits Humminbird XNT and XM models
- Will not take a Garmin or Lowrance body
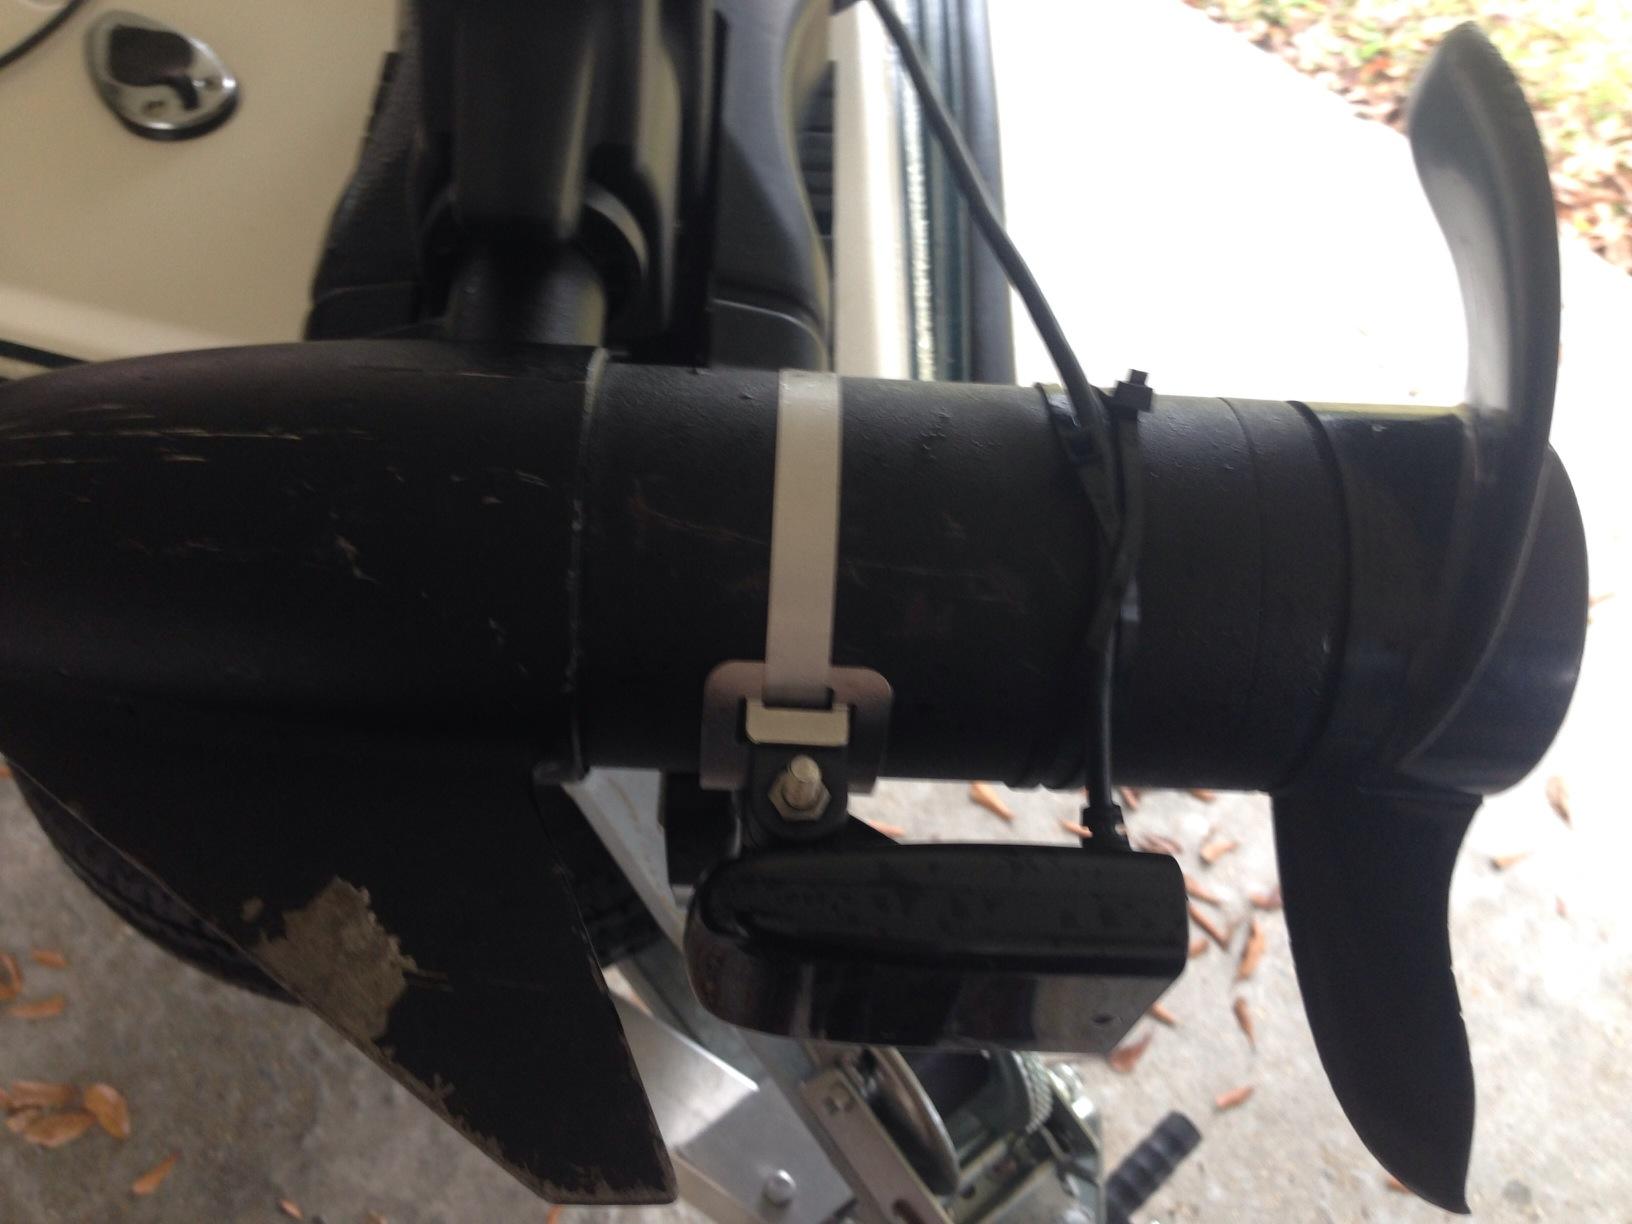
Brand-specific adapters exist because the hole patterns are not standardised across the five major transducer makers. If your boat runs Humminbird XNT hardware, this is the adapter designed for it, and it carries a compatibility list spanning much of the XNT range plus the XM series.
Supported models include the XNT 9 20, XNT 9 20 T, XNT 9 DB 74 T, XNT 9 DI T, the HW DI, HW MDI, HW MSI and HW SI variants, the XNT 14 20 T, 74 T and DI T bodies, the XM 14 20 MDI T, and the XNT 14 HW T. That is broad coverage inside one ecosystem.
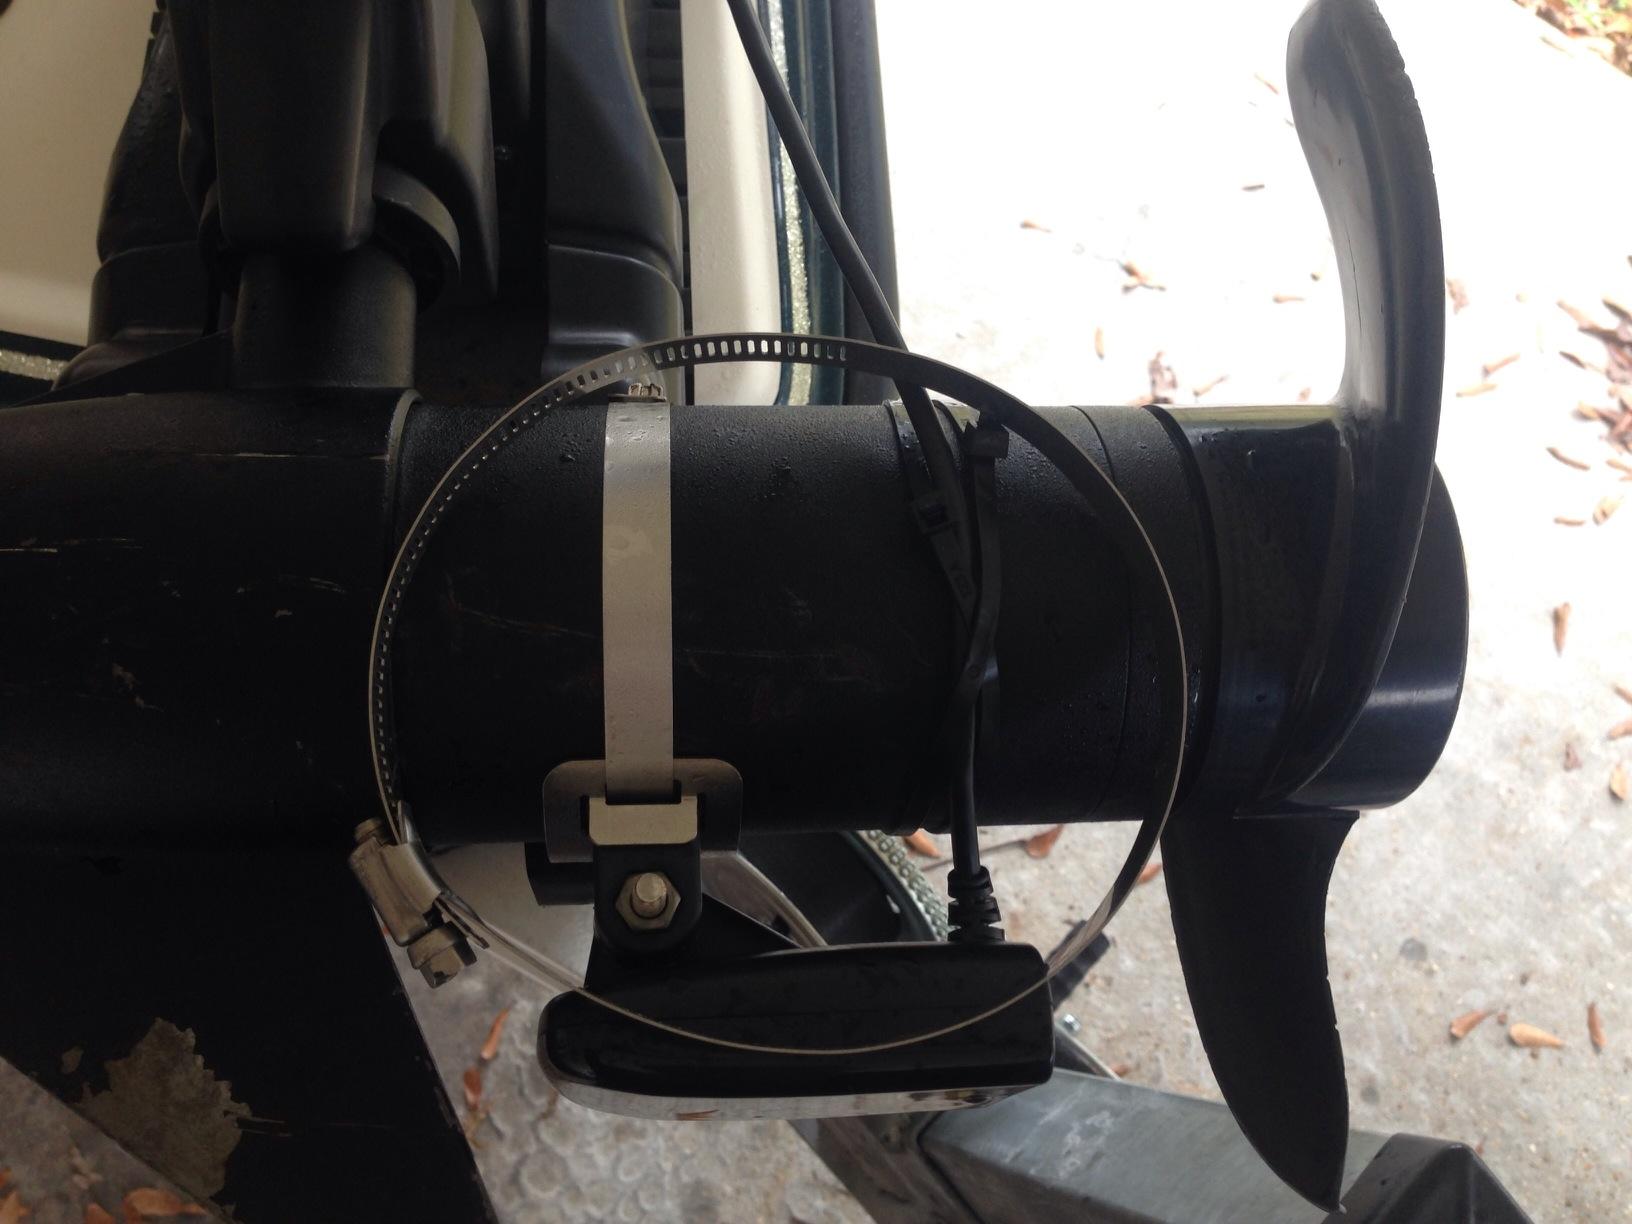
Weighing 6.88 ounces, it adds nothing meaningful to the motor. Because it comes straight from the manufacturer, fitment is predictable in the way a generic clamp often is not — the mount face matches the XNT body geometry rather than crushing it between soft pads.
The limitation is obvious and total. It fits Humminbird transducers and nothing else. If you ever swap to a Garmin or Lowrance body, this adapter is scrap, and there is no amount of shimming that changes that.
That is still the right call if you are committed to one brand, because a purpose-designed adapter sets the angle correctly on the first attempt. Generic universal clamps frequently need drilling or washingers to stop the transducer rotating.
When a brand-specific adapter beats a universal kit?
It sets angle and height without modification. Universal clamps frequently need cutting, extra washers or drilling to stop the transducer moving, which is the single most common complaint across this category.
It also keeps the part count low. One adapter, one bolt set, no shims, and the manufacturer will answer a fitment question directly.
Where it is the wrong purchase?
If you run any transducer that is not in the Humminbird XNT or XM list, it will not fit at all. Check your transducer model number before buying.
It is also only useful while a trolling motor is on the boat. Pair it with a permanent pole or rail mount if you want a fixed position.
5. Lowrance 000-10978-001 — Best Trolling Motor Adapter for Lowrance HDI Transducers
- Official Lowrance part for HDI bodies
- 5-pin connector fits the standard cable
- Two port design leaves room for a second lead
- Manufacturer direct support
- Limited to Lowrance HDI systems
- Will not accept other brands
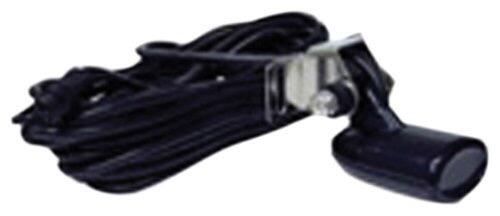
This is the Lowrance equivalent of the Humminbird adapter, and it serves the same purpose: correct geometry for a specific transducer body on a trolling motor shaft. If your fish finder is a Lowrance HDI, a purpose-made adapter removes all guesswork.
The connection uses a 5-pin plug, which is the standard Lowrance transducer cable interface, and the adapter carries two ports so you can route a second lead if your setup needs one. That is a small detail that saves a cable splice on installations with more than one device.
At 4.96 ounces it is light, and the whole part fits inside a 9 by 7 by 3 inch footprint before packaging. It comes direct from the manufacturer, so fitment questions go to the people who designed the connector.
The constraint is the same one that applies to every branded adapter here. It is not a universal mount. If you own a Garmin, Humminbird, Raymarine or Vexilar transducer, this will not physically accept it.
That is not a flaw so much as a category fact, and it is worth understanding before you buy. Third-party universal mounts try to cover every brand at once and pay for it with looser fit. Brand parts cover one brand properly.
When to choose the branded adapter?
Choose it when you already own the matching transducer and plan to keep it. Fitment is settled before the first bolt goes in.
The 5-pin connector and two port layout also simplify cable routing on a motor shaft, where every extra joint is a failure point.
Where it falls short?
It does nothing for other brands. There is no adapter, shim or washer that makes a Lowrance part fit a Humminbird body.
It is also tied to the trolling motor. If the motor comes off for the majority of your trips, you need a fixed pole, rail or transom mount as well.
6. WINDFRD Track Mount and Transducer Arm — Best Kayak Rig for Track-Mounted Setups
WINDFRD Fish Finder Track Mount with Transducer Mounting Arm for Kayak Boat
- Mounts screen and transducer on one frame
- Extendable arm covers most kayak depths
- Pre-drilled plate fits common Garmin
- Lowrance and Humminbird displays
- 316L stainless hardware resists corrosion
- 3 year warranty
- Arm folds for storage
- Adjustment knobs can foul each other
- Arm can run short in choppy water
- Only 4 of 8 track screws supplied
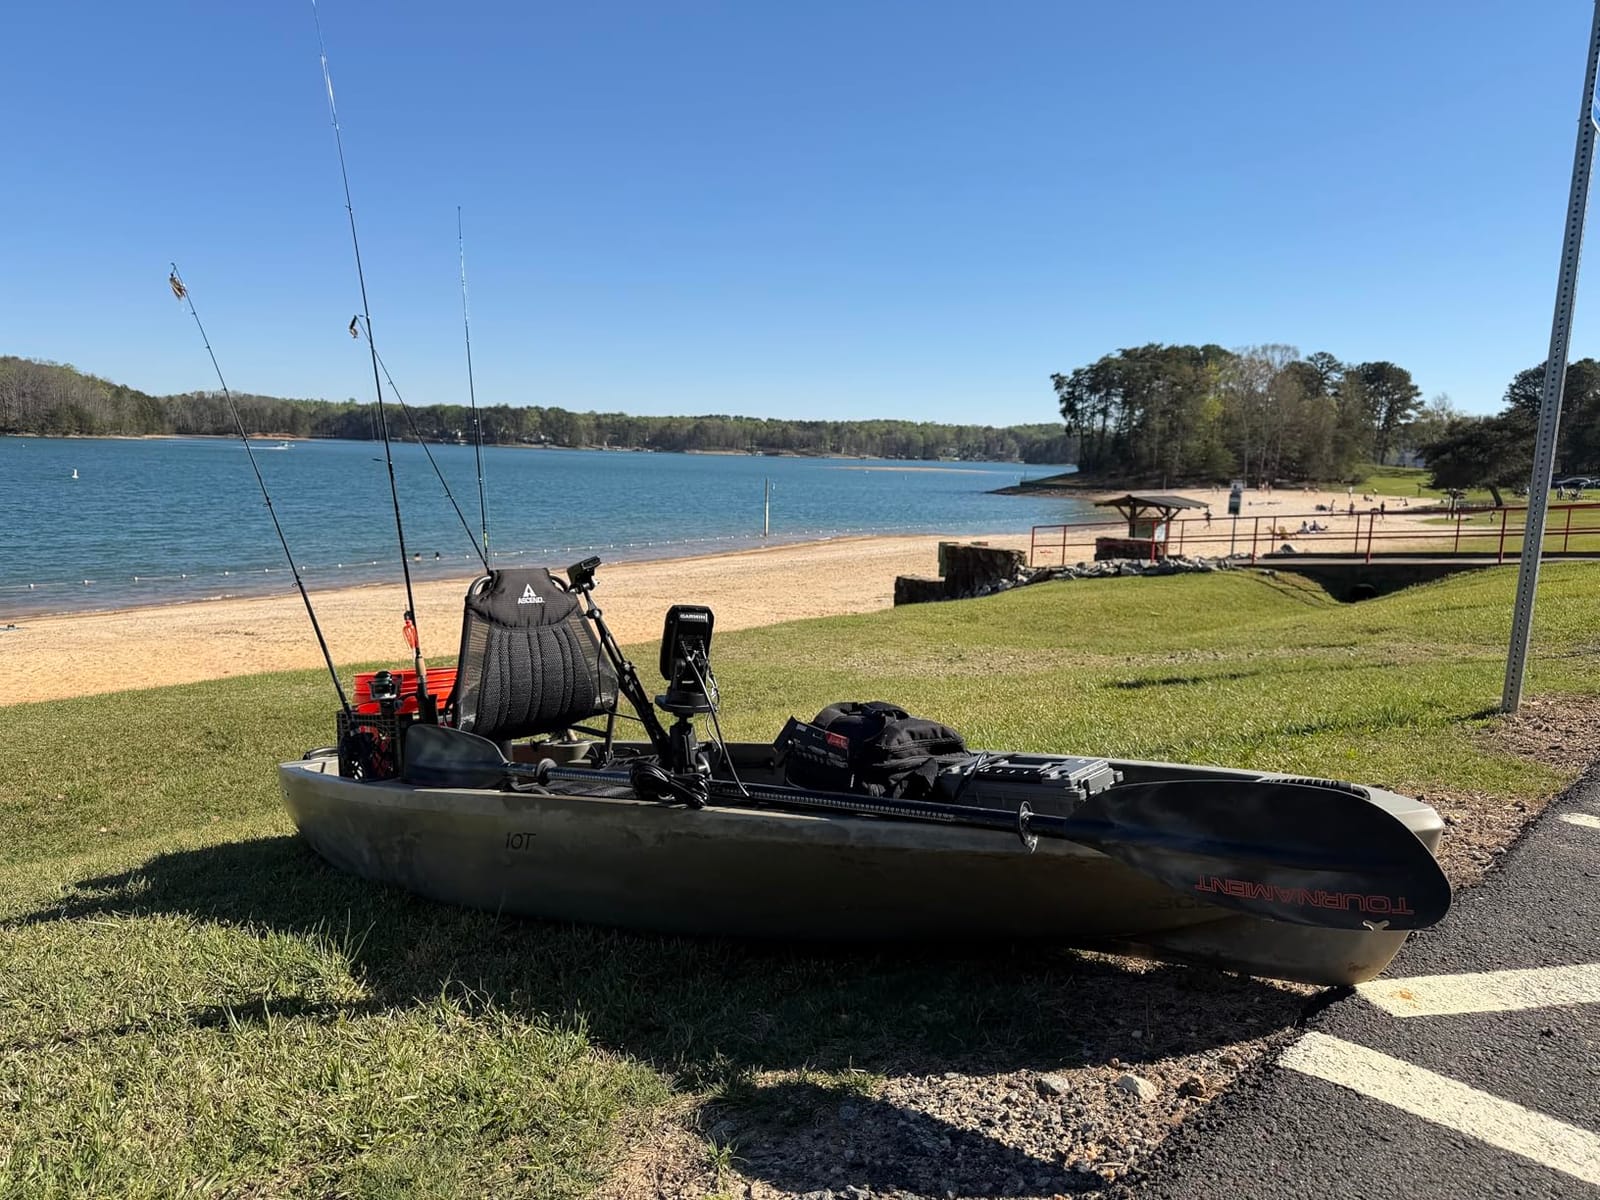
This is the only mount here that solves two problems at once. It carries the fish finder display and the transducer arm on a single track-mounted frame, so you are not stacking two separate bases on the same rail and fighting for space.
The arm extends from 11.42 to 17.91 inch and is held by a 1.5 inch double-socket ball with a 360 degree ratcheting slip disc for fine adjustment. That slip disc is the detail we liked most — it lets you trim the angle in small increments instead of re-positioning the whole arm.
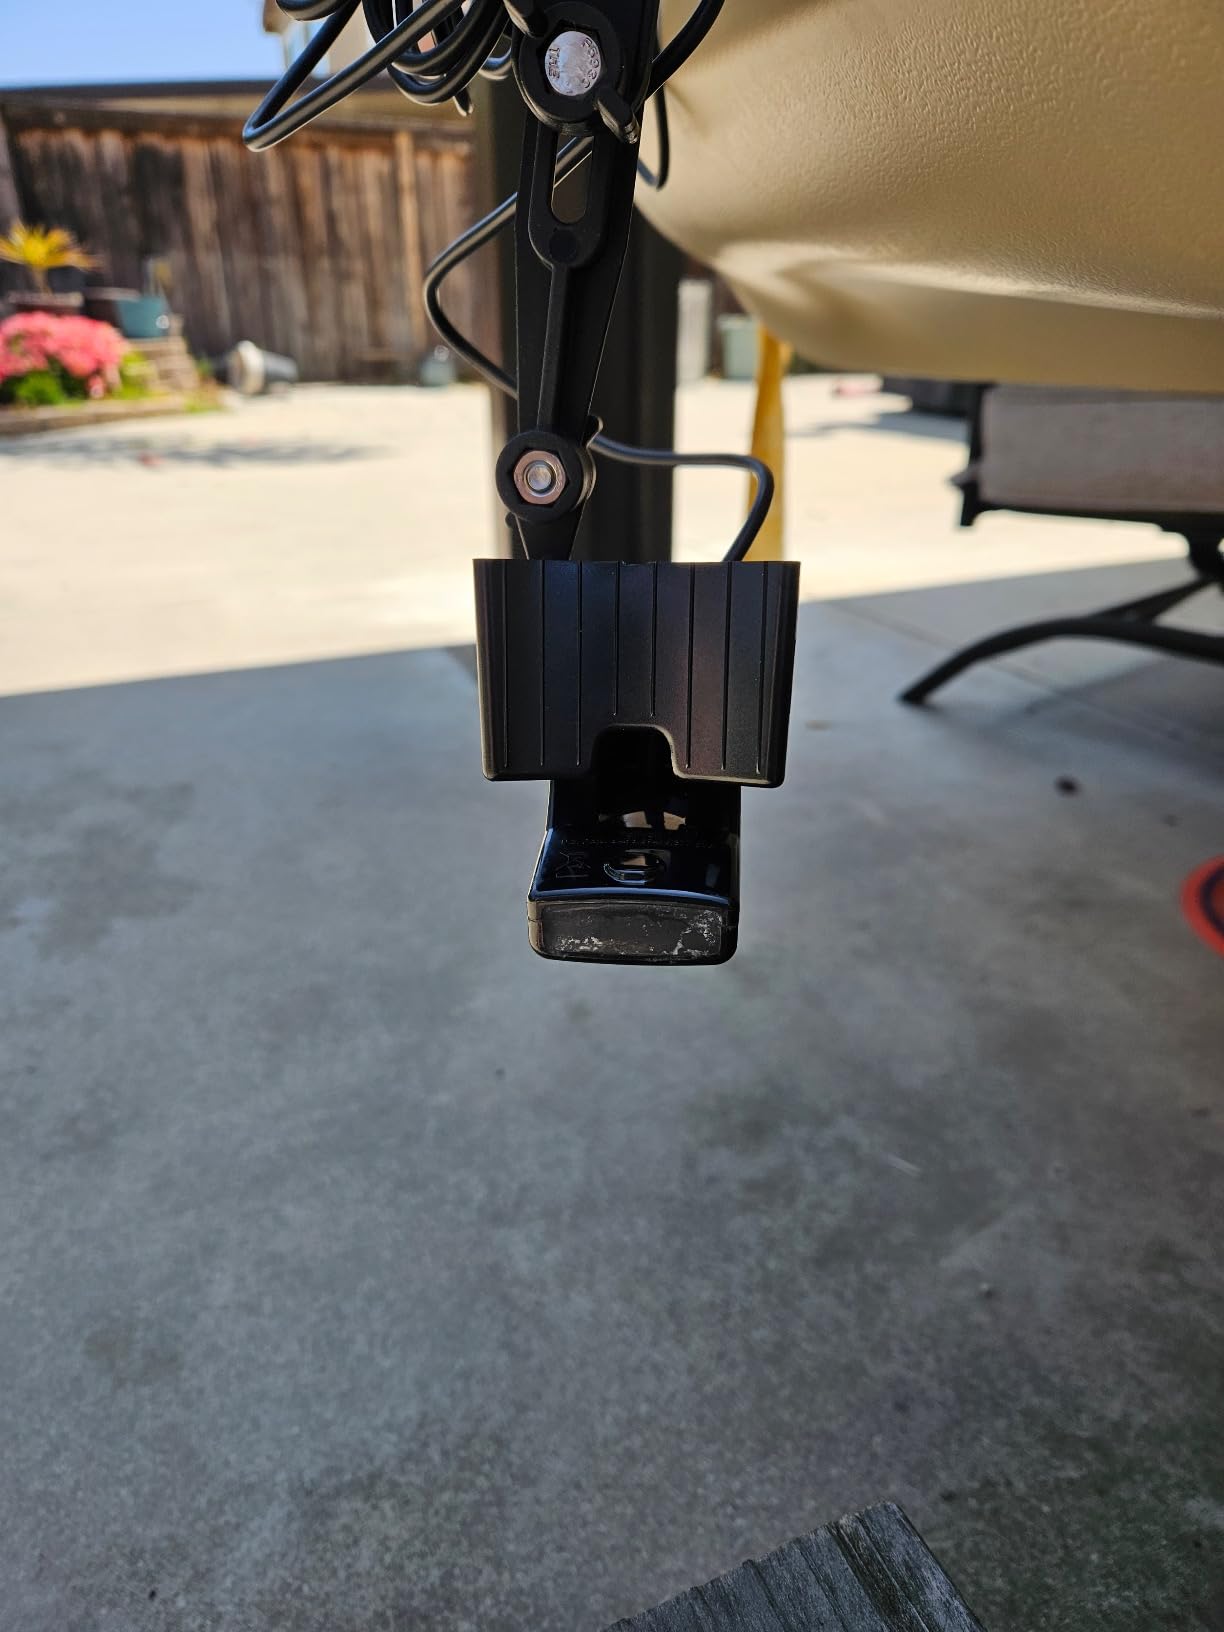
The device plate is pre-drilled to fit several common display families, including Garmin Striker 4, Striker Plus and Vivid units, ECHOMAP Plus displays, Lowrance Elite and Hook series, and Humminbird Piranha Max 4Di. The main structure is glass-reinforced nylon with aluminium and rubber balls, and the included screws are 316L marine-grade stainless.
It also weighs more than a plain arm, at 1.87 lbs, and the single-track footprint concentrates that weight. Kayak anglers raise a related concern on forums: putting the transducer and a battery on the same rail tips the boat, so balance the frame fore and aft rather than clustering everything on one side.
Three criticisms recur. The adjustment knobs can interfere with each other when both are tight. The arm can be short for certain hulls in rough water. And the track accepts eight screws while the kit includes four M5 by 20 fasteners, so on a longer track you will need to buy more hardware.
What this rig does better than a single-purpose arm?
One frame, two jobs. The screen and transducer sit at a set relationship to each other, so you read the graph while watching the arm rather than craning between two bases.
The ratcheting slip disc gives fine angle control, and the arm folds for storage. The 3 year warranty is also the longest in this roundup.
Where the weight and fitment bite?
At 1.87 lbs on one rail, it changes boat trim. Move the battery to the opposite side or forward of the seat to compensate.
Installation also takes trial and error, and the knob fouling is real. Budget an evening, not ten minutes.
7. Unexcelled Fishing Portable Bracket — Best Clamp-On Mount for Aluminum and Jon Boats
- No drilling on riveted aluminium hulls
- Adjusts over an 8 inch range
- Quick removal and depth adjustment
- Threaded hole accepts an electronics mount
- Custom lengths available from the maker
- Transducer not included
- Clamp can shift on some powered boats
- May need modification for larger craft
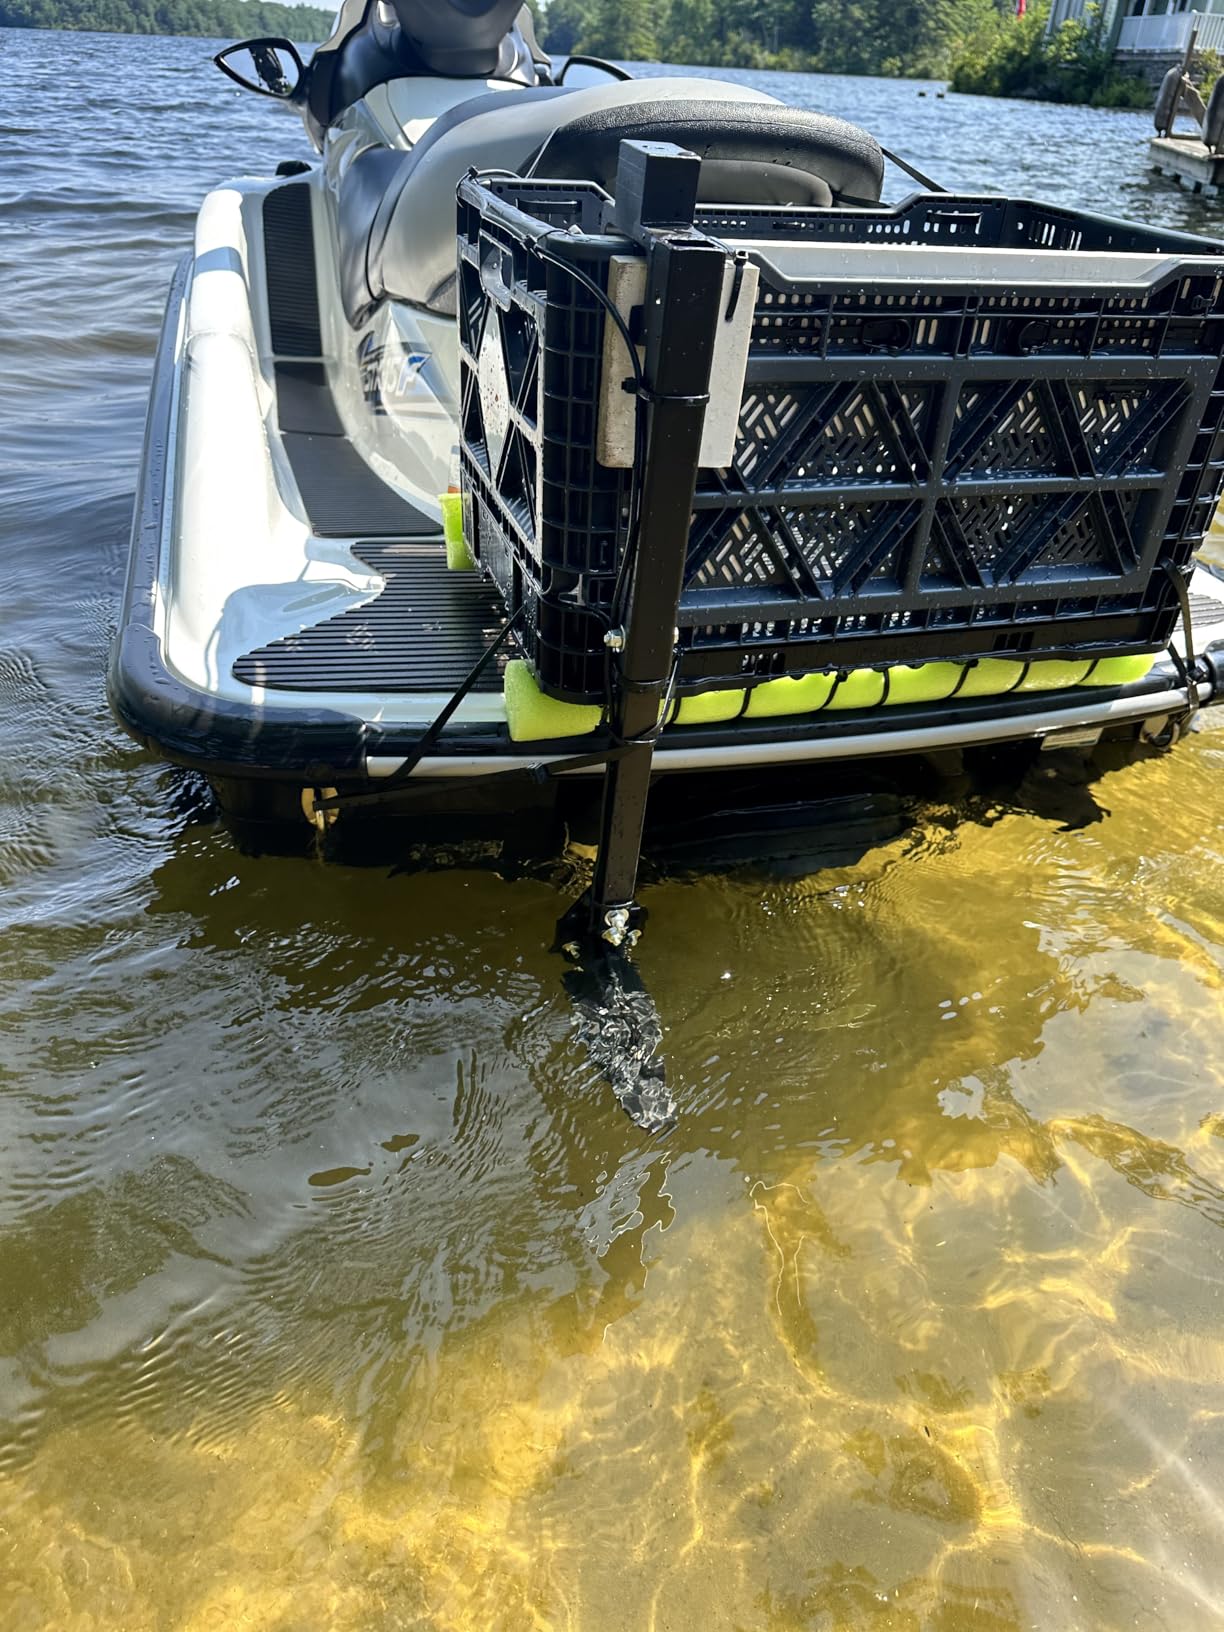
A jon boat has a hard aluminium transom full of rivets and no sensible place to drill, which rules out most conventional transom brackets. A C-clamp solves that, and this is a well-built one made in the USA from powder-coated aluminium.
The bracket adjusts from 15 to 23 inch, so you can match depth to a shallow jon, a wide bass boat or a small pontoon without a second part. The clamp opening is 2.375 inch, which is generous enough for most transom sections, and removal takes seconds once the knob is slackened.
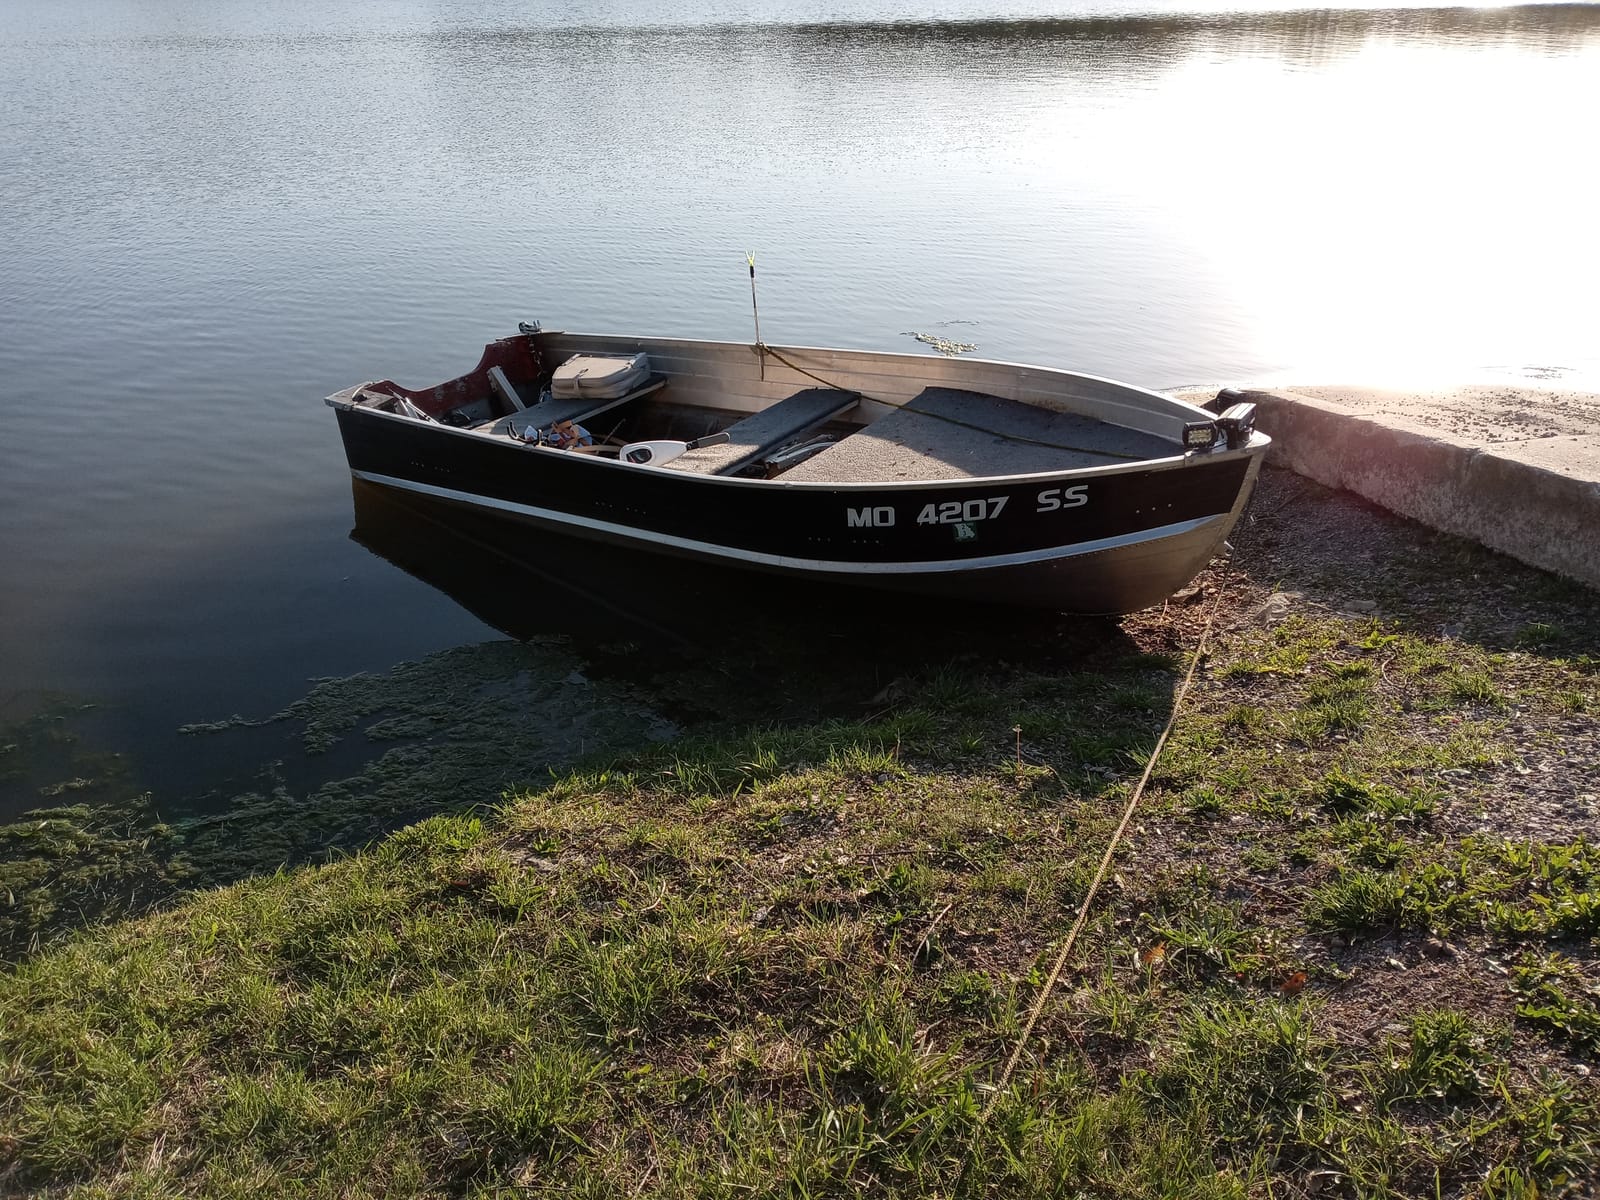
There is a threaded hole on top of the clamp for an add-on electronics mount, which turns the bracket into a general-purpose mount point rather than a single-purpose bracket. The manufacturer also offers custom lengths and answers fitment questions by phone, which is unusual at this level.
Two things to be clear about. The transducer is not included, so this is a bracket only. And on some powered boats the clamp does not stay perfectly fixed under hard acceleration — reviewers mention adding a wrap or strap if your boat is particularly lively.
The material choice is worth noting too. Aluminium does not crack or deform the way a glass-filled plastic arm can if you hit a stump with it, and powder coat handles salt water well.
Why a C-clamp suits aluminium hulls?
No holes. On a riveted transom, drilling risks leaking and weakens the panel, so a clamping solution is often the only sensible install.
The 8 inch adjustment range covers several hull depths, and quick removal means you can pull the transducer out for trailering or cleaning in under a minute.
Where it needs care?
Budget for the transducer separately. This is a bracket, not a kit, which is why the total cost lands higher than the sticker suggests.
On very lively powered boats, secure the clamp against creep. Modification is occasionally needed for larger craft.
8. Rig Rite 300 — Best Aluminium Bracket for Salt Water Trolling Motors
Rig Rite Manufacturing 300 Marine Trolling Motor Transducer Bracket
- Aluminium body resists salt water corrosion
- Fits both major trolling motor brands
- Works with three major transducer brands
- Spacers included for angle correction
- Light at 1.6 ounces
- Made in USA
- Often needs modification for a secure fit
- Supplied spacers can be insufficient
- Some reports of transducer movement
Most motor brackets in this category are moulded plastic. This one is aluminium, and for anyone fishing salt water that difference decides the service life. Plastic in a surf zone cracks and goes brittle; aluminium just weathers.
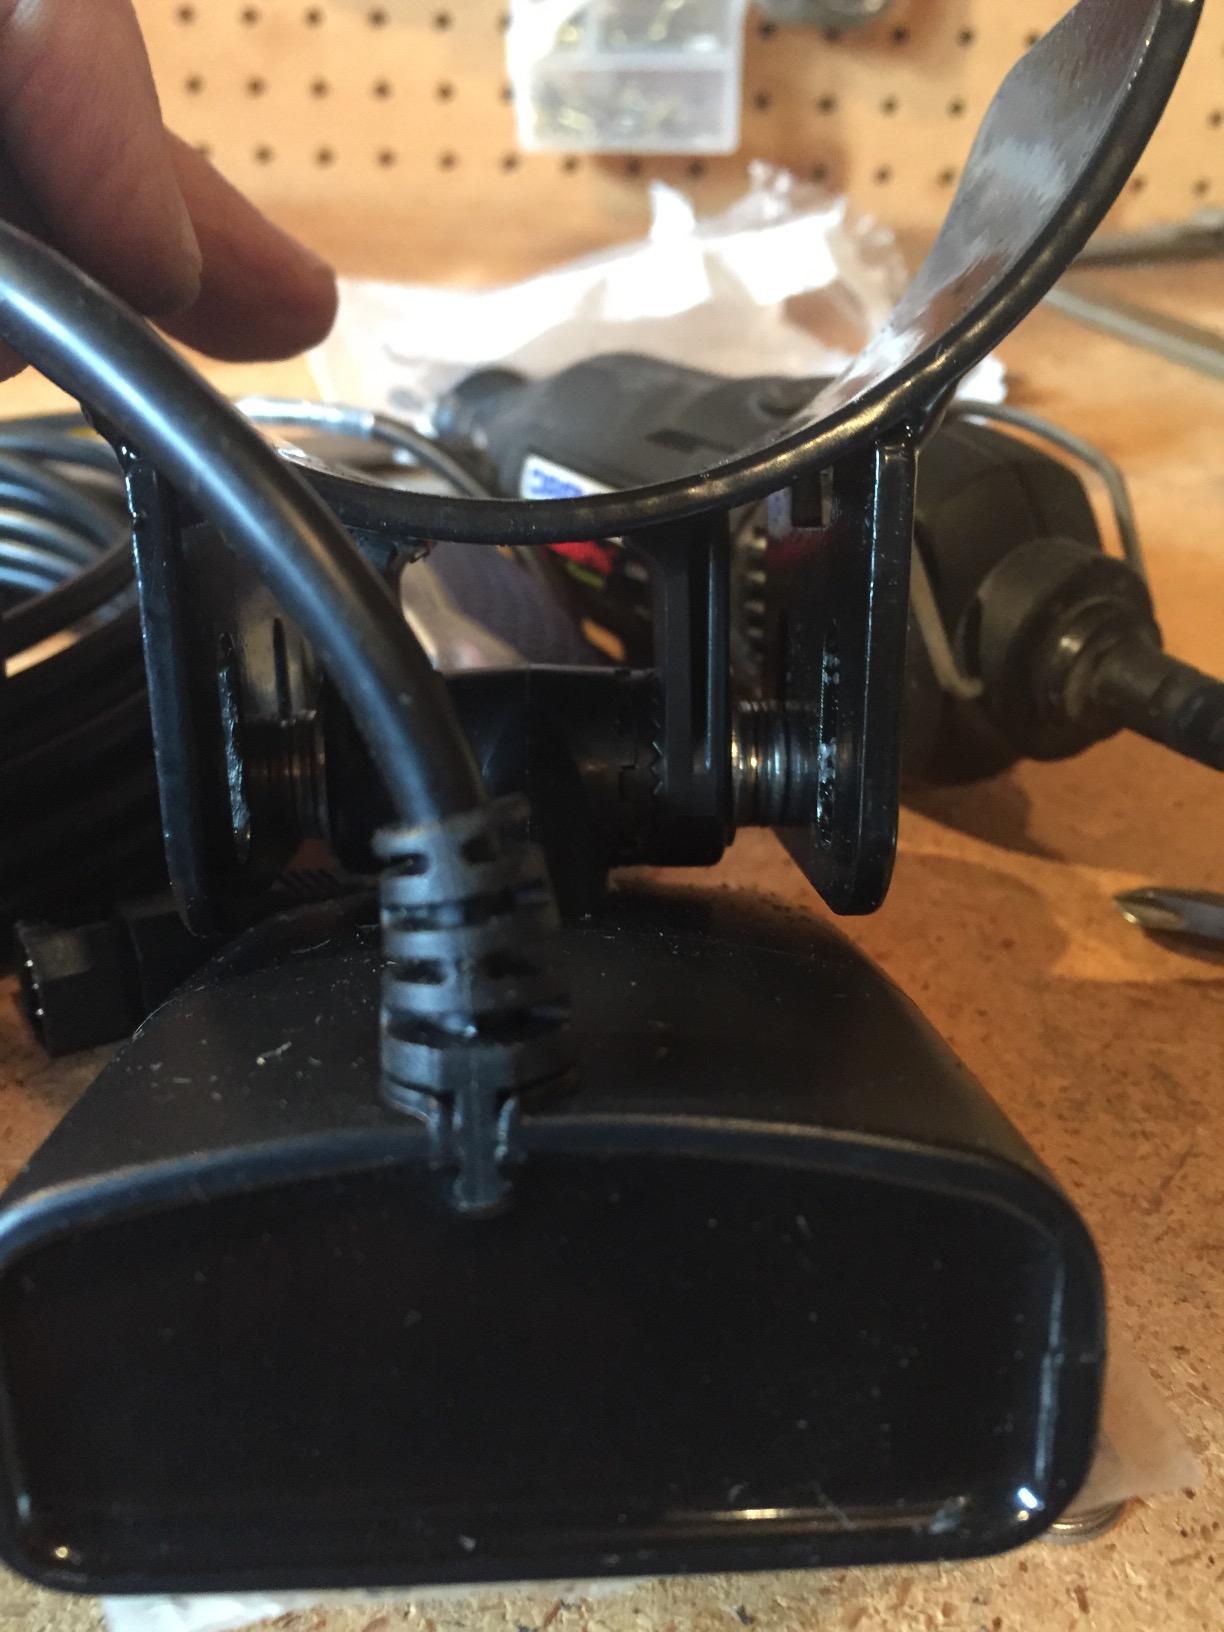
It fits Minn Kota and MotorGuide trolling motors, and works with Lowrance, Eagle and Humminbird transducers. At 1.6 ounces it adds nothing measurable to the motor head, and spacers are included so you can correct the transducer angle without hunting for washers.
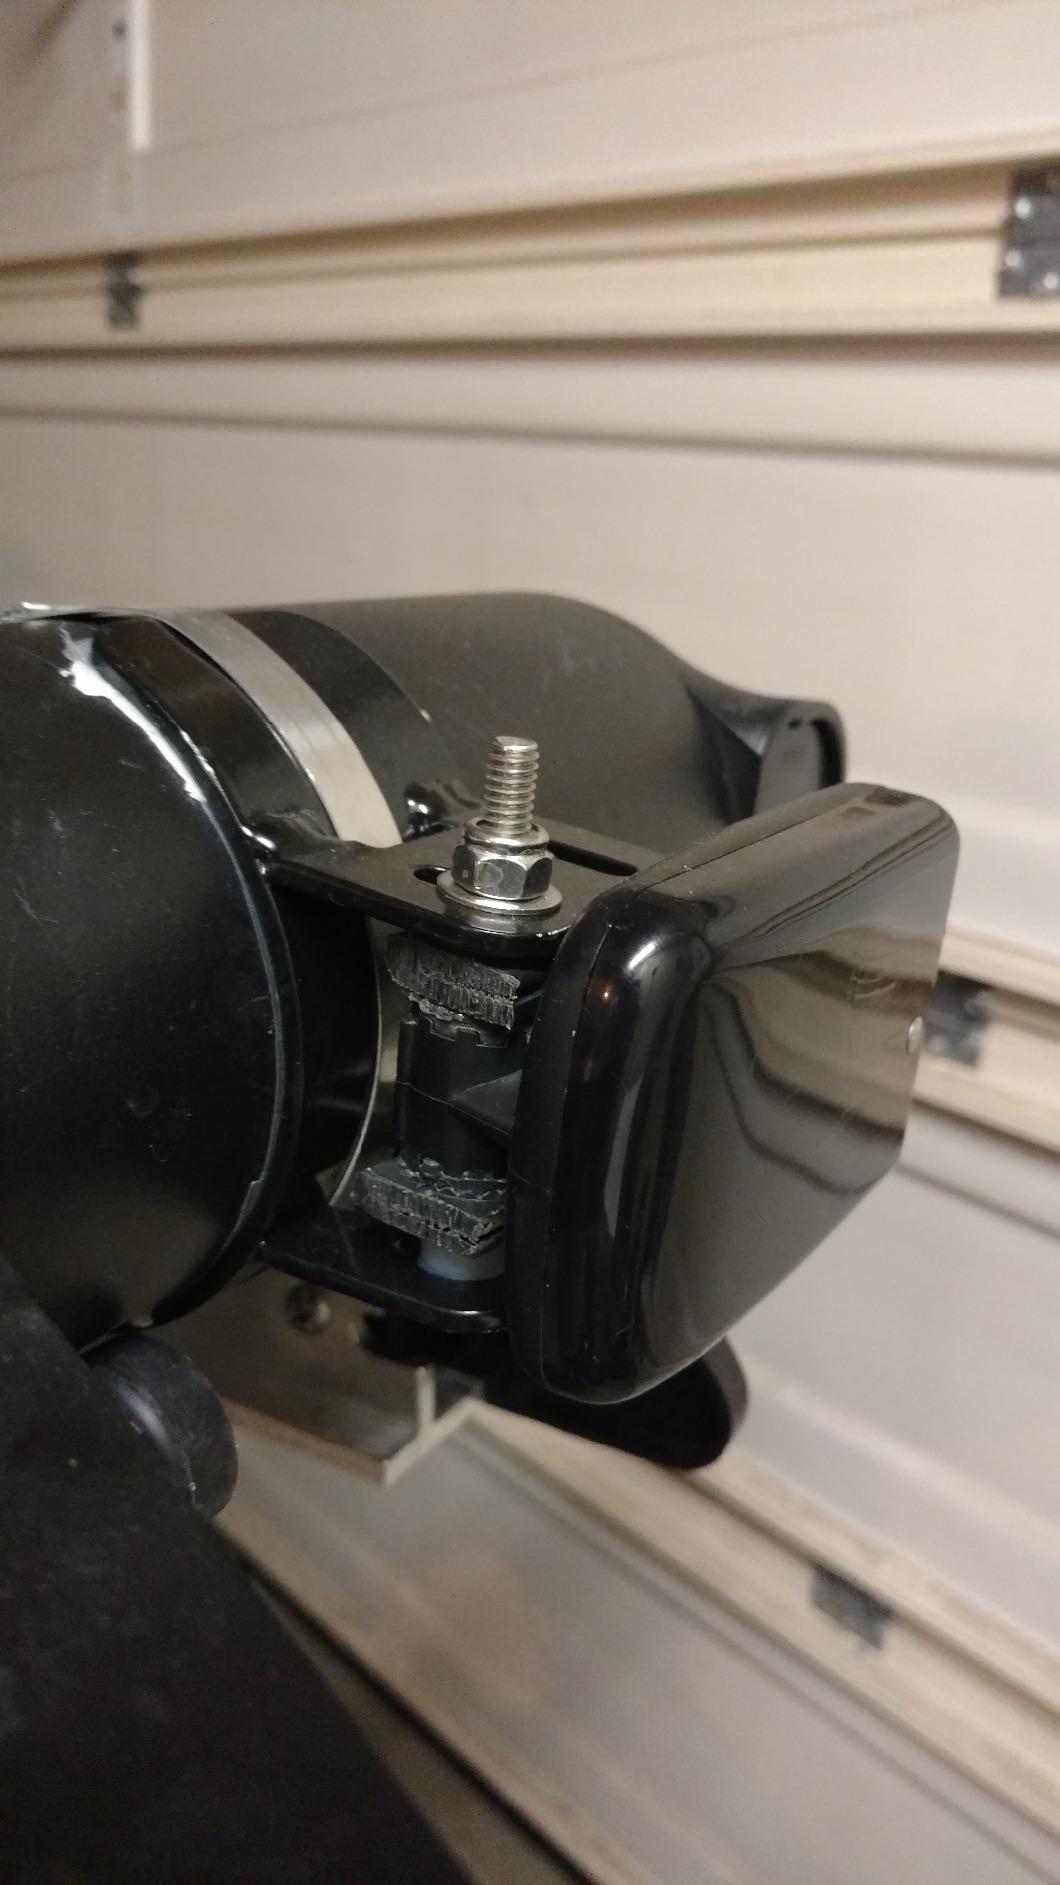
The rating is strong for a low-cost part. Owners consistently report that it fits the motors it claims and holds a transom-mount transducer correctly after a small adjustment.
The recurring criticism is that out of the box it does not always hold the transducer without help. Reviewers describe adding washers, trimming the bracket or drilling an extra hole to stop the body rotating. That is a five-minute job on a workbench, not a design flaw, but it is part of the ownership experience.
Instructions are also reported as absent from some shipments, so plan to work from the fitment rather than a manual.
Compare it with the plastic motor kits earlier in this roundup. On freshwater only, either works. In salt water, this is the one to buy.
What aluminium buys you here?
Corrosion resistance in salt water, and a bracket that will not crack if it hits structure. Both matter on a coastal run.
It spans two motor brands and three transducer brands in one part, which covers the majority of trolling motor installations.
What to expect on install day?
Plan on a small modification. Many owners add washers or trim the slot so the transducer stops turning, and the supplied spacers do not always solve it.
There are no instructions in some shipments. Check fitment against your motor model before the boat is in the water.
9. YakAttack CellBlok with SwitchBlade Arm — Best All-in-One Kayak Electronics Rig
- Battery box and transducer arm in one part
- No drilling
- Comes off with two knobs for transport
- Holds a 10Ah battery with room to spare
- SwitchBlade arm is hydrodynamic and folds
- Transfers between kayaks quickly
- Assembly instructions are poor
- Some reports of the arm loosening at speed
- Front cover does not always stay shut
- Quality control issues reported
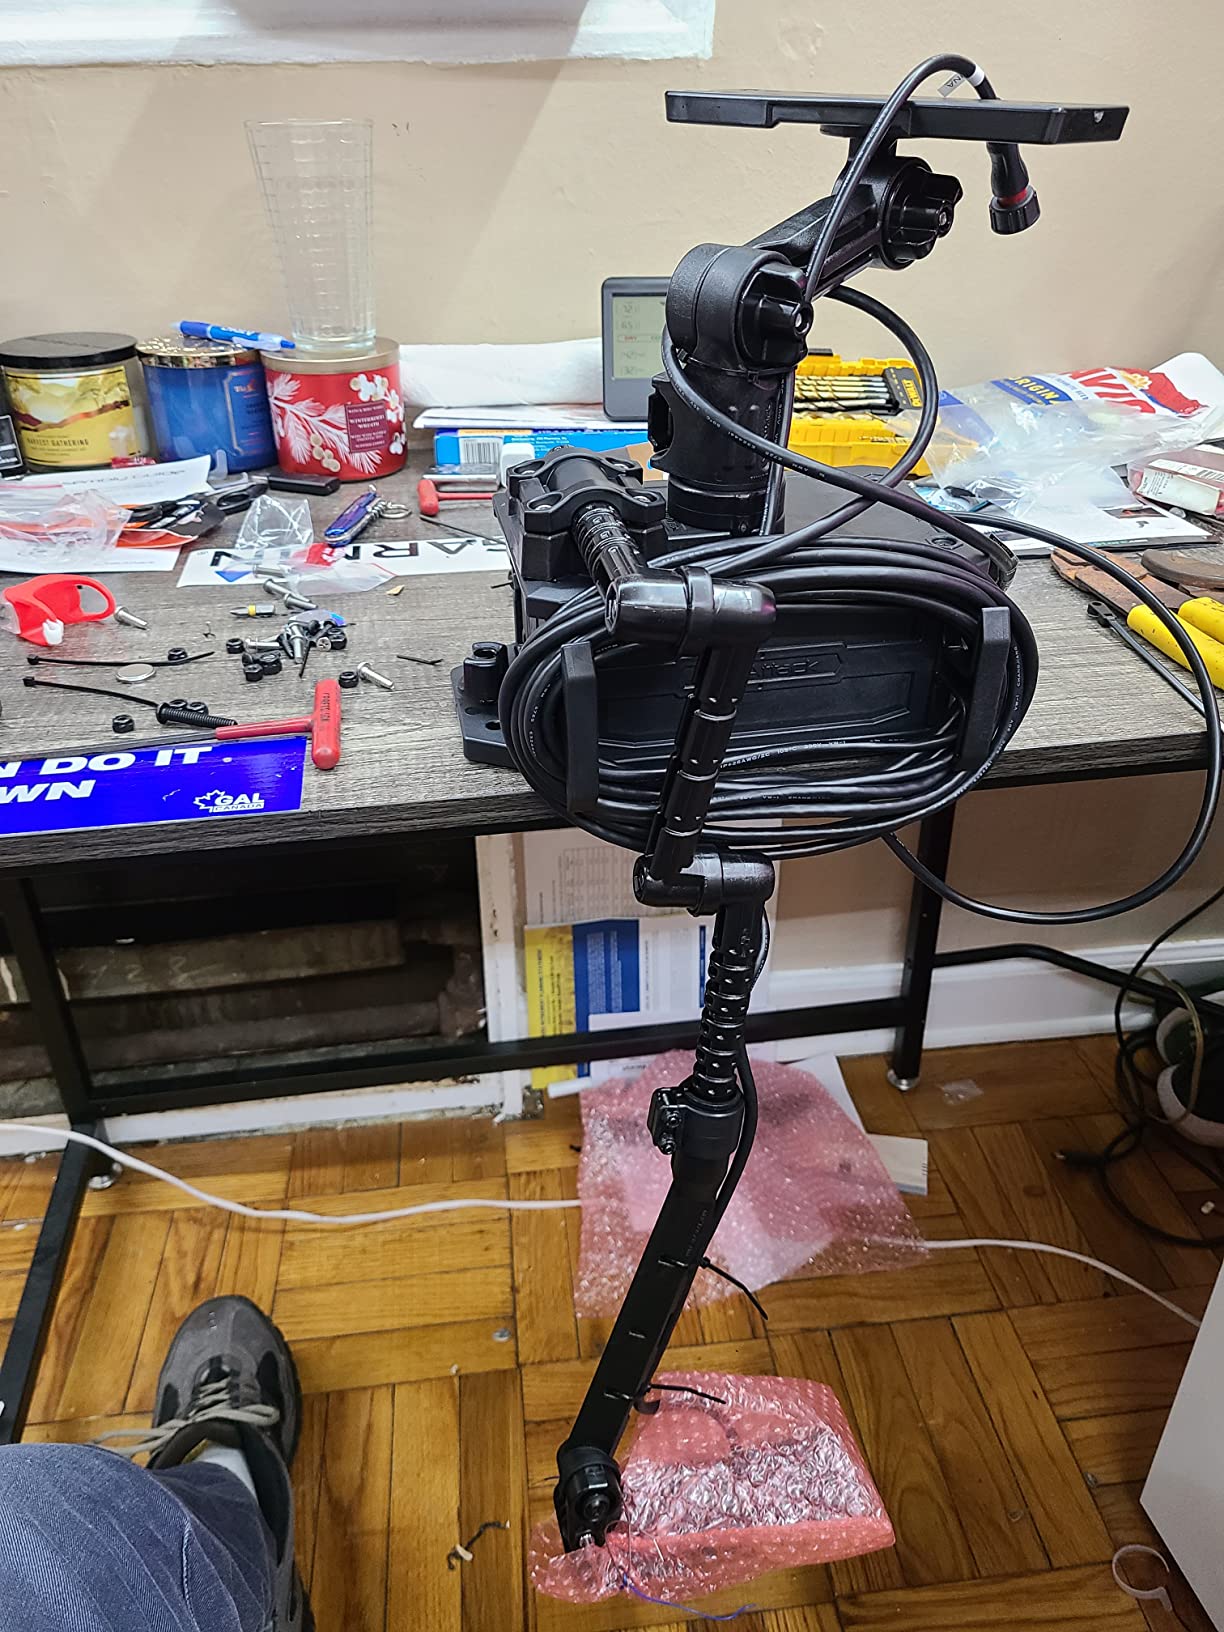
Almost every kayak electronics problem is really two problems: where the battery sits and where the transducer sits. This rig puts both on one track-mounted platform, which removes the balance argument entirely and stops the battery from shifting in a paddle stowage.
The battery box interior measures 6.375 by 4.25 by 2.60 inch, sized for a 10Ah battery with space around it. The whole system weighs 1.4 lbs, and it detaches by loosening two knobs, so a rigged kayak can be lifted onto a roof rack with the electronics left at home.
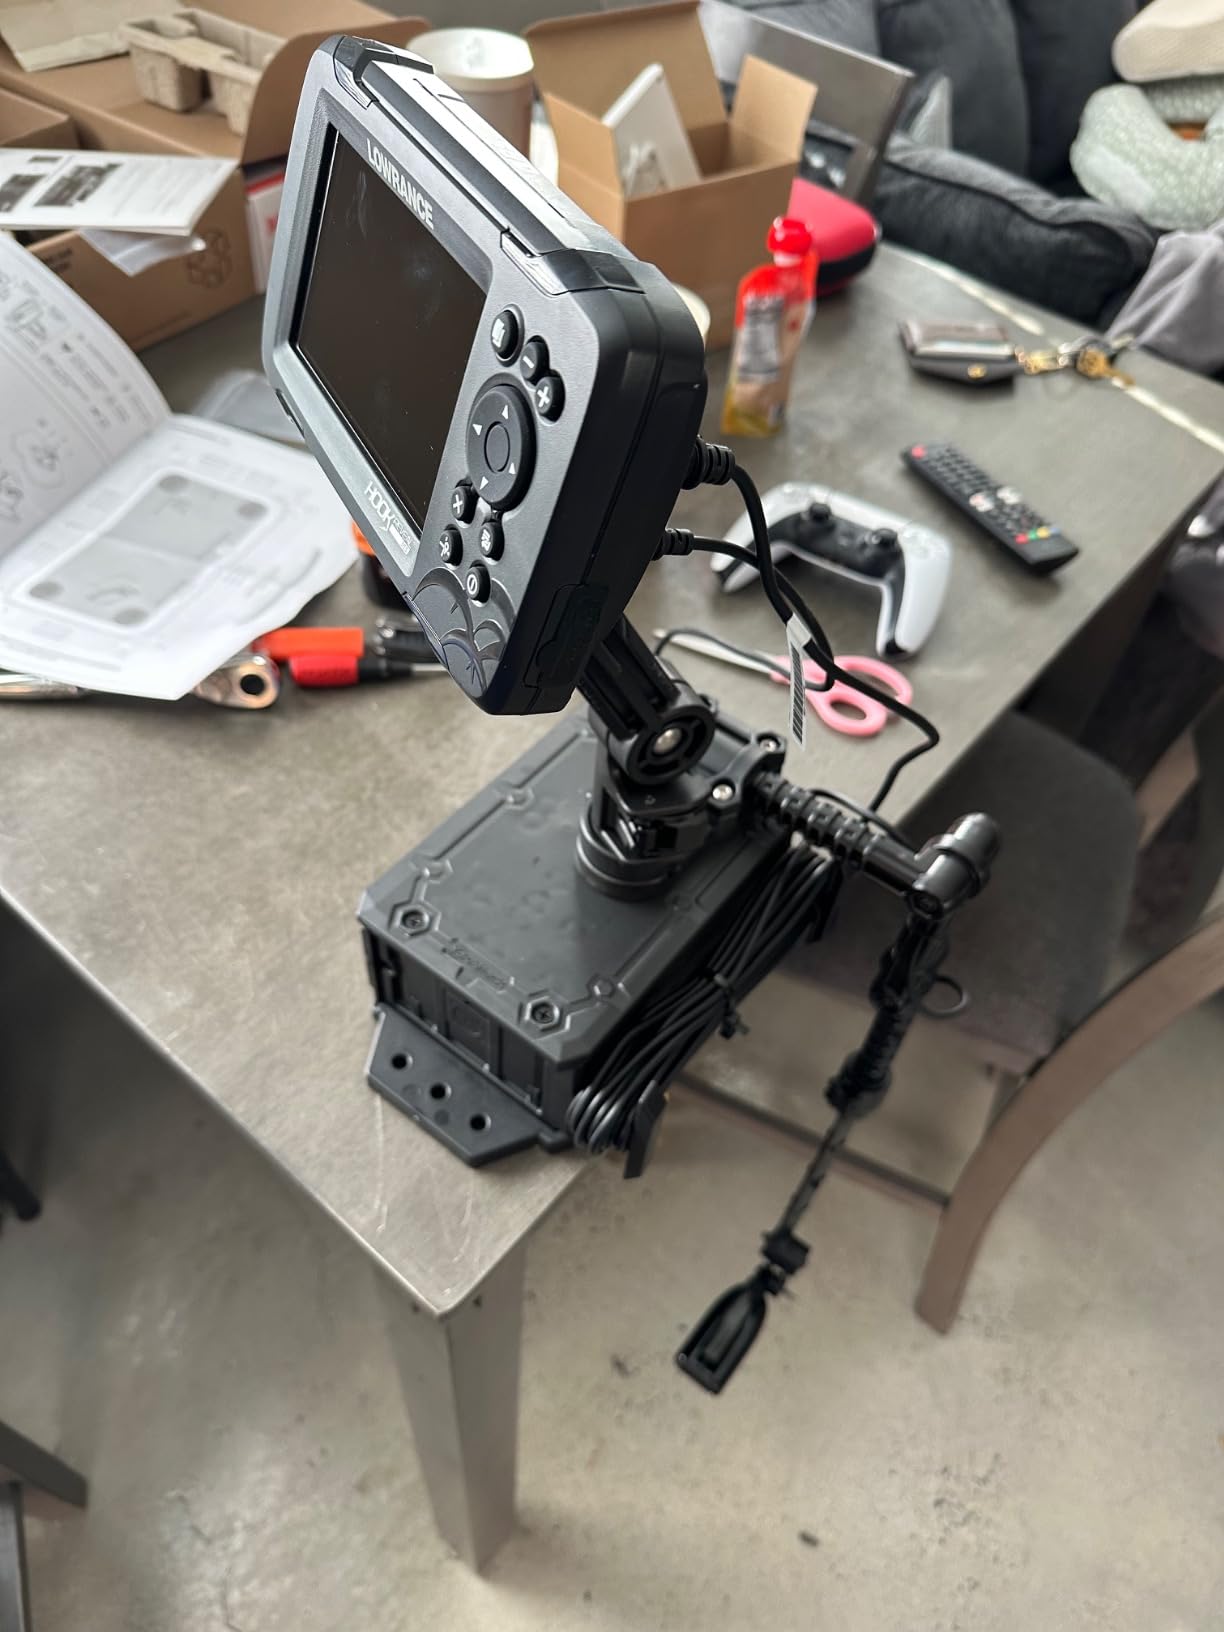
The SwitchBlade transducer arm is the distinctive part. Its patented profile is designed to reduce gurgle and drag as the boat moves, and it folds compactly for storage. Length is customisable, so it can be run for side-scan or a standard down-looking transducer.
Fitment is broad. It works with YakAttack MightyMount and GearTrac hardware plus most factory and aftermarket track systems, with adapters available for FeelFree, 3 Water and Jonny Boats. Three colour options are offered.
The honest problem is assembly. Multiple reviews call the instructions poor and say you will end up watching a video to work out the sequence. There are also reports of the arm loosening at speed on some setups, and of the front cover not staying fully secured. Inspect both before a long paddle.
Why a combined battery box changes the boat?
The battery stops floating around a deck and sits below the seat line, which lowers the centre of gravity and fixes the tipping problem anglers describe when everything mounts to one rail.
Two knobs means the whole rig can be removed for transport, and moving it to a second boat on a track system takes seconds.
Where it falls down?
Assembly. Allow an evening and a YouTube video, because the printed instructions do not explain the sequence well.
Check the arm clamp and the front cover under load. Loosening at speed has been reported, and a battery lid that pops open in a wave is not a small problem.
10. Brocraft BC-KP107A Transducer Arm — Best Long-Reach Arm for Pontoons and Inflatables
Brocraft Transducer Mounting Arm with Deck Mount/Kayak Fish Finder Transducer Mounting
- Longest reach in the roundup at 25 inch
- 360 degree swivel with slip disc for micro adjustment
- Aluminium arm with reinforced nylon joints
- Quick release deck mount
- Works on pontoons
- kayaks
- canoes and inflatables
- Short on high-deck bass boats
- Some play in the riveted joints out of the box
- May need drilling or shimming
- Holder may not fit every transducer body
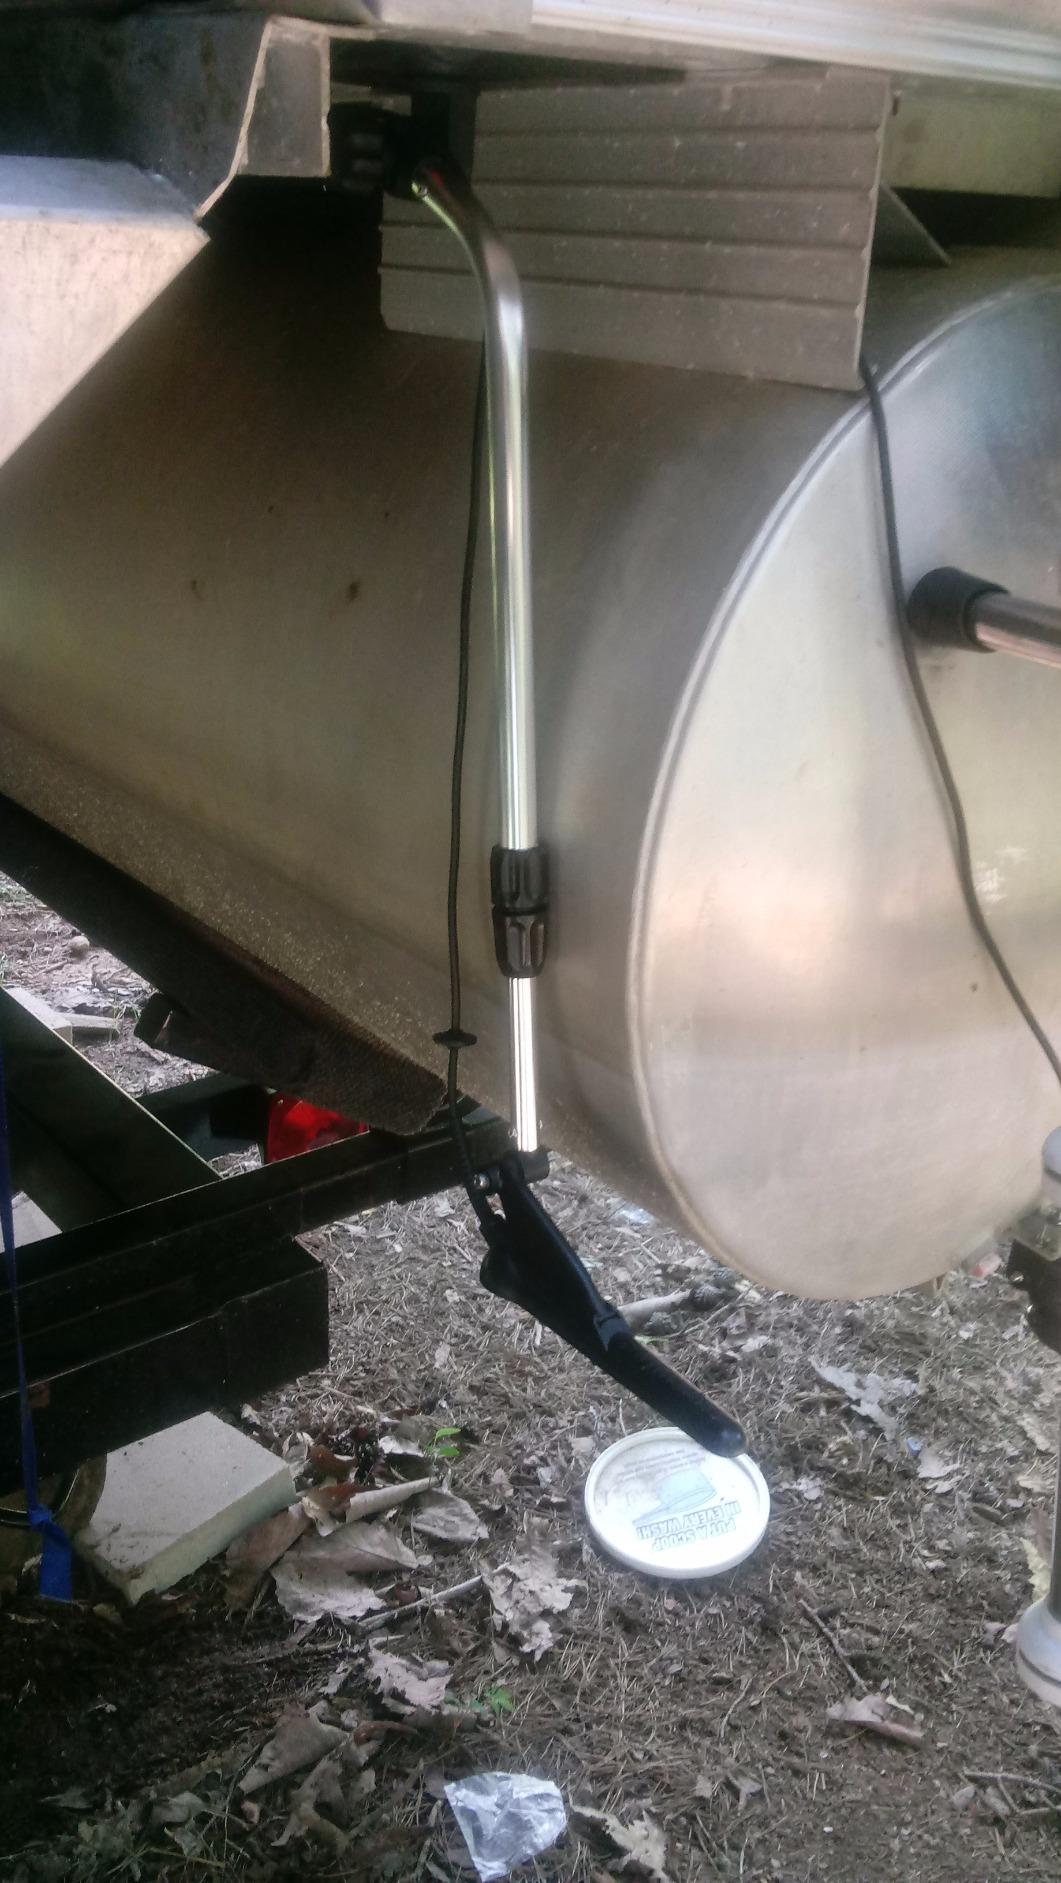
This arm reaches further than anything else here, telescoping from 17 inch stowed to 25 inch deployed. That extra reach is what makes it work on a pontoon, an inflatable with a raised floor, or a tall transom where a short kayak arm would never get below the surface.
The head swivels 360 degrees and sits on a slip disc, which gives the fine incremental angle adjustment you want when you are setting the transducer parallel to the waterline on a boat that has trim tabs.
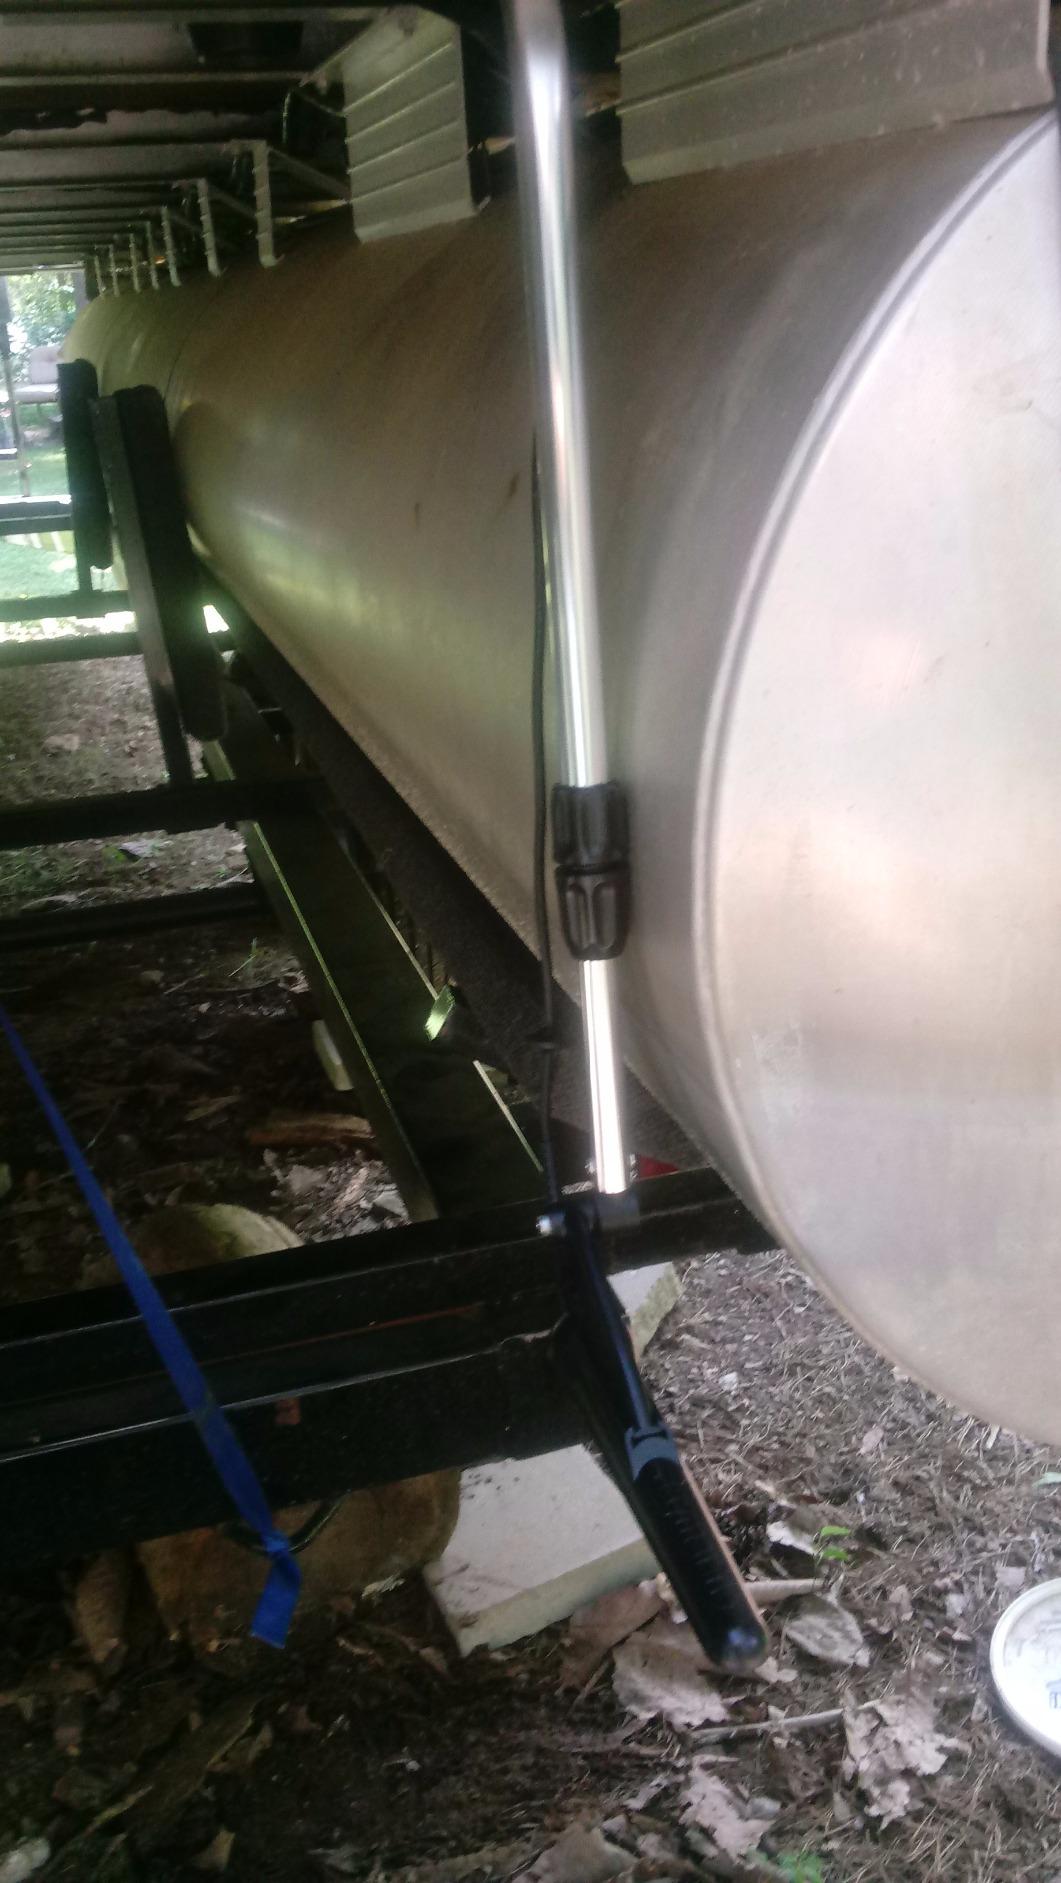
Construction is a marine-grade aluminium arm joined to fibre-reinforced nylon. That mix is the right call on a pontoon, where the arm is exposed to dock contact but also needs to survive a deflating and refilling cycle.
Two versions exist — deck mount and track mount — so you can pick based on your boat. The deck mount uses a quick release, which means the whole arm comes off for transport in seconds.
The drawbacks are joint play and reach. Some owners report looseness in the riveted joints straight out of the box and fix it with shims or a tightening pass. On a high-deck bass boat, 25 inch can still be marginal.
Fitment on the transducer body is also not universal. Kayak anglers report trimming the holder slightly to fit a particular body, which is a five-minute job with a file.
Where the extra length earns its place?
On pontoons and inflatables, reach is everything. The arm has to clear the deck edge and still put the transducer face in clean water, and 25 inch does that where 18 inch cannot.
Swivel plus slip disc gives the most precise angle setting of any arm here, which matters on boats with trim tabs.
Where it falls short?
High-deck bass boats can still exceed 25 inch, and joint play out of the box needs attention before the first trip.
Expect to shim or file the holder for an unusual transducer body. It is minor, but not zero.
11. Sixcow MHX XNT Transducer Bracket — Best Fixed Transom Bracket for Drilling
- Marine-grade steel with powder coat finish
- Long list of compatible transducers and displays
- Two slots allow quick angle adjustment
- Simple three screw installation
- Requires drilling three permanent holes
- Angle must be set before the third hole is drilled
- No adjustment hardware beyond the two slots
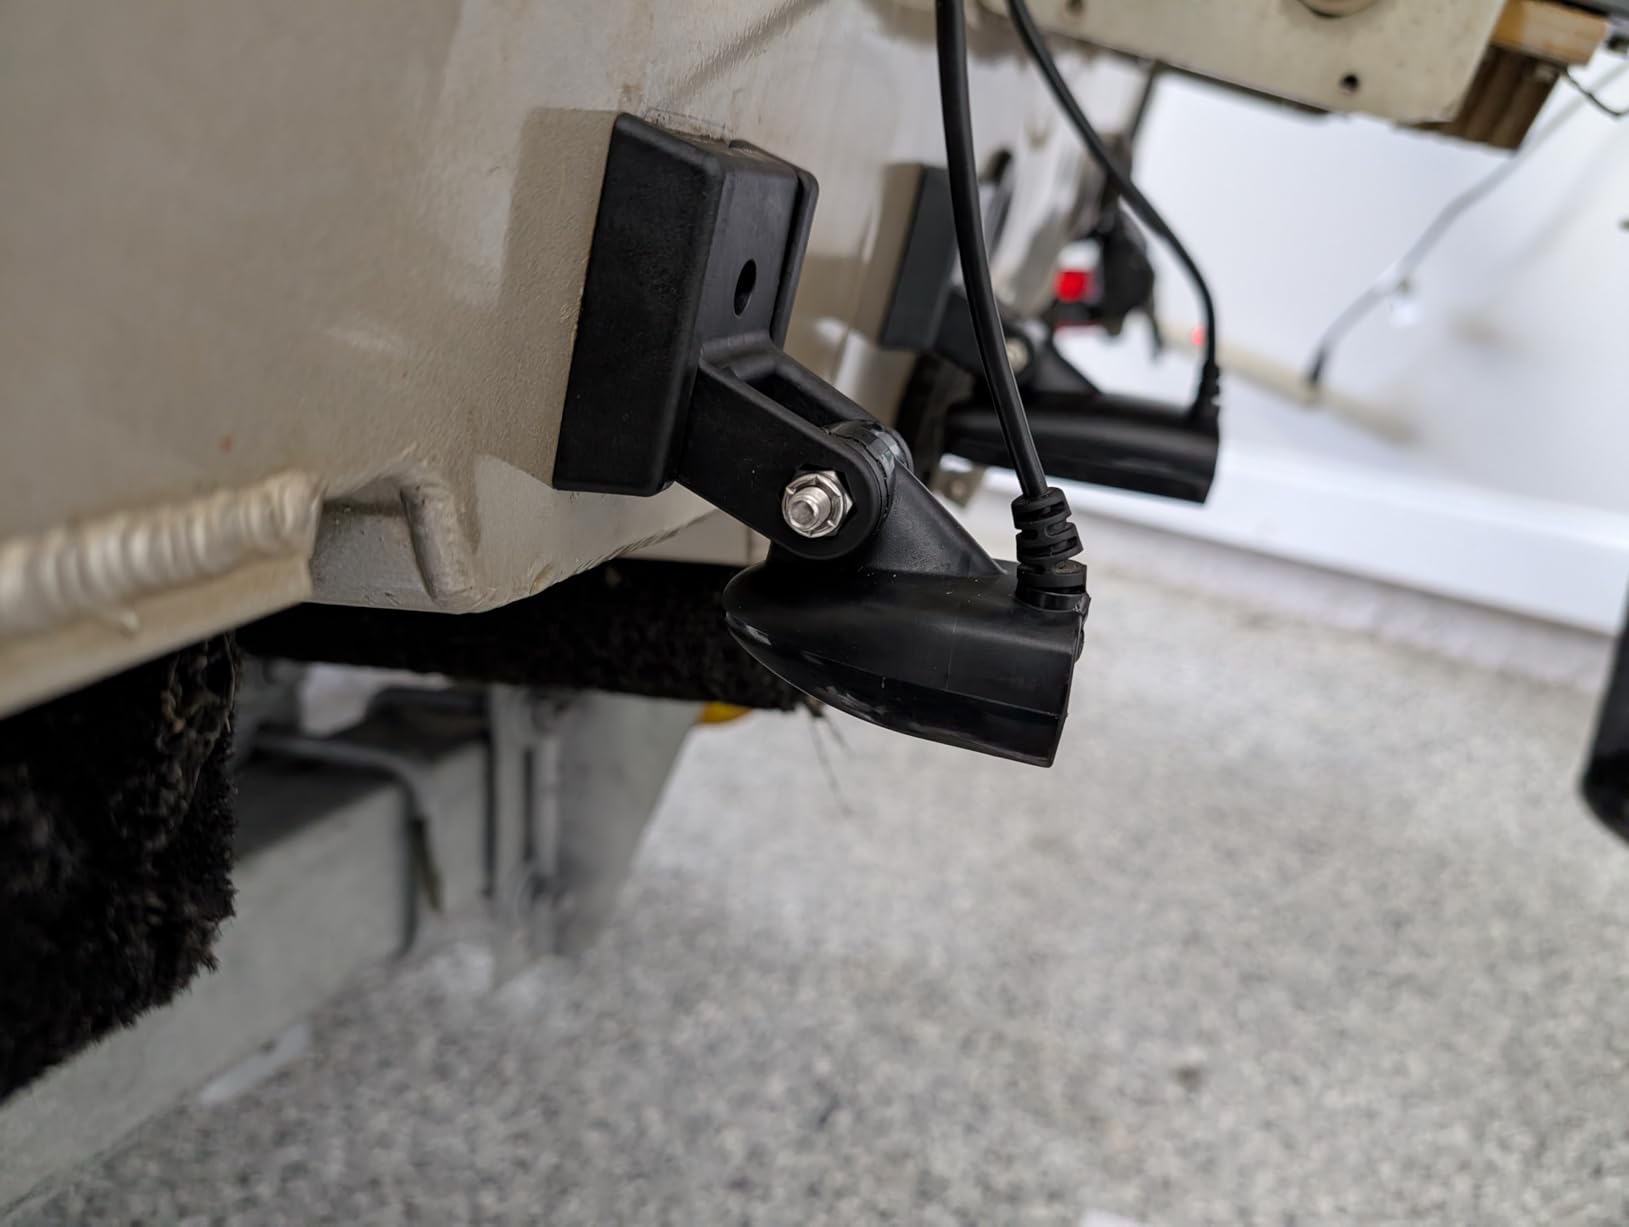
This is the traditional transom bracket and the only one in the roundup that asks you to drill. Three screws through the transom, a marine-grade steel bracket, powder-coated finish. If you own an aluminium boat and do not mind permanent holes, it does one job simply and cheaply.
The two-slot design is the useful feature. By moving the transducer between the two slots you can change the angle without buying an adjuster, which is enough correction to set the face parallel to the waterline on most hulls.
Compatibility is the selling point. It covers a long list of XNT bodies including the XNT 9 20, 9 20 T, 9 28 T, 9 DI T, 9 HW T, 9 HW MDI 75 T, 9 QB 90 T, 9 QB 90, 9 SI 180 T, 9 DB 74 T and the XNT 14 series, plus the XHS 9 HDSI 180 T. On the display side it lists HELIX, SOLIX, ION and ONIX series machines.
The rating is high, with 79 percent five-star and 12 percent four-star across 213 reviews. Owners consistently single out the broad compatibility and the straightforward install.
The catch is that you drill three holes into your boat. Sellers of this style also advise finalising the angle and height before you drill the third hole, because once that hole exists the position is fixed. Budget for care in choosing the location, and seal each hole properly.
Why a fixed drilled bracket still makes sense?
It is the most rigid hold in this roundup. A bolted steel bracket does not flex, and a rigid, correctly angled hold is the whole point of a transducer mount.
For an aluminium jon or jon boat owner who will never resell the hull, drilling three small holes is a fair trade for that rigidity.
Why most fiberglass owners should skip it?
Drilling is permanent and it drops resale value. If you own fiberglass, use the bonded pad or the bonded composite trim block method instead.
The two slots are also the only adjustment available. There is no knob, so plan the position carefully before the last hole goes in.
12. Saillong Transducer Mounting Plate Kit — Best Budget No-Drill Mount
- No drilling
- so the hull stays original
- Kit includes scouring pad
- wipe and 3 cable clips
- PP body resists corrosion
- Removable without damaging the hull
- 18 hour wait after bonding
- Sized for small to medium transducers
- Bond strength depends on surface preparation
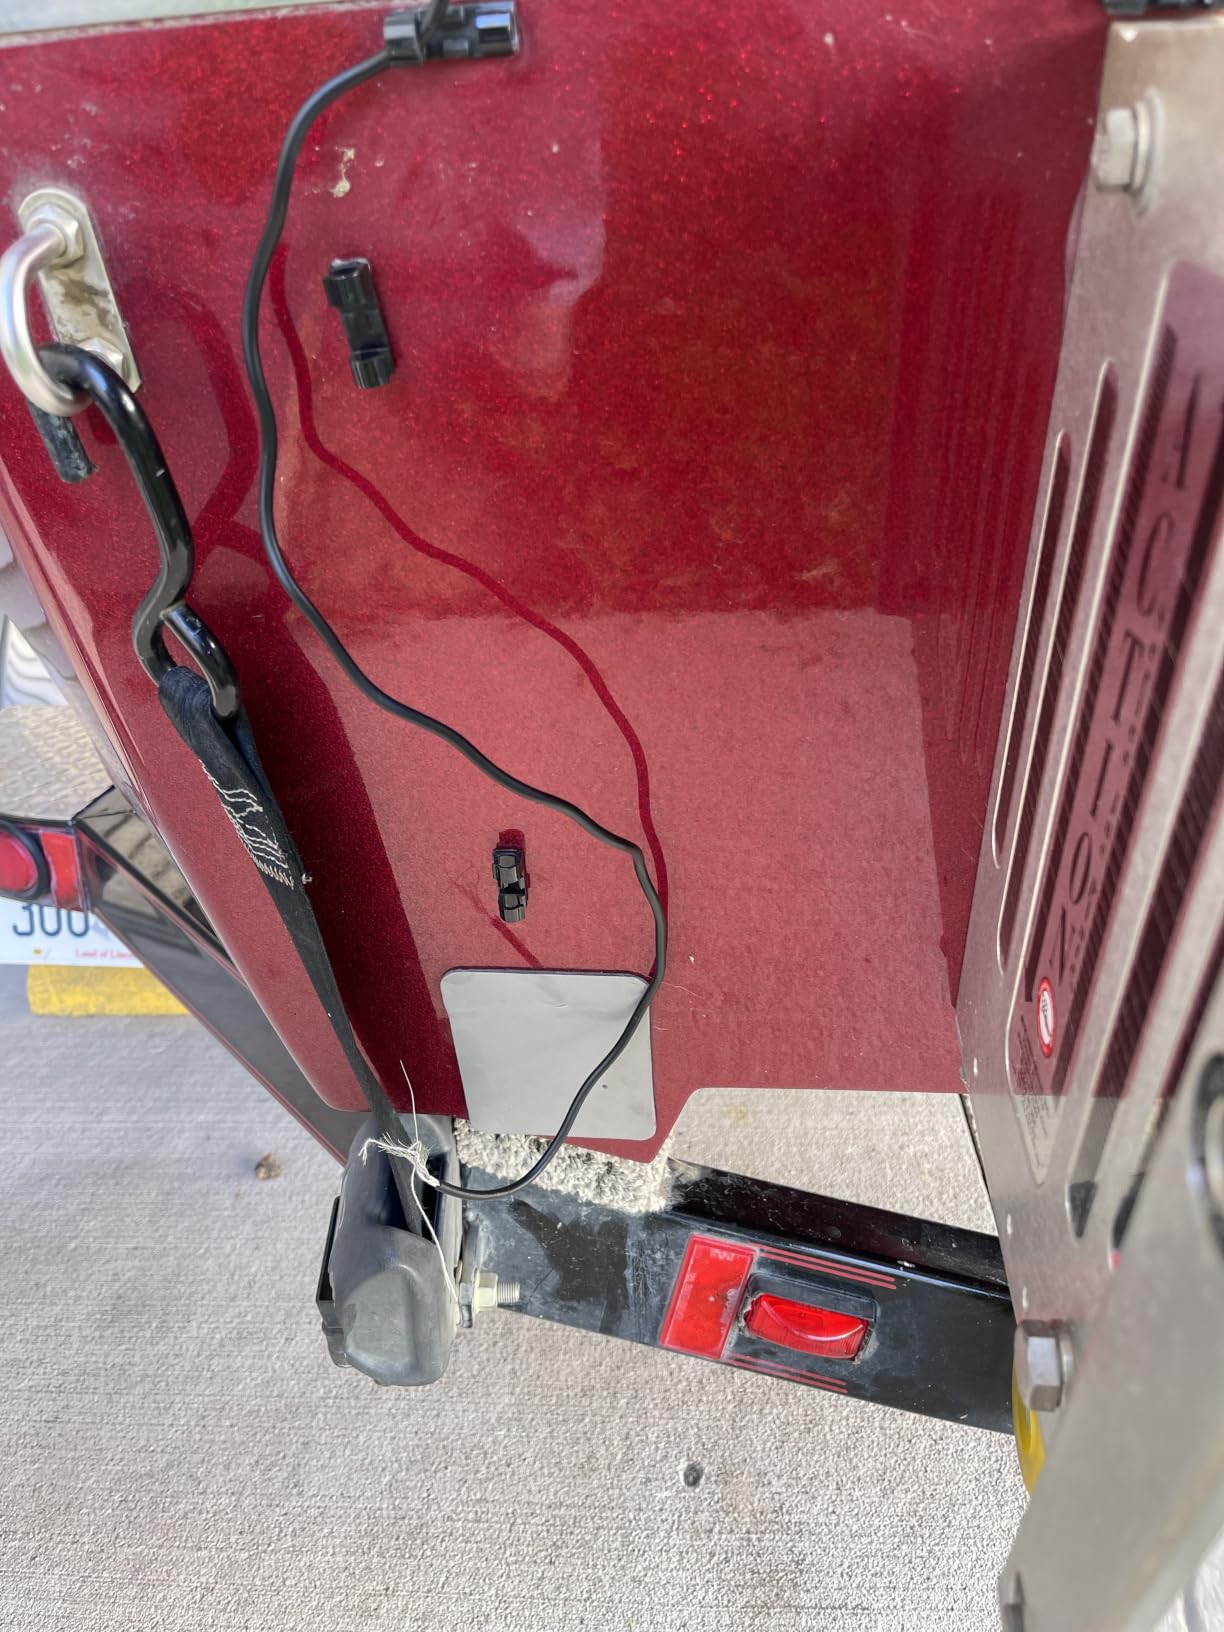
This is a straightforward answer to the no-drill problem, and the kit format is more thoughtful than the price suggests. You get the pad block, a scouring pad, a cleaning wipe and three cable clips, which is everything needed to get a clean bond in one session.
The pad measures 4.33 by 3.54 by 0.98 inch with a 2mm adhesive backing, and it is moulded from high-hardness polypropylene that will not corrode in salt water. It bonds to a hull or transom without screws and lifts off later without damaging the surface.
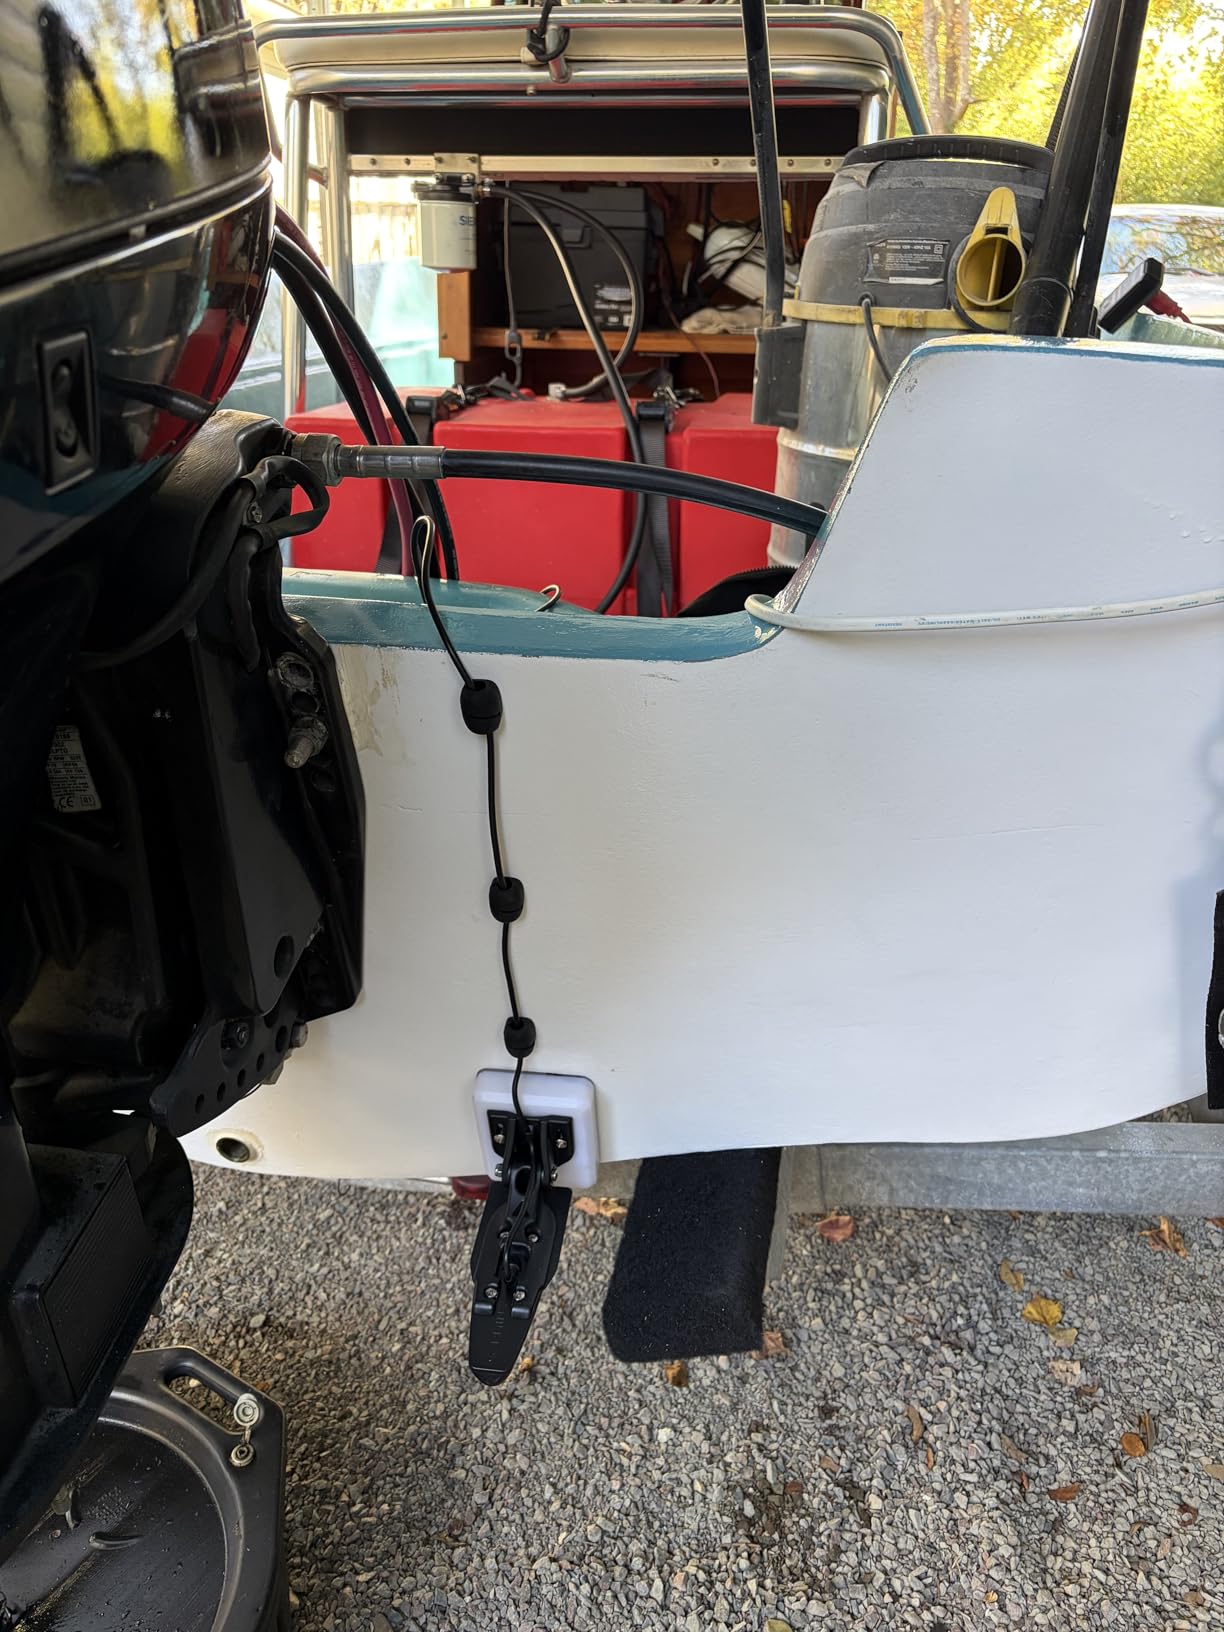
The rating of 4.3 across 141 reviews is honest rather than exceptional, with 69 percent five-star and a small tail of one-star feedback. The positive comments cluster around the no-drill approach and the completeness of the kit.
The two recurring negatives are the 18-hour cure before the transducer can be mounted, and the size. It suits small to medium transducers, not large skimmer bodies. Use it on a small boat, a jon or a kayak hull and it does its job; use it as the mount for a wide side-scan array on a bass boat and it is undersized.
It is also genuinely more flexible than a transducer mount. The same pad will carry LED lights, a hailing speaker, an antenna or a livewell pump, which adds value if you are rigging out the boat anyway.
What the budget kit gets right?
It includes everything. Surface prep materials and cable clips in a kit at this price is unusual and saves a separate trip to the shop.
Polypropylene will not corrode, and the pad removes without marking gel-coat or paint, so it suits owners who want to keep the hull original.
Where it is the wrong choice?
Large side-scan or wide skimmer transducers exceed what this pad is sized for. Buy the larger bonded pad for those.
The bond only works as well as the preparation, and you cannot mount anything for 18 hours. Test the fit first, then bond once.
How to Choose the Right Transducer Mount?
Start with the platform, because it removes most options immediately. Kayaks need a rail, gear-head or fold-over arm. Pontoons and inflatables need reach. Jon boats and riveted aluminium need a clamp or a motor mount. Bass boats have the widest choice because they usually already carry a trolling motor.
Second, be honest about the sonar you are running. A depth-only sounder does not need a mount at all — duct putty inside the hull will do. Side-scan and down-imaging need an unobstructed position outside the hull and a mount that holds angle under way.
Third, decide about drilling. Fiberglass owners usually will not drill, which points them at bonded pads or the composite trim block method. Aluminium owners on a boat they will keep forever can drill a three-screw bracket for maximum rigidity.
Fourth, check the transducer body geometry. Brand-specific adapters such as the Humminbird and Lowrance parts cover one ecosystem properly. Universal clamps cover many but often need washers, shims or trimming to stop the body rotating.
Fifth, measure. Note your hull depth at the mounting point, the transom section thickness if you are clamping, and the length of your transducer cable. Cable length is a real constraint — a short lead from a motor-mounted position will not reach an accessory bar without a splice.
Sixth, consider what happens at speed and on the ramp. Poor readings at speed are frequently blamed on trim tabs and bow-up trim rather than the mount, so set the angle with the boat running, not sitting at a dock. One forum answer makes the point exactly: different hull bottoms do require thought about which will work best at all normal planning speeds.
Seventh, plan for maintenance. Side-scan transducers foul with kelp, weed and slime faster than people expect. Clear them after every trip with a soft brush and mild detergent, avoid abrasives, and inspect the face before you rely on the image. A mount that raises the transducer out of the water for transport also cuts fouling between trips.
Two further details are worth remembering. Angler forums repeatedly flag balance: putting the transducer, display and battery all on the same kayak rail tips the boat, so spread the load fore and aft. And if you use one mount across two boats, budget for two anchor points rather than trying to make one do both jobs.
For context on how the same reasoning applies elsewhere, our guides to star tracker mounts and telescope mounts cover the same ground in a different instrument: a rigid, correctly aligned hold beats a sophisticated one every time.
Frequently Asked Questions
What are the best fish finder mounts?
For kayak and SUP anglers the Scotty 0141 arm is the most versatile choice, with an 11.5 to 18 inch telescoping range and a 360 degree swivel. Fiberglass owners who will not drill should use a bonded stern pad such as the Seaworthy Innovations pad. Trolling motor setups are best served by a motor lower unit kit such as the Minn Kota MKR-15, and brand-specific adapters cover Humminbird XNT and Lowrance HDI bodies. Clamp-on brackets suit riveted aluminium jon boats.
How should I mount my transducer?
Mount the transducer so its face sits parallel to the waterline, clear of the propeller, strakes and any source of turbulence, with no air bubbles trapped behind it. Choose a rigid location that is not on a hull stiffener. Secure the cable with clips so it cannot chafe. Then run the boat at your normal cruising speed and re-check the angle, because trim and trim tabs shift a hull that looked right at rest.
What angle should a fish finder transducer be mounted at?
Parallel to the waterline is the target, which usually means matching the hull at your cruising trim rather than at rest. Trim tabs, hull dead rise and bow-up trim all change the angle under way, so a mount set at a dock drifts out of alignment once you are moving. Set the angle with the boat running, then re-tighten the adjuster before you leave the launch.
Are magnetic and suction cup fish finder mounts reliable?
Only for light use on a slow-moving kayak in calm, weed-free water. Suction cups and magnetic holders lose grip with vibration, a wake or current, and a failed holder at speed takes the transducer and often the cable into the water. For anything involving a trolling motor, current or open water, use a mechanical clamp or a telescoping arm locked in place. Adhesive pads are more dependable than suction because the bond does not depend on friction.
Can I mount a transducer through a scupper hole on a kayak?
Yes for a standard down-looking or depth transducer, which is the answer given on fishing forums for budget sit-on-top kayaks. Side-scan and down-imaging transducers should not go through a scupper hole, because they need an unobstructed position outside the hull to see to each side. For those, use a rail, track or fold-over arm so the face sits in open water.
Do I need a transducer mount at all?
If you only want a depth readout, no. An in-hull transducer bonded to the inside of the hull with duct putty will do it, provided it sits in an unstiffened area so it can vibrate the hull skin. Once you need side-scan, down-imaging or consistent structure at speed, you need a rigid external mount and the in-hull option is no longer enough.
The best transducer mounts for fish finders are the ones that hold a fixed, correct angle in your specific hull. Kayak and SUP anglers get the most flexibility from the Scotty 0141, fiberglass owners get a clean install from the Seaworthy Innovations bonded stern pad, and anyone on a trolling motor solves it for very little with the Minn Kota MKR-15. Match the mount family to your platform, set the angle with the boat under way, and the picture stops falling apart at speed. Browse the picks above and pick the one that matches how you actually fish.