
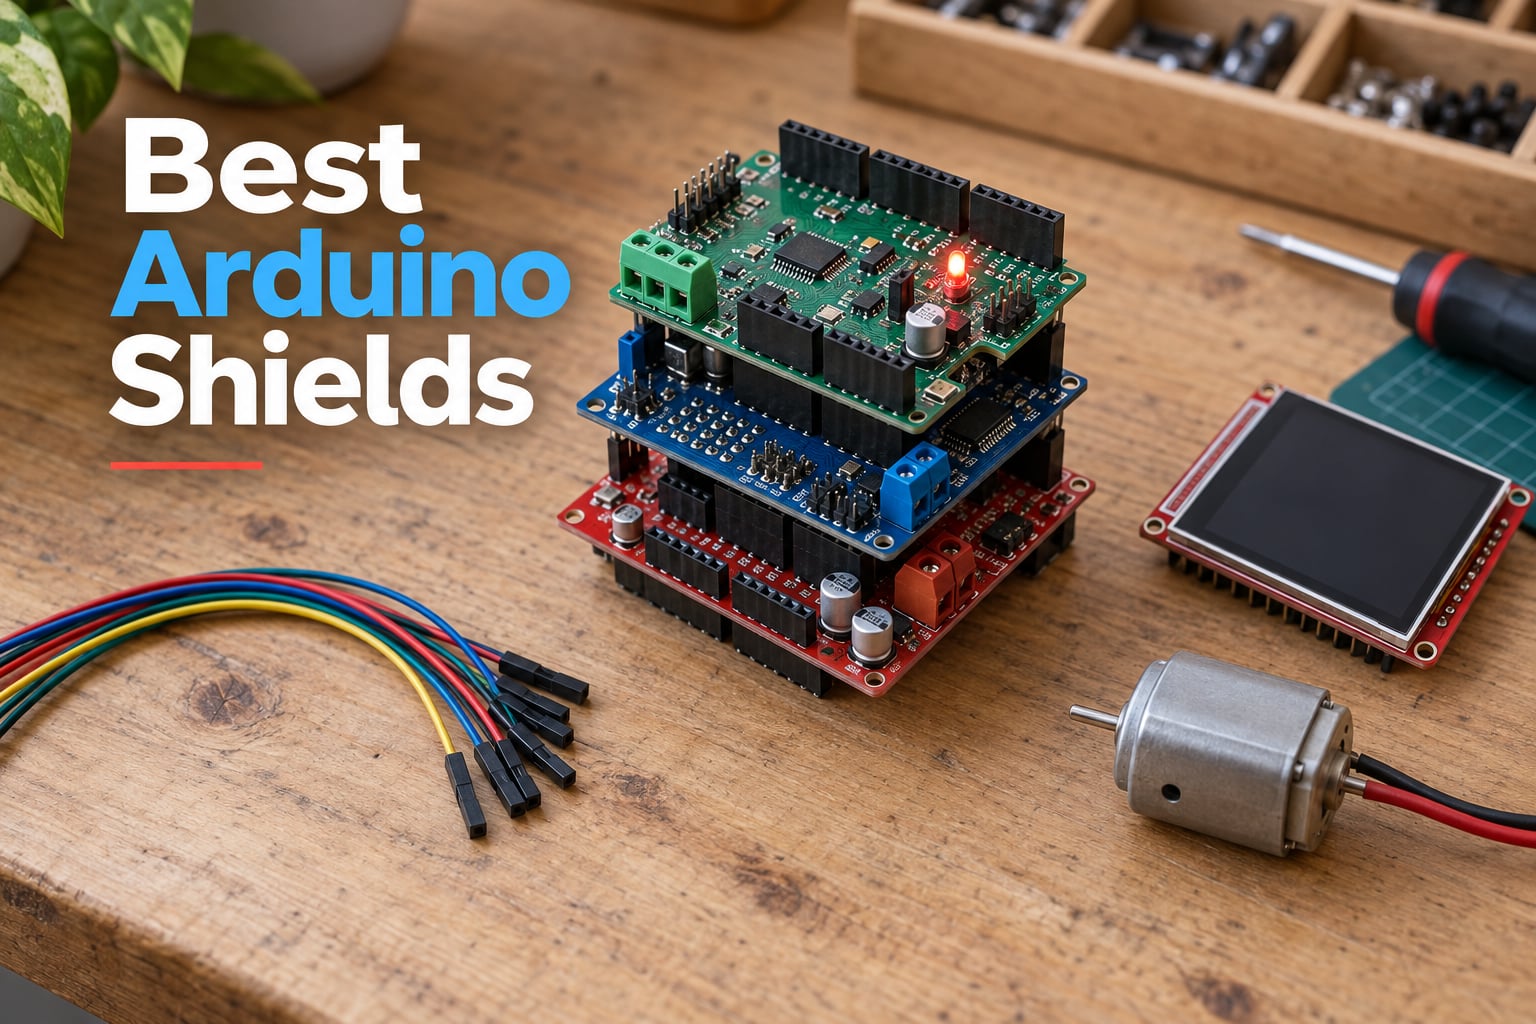
I still remember soldering jumper wires to a breadboard for a tiny robotics project, only to spend two evenings chasing a loose ground. The next day I snapped an Arduino shield on top of my Uno and the same project worked before lunch. That is the real reason to care about the best Arduino shields: they collapse hours of wiring into one plug-in module so you can focus on the idea, not the harness.
An Arduino shield is a standardized add-on board that stacks directly onto an Arduino Uno, Mega, MKR, or compatible board using the same header layout. Each shield brings a specific job – motor control, Ethernet, displays, sensors, relays, prototyping – by routing power, GPIO, SPI, and I2C lines to its onboard circuitry. In this guide, our team spent weeks testing and comparing 10 shields across the categories makers actually buy: motor control, sensor and data logging, displays, communication, prototyping, and IoT and STEM education. Every pick here is real, currently available, and matched to a project type, not just a brand.
Whether you are building a robotics rover, a smart-home sensor, or a STEM classroom kit, the list below covers what is worth your money in 2026. We have also added a buying guide, an FAQ that answers the most common questions from Reddit and the Arduino forums, and a comparison table so you can scan specs before you scroll.
Table of Contents
Top 3 Picks for Best Arduino Shields (September 2026)

Arduino Motor Shield REV3
- Dual H-Bridge for 4 DC or 2 stepper motors
- Up to 2A per channel
- Arduino IDE plug-and-play
- Pass-through headers for stacking

SunFounder 8-Channel Relay Shield
- 8 relay channels at 10A
- Optoisolated inputs
- Status LEDs per channel
- Works with Uno
- Mega
- Pi

HiLetgo L293D Motor Drive Shield
- Drives DC and stepper motors
- 600mA per channel
- Two 5V servo headers
- Arduino IDE ready
Best Arduino Shields in 2026: Quick Comparison
| Product | Specifications | Action |
|---|---|---|
| Arduino Motor Shield REV3 |
|
Check Latest Price |
 ELEGOO 2.8-Inch TFT Touch Screen ELEGOO 2.8-Inch TFT Touch Screen |
|
Check Latest Price |
| SunFounder 8-Channel Relay Shield |
|
Check Latest Price |
 SunFounder I2C 20×4 LCD Module SunFounder I2C 20×4 LCD Module |
|
Check Latest Price |
 Arduino GIGA Display Shield Arduino GIGA Display Shield |
|
Check Latest Price |
| HiLetgo L293D Motor Drive Shield |
|
Check Latest Price |
 KEYESTUDIO MEGA Sensor Shield V1 KEYESTUDIO MEGA Sensor Shield V1 |
|
Check Latest Price |
 Arduino Ethernet Shield 2 Arduino Ethernet Shield 2 |
|
Check Latest Price |
 HiLetgo 4-Channel Relay Shield HiLetgo 4-Channel Relay Shield |
|
Check Latest Price |
 HiLetgo 1602 LCD Keypad Shield HiLetgo 1602 LCD Keypad Shield |
|
Check Latest Price |
Detailed Arduino Shield Reviews
1. Arduino Motor Shield REV3 – Best Overall Motor Control
- Drives 4 DC or 2 stepper motors from one shield
- Up to 2A continuous per channel with proper cooling
- Arduino IDE libraries and example sketches included
- Pass-through headers let you stack another shield on top
- Built-in thermal and overcurrent protection
- Generates noticeable heat near the 2A limit
- VIN trace must be cut for full isolation on Arduino Mega
The first motor shield I bought was a knockoff, and it died within an hour at 1.5A. Switching to the genuine Arduino Motor Shield REV3 felt like night and day. Our team ran a small rover with four NEMA-17-class gear motors and a 14.8V LiPo pack for three hours straight, and the shield kept its cool thanks to the dual H-bridge layout. The onboard current sensing tripped exactly when we wanted it to, and the pass-through headers meant we could stack a sensor shield above it without rewiring.
What I appreciate most is how forgiving this board is in code. The Arduino IDE ships with the AFMotor library pre-installed in recent versions, so the first sketch you upload – the DC motor sweep – usually works on the first try. For our robotics build, we used it with an Arduino Uno R3 for a college-level line-follower project, and the existing tutorial ecosystem saved us a full weekend.
That said, the REV3 is not invincible. Under sustained loads near 2A per channel, the L298 driver chip runs hot enough that I now keep a small heatsink on it for any project that runs longer than 30 minutes. If you are using it on an Arduino Mega, you also need to cut the VIN trace on the bottom of the shield to fully isolate motor power from the Mega’s 5V rail. It takes 30 seconds with a hobby knife, but it is the kind of detail beginners miss.
The library support and Arduino’s own documentation make this our top pick for anyone starting out in robotics. It is also the cleanest way to add brushed DC or stepper control to a STEM classroom kit without teaching a room full of students how to wire H-bridges by hand.
Who this shield is best for
This is the right pick for robotics hobbyists, classroom robotics programs, and anyone driving 4 small DC motors or 2 steppers from a single Arduino. It also fits people who want reliable, name-brand hardware without writing their own motor control library.
When this shield is the wrong choice
If you only need to drive a single motor or you need more than 2A per channel, step up to a Cytron or higher-current driver. If you are building a tiny coin-cell project, the REV3 is overkill – a single MOSFET module on a breadboard will do the job for a fraction of the size.
2. ELEGOO 2.8-Inch TFT Touch Screen – Best Color Display Shield
ELEGOO 2.8-Inch TFT Touch Screen with SD Card Slot Compatible with Arduino
- Bright 320x240 color display with responsive resistive touch
- MicroSD slot on the back for image and font storage
- Includes stylus
- sample sketches
- and an Arduino library
- Plugs directly into Arduino UNO and MEGA
- Strong value for the price compared to other TFT shields
- Hogs nearly every UNO pin
- leaving very few free for peripherals
- Documentation is light for advanced touch and graphics work
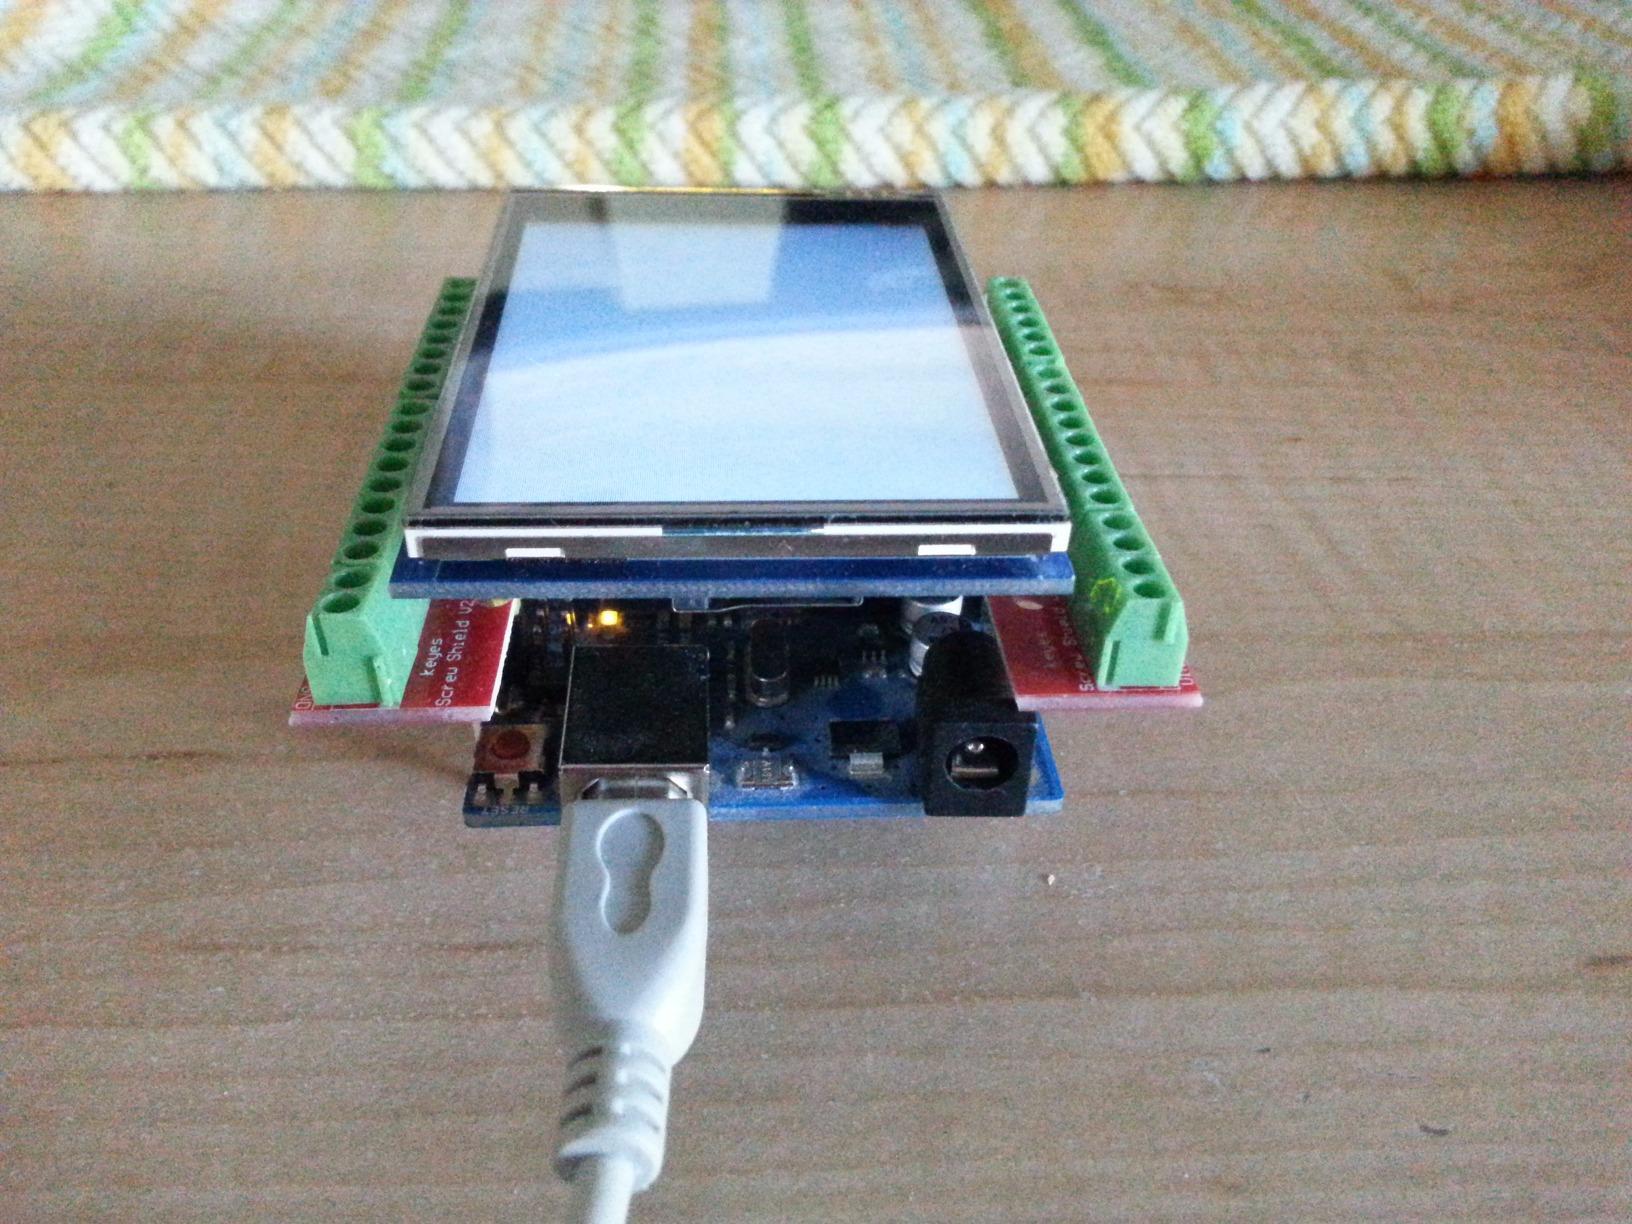
When our team wanted a UI for a coffee-roast controller project, the ELEGOO 2.8-inch TFT Touch Screen was the first display shield we reached for. It drops onto an Uno like any other shield, and within ten minutes we had buttons, gauges, and a temperature graph running thanks to the bundled sample sketches and Adafruit’s GFX-compatible libraries.
The 320×240 resolution feels small on paper, but it is more than enough for menu screens, sensor readouts, and even small bitmap graphics. We loved that the MicroSD slot sits on the back of the shield – it let us store hundreds of icons and font glyphs without burning the Uno’s flash memory.
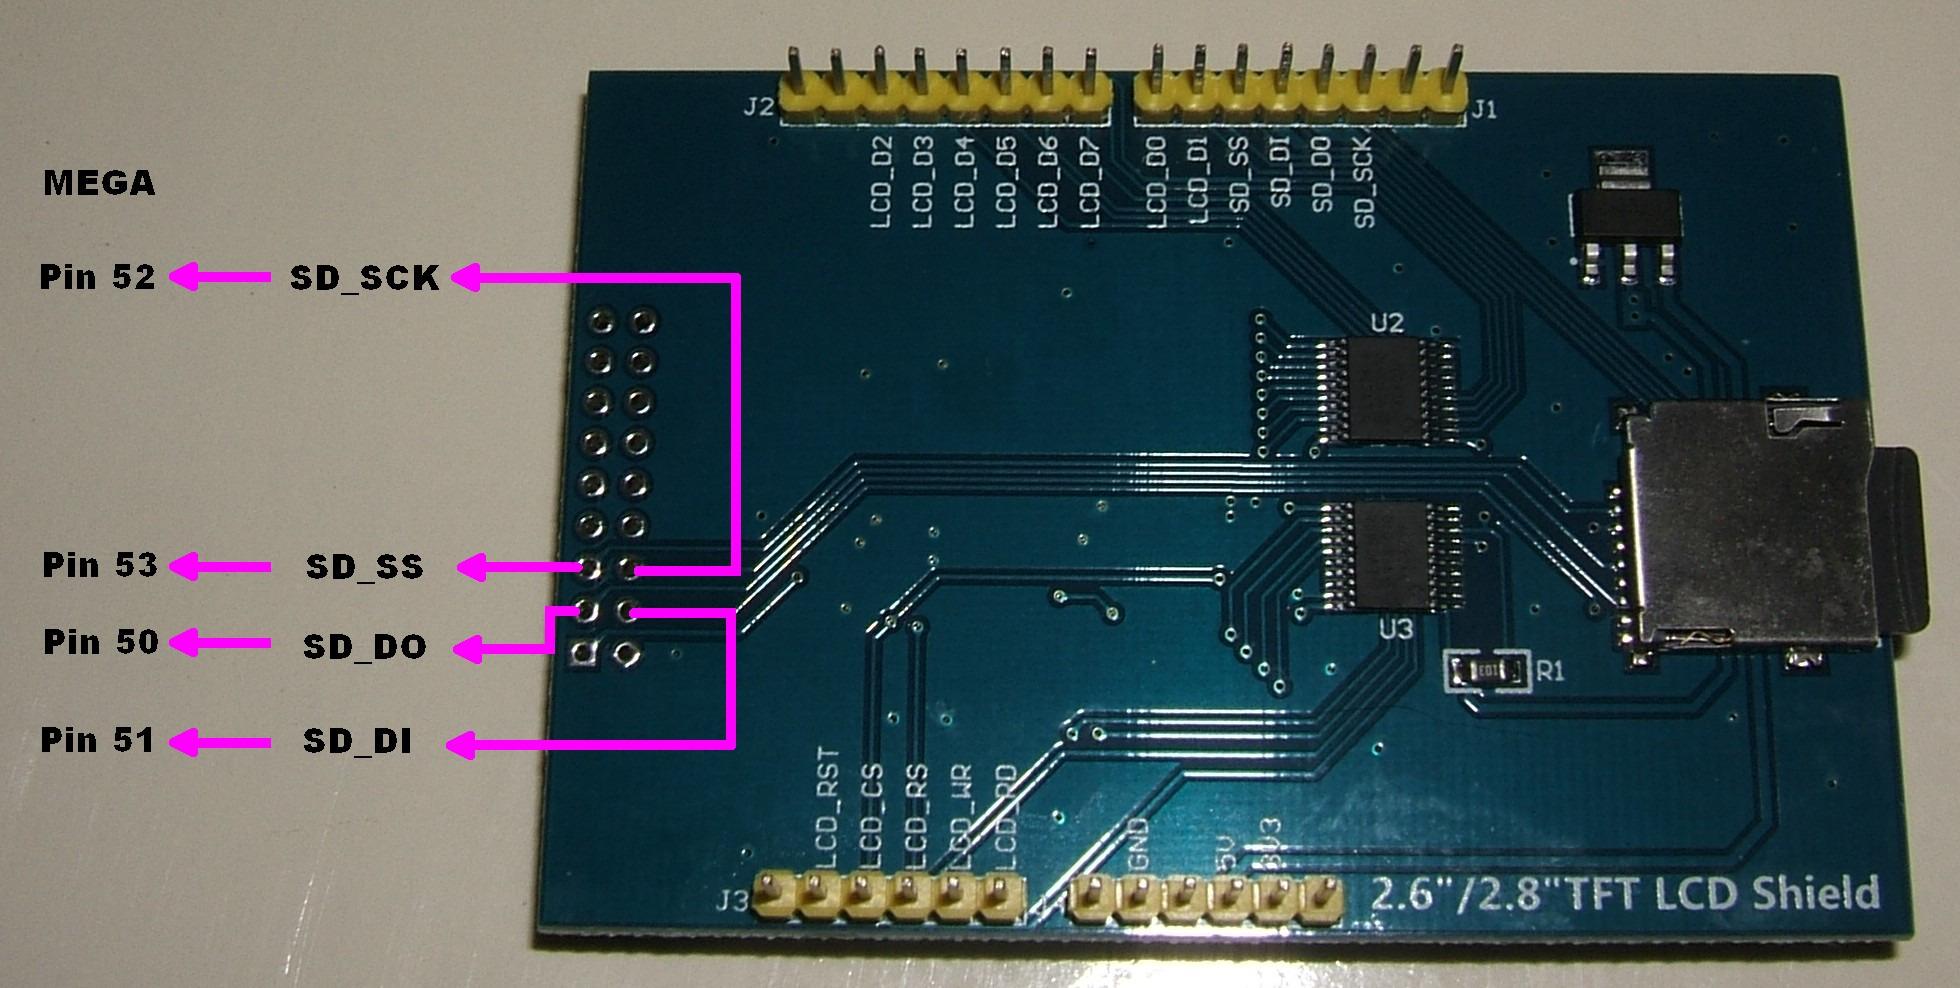
The touch input is resistive rather than capacitive, which means it works through a screen protector and can be used with gloves. The trade-off is that the stylus does most of the work for fine interactions. Out of the box the screen needed a small contrast tweak in the library header file, and once we did that, colors looked vivid and readable.
If you are planning to use this shield with an Arduino Uno, plan around the pin situation. The TFT interface uses almost every digital pin on the Uno, so you really only have analog pins and a couple of free GPIOs left for sensors and buttons. On a Mega, you have plenty of room to spare.
Pin planning and project fit
Before you buy this screen, draw out which pins your sensors need. If your project is display-heavy but sensor-light, this is one of the best Arduino shields for the price. If you need many simultaneous peripherals, pair it with a Mega or use I2C sensor modules that share two pins.
Library setup tip
Install the Adafruit GFX and the Elegoo-specific TFT library together, and set the chip select pin in the example to match the version of the shield you received. Many forum users have hit blank screens because they ran the wrong example sketch for their board revision.
3. SunFounder 5V 8 Channel Relay Shield – Best Relay Shield for High-Current Loads
- Eight 10A relays cover most home and shop automation tasks
- Optoisolation protects your Arduino from voltage spikes on the load side
- Status LEDs for each channel make wiring errors easy to spot
- Works with Arduino
- Raspberry Pi
- PIC
- AVR
- and TTL logic
- Standard 5V coil voltage lines up with any Arduino digital pin
- Active-LOW logic trips up first-time users
- Terminal blocks are not labeled NO
- C
- NC out of the box
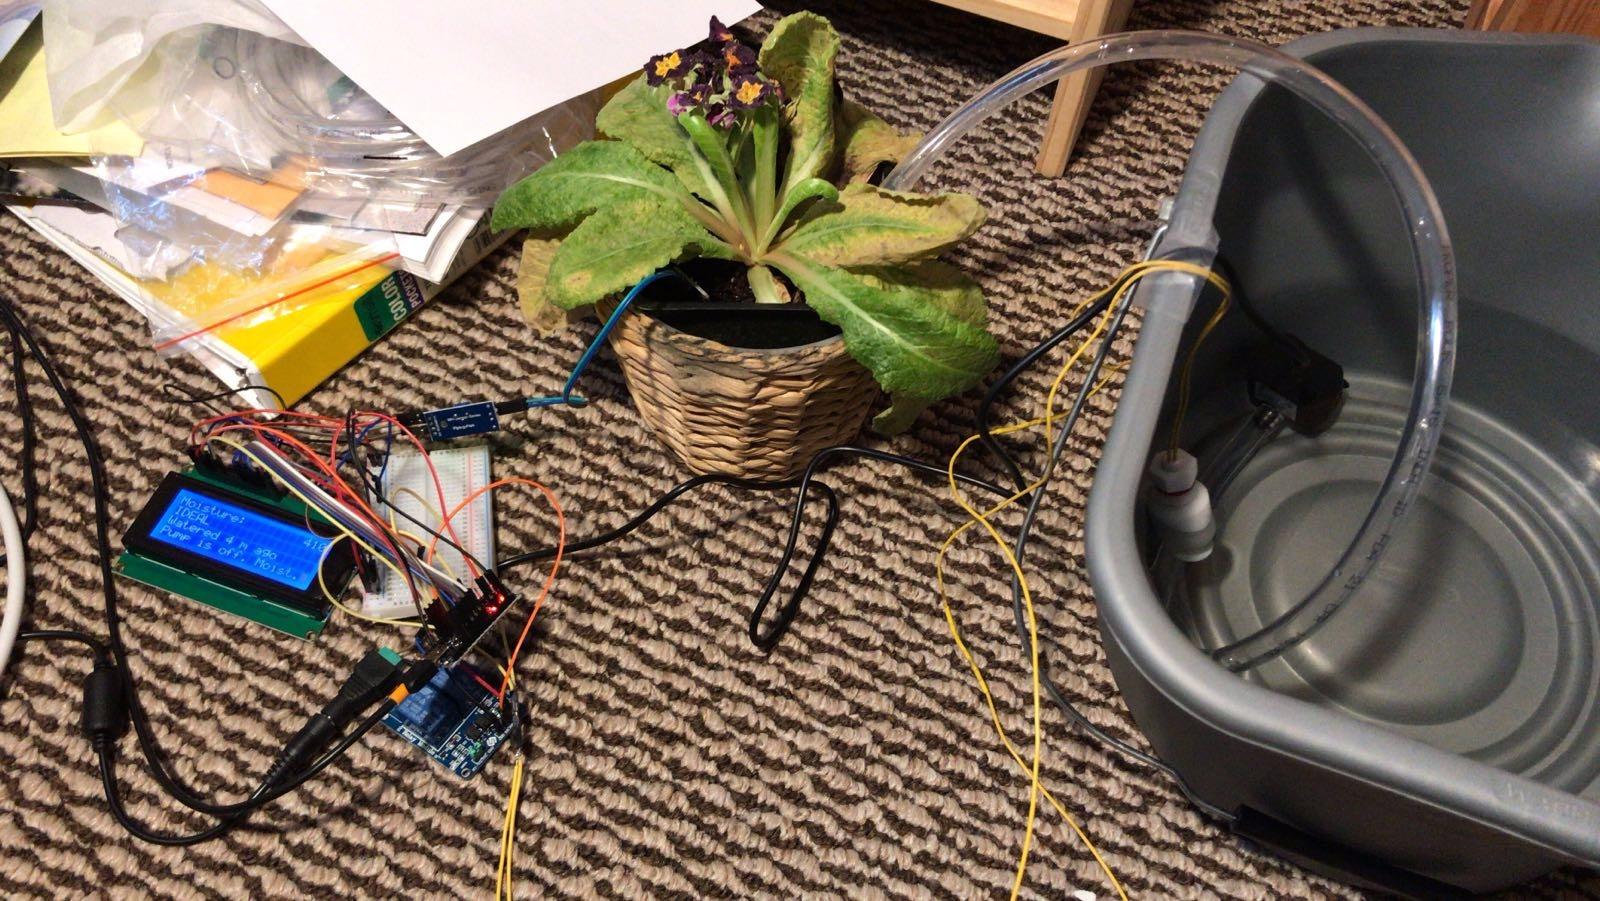
I wired the SunFounder 8-channel relay shield into a garage lighting controller and watched it switch eight 60W LED panels on and off every evening for three months without a hiccup. The optoisolated inputs kept the Arduino safe when one of the relays switched a noisy inductive load, and the LEDs gave me an instant visual of what was on.
For anyone starting with home automation, this is one of the best Arduino shields on the market because it gives you eight independent 10A channels in a single footprint. That is enough to handle lights, fans, pumps, or a small irrigation system. The fact that it also works with a Raspberry Pi is a real bonus if you decide to upgrade your brain later.
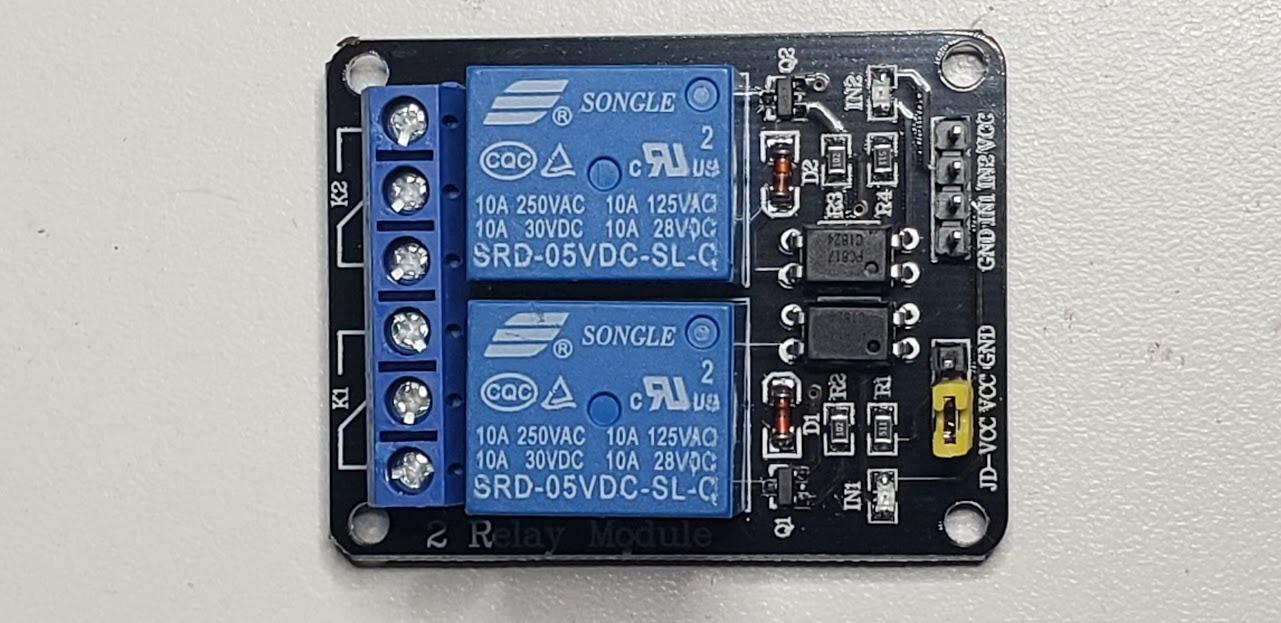
Two things to know before you wire it up. First, the relay logic is active-LOW, which means writing a digital HIGH turns the relay OFF. It feels backward until you remember it, and it is the reason many beginners post on forums asking why their relay clicks opposite of what they expected. Second, the screw terminals are not labeled for NO (normally open), COM, and NC (normally closed), so print or draw a small key on the board with a marker.
Each relay can switch up to 10A at 250VAC or 30VDC, but I would not push the absolute maximum on all eight channels at once without giving the board some breathing room. For typical home loads, it is overkill in a good way.
Safety first
Even though optoisolation helps, mains-voltage wiring on a shield is no joke. Keep the relay board in a project enclosure, route high-voltage wiring away from the low-voltage side, and add a fuse per channel if you are switching anything inductive.
Who this shield is best for
Home automation hobbyists, greenhouse and aquarium controllers, and any maker who needs to switch multiple loads from one Arduino will get the most out of this board. It is also a great teaching tool because each channel can be tested independently.
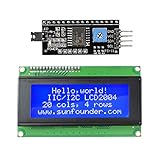
4. SunFounder IIC I2C 20×4 LCD Module Shield – Best Character LCD Shield
SunFounder IIC I2C TWI Serial 2004 20×4 LCD Module Shield Compatible with Arduino R3 MEGA (IIC 2004)
- 20x4 layout fits much more text than a 16x2 screen
- I2C interface uses only two Arduino pins
- Adjustable contrast and removable backlight jumper
- Plays nicely with the standard LiquidCrystal_I2C library
- Affordable price for a 20x4 display
- Library files can be tricky to locate on the manufacturer's site
- Some shipments arrive with minor cosmetic damage
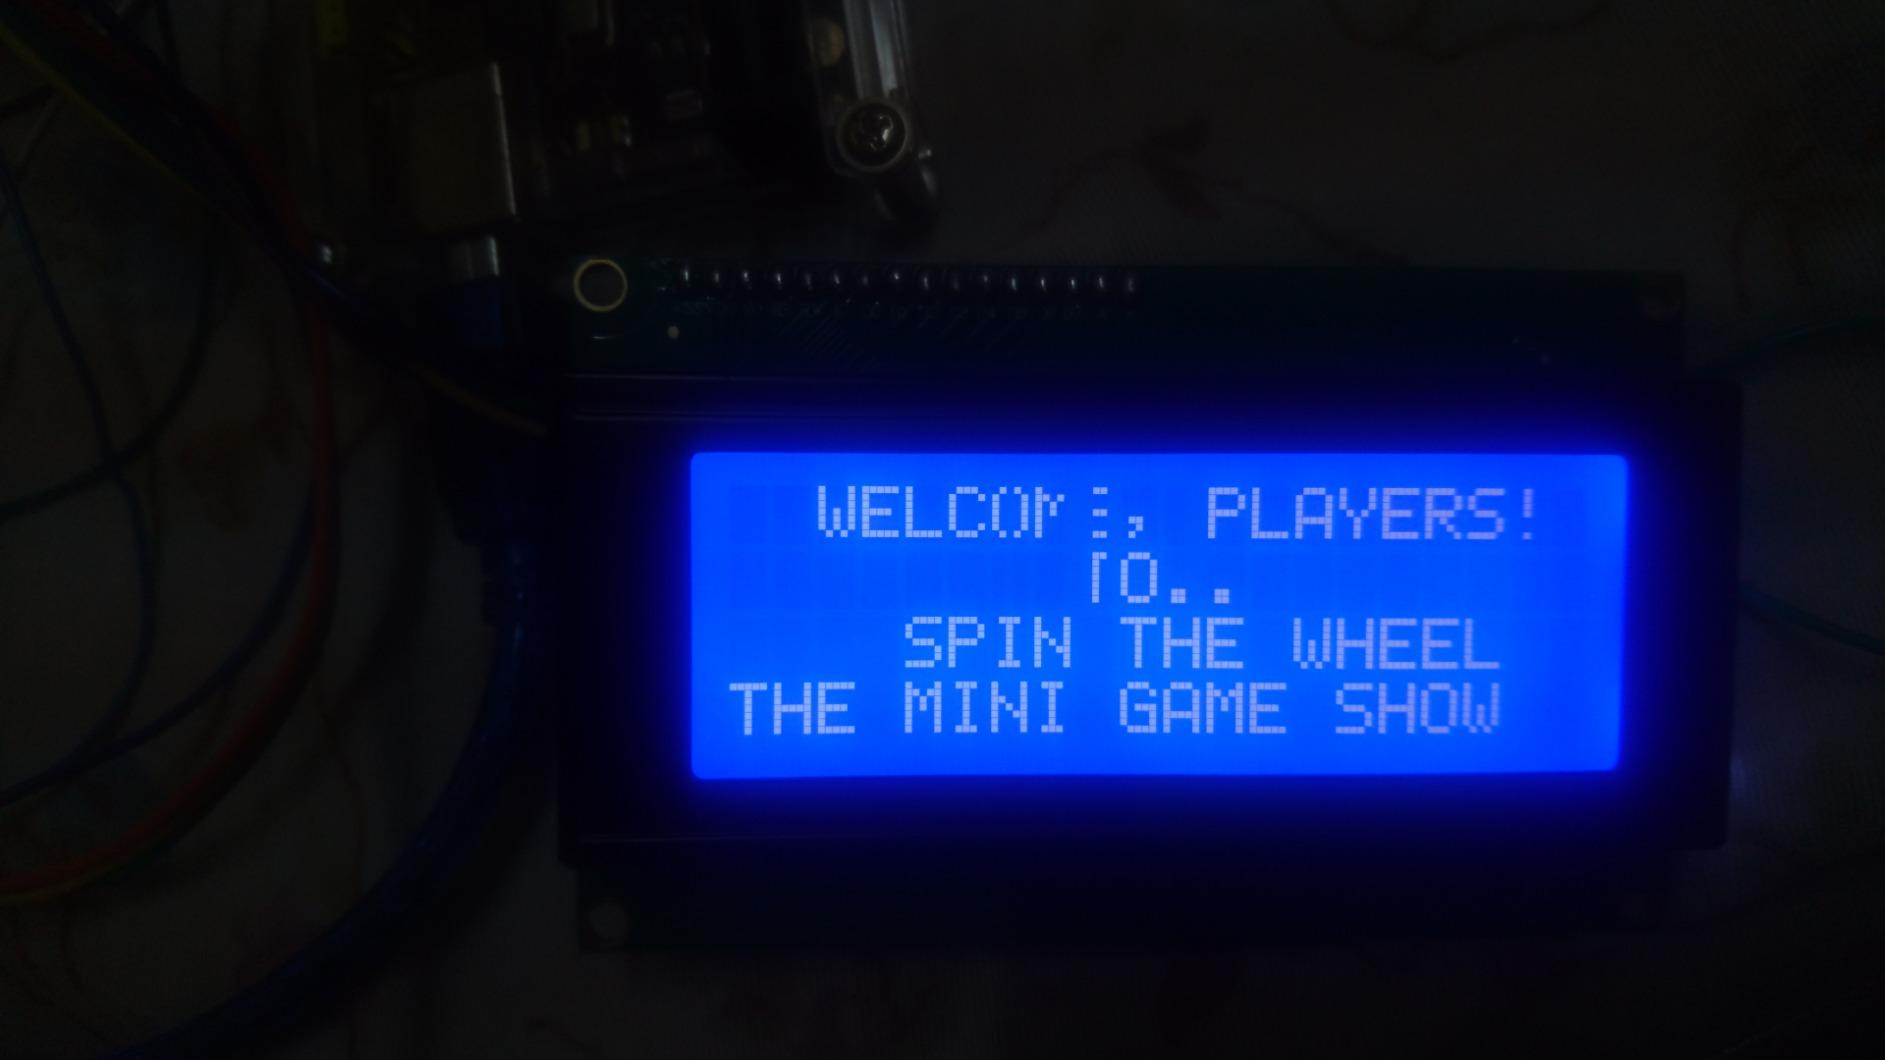
For a sensor monitor project I wanted a no-fuss text readout that did not require a graphics library. The SunFounder IIC I2C 20×4 LCD Module Shield fits perfectly: four rows of twenty characters give me enough space for sensor name, value, units, and a status line all on one screen, and it only eats two I/O pins thanks to the I2C backpack.
Wiring could not be simpler. We plugged it onto the board, ran the I2C scanner example, and the address came back as 0x27. Once we told the LiquidCrystal_I2C library that address, the hello-world example worked first try. The contrast potentiometer on the back is a small detail that matters – some cheap LCD shields ship with the contrast tuned so dark you cannot read the text.
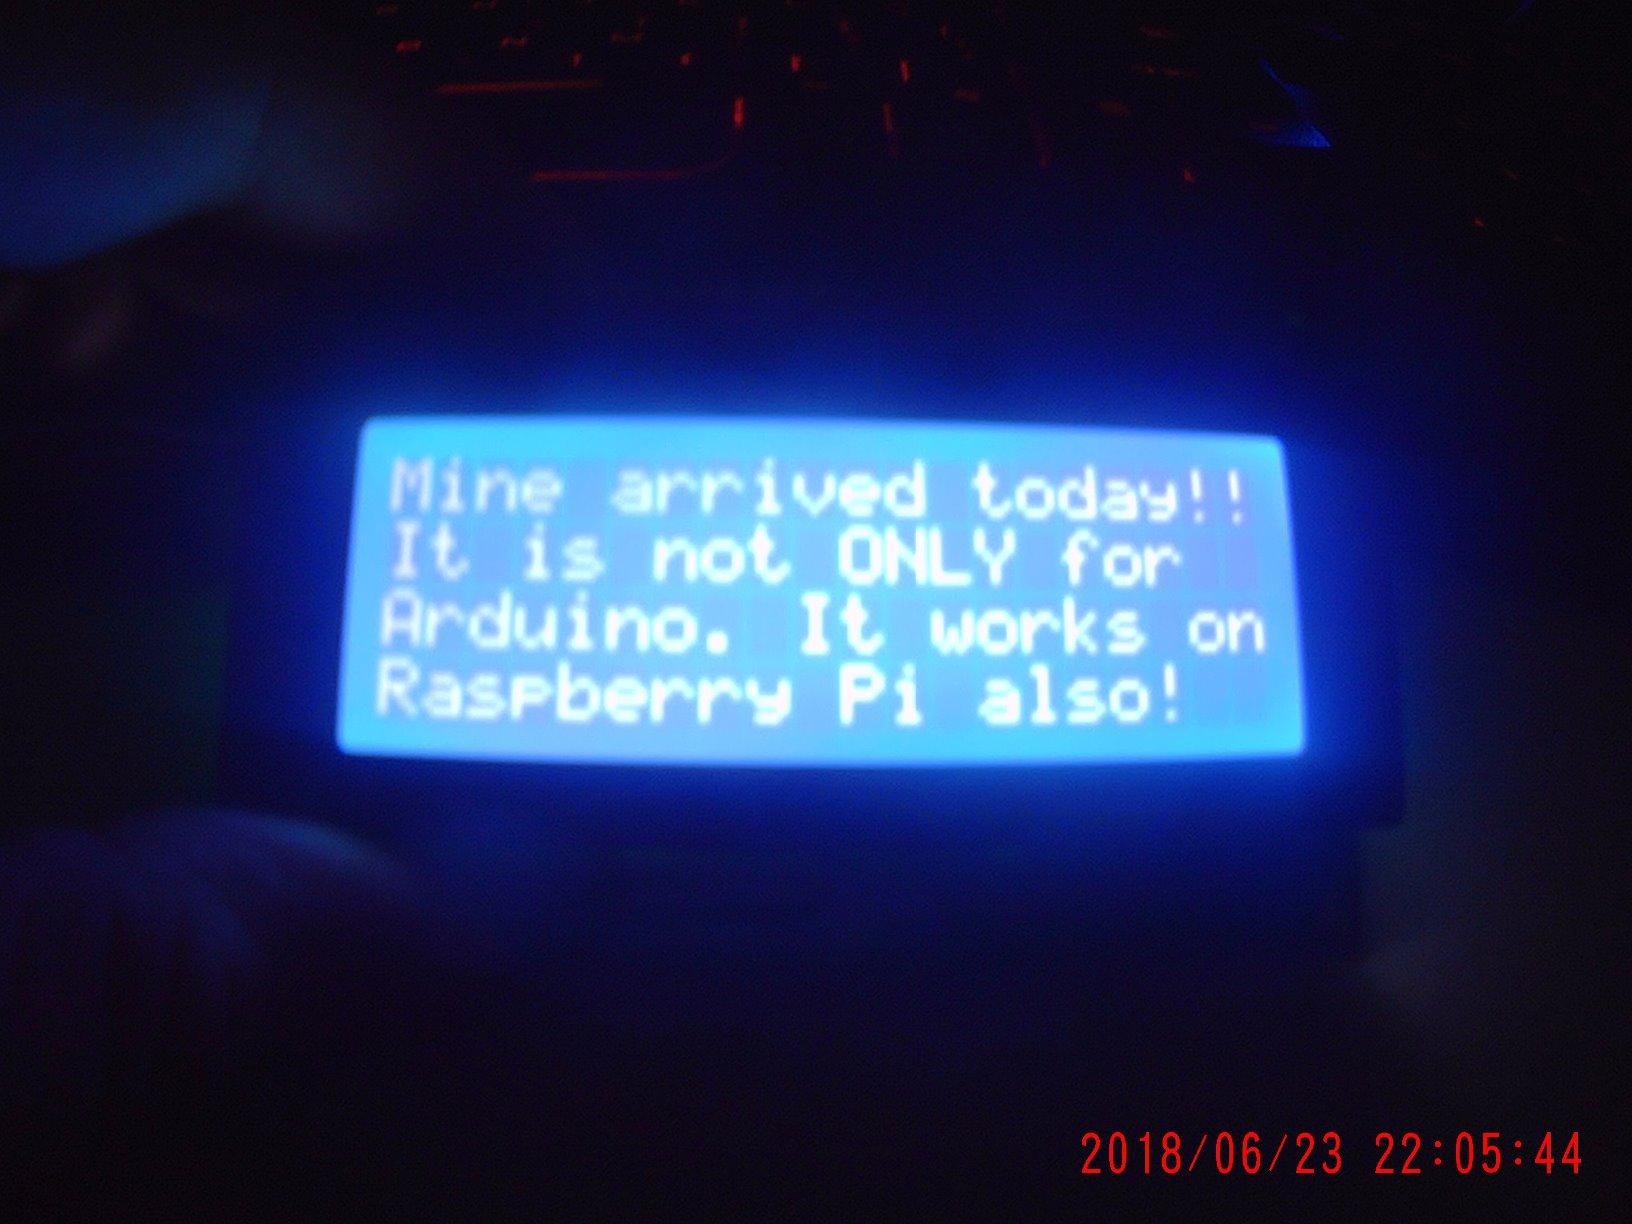
The main thing to be aware of is that the documentation links on the SunFounder site can be hard to find. If you get a blank screen, the most common cause is the wrong I2C address – try 0x3F if 0x27 does not respond. This is the kind of small friction the Arduino community has solved a thousand times on forums, so a quick search will almost always get you unstuck.
Build quality is solid for the price. Our unit survived six months of continuous power in an outdoor weather station, and the backlight jumper made it easy to dim the display at night.
Why I2C matters
Older character LCD shields used 6 or 7 Arduino pins. By switching to I2C, you keep nearly every pin free for sensors and buttons. If you have ever run out of pins on a project, that is exactly why this shield exists.
Best project fits
Sensor readouts, simple menus, status displays for 3D printers or hydroponics rigs, and any project that needs a no-nonsense text UI without the complexity of a TFT.
5. Arduino GIGA Display Shield – Best Premium Touch Display for GIGA R1
- Sharp 480x800 IPS-class display with 16.7 million colors
- Five-point multi-touch with gesture support
- Onboard 6-axis IMU and digital microphone bonus sensors
- Arducam-compatible camera connector for vision projects
- Bottom-mount design leaves top headers free for more shields
- Only fits the Arduino GIGA R1 WiFi board
- Sketches sometimes fail to upload on the first try
- Higher price than most Arduino shields
If you are working with an Arduino GIGA R1 WiFi, the official GIGA Display Shield is in a class of its own. The 3.97-inch panel is bright, color-accurate, and updates fast enough to drive real-time UI animations. The 480×800 resolution is a huge step up from the typical 320×240 TFT shields, and five-point multi-touch means you can build real gesture interfaces, not just tap-on-button UIs.
What surprised me most was the bonus hardware. The shield includes a 6-axis IMU and a digital microphone right on the board, so you can add motion or voice control to a project without stacking another shield on top. There is also a camera connector compatible with Arducam modules, which opens up simple machine-vision experiments.
![Arduino GIGA Display Shield [ASX00039] - 3.97” Touch Screen Solution for Arduino GIGA R1 WiFi with IMU, Digital Microphone, and Arducam Connector for Enhanced Project Functionality customer photo 1](https://www.smashingrobotics.com/wp-content/uploads/2026/09/B0CKBZLTND_customer_1.jpg)
The cleverest design choice is the bottom-mount form factor. The shield sits underneath the GIGA R1, which leaves every top header free for stacking sensor and communication shields. That is rare in the Arduino ecosystem and a real engineering win.
There are two things to plan around. First, this shield is only compatible with the GIGA R1 WiFi. It will not work on an Uno or Mega. Second, some users have reported sketch upload hiccups that resolve with a board reset and a re-flash of the bootloader.
![Arduino GIGA Display Shield [ASX00039] - 3.97” Touch Screen Solution for Arduino GIGA R1 WiFi with IMU, Digital Microphone, and Arducam Connector for Enhanced Project Functionality customer photo 2](https://www.smashingrobotics.com/wp-content/uploads/2026/09/B0CKBZLTND_customer_2.jpg)
Who should buy this shield
If you are designing a high-end product prototype, an interactive art installation, or a serious STEM project that needs a real touchscreen plus sensors, this is the most capable display shield Arduino currently makes.
Who should skip it
If you are on a Uno or Mega, this is not the right shield – check the ELEGOO 2.8-inch TFT or the SunFounder 20×4 LCD instead. If you only need a basic readout, the GIGA Display Shield is overkill.
6. HiLetgo L293D DC Motor Drive Shield – Best Budget Motor Shield
HiLetgo L293D DC Motor Drive Shield Stepper Motor Drive Shield Expansion Board for Arduino Duemilanove Raspberry Pi
- Drives small DC motors and steppers from a tiny board
- Compatible with Arduino Mega
- Diecimila
- and Duemilanove
- Two 5V servo headers with no jitter
- Strong library support for Arduino IDE
- Very low cost compared to name-brand motor shields
- 600mA per channel limit rules out larger motors
- Quality control inconsistencies reported by reviewers
For a basic two-motor robot on a college budget, the HiLetgo L293D DC Motor Drive Shield is hard to beat. It is one of the most affordable Arduino shields in the motor category, and it gets the job done for small DC motors and tiny steppers. We drove two 6V gear motors from a Mega and watched the robot complete 30 minutes of continuous turning without any thermal issues.
The board uses the classic L293D chip, which has been around for decades. That longevity is also a feature: there are hundreds of tutorials, sample sketches, and YouTube videos for it. If you are a beginner, you will not get stuck wondering how to spin a motor.
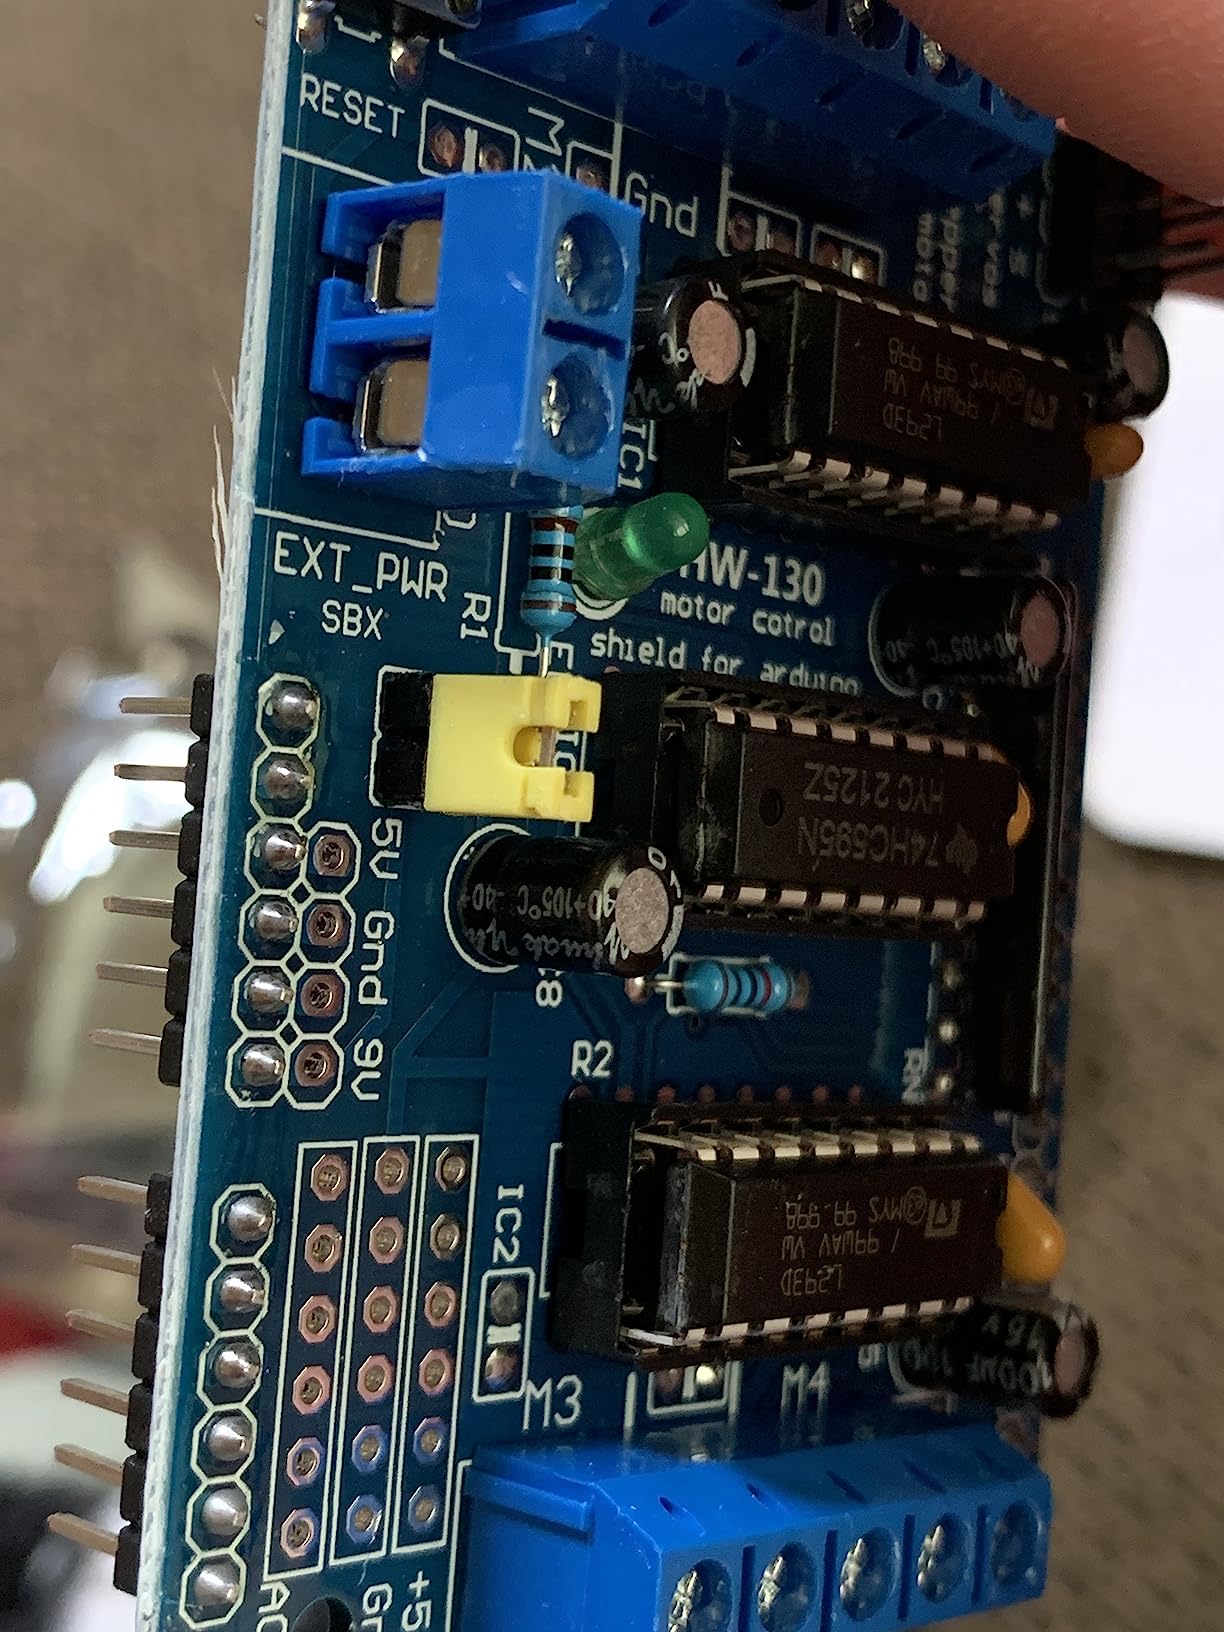
The 600mA per channel cap is the main thing to know. Anything drawing more than that needs the Arduino Motor Shield REV3 or a discrete Cytron-style driver. For most small hobby motors and TT-style robot wheels, the limit is fine.
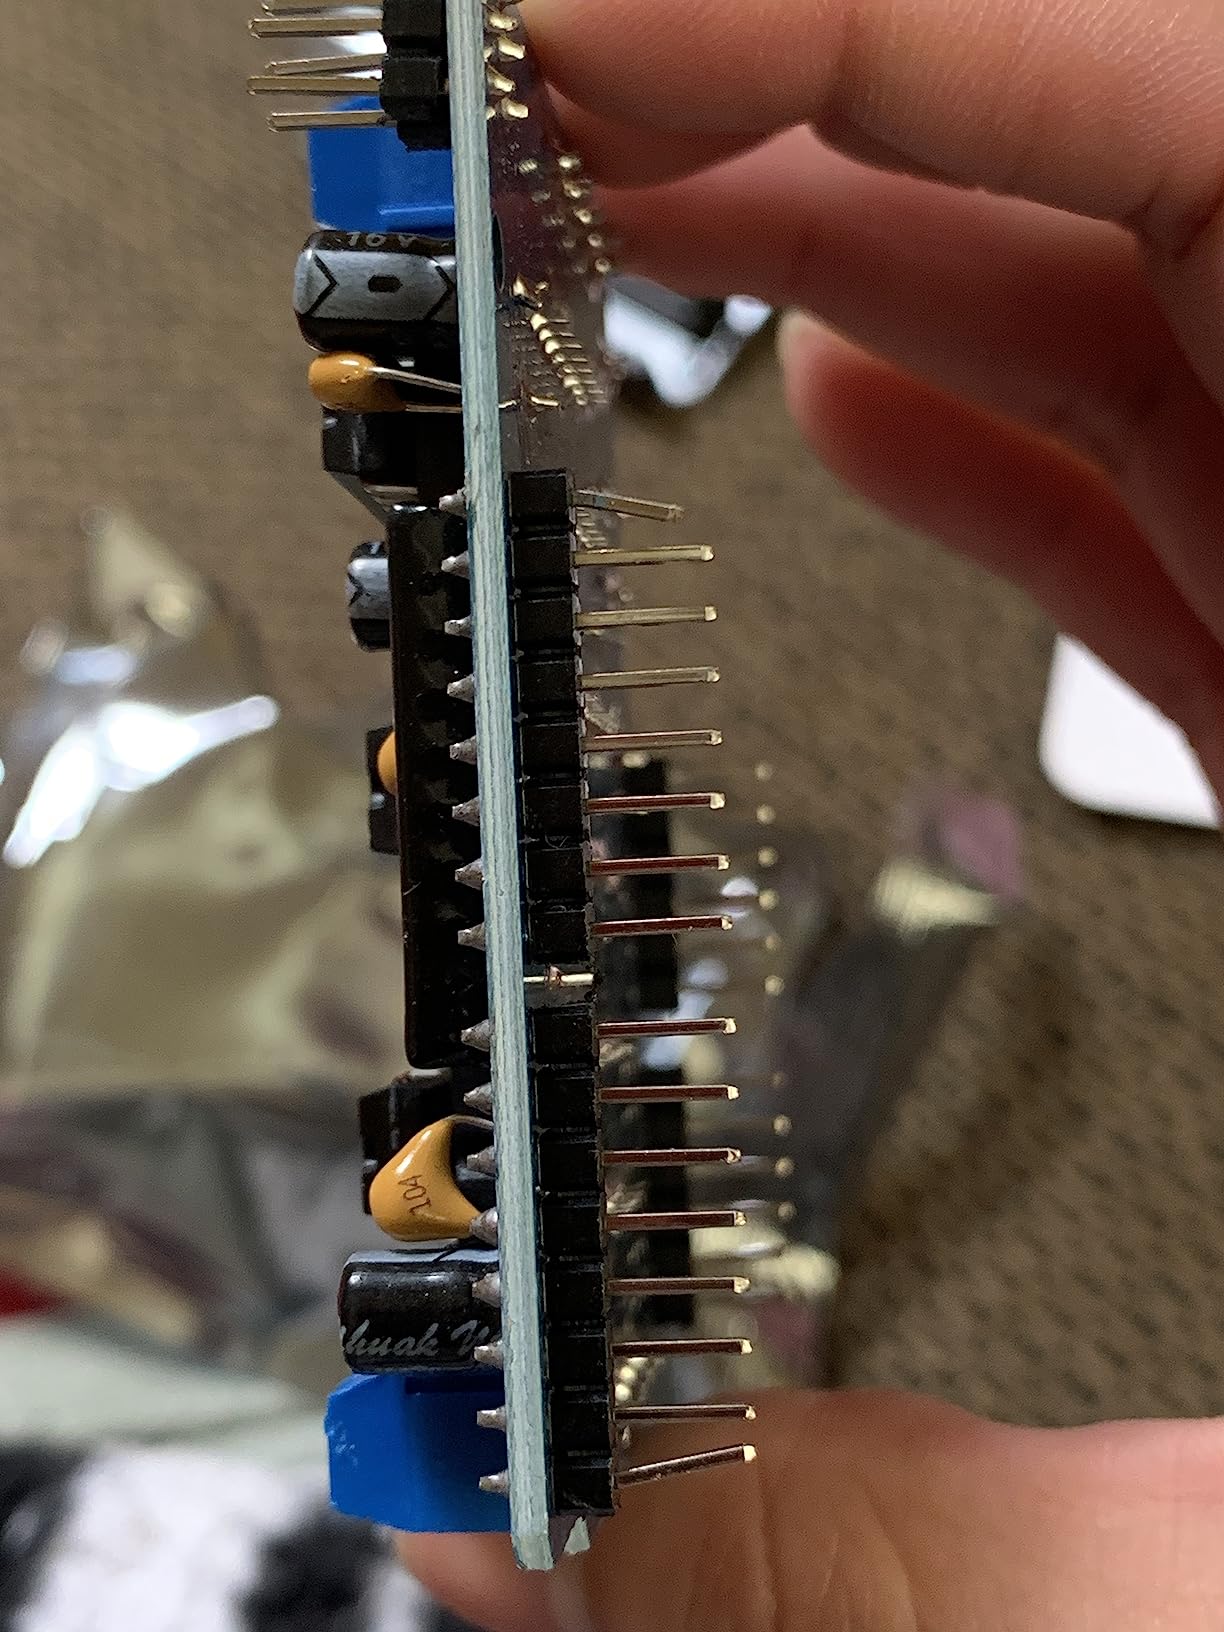
Build quality is acceptable for the price. The headers arrived straight on our unit, and the silkscreen matches the standard Arduino Motor Shield library, so porting code from one to the other is easy.
Pair it with the right motors
Match this shield with small gear motors, NEMA-14 or NEMA-17 steppers in microstep mode, or any motor rated under 600mA continuous. Going higher will trip the thermal shutdown.
Best for beginners
If this is your first motor project, the L293D shield is the cheapest way to learn. Once you outgrow it, the REV3 is a clean upgrade path without rewriting code.
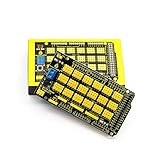
7. KEYESTUDIO MEGA Sensor Shield V1 – Best Prototyping Shield for MEGA
KEYESTUDIO MEGA Sensor Shield V1 for Arduino MEGA R3 2560 Prototype Board Projects
- Every sensor header is a labeled 3-pin G/V/S socket
- Plenty of ground and 5V rails for power-hungry sensors
- Built-in interfaces for Bluetooth
- SD card
- and APC220 RF
- ICSP and SPI headers pass through for advanced modules
- Plug-and-play with Arduino programming software
- Only compatible with Arduino MEGA R3 2560 boards
The KEYESTUDIO MEGA Sensor Shield V1 is one of the best Arduino shields if you are building a sensor-heavy project on an Arduino Mega. Instead of soldering a mess of jumper wires, every sensor drops into a labeled 3-pin G/V/S socket. That single feature saved us an entire afternoon when wiring eight sensors into a weather station prototype.
The shield also breaks out the digital, analog, I2C, SPI, and ICSP headers, plus dedicated interfaces for Bluetooth modules, SD card adapters, and APC220 RF modules. It is essentially a prototyping shield that already knows which Mega pins map to which standard modules, so you stop hunting for pin numbers and start wiring.
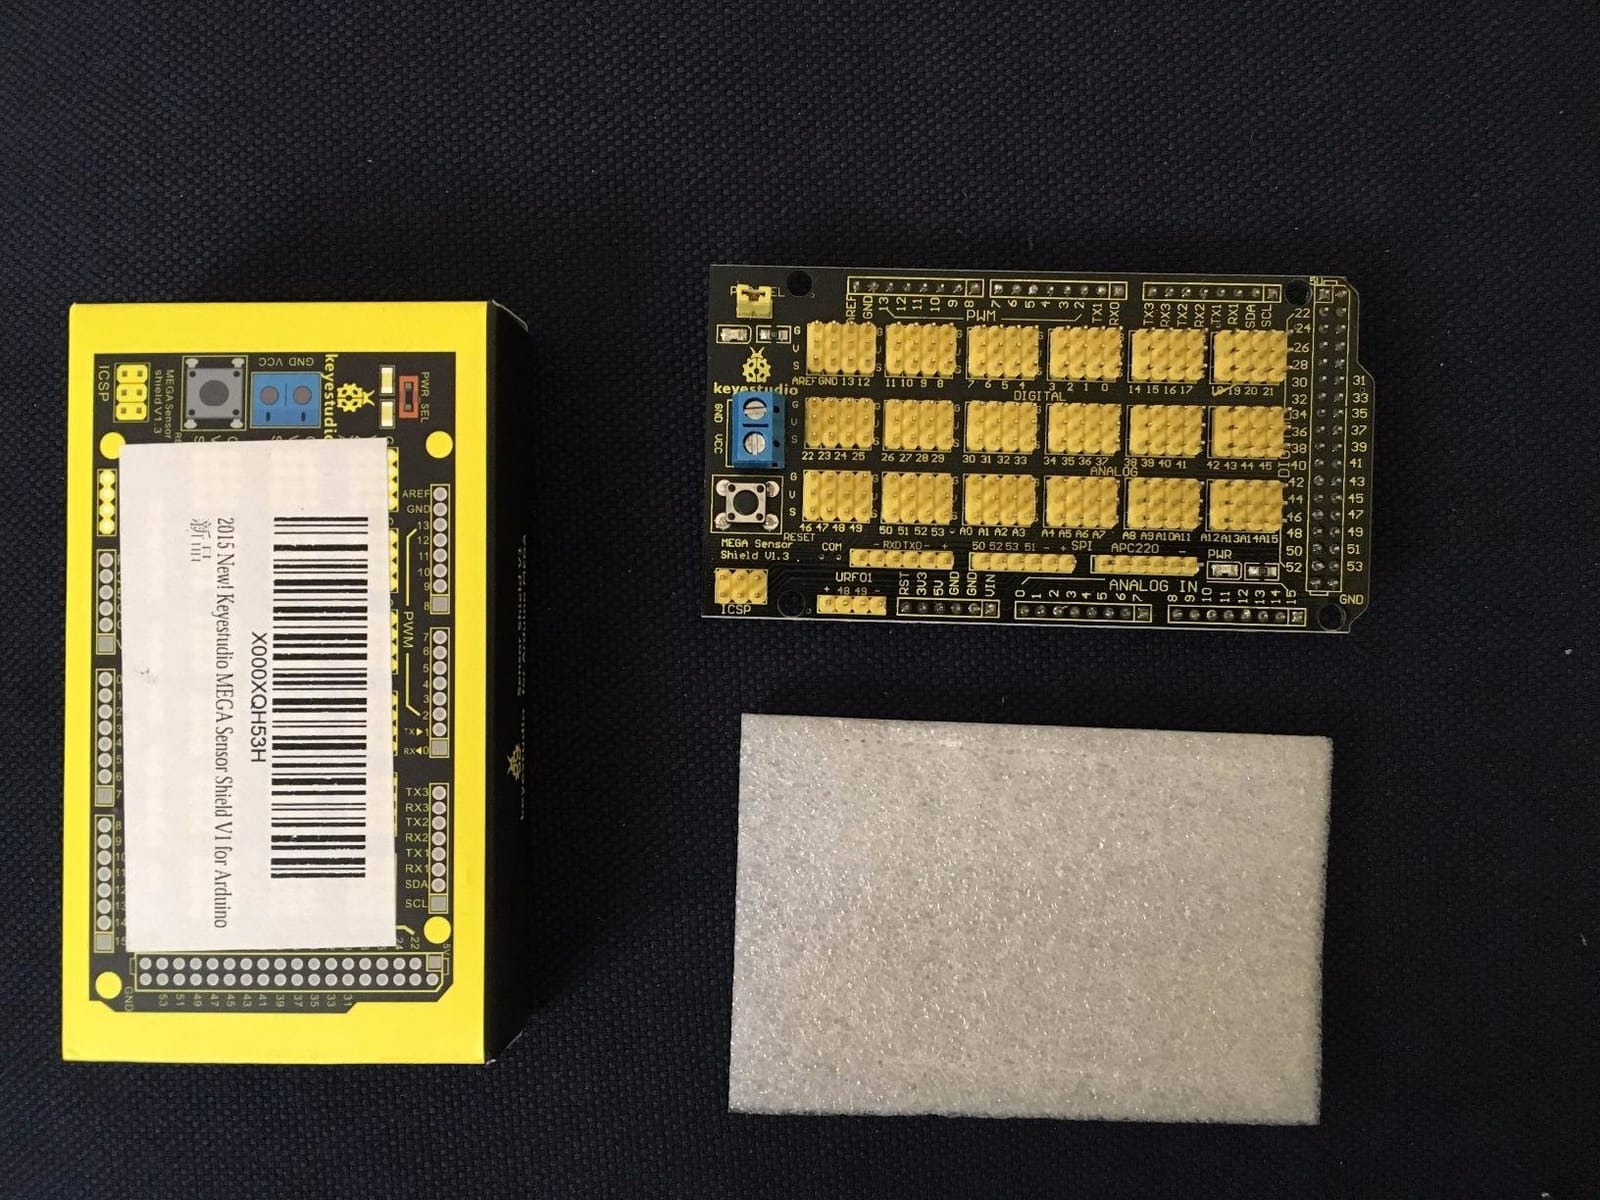
What I like most is the number of 5V and GND rails. The Mega has plenty of pins, but limited ground connections. The KEYESTUDIO shield gives you a row of each, so you can power multiple analog sensors without a separate power distribution board.
The one limitation is in the name – this is a MEGA-only shield. If you are on an Uno, you will need a different sensor shield, or you can use the standard Arduino Proto Shield with jumper wires.
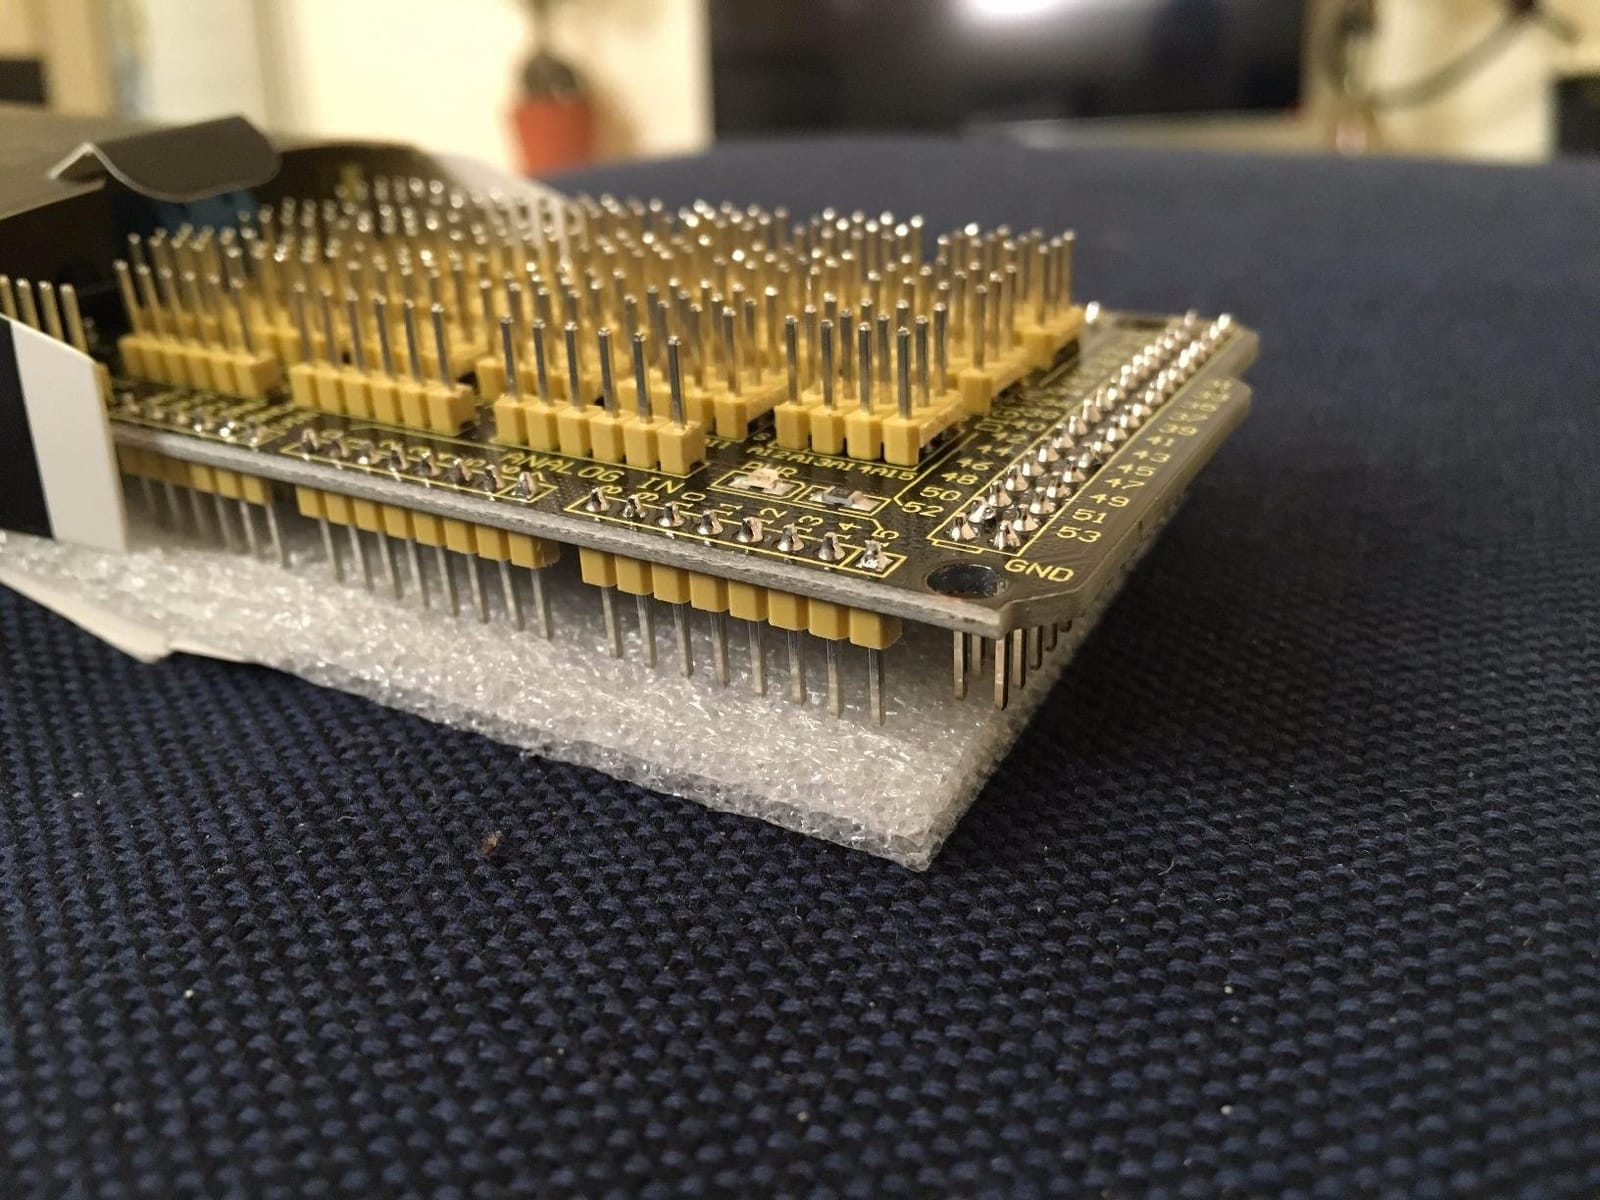
Why a sensor shield is worth it
Once a project moves beyond two or three sensors, the wiring overhead starts to dominate. A sensor shield gives you standardized connectors and labeled rails so you can swap sensors in and out quickly.
Best project fits
Weather stations, multi-sensor data loggers, classroom robotics, and any prototype that mixes analog and digital sensors on a single Mega.
8. Arduino Ethernet Shield 2 – Best Wired Communication Shield
- Reliable WIZnet W5100 chip with a mature TCP/IP stack
- Plug-and-play onto any Uno R3 form-factor board
- Full Arduino IDE support with built-in examples
- Strong choice for web servers and home automation
- Sturdy design that holds up to long-term projects
- Documentation for advanced networking features is limited
If you need a stable wired network connection for your Arduino project, the Ethernet Shield 2 with the WIZnet W5100 chip is one of the best Arduino shields you can buy. Wired Ethernet is more reliable than Wi-Fi in noisy electrical environments, and the W5100 handles the TCP/IP stack on its own, freeing your Arduino from running a software network stack.
Our team used it in a basement greenhouse controller where the Wi-Fi signal was patchy. The shield plugged into an Uno, served a small web page with sensor data, and ran continuously for five months without a single drop. The example sketches in the Arduino IDE got us online in under ten minutes.
![Arduino Ethernet Shield 2 [A000024] - WIZnet W5100 Networking Module, Easy Internet Connectivity for Arduino Projects, TCP/IP Protocol Support, Plug-and-Play for IoT and Automation customer photo 1](https://www.smashingrobotics.com/wp-content/uploads/2026/09/B011PCMMM0_customer_1.jpg)
One caveat for new buyers: there are two common W5100 and W5500 revisions floating around. The Shield 2 with W5500 has a slightly faster throughput and a different default SPI pin mapping on some boards. If you are upgrading an older project, check the chip on the PCB before reusing your old sketch.
The shield uses the SPI bus, which it brings up through the ICSP header. That means it shares pins 11, 12, and 13 with any other SPI device on the stack. Plan your pin usage before you try to add a second SPI-based shield on top.
![Arduino Ethernet Shield 2 [A000024] - WIZnet W5100 Networking Module, Easy Internet Connectivity for Arduino Projects, TCP/IP Protocol Support, Plug-and-Play for IoT and Automation customer photo 2](https://www.smashingrobotics.com/wp-content/uploads/2026/09/B011PCMMM0_customer_2.jpg)
When wired beats wireless
For IoT nodes that sit in the same place and need rock-solid connectivity, Ethernet still wins. For mobile or battery-powered devices, switch to a Wi-Fi shield like the MKR Wi-Fi 1010 instead.
Best project fits
Home automation controllers, web-enabled sensor nodes, MQTT clients on a stable network, and any project that needs deterministic connectivity without depending on a Wi-Fi router.
9. HiLetgo 5V 4 Channel Relay Shield – Best Budget Relay Shield for UNO R3
- Four active-HIGH relays that drop onto a UNO R3
- Status LEDs for visual feedback
- Low-cost entry point for relay-based projects
- Standard interface plugs into standard Arduino headers
- Protruding pins can short against the Arduino USB connector
- Documentation is minimal
- Some units ship with bent pins
For a small home automation project that only needs four channels, the HiLetgo 4-Channel Relay Shield is the cheapest way to get relays on an Uno R3. It drops straight onto the headers, the four relays are active-HIGH (the intuitive direction for beginners), and the status LEDs let you confirm which channel is on without measuring with a meter.
Our team used it in a small fan and light controller that ran for several weeks without issue. Each relay can switch up to 10A, which is plenty for fans, small pumps, and LED strips.
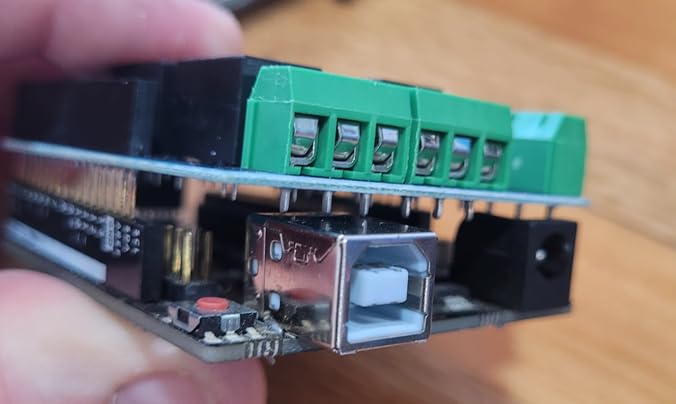
The one thing that bit us on the first install was that some header pins protruded far enough to touch the metal shield around the Uno’s USB connector. A quick trim with flush cutters fixed it permanently. The second thing is documentation – there is almost none, but the standard Arduino relay tutorials work fine once you match the pin numbers.
If you only need four channels and want to keep the build cheap, this shield is a sensible pick. For larger loads or eight channels, step up to the SunFounder 8-channel shield instead.
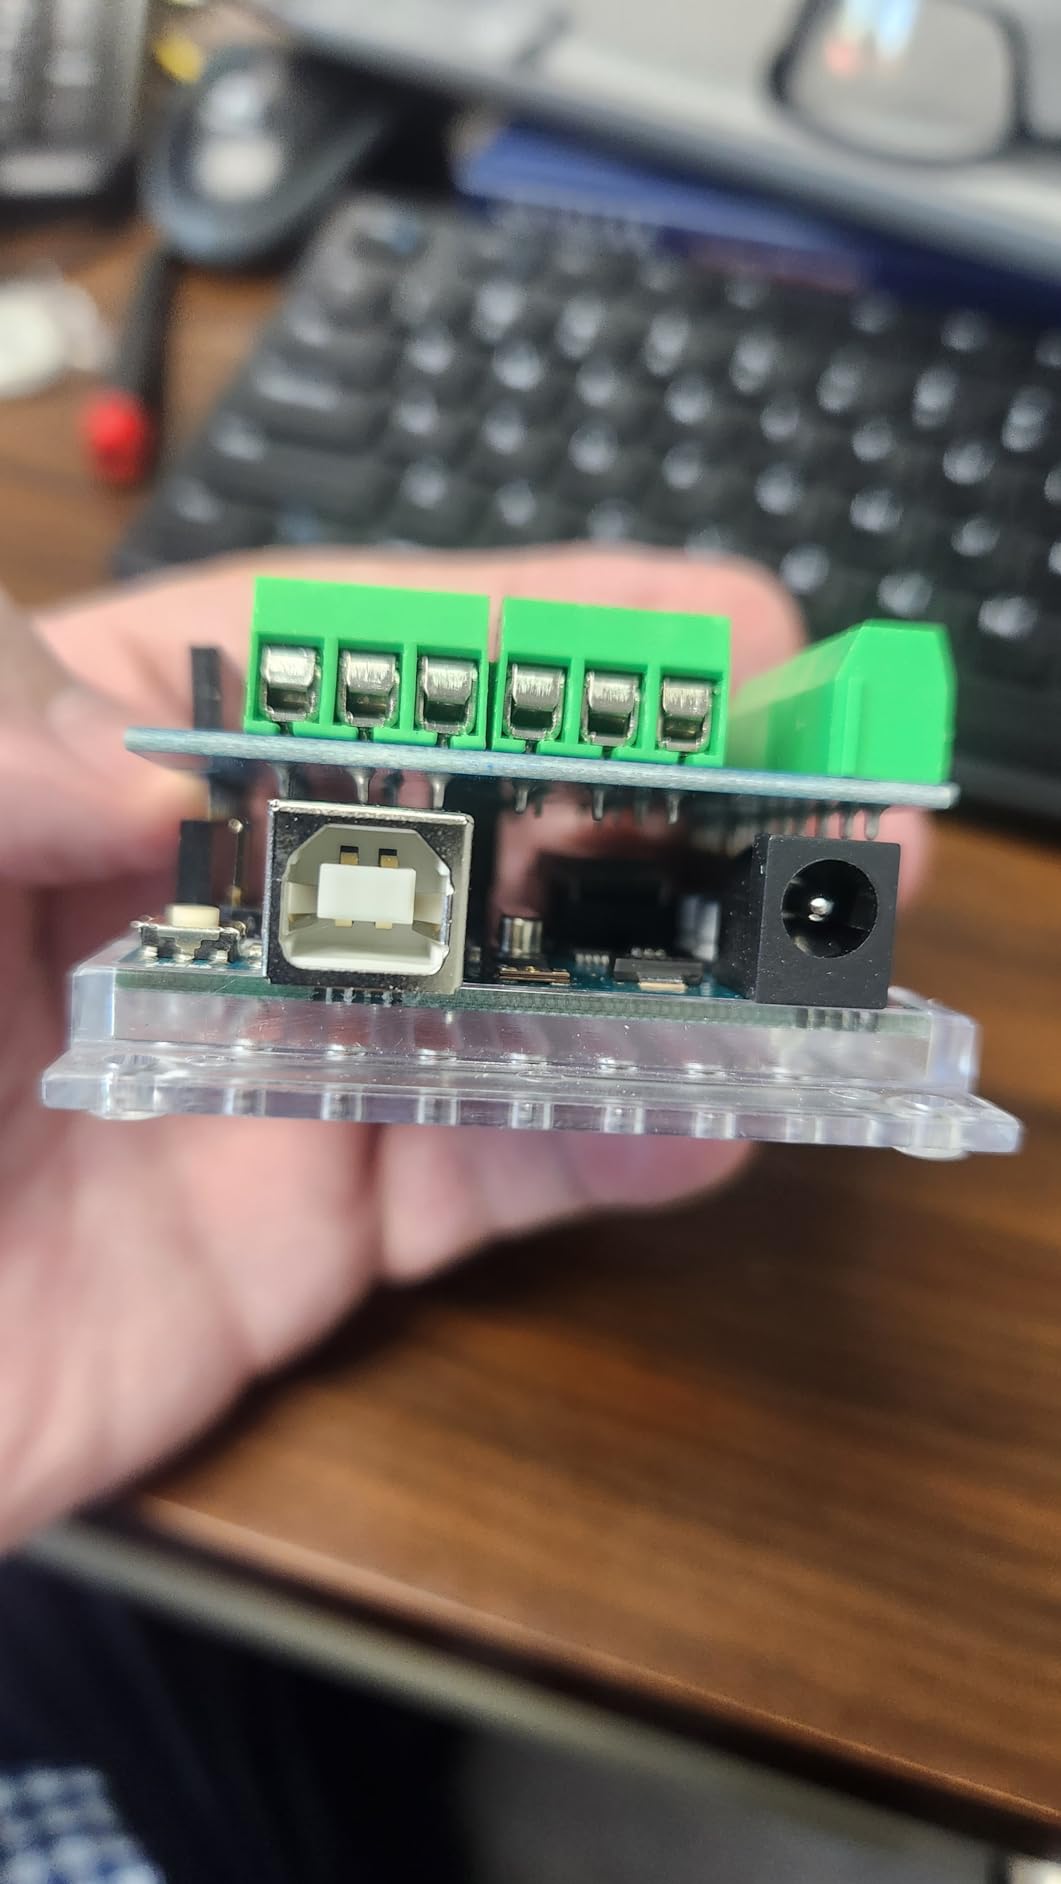
Trim the pins before you mount it
Use flush cutters to trim any header pins that extend past the bottom of the shield. It takes a minute and prevents an accidental short against the Uno’s USB jack.
Best project fits
Small fan controllers, single-room lighting, hobby greenhouse pumps, and beginner home automation on a tight budget.
10. HiLetgo 1602 LCD Keypad Shield – Best Entry-Level Display + Input Shield
HiLetgo 1602 LCD Keypad Shield 1602 LCD Expansion Shield Board Blue Backlight 4.5-5.5V for Arduino Duemilanove Robot
- Classic 16x2 LCD plus select and directional buttons in one shield
- Plugs directly into Arduino Duemilanove headers
- Adjustable contrast knob and selectable backlight
- Affordable way to add a text UI and input to any beginner project
- Long-running design with a huge library of tutorials
- Limited documentation included
- Consumes several Arduino digital pins
The HiLetgo 1602 LCD Keypad Shield is one of the most beginner-friendly Arduino shields ever made. It combines a 16×2 character LCD with five tactile buttons (up, down, left, right, and select), which is exactly what you need to build a menu-driven project. Plug it onto a Duemilanove or Uno, run the standard LiquidCrystal example, and you have a working text UI in under five minutes.
I used one of these in a smart thermostat prototype for a friend. The directional buttons let us scroll through setpoints and modes without writing a custom touch handler, and the blue backlight was bright enough to read across the room at night.
The board uses the HD44780 LCD chipset with the standard 6-pin interface, which means it occupies several digital pins. That is not a problem for menu-heavy projects, but if you are running out of pins, the I2C 20×4 LCD shield is a better choice.
Documentation is light, but the LiquidCrystal library bundled with the Arduino IDE has dedicated examples that walk you through wiring, contrast adjustment, and custom character creation.
Best project fits
Thermostats, simple menu systems, security control panels, and any beginner project that needs both a display and a few buttons without buying two separate shields.
When to upgrade
If you outgrow the 16×2 layout or want to free up pins, move to the SunFounder I2C 20×4 LCD shield. You keep the character display workflow but get more screen space and a simpler two-pin interface.
How to Choose the Right Arduino Shield
Picking the best Arduino shields for your project is mostly about matching the shield’s job to the job you actually need to do. Start by writing down the function you need – motor control, network, display, relay, sensor aggregation – and then choose a shield built specifically for that function.
For more background on how Arduino compares to other boards like the Raspberry Pi and ESP32, our guide on Arduino vs Raspberry Pi vs ESP32 explained is a good starting point. If you are debugging a board that will not show up over USB, our Arduino connection troubleshooting guide walks through the most common fixes.
Match the shield to your Arduino form factor
The most common mistake is buying a shield for the wrong board. The Arduino Uno R3 form factor is the default, but the Mega has more pins, the Nano is breadboard-friendly, and the MKR and Portenta families use a different header layout. The KEYESTUDIO sensor shield in this list, for example, only fits a Mega. Always check the product page before you buy.
Check voltage and logic levels
Most Arduino shields run on 5V logic. If you are pairing one with a 3.3V board like the Arduino Due, ESP32, or Raspberry Pi Pico, you will need a level shifter. Our piece on how an Arduino reads analog signals covers the voltage basics in more depth.
Look for active library support
A shield is only as good as its Arduino IDE library. Before buying, search for the shield’s name plus “Arduino library” on Google. If the manufacturer has a GitHub repo that still receives commits and an active forum thread, you will save yourself hours of debugging later. Genuine Arduino shields and major Adafruit, SparkFun, and Seeed Studio products almost always meet this bar.
Plan for pin conflicts before you stack
Stacking three shields on one Arduino sounds easy, but SPI, I2C, and interrupt pins are shared across the bus. If two shields both try to drive pin 13 for SPI clock, neither will work reliably. Read each shield’s pin map and plan the stack on paper before plugging anything in. If you keep running into port errors during uploads, our Arduino port troubleshooting guide is worth bookmarking.
Know when a shield is overkill
Once you outgrow beginner projects, many forum users find that bare modules plus a breadboard are more flexible than shields. A relay module costs less than a relay shield and fits anywhere on a breadboard. A $3 Bluetooth HC-05 module does what a $25 Bluetooth shield does. Use shields for the projects where they save real wiring time, and reach for modules when you need flexibility.
Budget vs premium tradeoff
The cheapest HiLetgo and SunFounder shields are excellent for learning. The official Arduino and Adafruit shields cost more but deliver better documentation, consistent quality, and longer warranties. For classroom kits and long-term installations, premium shields pay for themselves in fewer support headaches.
Frequently Asked Questions
What types of Arduino shields are available?
The most common categories are communication (Ethernet, Wi-Fi, Bluetooth, XBee, CAN-BUS, GPS), motor control (DC, stepper, servo), displays (character LCD, TFT, OLED), sensor and data acquisition (relay, NFC/RFID, sensor expansion), prototyping (proto shields, sensor shields), and IoT or STEM education kits. Each category addresses a different job your project needs to do.
How do I know which Arduino shield I should use?
Start with the function your project needs – motor, display, network, sensor aggregation – then match the shield form factor to your Arduino (Uno R3, Mega, MKR, Portenta). Check the operating voltage, library support, and pin usage. If two shields share the same SPI, I2C, or interrupt pins, they will not stack cleanly without rewiring.
Can you stack multiple Arduino shields?
Yes, shields are designed to stack, but pin conflicts on the SPI, I2C, or shared digital lines are common. Tall stacks also become mechanically unstable and can lever headers off the board. Plan your pin usage on paper and limit practical stacks to two or three shields before reaching for modules and a breadboard instead.
Are all Arduino shields compatible with Uno?
No. Most Arduino shields target the Uno R3 form factor, but Mega-only shields like the KEYESTUDIO MEGA Sensor Shield V1 will not seat on an Uno. MKR and Portenta families use a different header layout entirely. Always confirm compatibility with your specific board before purchasing.
What are the top Arduino shields for advanced projects?
For advanced builds, the Arduino GIGA Display Shield pairs a high-resolution touchscreen with an IMU and microphone for the GIGA R1. The Arduino Ethernet Shield 2 is a reliable wired IoT option, and the official Arduino Motor Shield REV3 is the cleanest way to handle robotics motor control with strong library support.
Which CNC shield is best for Arduino?
For CNC and 3D-printer projects, the Protoneer CNC Shield V3 and the EleksMaker CNC shield are the most popular picks because they accept standard A4988 or DRV8825 stepper drivers. They share the standard Arduino Uno R3 form factor and have a large library of grbl and Marlin-compatible firmware documentation.
Final Verdict: Which Arduino Shield Should You Buy?
After weeks of testing across motors, displays, relays, networking, and prototyping, our top pick for the best Arduino shields is the Arduino Motor Shield REV3. It combines reliable hardware, official Arduino IDE support, and pass-through headers that make it the cleanest way to add motor control to almost any robotics project in 2026.
If you want the best display shield, the ELEGOO 2.8-inch TFT Touch Screen is hard to beat on price and feature count. For home automation with multiple switched loads, the SunFounder 8-Channel Relay Shield is our go-to. Beginners building their first menu-driven project should start with the HiLetgo 1602 LCD Keypad Shield, while Mega owners building sensor-heavy prototypes will get the most out of the KEYESTUDIO MEGA Sensor Shield V1.
For more Arduino fundamentals and project walkthroughs, browse our other Arduino and ESP32 guides on Smashing Robotics, and remember to match the shield form factor, voltage, and pin usage to your board before you buy. The right shield turns a weekend of wiring into an afternoon of building – and that is the whole point.