
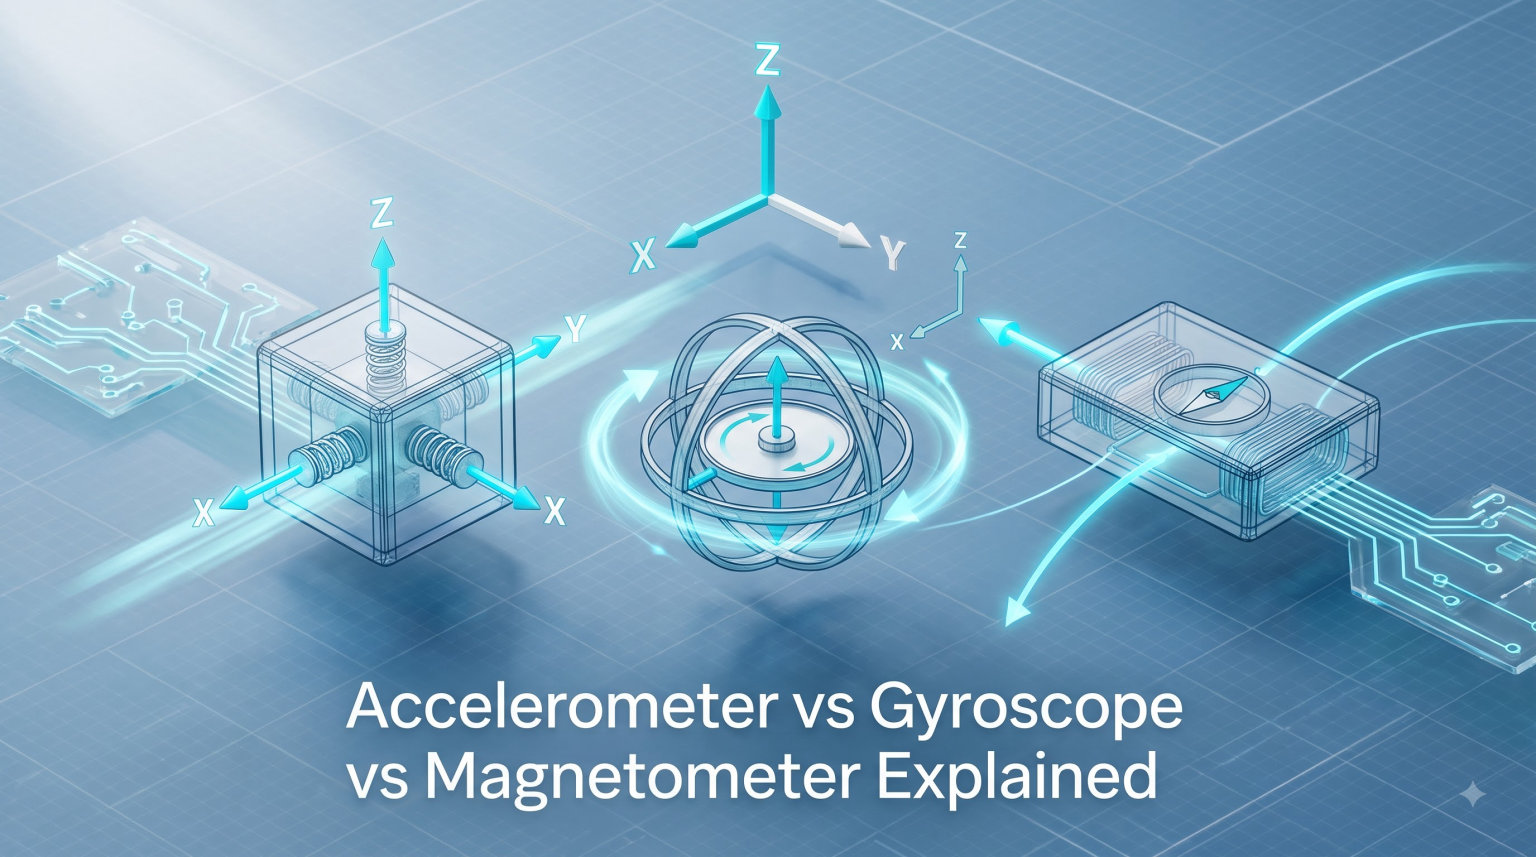
When you tilt your phone and the screen rotates, a drone stays level in a crosswind, or a robot arm moves with surgical precision, three tiny sensors are doing the heavy lifting. The accelerometer vs gyroscope vs magnetometer comparison is one of the most common questions in robotics and embedded electronics, because each sensor measures something fundamentally different about motion.
I have spent years working with motion sensors in drones, robotics projects, and wearable prototypes. The confusion I see most often is not about what each sensor does individually, but about how they fit together. In this guide, I will walk you through what each sensor measures, how it works at the silicon level, where each one shines, and why the most powerful systems combine all three through sensor fusion.
By the end, you will understand the difference between linear acceleration, angular rotation, and magnetic heading, and you will know exactly which sensor to reach for in your next project.
Table of Contents
What Is an Accelerometer and How Does It Work?
An accelerometer is a sensor that measures linear acceleration, including the force of gravity. When your fitness tracker counts steps or your phone flips its screen from portrait to landscape, an accelerometer is detecting those motion changes.
Most modern accelerometers are built using MEMS technology (micro-electromechanical systems). Inside the chip, a tiny proof mass is suspended by flexible springs. When the device accelerates, the mass moves slightly relative to the chip body. That movement changes the distance between microscopic capacitor plates, and the chip converts that capacitance change into a voltage proportional to acceleration.
The output is typically measured in g (1 g equals 9.81 m/s², Earth’s gravity) or m/s². A 3-axis accelerometer reports acceleration along the X, Y, and Z axes simultaneously, giving a complete picture of linear motion. When the device is sitting still, the accelerometer still reads 1 g along the vertical axis, because gravity is itself a form of acceleration.
Accelerometers are excellent for tilt sensing, vibration monitoring, step counting, and detecting taps or free-fall events. They are inexpensive, low power, and available in tiny packages, which is why nearly every smartphone, game controller, and wearable contains one.
One weakness to remember: an accelerometer cannot tell the difference between gravity and actual linear acceleration. If a device is accelerating at 1 g horizontally, the sensor will misread it as a tilt. This is where a gyroscope becomes essential.
What Is a Gyroscope and How Does It Work?
A gyroscope measures angular rotation rate, which is how fast something is spinning around an axis. If an accelerometer tells you “we moved forward,” a gyroscope tells you “we turned around.”
MEMS gyroscopes work on a fascinating physics principle called the Coriolis effect. Inside the chip, a tiny vibrating structure oscillates at a known frequency. When the device rotates, the Coriolis force pushes the vibrating mass sideways by an amount proportional to the rotation speed. That sideways motion is detected by capacitive sensors, and the chip converts it into an angular rate, typically reported in degrees per second (dps) or radians per second.
A 3-axis gyroscope tracks rotation around the X, Y, and Z axes. This is what allows a drone to correct for unwanted yaw, a VR headset to track head turns, and a robot to maintain its heading while moving.
Gyroscopes are superb for short-term rotation tracking. They respond almost instantly to changes in orientation and have very low latency, which is critical for stabilization loops. However, they suffer from a problem called drift. Because the gyroscope integrates angular rate over time to estimate orientation, even tiny errors accumulate, and after a few minutes the calculated angle can be off by several degrees.
That drift is the reason gyroscopes are almost always paired with another sensor. The accelerometer corrects long-term tilt errors, and a magnetometer corrects heading errors, which brings us to the third member of this trio.
What Is a Magnetometer and How Does It Work?
A magnetometer measures the strength and direction of a magnetic field, most commonly Earth’s magnetic field. Think of it as a digital compass: it tells you which way is north.
Most MEMS magnetometers use one of two sensing technologies. Hall effect sensors detect the voltage that appears across a current-carrying conductor when a magnetic field is applied. Magnetoresistive sensors change their electrical resistance in response to a magnetic field. Both approaches output a reading in microteslas (µT) along the X, Y, and Z axes.
By comparing the measured field against Earth’s known magnetic vector, the chip calculates a heading angle, which is what your phone’s compass app displays. A 3-axis magnetometer also lets the system distinguish between true heading and a tilted device, which is essential for accurate navigation.
Magnetometers are the only one of these three sensors that gives an absolute reference. The accelerometer tells you the direction of gravity, and the gyroscope tells you how fast you are turning, but only the magnetometer tells you which way is north regardless of how the device is moving.
The catch: magnetometers are easily confused by nearby metal, speakers, motors, and other magnetic interference. Calibration is mandatory, especially in robotics and drone applications where motors and battery packs create strong local fields.
Accelerometer vs Gyroscope vs Magnetometer: Key Differences
The cleanest way to understand the difference between these three sensors is to compare what each one actually measures. I have put together a side-by-side table that captures the essentials.
| Property | Accelerometer | Gyroscope | Magnetometer |
|---|---|---|---|
| Measures | Linear acceleration (including gravity) | Angular rotation rate | Magnetic field strength and direction |
| Output unit | g or m/s² | degrees per second (dps) | microteslas (µT) |
| Working principle | Capacitive MEMS proof mass | Coriolis effect on vibrating structure | Hall effect or magnetoresistance |
| Axes (typical) | 3-axis (X, Y, Z) | 3-axis (X, Y, Z) | 3-axis (X, Y, Z) |
| Absolute reference | No (gravity-relative) | No (rate only) | Yes (Earth’s magnetic field) |
| Strengths | Low power, no drift in tilt, low cost | Fast response, no drift in short term | Absolute heading reference |
| Weaknesses | Confuses gravity with acceleration | Drifts over time | Vulnerable to magnetic interference |
| Typical use | Tilt, vibration, step counting | Stabilization, rotation tracking | Compass heading, navigation |
As a rule of thumb, an accelerometer knows “which way is down,” a gyroscope knows “we turned around,” and a magnetometer knows “we are facing north.” Each sensor answers a different question, and none of them alone gives a complete picture of motion.
How These Sensors Work Together: Sensor Fusion and IMUs
This is where things get interesting. Modern devices rarely use a single sensor. They combine all three into a sensor fusion system, typically packaged as an Inertial Measurement Unit (IMU).
A 6-axis IMU pairs a 3-axis accelerometer with a 3-axis gyroscope. The accelerometer provides a stable long-term tilt reference, while the gyroscope provides fast, low-latency rotation data. A fusion algorithm, usually a Kalman filter or complementary filter, blends the two streams. The result is orientation tracking that is both responsive and drift-free over the long term.
A 9-axis IMU adds a 3-axis magnetometer, completing the trifecta. With all three sensors, the system can compute a full 3D orientation: roll, pitch, and yaw (heading). This is what your phone uses to know which way you are facing in a maps app, and what a drone uses to hold its position in a GPS-denied environment.
Popular 9-axis IMU chips include the Bosch BMX160, InvenSense ICM-42688-P, and STMicroelectronics LSM9DS1. The MPU6050 is a classic 6-axis choice for hobbyists, though it lacks a magnetometer. For Arduino projects, boards like the GY-87 combine an MPU6050 with a magnetometer in one module, giving you all nine axes for under five dollars.
Sensor fusion is also why smartphone games feel smooth. The gyroscope handles the quick flicks, the accelerometer keeps the gravity reference honest, and the magnetometer keeps the digital compass pointing the right way even when you rotate the phone in your hand.
MEMS Technology Explained
MEMS stands for micro-electromechanical systems. It is the manufacturing approach that made these sensors cheap enough to put in every smartphone, drone, and fitness band.
Traditional gyroscopes used spinning wheels and could weigh several kilograms. MEMS versions shrink the entire mechanical structure down to the micrometer scale and fabricate it directly onto a silicon chip using the same processes used for computer processors. The result is a sensor that costs cents instead of dollars, draws microamps of current, and fits inside a package smaller than a grain of rice.
Beyond cost, MEMS offers a few other benefits. The sensors are rugged, with no moving parts exposed to the outside world, and they can be batch-fabricated by the millions with consistent calibration. The trade-off is that MEMS sensors are less precise than their traditional counterparts, which is why they tend to be paired with fusion algorithms that compensate for individual weaknesses.
Common Applications of Motion Sensors
You interact with these sensors dozens of times a day without realizing it. Here are the most common applications, by industry.
Smartphones and Tablets
Every modern phone contains a 9-axis IMU. The accelerometer detects screen rotation and shake gestures. The gyroscope powers image stabilization in the camera and enables smooth gameplay. The magnetometer drives the digital compass and augments GPS in urban canyons.
Drones and UAVs
Flight controllers lean heavily on gyroscopes for stabilization. The accelerometer corrects long-term attitude drift, and the magnetometer keeps the heading locked even when GPS is unreliable. Without all three, stable autonomous flight is essentially impossible.
Robotics
Robotic arms, mobile robots, and humanoid platforms use IMUs for balance and orientation. A self-balancing robot, for example, relies on the gyroscope for fast tilt corrections and the accelerometer to know which way is up.
Automotive
Electronic stability control, airbag deployment detection, and GPS-assisted navigation all use accelerometers and gyroscopes. The magnetometer increasingly supports dead reckoning when GPS signals drop out in tunnels.
Wearables and Fitness Trackers
Step counting, fall detection, and gesture recognition are driven by accelerometers. Gyroscopes add exercise-type recognition, and magnetometers help outdoor watches maintain accurate heading data.
How to Choose the Right Sensor for Your Project
Choosing a motion sensor comes down to three questions: what motion are you measuring, what is your environment, and how much post-processing are you willing to do.
Step 1: Decide What You Actually Need to Measure
If you only need to detect tilt, vibration, or simple motion, an accelerometer alone is enough. The ADXL345 and LIS3DHTR are popular 3-axis choices that work well with Arduino and Raspberry Pi. If you also need to track rotation, add a gyroscope, or buy a 6-axis IMU like the MPU6050. If you need compass heading or full 9-DoF orientation, you will need a magnetometer in the mix.
Step 2: Check the Environment
Magnetometers are easily thrown off by motors, metal chassis, speakers, and even high-current battery cables. If your project contains any of these, plan to mount the magnetometer away from the interference and budget time for calibration. Industrial environments may require shielding or a software-based hard-iron compensation routine.
Step 3: Plan for Drift and Calibration
Every MEMS sensor drifts, and every magnetometer needs calibration. Before you commit to a chip, check whether the manufacturer provides a built-in calibration routine, and whether your microcontroller can run a fusion filter. Most modern IMUs include on-chip Digital Motion Processors (DMPs) that offload this work from your main CPU.
Step 4: Watch the Power Budget
Wearable and IoT applications often run on coin cells. Look for sensors with low-power modes and configurable data rates. The LSM6DS3, for example, can run its accelerometer at under 10 microamps while still delivering useful data.
Frequently Asked Questions
What is the difference between an accelerometer, a magnetometer, and a gyroscope?
An accelerometer measures linear acceleration and the direction of gravity. A gyroscope measures angular rotation rate around each axis. A magnetometer measures the strength and direction of a magnetic field, which is why it works as a digital compass. The three sensors answer different questions about motion and are usually combined into a 9-axis IMU.
What is the difference between a magnetometer and a gyroscope?
A gyroscope measures how fast the device is rotating, in degrees per second, and it drifts over time. A magnetometer measures the surrounding magnetic field and provides an absolute heading reference, so it does not drift but is sensitive to nearby metal and electronics.
Do iPhones have accelerometers in them?
Yes. Every iPhone since the original model includes a 3-axis accelerometer, a 3-axis gyroscope, and a 3-axis magnetometer. Together they form a 9-axis IMU that powers screen rotation, image stabilization, gaming, and the digital compass.
Can you use an accelerometer as a gyroscope?
Not directly. An accelerometer can estimate rotation in special cases, such as when gravity is the only acceleration present, but it cannot measure rotation when the device is in free fall or moving smoothly. A gyroscope is required for accurate, low-latency rotation tracking.
Why are accelerometers so expensive?
MEMS accelerometers are actually very cheap at the component level, often under a dollar in volume. Higher prices usually come from added features like high g-ranges, low noise, hermetic packaging for harsh environments, or built-in temperature compensation.
Why use all three sensors together?
Each sensor compensates for the weaknesses of the others. The accelerometer removes long-term drift from the gyroscope, the gyroscope handles fast rotations the accelerometer cannot, and the magnetometer provides an absolute heading reference that neither of the other two can supply on its own.
Conclusion
The accelerometer vs gyroscope vs magnetometer comparison really comes down to one idea: each sensor measures a different physical quantity. The accelerometer captures linear acceleration and gravity, the gyroscope captures rotation rate, and the magnetometer captures the magnetic field that gives you a true north reference.
Used alone, each sensor has clear limitations. Used together through sensor fusion, they produce orientation data that is fast, accurate, and drift-free. That is why 9-axis IMUs have become the default motion-sensing solution in everything from smartphones and drones to robots and autonomous vehicles.
If you are starting your first project, I would recommend grabbing a 9-axis IMU module and a basic fusion library. Run it on an Arduino or ESP32, log the raw and fused data, and watch how the system behaves when you move the board around. Once you see how the three sensors complement each other in real time, the differences will click into place permanently.