In our article about stepper motors we have presented this type of electric motors, how they operate and what makes them highly compatible with digital control systems. Now we will talk about how to control such a motor together with a simple example, involving a H-bridge electronic circuit and simple scripting. In our implementation we have used a bipolar stepper motor, however minor changes in control sequences are required for other types of stepper motors.
To summarize, the electromagnetic coils are located on the stator of the stepper motor, while permanent magnets, equal in pair numbers, are located on the rotor. A more detailed discussion about stepper motors can be found in our dedicated article, but making a long story short, like any DC motor, these motors rotate when the coils are energized however, if the coils are continuously energized in the same way, the movement will stop when opposite magnetic poles are aligned, e.g. S-pole on coil aligned with N-pole on rotor permanent magnet.
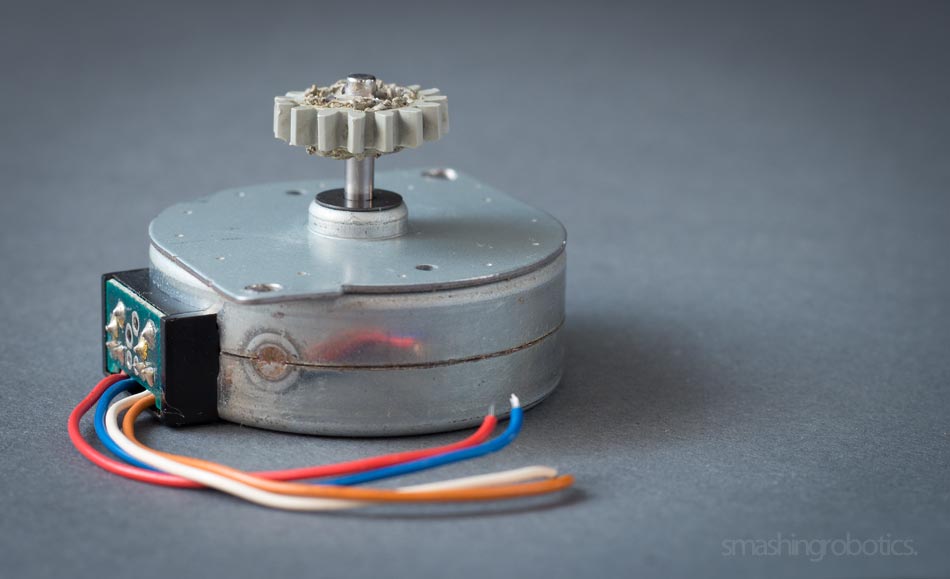
Electromagnetic coils found in a bipolar stepper motor are arranged as independent windings, each of them corresponding to one phase. Usually such stepper motors have 6 terminals, 5 if the common wires of the two windings are internally connected, and the terminals can be identified by measuring the resistance between terminals using a multimeter.

In short, if resistance of a coil, between its two end terminal has a certain value, the resistance between the common lead and any of its terminals must a value divided by 2. In 5-lead motors, coil terminals can be determined by touching each two wires together. When the rotor shaft becomes harder to turn it means that the two connected wires belong to the same winding.
Control sequences
There are four types of waveforms, or sequences, through which stepper motors are driven. These are:
- Wave drive;
- Full step drive;
- Half step drive;
- Micro stepping – we will present this method and when it is employed in another article.
Wave drive
By using this method, a single phase of a stepper motor is energized at a time. If we refer to figure 1 below we can see how a stepper motor is driven. We can observe that there are 3 phases (f=3), AA’, BB’ and CC’ and 2 teeth (z=2) North and South. The rotor will perform full steps, with the angle: Theta=360/(f*z)=60 degrees.

The wave drive impulse sequence will be:
| AA’ | BB’ | CC’ |
| 1 | 0 | 0 |
| 0 | 1 | 0 |
| 0 | 0 | 1 |
| 1 | 0 | 0 |
Full step drive
When the rotor of the motor depicted in figure 1 reaches position 3 we can see that the motor can also be driven by having two phases energized at the same time. The rotor will perform full steps, according to the formula above, aligning itself exactly in the middle of the angle between the stator poles, North and South. This drive method provides full torque of the motor.
The sequence will be:
| AA’ | BB’ | CC’ |
| 1 | 1 | 0 |
| 0 | 1 | 1 |
| 1 | 0 | 1 |
| 1 | 1 | 0 |
Half step drive
This method implies alternately powering either one phase or two phases at a time. The rotor will align itself either with stator poles, as in wave drive, or between them, as in full step drive. In this case the rotor will have 30 degree step angles.
The sequence is:
| AA’ | BB’ | CC’ |
| 1 | 0 | 0 |
| 1 | 1 | 0 |
| 0 | 1 | 0 |
| 0 | 1 | 1 |
| 0 | 0 | 1 |
| 1 | 0 | 1 |
| 1 | 0 | 0 |
The direction of rotation in either case is determined on how the sequence is started. Sequences presented above assume clockwise rotation when applied starting from the first row and counter-clockwise rotation when started from back to front.

So, if we look at figure 1, depicting a 2-phase bipolar stepper motor like the one we want to control, we can determine the control sequences for each method mentioned above. It can be observed that such a motor has 4 leads, corresponding to 4 pins of an output controller or interface. So the sequences will be:
- Wave drive: 1000 0100 0010 0001;
- Full step drive: 1100 0110 0011 1001;
- Half step drive: 1000 1100 0100 0110 0010 0011 0001 1001.
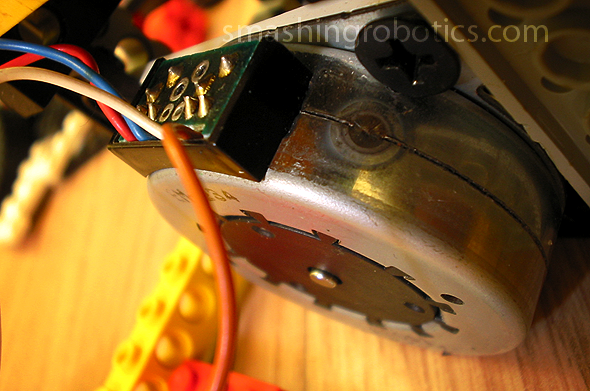
H-bridge circuit
As simple in construction as a bipolar stepper motor is as complicated control circuits can be. However of-the-shelf ICs or complete electronic modules for controlling stepper motors, with costs not exceeding a few dollars, are available. Generally, in order to reverse the flow of current through a winding, i.e. reversing polarity, a H-bridge circuit is required for each winding. In order to better understand the inner working of such a system such circuitry is also used in our example. The circuits are powered by a 12 VDC source but a 24 VDC power source can also be used. The power transistors are BD139 NPN with their respective PNP BD140 complements, supporting up to 1,5 A current.
In addition to the simple H-bridge circuit, a protection circuit is added in order to prevent short-circuits when both bits controlling the H-bridge are 1, thus preventing high values of current flowing through the power transistors. Transistors used in this section are BC639 NPN, together with 1 KOhm resistors.

- Q1, Q2 – BD140 power transistors;
- Q3, Q4 – BD139 power transistors;
- Q5, Q6 – BC639 transistors;
- All resistors have 1 KOhm ratings.
If the first data bit is 1 and the other 0, Q3 will conduct suppling ground to Q2 which will also conduct and the motor will turn in one direction. Conversely, if the sequence is 01, Q4 and Q1 will conduct, allowing for reverse polarity and thus reverse current flow through the winding. If there would be no protection circuitry, if the sequence would be 11, all four transistors, Q1-Q4, will conduct and creating a short circuit. Due to the high current they will burn out.
Programming
The first script presented below is written for controlling our bipolar stepper motor using the Parallax Basic Stamp 2 microcontroller and the Board of education, and is best suited for demonstrating the principle of stepper motor control, however other hardware can be used with appropriate electronic modules. The stepper motor is assumed to be connected on pins 1 to 4, and 3 buttons, for changing the direction and type of sequence, are employed.
' {$STAMP BS2}
' {$PBASIC 2.5}

pulsetime CON 25 //experiment with this value in ms

buttons PIN 13
button1 PIN 14
button2 PIN 15

driveanddir VAR Nib
sel VAR Bit

driveanddir=0

DO //main loop start

SELECT driveanddir

IF (buttons=0) THEN
	sel=0
	IF (button1=1) AND (button2=0) THEN
	driveanddir=0
	ENDIF
ELSEIF (buttons=0) THEN
	sel=0
	IF (button1=0) AND (button2=1) THEN
	driveanddir=1
	ENDIF
ELSEIF (buttons=1) THEN
	sel=1
	IF (button1=0) AND (button2=1) THEN
	driveanddir=2
	ENDIF
ELSEIF (buttons=1) THEN
	sel=1
	IF (button1=0) AND (button2=1) THEN
	driveanddir=3
	ENDIF
ENDIF

CASE 0 //wave drive clockwise
DO
        driveanddir=0
        HIGH 1
        LOW 2
        LOW 3
        LOW 4
        PAUSE pulsetime
        LOW 1
        HIGH 2
        LOW 3
        LOW 4
        PAUSE pulsetime
        LOW 1
        LOW 2
        HIGH 3
        LOW 4
        PAUSE pulsetime
        LOW 1
        LOW 2
        LOW 3
        HIGH 4
        PAUSE pulsetime
LOOP UNTIL (button2=1) OR (sel=1)

CASE 1 //wave drive counterclockwise
DO
        driveanddir=1
        LOW 1
        LOW 2
        LOW 3
        HIGH 4
        PAUSE pulsetime
        LOW 1
        LOW 2
        HIGH 3
        LOW 4
        PAUSE pulsetime
        LOW 1
        HIGH 2
        LOW 3
        LOW 4
        PAUSE pulsetime
        HIGH 1
        LOW 2
        LOW 3
        LOW 4
        PAUSE pulsetime
LOOP UNTIL (button1=1) OR (sel=1)

CASE 2 //wave drive clockwise
DO
        driveanddir=2
        HIGH 1
        HIGH 2
        LOW 3
        LOW 4
        PAUSE pulsetime
        LOW 1
        HIGH 2
        HIGH 3
        LOW 4
        PAUSE pulsetime
        LOW 1
        LOW 2
        HIGH 3
        HIGH 4
        PAUSE pulsetime
        HIGH 1
        LOW 2
        LOW 3
        HIGH 4
        PAUSE pulsetime
LOOP UNTIL (button2=1) OR (sel=0)

CASE 3 //wave drive counterclockwise
DO
        driveanddir=3
        LOW 1
        LOW 2
        HIGH 3
        HIGH 4
        PAUSE pulsetime
        LOW 1
        HIGH 2
        HIGH 3
        LOW 4
        PAUSE pulsetime
        HIGH 1
        HIGH 2
        LOW 3
        LOW 4
        PAUSE pulsetime
        HIGH 1
        LOW 2
        LOW 3
        HIGH 4
        PAUSE pulsetime
LOOP UNTIL (button1=1) OR (sel=0)
ENDSELECT

LOOP
Another scripting example, written in C++, for controlling the motor by using the now defunct parallel port is presented below. In this script the stepper motor is assumed to be connected on physical pins 2 to 5, or bits D0 to D3. A rapid example on how to calculate the output sent to the port:
| Bit (pin) | D0 (2) | D1 (3) | D2 (4) | D3 (5) | D4 (6) | D5 (7) | D6 (8) | D7 (9) |
| Value (power of 2) | 1 | 2 | 4 | 8 | 16 | 32 | 64 | 128 |
If you want to set a pin high, i.e. logic output 1, you need to send the corresponding value of the pin to the port. For instance for pin 5 the value to be sent is 8, for pin 3 the value is 2. If multiple pins are required to be set high, the sum of their corresponding values is sent tot the port. As an example, for pins 3 and 4 to be set high simultaneously, the value to be sent is 2+4=6, for pins 5 and 1 to be set high the value is 8+1=9.
#include
#include // ... all required libraries

#define PORT1o 0x378   //lpt output address -- check exact value in your settings
#define PORT1i PORT1o+1 //lpt input address

// ...... removed code used for defining variables and graphics drawing

//---functions defining control sequences for the motor, experiment with the delay value
void action1(void) // ----  wave drive clockwise
{
outportb(PORT1o,0);
outportb(PORT1o,1);
delay(50);
outportb(PORT1o,2);
delay(50);
outportb(PORT1o,4);
delay(50);
outportb(PORT1o,8);
};

void action2(void) // ----  wave drive conterclockwise
{
outportb(PORT1o,0);
outportb(PORT1o,8);
delay(500);
outportb(PORT1o,4);
delay(500);
outportb(PORT1o,2);
delay(500);
outportb(PORT1o,1);
};

void action3(void) // ----  full step clockwise
{
outportb(PORT1o,0);
outportb(PORT1o,3);
delay(500);
outportb(PORT1o,6);
delay(500);
outportb(PORT1o,12);
delay(500);
outportb(PORT1o,9);
};

void action4(void) // ----  full step counterclockwise
{
outportb(PORT1o,0);
outportb(PORT1o,9);
delay(500);
outportb(PORT1o,12);
delay(500);
outportb(PORT1o,6);
delay(500);
outportb(PORT1o,3);
};

// .... removed code

void main(void)  // main program loop

{
	// ... removed code
}
The parallel port in brief
In a few words, the parallel port was initially designed for connecting printers to a computer but using it as a general I/O port for communicating with various other devices was pretty straight-forward, especially since IEEE 1284 standard defined the bidirectional implementation of the port. A variety of USB-to-parallel adapters are still available, a selection can be found here.
The parallel port occupies 3 consecutive addresses in the CPU’s addressable space with data, status and control registers and can reach transfer speeds between 50 and 150 kbps. A standard parallel port has an 8 bit unidirectional (bidirectional in enhanced port version) workspace, a 6 bit bidirectional control register with 4 bits available on the physical parallel interface and an 8 bit input buffer of which 5 bits are used for storing status from the connected device. The parallel interface allows for simultaneous reading of up to 9 bits (17 in the bidirectional version) and writing up to 12 bits at any given moment.

- The data register is located at IOBaseAddress+0 (e.g. 0x378, if the LPT port address is 0x378);
- The status register is located at IOBaseAddress+1 (e.g. 0x379) and can be accessed only through read operations;
- The control register is located at IOBaseAddress+2 (e.g. 0x37a) and can be accessed either through write or read operations.
The lines are bidirectional and bits 4 and 5 are for internal control of the parallel interface, bit 4 validates interrupts and bit 5 validates data register input.
Resources
- Control of stepper motors, StepperWorld
- Stepper motors, Mechatronics Design Lab at Northwestern University
- Stepper Online
- Stepper motors, Pololu
- USB to parallel adapters, Chemnitz University of Technology